All posts by Anastasia Heuer

When she’s not writing, you can find her on the road in search of the world’s best hot chocolate, trying not to burn down her kitchen, or in a park somewhere with a good book.

Ahhhh! We’re Sending Out Spam

In true UE form, the following is what the UE Staff learned when we realized that one of our email accounts was sending out spam.

As we continue to learn the ins-and-outs of managing a community-run volunteer website, we’ve come across another fascinating aspect of being an online entity: becoming the victims of a joe job / spoofing attack.

A couple months ago, our Twitter account tweeted out a spam link. We changed all our passwords and double-checked all our other accounts: everything was fine. Then, a few days later, we found an email in the spam folder of one of our accounts from ourselves with a spam link! WTF? That was accompanied by several “mail delivery messages” (also in our spam folder) that our email had labeled with a warning, “This is a fake ‘bounce’ reply to a message you didn’t actually send.”

Okay, but if we didn’t send any messages, then why did some people in our contacts—including us—receive an email?!

Sure, we’ve all seen some form of these spam emails from friends, family members, coworkers, etc. Most likely, you assume they accidentally clicked on a bad link that compromised their account, you make sure not to click the link, delete, move on, and be happy it was not your account. But what if it was your account…?  Well, then, you promptly freak out.

After updating everyone with access to this email and changing all our passwords again, we started our Sherlocking.

First question: Were we hacked? Nope. We were not hacked. At the time, the majority of the members of our staff had access to this particular account so, of course, we were worried someone had been sloppy with the password. But, thankfully, most email clients (like Gmail) actually track every IP address that accesses your email (and the location, web browser, and computer type being used by said IP address.) We were able to verify every single log-in to the infected account in the last month. Not to mention we also checked all of its email history: not a single unidentifiable email was sent from the account. Just to be safe, we still changed the password (again) and deleted all its contacts. We are not ones to mess around with security!

So, if we weren’t sending it, where the frak was it coming from? According to those receiving our emails, the spam emails were being flagged in their inboxes (or were being automatically moved to their spam boxes), because the emails were not actually coming from our servers. That’s also why all record of any of this happening was in our spam box. When we investigated the headers of the spam message, we discovered that they were actually coming from an IP address originating in Kyrgystan. Awesome.

Then, we learned that a joe job is when a spamming company uses your email as a front to send out a bunch of gross links.  One great analogy we ran across explained it like this: spoofing is comparable to someone sending a letter via snail mail, but they wrote your residence as the “return address” in the top left corner instead of their own. This makes the spammy email look like it’s coming from us, when we actually had nothing to do with it.

What do we think caused this? Either someone on the staff was logged into the infected email and accidentally clicked on something, or they were using a computer compromised with spyware, malware, or a virus. We had everyone who had access to the account run scans, and we did find some spyware on one staffer’s computer—we think it was probably the culprit. Either way, the spammers were able to commandeer our address book and thus send out the spam.

So what happened? Unfortunately, there is not much you can do to stave off a joe job except wait for the spammers to move on to a new victim. Fortunately, most email clients either rejected the emails outright, warned that they were not from us, or moved the emails immediately into everyone’s spam folders so they didn’t even notice. We apologized, we ignored, and we hoped it would go away soon. Thankfully, it did. In the end, the whole ordeal lasted less than a week and, from what we could tell, most of the emails were bounced back before they were delivered. We decided not to send out a mass email about the whole thing, for fear of potentially adding to the number of emails, so we wrote this article instead.  The most important thing to know should this happen to you is to remind everyone not to click on the links. If no one clicks, you aren’t profitable to the spammers, and they will move on.

The silver lining?  We’re a little bit more enlightened this week, and we hope we’ve enlightened you a bit on the wonderful world of spoofing. Also, if could be worse: AOL literally sent out zombie spam that same week…

Extra credit: Why is it called a joe job? Well, this is a terrifying account of what happens when someone purposefully uses your domain to sabotage your business and email as a spammer. This did not happen to us. Not that that’s going to help us sleep tonight.

Have a wonderful, spam-less week!

Photo by Gali Levi-McClure

Photo by Gali Levi-McClure

Let’s Go Get The Shit Kicked Out Of Us By Vulnerability

After Dr. Brené Brown gave her first TED Talk, about the power of vulnerability, she woke up with a “vulnerability hangover.” She hid in her house for three days, ashamed of confessing that she’d had a “breakdown” to the over 500 attendees. Knowing her video was headed for the Internet, she told a friend she anticipated another couple hundred people seeing her admission but, “If 500 turns into 1000 or 2000, my life is over.” Her talk has since been watched over 12 million times.

[ted id=1042]

When I think about vulnerability, I imagine something raw and tender. The kind of thing I might boast about embracing but, more often, actually find myself cowering from. When I watch a TED Talk like Brené’s, or read some quotes on Tumblr, I think, “YES! That sounds amazing! I am going to start being vulnerable right now! I am going to let go of all my insecurities immediately, accept my imperfections, be kind to myself, really let go of who I’ve thought I should be for all these years, and embrace the imperfect reality of who I am!” Boom. Done. I am vulnerable. And yet, just saying the words “imperfect reality of who I am” sets off a wave of discomfort. Because that’s the reality of vulnerability: it can be really uncomfortable.

[box] “To love at all is to be vulnerable. Love anything and your heart will be wrung and possibly broken. If you want to make sure of keeping it intact you must give it to no one, not even an animal. Wrap it carefully round with hobbies and little luxuries; avoid all entanglements. Lock it up safe in the casket or coffin of your selfishness. But in that casket, safe, dark, motionless, airless, it will change. It will not be broken; it will become unbreakable, impenetrable, irredeemable. To love is to be vulnerable.” ― C.S. Lewis [/box]

For most of my life, just like Brené, I thought I could “outsmart” vulnerability—that if I just locked it up in a box, made all the right choices, and checked off all the boxes on my list of impossible expectations, I could be perfect. And, obviously, perfection was, well, perfect and when you’re perfect, there’s no need for vulnerability. If only that was true. But I did not see vulnerability as a strength back then, I saw it as a weakness. A big, undefined, pain causing weakness. And this unknown thing was so scary to my brain that the idea of even exploring it was enough to get me to bury anything tagged “could be painful” so deeply, that once I started searching, it took me almost a year before I was even looking in the right place.

The fear that vulnerability induces in me is the kind of terror that dictates my actions without me even realizing it. So, first, I had to not only recognize, but also accept, that so many of my actions were defenses. As if that wasn’t vulnerable enough, then I had this exposed raw, tender, place that I was supposed to stay with and sit with! Patience in my life before: not fun. Patience while sitting with discomfort caused by vulnerability: excruciating.  In her TED Talk, when Brené talks about the “whole-hearted”—the ones who believe that what makes them vulnerable makes them beautiful, that vulnerability is not comfortable or excruciating, just necessary—you need to know that when I started this process, I was not one of them. Whether I was willing to articulate it or not, I was one of the ones who always questioned if I was good enough and I was pretty sure I wasn’t.

[box] “[The whole-hearted] talked about the willingness to say, “I love you” first, the willingness to do something where there are no guarantees, the willingness to breathe through waiting for the doctor to call after your mammogram. They’re willing to invest in a relationship that may or may not work out. They thought this was fundamental.” ― Dr. Brené Brown [/box]

Some of the most seemly confident, happy, and/or successful people can still have this voice in their head that makes them believe, in spite of their “accomplishments,” that they are not good enough. On the outside, I denied that I had low self-esteem. Because, honestly, I didn’t think I did. But that was because I only gave weight to the parts of me that I showed to other people and I didn’t count all the things that I only thought to myself.  Look in the mirror and pay attention to your thoughts: Are they kind? Are they accepting? Or do they scan for every flaw? Do they plot how to hide away the things you’re most ashamed of? Do they berate you for not having done more to “fix” something that you consider “wrong”? I was feeding my own insecurities without even knowing they were insecurities. And, worse, I just accepted them as limitations to myself. This was “the way things were” and nothing and no one were ever going to change that. Well, I was right about part of that, no one else was ever going to change the way I saw myself, but I could.

[box] “When you’re raised with the belief that perfection is possible, it’s very hard to let go of that.” – Hannah “Harto” Heart [/box]

Alright, so finally I start digging up my insecurities, I acknowledge them with a curt head nod, and I start trying to sit with them in a very large room (in which I do my best to never directly look them in the eye, because, ow.) Finally, we get closer, we’re not cuddling on the couch or anything, but we’ve started having marginally polite conversations, and then I realize it’s not enough to be aware and sit with my insecurities by myself, to really heal, I have to accept them: out loud. I have to let them be seen by others.

Terror doesn’t come close to describing how I feel about doing this. Because this is not the kind of “being seen” where I get to admit my flaws and then get patted on the back with some reassuring comment to make me feel better. This is the “being seen” where I admit them to a large room full of people and then we all just sit there awkwardly in silence together. Not because it’s awkward, or shameful, or even anything revelatory that they are seeing, but because am so scared of the risk, I create my own fear-fueled reality. But when I figured out that I was actually sitting in the middle of a boisterous vulnerability party and my shame was just sitting on top of the mute button, every thing changed. Of course this also required something else I had been in denial of: the ability to really trust. Because finding self-confidence in your imperfections requires a kind of trust in yourself and others that is not the kind of trust you give your friends when you tell them about that one time you waited outside a hotel to stalk the Jonas Brothers in college, but the kind of trust that is choosing to go on television, naked, to do an interview in which you willingly hand over a flashlight and say, “Please, examine me.” And I do mean choosing, because that was my turning point with vulnerability, when I realized no one was going to roll out a red carpet and escort my vulnerability to the party. That I was going to have to drag her out myself, sometimes kicking and screaming, every day, for the rest of my life.

[box] “We can let the circumstances of our lives harden us so that we become increasingly resentful and afraid, or we can let them soften us and make us kinder and more open to what scares us. We always have this choice.” — Pema Chödrön [/box]

Vulnerability is a choice. It’s about making the choice to accept my imperfections, my mistakes, my failures, even when it really stings, when all I want to do in the face of criticism is launch into one of my “Whatever, you’re wrong!” or “OMG, I’ve failed at everythinggg” monologues. When going on Facebook to complain seems like so much more fun than apologizing, when sending an angry and defensive email makes us feel better than admitting that maybe the other person is actually right. It’s never starting a thought with, “I know I said I was going to be vulnerable, and that I need to sit with this discomfort, but that sucks and it is uncomfortable, and I don’t want to feel this, so just this once…” It’s not seeking out a drug hit of sympathy from someone by making sure, “You still love me, right?” It’s not justifying my mistakes so that I can make them again. It’s not going numb in an attempt to forget, ignore, or deny. As Brené says: we cannot selectively numb emotion.  If we numb out pain, grief, shame, disappointment, we also numb our happiness, gratitude, and joy. That’s why taking a risk is such a vulnerability, because the inherent definition of a risk is that there is no certainty, and without certainty, we risk failure. And vulnerability is all about embracing your successes and your failures. It’s actually being yourself in the face of possibly losing everything because of it.

[box] “To let ourselves be seen, deeply seen, vulnerably seen; to love with our whole hearts, even though there’s no guarantee, to practice gratitude and joy in those moments of terror, when we’re wondering, ‘Can I love you this much? Can I believe in this this passionately? Can I be this fierce about this?’ just to be able to stop and, instead of catastrophizing what might happen, to say, ‘I’m just so grateful, because to feel this vulnerable means I’m alive.’ — Dr. Brené Brown [/box]

There’s an ancient Japanese art form, called Kintsukuroi, that repairs pottery with gold or silver lacquer with the understanding that the piece is more beautiful for having been broken. That’s the biggest truth of all this. I still do not have this figured out. I will probably never have it all figured out. I will succeed and fail at vulnerability, and in life, again and again and again. The point it not to actually figure it out but to make the choice to go on that journey, to be broken and put back together. So I am trying, and stumbling, and trying again. And even when I fall into my old patterns, and cycle through the same loops, I just remember that it’s not about the loop, it’s about how much more quickly I can get out of it. And every time I make that choice, as hard as it can be in the moment, I always look back and feel better, stronger, and more alive than I ever did before.

[box] “It is not the critic who counts; not the man who points out how the strong man stumbles, or where the doer of deeds could have done them better. The credit belongs to the man who is actually in the arena, whose face is marred by dust and sweat and blood; who strives valiantly; who errs, who comes short again and again, because there is no effort without error and shortcoming; but who does actually strive to do the deeds; who knows great enthusiasms, the great devotions; who spends himself in a worthy cause; who at the best knows in the end the triumph of high achievement, and who at the worst, if he fails, at least fails while daring greatly, so that his place shall never be with those cold and timid souls who neither know victory nor defeat.” — Theodore Roosevelt [/box]

If you’re interested in reading more about these ideas, I strongly encourage you to go read all the Pema Chödrön you can get your hands on (apparently the Buddhists have had this vulnerability thing figured out for over 2,000 years) and watch Brené’s other TED Talk, about listening to shame. Brené has also written several books that I have yet to read but are waiting for me on my bookshelf. Or just go watch Love Actually.

Photo by Remi Coin

Photo by Remi Coin

Adventures of an Aspiring Chef: The Produce Challenge

A couple months ago, I wrote an article about figuring out how to cook chicken. Since then, I’ve been challenging myself to become a better chef. This past month, the challenge was to purchase five produce items that I wouldn’t normally buy and figure out how to cook them:

  • a turnip
  • an eggplant
  • a spaghetti squash
  • a bag of Brussels sprouts
  • two pears

Let the games begin.

THE TURNIP

Okay, so first I’ll admit I didn’t cook the turnip. But I tried to! Do you know how hard it is to find good turnip recipes? I wasn’t in the mood for anything in the soup variety, anything involving mashing, or anything remotely close to fries, so I settled on a nice cheesy turnip gratin—which sounded delicious until I realized a modest-sized block of Gruyere cheese (only enough for this one recipe) was $12. Yes, I know good things cost money, but $12 worth of a cheese I don’t even know if I like? Suffice to say, the neglected white and purple ball of guilt is still sitting in my refrigerator… fine, I’ll get some Gruyere at the store tomorrow.

EGGPLANT PARMESAN

I’m pretty sure the only thing I’ve ever eaten with eggplant in it was eggplant parmesan. I figured that was a good place to start. I found  this seemingly easy, highly rated recipe (two criteria I always look for) and got to work.

Ingredients:

AllRecipes.com

What I Used

My Commentary

3 eggplants, peeled & thinly sliced

1 eggplant, sliced

I probably should have peeled the eggplant, but I forgot I owned a vegetable peeler, and peeling without one… not so easy. I also didn’t “thinly” slice my eggplant, but I’ll be better about that next time. The thicker pieces didn’t cook as well and ended up being a bit tough and chewy.

2 eggs, beaten

2 eggs, beaten

I don’t know how this lady thought 2 eggs would cover 3 eggplants. I needed both just to coat my 1 eggplant. In the future, with even thinner slices—meaning more sides to coat—I will probably need 3.

4 cups Italian seasoned bread crumbs

A container of Italian seasoned bread crumbs.

Have enough to use “as needed.”

6 cups spaghetti sauce, divided

A jar of spaghetti sauce.

This is what “divided” means in cooking. I just poured from the jar, again, “as needed.” I ran out of sauce really quickly, though, so I probably should have used 2 jars.

1 (16 ounce) package mozzarella cheese, shredded and divided

A ball of mozzarella that was on sale at Ralph’s.

I think it was 16 ounces…

1/2 cup grated Parmesan cheese, divided

Poured from my Costco jar of pre-grated Parmesan.

Clearly there is an “as needed” trend going on here.

1/2 teaspoon dried basil

Oops.


Directions:

AllRecipes.com

My Commentary

1. Preheat oven to 350°F.

To reduce potential bitterness, the comments suggested sweating the eggplant by sprinkling them with salt, letting them sit for 30 min, rinsing with cold water, and patting dry with a paper towel. I did none of this and did not notice, but I still might try it next time.

2. Dip eggplant slices in egg, then in bread crumbs. Place in a single layer on a baking sheet. Bake in preheated oven for 5 minutes on each side.

Add foil to your baking sheet for easy clean up. Bake for 10 minutes on each side, as suggested by the comments and my own experience.

3. In a 9×13 inch baking dish, spread spaghetti sauce to cover the bottom. Place a layer of eggplant slices in the sauce. Sprinkle with mozzarella and Parmesan cheeses. Repeat with remaining ingredients, ending with the cheeses. Sprinkle basil on top.

I did this until I ran out of sauce. Then I just kept layering eggplant and cheese, it all worked out in the end. Forgot about the basil, which might have been a nice touch.

4. Bake in preheated oven for 35 minutes, or until golden brown.

I had to bake mine for at least 45 minutes and most of the comments suggested something in the 40-60 minute range. Be your own judge of this. Undercooking might lead to tougher eggplant: I wish I had cooked mine even longer.

All in all, this turned out to be a success. I’d do it again with thinner slices and a longer baking time. I ended up serving it by itself with some salad, but next time I’d serve it over some plain spaghetti (which is what I did with the copious leftovers and it was delicious). The breaded eggplant was definitely the best part so now I’ve got big plans to make these breaded eggplant sticks with my next eggplant.

BROWN SUGARED ROASTED BRUSSELS SPROUTS

Emily Knight did a whole piece for UE on the excellence of Brussels sprouts. She also dazzled me with them in person a couple years ago and wrote up the recipe on her blog. I tried to replicate to her success with my bag of Brussels sprouts.

Ingredients:

Directions:

Brussels sprouts

1. Preheat the oven to 400°.

Olive oil

2. Prep the Brussels sprouts by cutting off the icky end bit, slicing them in half, and then rolling them around in a bowl with some olive oil.

Brown sugar

3. Sauté the Brussels sprouts for about 5 minutes with plenty of brown sugar and more oil so they can get soft and sweet.

4. Spread the Brussels sprouts out on a baking tray and cook for 30 minutes.

This seemed so easy that I’m actually impressed that I screwed it up. See, when Emily said “plenty” of brown sugar, I channeled all my childhood memories of horrible boiled Brussels sprouts—and put in a copious amount of brown sugar. So much brown sugar, there was in fact a caramelized liquid to drizzle over the sprouts before I baked them. Sounds like a recipe for awesome, right? Not so much. Unfortunately, and I can’t believe sweets-loving me is saying this, this made them too sweet and not nearly as good as Emily’s. But this will definitely not be the last time I attempt this side dish.

SPAGHETTI SQUASH SPAGHETTI

I’d been intrigued by spaghetti squash since my neighbor first introduced me to it. As a lover of noodles, I’ll admit, I was a little skeptical. But after hearing several friends repeatedly rave about the dish, I was ready to give it a try.

Before you even get to making the spaghetti sauce, you must first “prep” the spaghetti squash:

Directions:

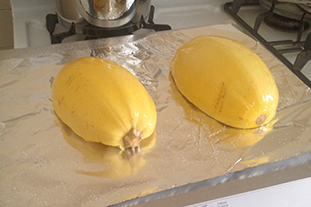
1. Cut the squash in half (AKA hack the shit out of this tough squash until it splits in half).

2. Remove the seeds / pulp. Pumpkin carving flashbacks are optional.

3. Douse with olive oil, salt, and paper and then turn flesh side down on a foil covered baking sheet and cook for 30-40 min at 450°F.

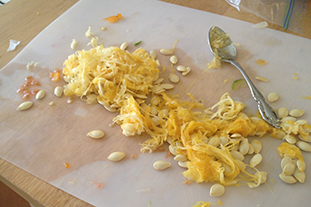
The “spaghetti” comes out like buttah when scraping it with a fork and has the consistency of angel hair noodles. I may have overly enjoyed this step, but noodles are being created from squash, it’s meant to be enjoyed.

Making the Sauce:

Spaghetti is one of the few things I’ve actually been able to cook for years, though it’s really not that hard when you are just cutting up vegetables and stirring in jarred tomato sauce. This time I decided to add ground beef, which I’d only ever cooked once before.

For anyone who, like me, feared ground beef, it’s actually even easier than chicken. I put some olive oil in a frying pan, added the garlic and onion first, gave them a minute or two, and then added the ground beef. Brown the ground beef (until you see no more pink) and add in the zucchini when it’s almost done. Continue cooking until you see no more pink in the meat, then add the jar of sauce. I usually let the whole thing come to a boil and then simmer for a few minutes. But really, you can eat it as soon as it’s hot. I also usually add in the chopped tomatoes last, so they retain some of their original consistency when I serve. Seeing as how I made this entire recipe up, it’s really a use-what-you’ve-got-and-go-with-it situation.

Serve your sauce over your spaghetti squash “noodles.” I added some grated Parmesan cheese and had to salt and pepper my “noodles” a bit more (so I’ll probably add salt and pepper to the squash post–baking-and-forking next time), but otherwise I’d say this was every bit delicious as I had heard. I barely noticed that I was eating squash, in fact, I might have even liked it more than pasta but don’t tell anyone.

FRUIT CRUMBLE

With all the use I’d been giving my oven, I’d yet to bake a dessert in it. This was clearly not okay! I decided to rectify this with my pears and some remnant raspberries I had left in my refrigerator. I Googled pear and raspberry crumble, found this, and went to town.

Ingredients:

CanadianLiving.com

What I Used

My Commentary

FILLING

4 cups sliced peeled pears

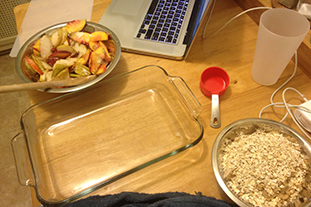
Two sliced, unpeeled, pears

I didn’t even notice the skin, but now that I’ve found my peeler, I might peel next time.

2 cups frozen raspberries

a handful of fresh raspberries

Unfortunately, when I went to get my raspberries, I realized many of them had gone to the other side and I found myself with far fewer than I’d anticipated.

a nectarine

To compensate, I added in a nectarine.

a couple grapes

This is where I went a bit off the rails, but I was bolstered by this grape and pear crisp recipe (and I was still lacking fruit!). You’ve got to work with what you’ve got!

1/3 cup packed brown sugar

1/3 cup packed brown sugar

2 tbsp all-purpose flour

2 tbsp all-purpose flour

1/2 tsp nutmeg

Yeah, I don’t keep nutmeg on hand. Probably should.

TOPPING

3/4 cup all-purpose flour

3/4 cup all-purpose flour

3/4 cup packed brown sugar

3/4 cup packed brown sugar

3/4 cup quick-cooking rolled oats

3/4 cup quick-cooking rolled oats

1/3 cup butter, melted

1/3 cup butter, melted

Melted in the microwave.


Directions:

CanadianLiving.com

My Commentary

1. In large bowl, gently toss together pears, raspberries, brown sugar, flour and nutmeg. Spread in 8-inch square glass baking dish.

I did this with my fruit additions and omitted the nutmeg.

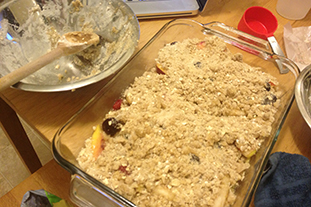
2. In separate bowl, stir together flour, brown sugar and rolled oats. Drizzle with butter; stir until crumbly. Sprinkle over fruit.

3. Bake in 350°F oven until golden and bubbly and fruit is tender, 45 to 60 minutes.

Watch one episode of Breaking Bad, then eat.

I served this warm with some whipped cream and had to hold myself back from going for seconds.


Cooking used to be so daunting to me but when I remind myself of these simple rules/guidelines, it’s just another tasty challenge:

More Meals = More Practice

Make dinner every night. Even when I don’t feel like it, I cook. By doing this I learned (1) cooking is not nearly as hard as I thought it was, (2) it is possible to do it both well and quickly, and (3) it’s a great, fun way to switch gears after a long day even if it feels like a chore when you first start.

Improvise AKA Get Creative

Don’t make cooking harder than it needs to be, follow the instructions, but don’t be afraid to switch ingredients or adapt recipes to your equipment/time/skill level. I usually combine several recipes and look closely at reviewers comments and see what their experience was like.

Don’t Skimp on Essentials

Substituting and improvising can be a wonderful adventure, but skimping on essentials like oil, butter, eggs, milk and cream can severely effect the taste of a meal (and not in a good way). If it says it wants A WHOLE CUP OF ACTUAL BUTTER, put in a damn cup of ACTUAL butter!  Not margarine, not half a cup, not anything else. I could start linking to all the articles and arguments about butter being better for you than all of its substitutes but I’m going to go with this line from Michael Pollan: “Eat food, not food products.” Or this line from me: “It tastes so much better.” Eat in moderation, exercise, be smart, and put down all the junk food before you blame butter.

Leftovers are your friend

Always make enough to take for lunch the next day and, if possible, even more to keep in the freezer. If you don’t eat it for lunch, it can be there for another dinner. There’s nothing better than coming home from a long day and turning some frozen leftovers into a new 15 minute meal.

That One Time I Started a Blog: The One Year Anniversary of UE

A year ago today, we started the UNDERenlightened.

In the past year we’ve covered everything from lock outs to hand jobs, drunk texts to internet slang. We’ve offered advice on dealing with your finances, your eyebrows, your car, your face, your period, your apartment, your roommates, and your toolbox. From finding the perfect lipstick or playing Quidditch, going to brunch or making cocktails, getting started with Android or trying out cosplaying, our writers have shared their stories and their experiences. They’ve taken you through being diagnosed with cancer, losing their wallet, turning 26, getting catfished, and going to the West Bank. We’ve created primers on religions, grammar, programming, wines, fan fiction, STIs, and an article on vibrators that is consistently the most viewed post on our site. We taught you how to make a GIF, make new friends in a new city, get from the couch to a 10k. Offered tips on outfits, interviews, restaurant behavior, DIY transformations, and decorating. And whether it’s getting that first number, meeting online, dating long distance, moving in together, or proposing, our writers have tackled relationships, sex, and dating with honesty and insight from their own lives.

When I first dreamed up the idea for UE in my friend’s kitchen, I had no idea it would grow into what it has become today. I am immensely proud of the articles we’ve put up this year, the people behind them, and I believe I can speak for all of us when I say that we are eager to continue bringing you the great content you’ve come to expect from us in this upcoming year.

Like all fledgling projects, our first year has not been without its ups and downs. And, in keeping with UE tradition, I would like to share with you some or our successes and some of our mistakes. While I can’t give you a textbook for starting a blog, collaborative or otherwise, I can tell you what it’s been like to start this one:

Start With An Idea

Back in early 2012, I was listening to my friend tell me about getting her license suspended and it got me thinking about all the things we will forever be learning how to do. I started keeping a list. The more I talked about this idea of being “under enlightened,” the more ideas people gave me. Soon I had several hundred “potential” article topics. Even though I knew most of these experiences had to be lived to be understood, I hoped that by creating a place where we could share these experiences, we could make it just a little bit easier for us.

From the beginning, I knew I wanted UE to be a collaborative site. I had so many friends who, like me, were writers without a place online where they could showcase their work. I wanted to start building an online writing portfolio but I found the idea of starting and maintaining a solo blog overwhelming–plus, let’s be honest, I’m not that consistently interesting. But through our combined efforts, we could maintain a constant content source and build a community where both writers and readers were learning from each other.

Just Do It

I started by talking to everyone about UE. And I mean everyone. Even my Grandmother was trying to wrap her head around “collaborative blog” during those first few months. At first, I was just trying to drum up potential writers among my friends but, to my surprise, the idea struck a stronger chord with some and they offered me their professional skills along with their time and dedication. I’d pretty much planned to beg, barter, and bribe people into helping me with the more complicated aspects of putting together the site (i.e. web design, graphic design, etc.) but before I knew it, my idea had spread from my friends to their friends and I had people sending me emails with their resumes asking if they could help.

I still remember saying right after a “phone interview” with a potential new editor, “Doesn’t she know that we have no idea what we are doing?” The managing editor at the time said back to me, “It doesn’t matter because you sound like you do.” Over the past year I’ve come to realize, with the help of UE, that no one has it figured out: there is no “right” way to do things. You just have to do it and trust that you will work it out.

Find a Team

Through sheer luck, our staff ended up being a mix of very close friends, good friends, and brand new acquaintances (whom I now consider very good friends). I knew there was no way I was going to pull off something this massive on my own but I still hadn’t anticipated running a staff of people dedicated this idea. I already knew how valuable a team could be from years of collaborating on creative projects and I felt an obligation not to waste their time or efforts. It was also important to me that they felt some sense of ownership in the site, so I saw each of them as the director of their own “department.”  I knew that giving them responsibility (read: trust) would foster a truly collaborative environment.

The minute you decide to make a collaborative blog, that blog is no longer yours. Even though people will often assume that I do all the work behind the scenes or call UE “Anastasia’s” blog, I do not like this. Whether in praise or in blame, I am always quick to remind them that there is a team running this show.

Be a Leader

Leading isn’t about telling people what to do, it’s about guiding a vision. It means listening and learning. When it came to creating something new, generally I would start by offering my vision for a particular aspect but used this merely as a place to get the conversation started. Give your staff the creative freedom to come up with their own approaches and implement them. You’ve put together a team of brilliant minds, trust in their talents. Your job is to keep everyone pushing towards the same goal.

Take the Time to Get it Right

Since our staff (and our writers) are located all over the country, we had to do all of our communication via the Interwebs. We embraced the power of Google. We use Google Drive to keep all of our articles, photos, publishing schedule, to do lists, etc., in sync and Google Hangouts to run our staff meetings. For many of us, UE is the job we do in addition to our full-time jobs. So, when we were building the site, gChat became an essential tool for getting things done during the work day.

We spent weeks working to get the look and feel of the site just right. We all agreed that it was essential to have a fully polished site before we went live. Even if this meant pushing our launch date (initially planned for early July) all the way to early September. We spent those months finessing every single little detail on the site. No link or font or color choice was too small to warrant some sort of discussion. We wanted UE to be a brand, so this meant coordinating not only the site but also our social media accounts as well. Every time we crossed something off the to do list, five more things would get added. And as the launch date moved closer and closer, it seemed like it would never get done.

The two hardest things were the site navigation and the legal. Try condensing a site about “everything” down into easily navigable subcategories. We’d come up with a plan, we’d throw it out, and we’d do it again. This process went on for weeks until slowly we built one that worked. The legal, on the other hand, ended up being a solo mission. It’s probably the least read thing on our site, but it’s one of things I am most proud of. Researching and drafting the various policies and agreements was particularly daunting for me because UE is legally registered and paid for by me. It would be my ass on the line if anything ever happened. There was one night, the week before launch, where I seriously considered scrapping the whole thing because I couldn’t get my head around it all. But with a little focus and a read-through by someone with a law degree, it came together. Now we have a solid User Agreement, Comment Policy, Submission Agreement, and Privacy Policy.

Honing Your Tone

I was so focused on putting the site together that I neglected the editorial side. I wanted us to have a backlog of articles before we launched the site. But what I didn’t anticipate was that when you are asking people to write for an unestablished site, no matter how much explanation you give them upfront, you’re going to get a lot of different tones back because they don’t have any clear examples as a base. And even if you thought you had a clear sense of your tone, once you start reading articles it will start shifting. So you have to balance deciding exactly what you want your tone to be, and communicating it back to both your writers and your editorial staff, all while carefully nurturing these fledgling professional relationships. This took time, practice, and a lot of mistakes. And, even a year later, we’re still working on getting it all just right.

Learn Your Limitations and Admit Your Faults

I believe the best managers are the ones who can admit their own faults: mine is deadlines. Despite all of my delegating and my best intentions, I’d overestimated the workload that I could handle. I was taking longer to edit submissions than I’d allotted time for, and since I couldn’t stick to my deadlines, I felt bad nagging my writers to stick to theirs.

Even with my team, for the first few months, I was still the lynchpin to the site running. If I went dark for a day, so did the site. So while I’d dreamed of UE publishing content every day, it got harder and harder to do so with both my managing editor’s and my own increasingly hectic schedules. We struggled along for a while, with a lot of last minute posts, but without either of us to keep the publishing schedule together the site fell silent.

We were dark all through the holidays and I felt tremendously guilty. I didn’t want to admit where I had failed but I also wasn’t willing to let all our hard work go to waste. I wanted to get the site back up and running but I knew that I needed to take a hard look at where we’d fallen short and be very honest with myself about what I could and couldn’t handle. I knew this would mean handing over control on things I’d previously been overly concerned with. But, as I said before, this was not “my” blog and if I wanted it to really thrive, I had to really let it go.

I called my managing editor and we had a very frank conversation about our time. This is where a lot of people might say working with your friends can get messy, but I thought our honesty in that conversation only strengthened our friendship. Together we reached out to one of the editors and asked if she might be interested in stepping up to take on the role.

When she agreed, I handed over complete control of the editorial side. I asked her to come in and implement her own ideas and system and to let me know where I would best fit in. I still wanted to read every article before it went up on the site but no article would again be held up by me in the editing process. We shrunk our publishing schedule down from five or six articles a week to a much more manageable three and we spent a lot of time making sure our new system worked before we were ready to officially “relaunch.” I really can’t thank Meggyn Watkins, our incredible managing editor, enough for her tremendous dedication and persistence. Without her efforts we would not be here today.

But if I have learned one vital lesson from UE this year it is:

The Importance of Commitment

This includes the commitment of the staff and writers, but I mostly mean a leader’s commitment. If you want to create something like UE, you have to remember that you are the reason all the wheels keep turning. If you lose drive, if things stop being shiny, if you don’t have time, or you stop pulling your part of the weight, everyone else around you will do the same. Not only are you the barometer of motivation, you’re also the source. If you’re not meeting your deadlines, why should anyone else? How can you be annoyed at someone for not doing their job, if you’re not doing yours? Teams are only as strong as their weakest link. If someone on your team is dropping the ball, it is not their fault, it is your fault for letting them.

To everyone reading this and to everyone who has ever taken the time to read any of the articles on our site–thank you so much for being a part of the UE family. We look forward to continuing to bring you great content for another year. If there is ever anything you’d like to read on the site, please let us know here. If you are interested in writing for UE, drop us a line over here.

Again, thank you for this incredible year.

Anastasia Heuer
Founder & Editor-In-Chief

Let Me Fix You: Box Spring to Bed Slats

Scouring thrift stores can be a great, cheap solution for outfitting your space with vintage furniture, but it can also be the source for a growing to-do list of DIY projects. Such was the case with the beautiful wooden bed frame I found at my local Salvation Army. I scooped it up for $120 and brought it home to my new apartment only to discover that my box spring now posed two major problems: (1) the box spring, combined with my modern day super thick pillow-top mattress, made the bed too high to get into (like step-stool necessary), and (2) at some point during the move, my box spring developed this squeaking sound that creaked every time I rolled over.

So, I could get a new box spring (but it would set me back another $100 and it still wouldn’t solve the height problem) or I could replace my box spring with an alternative. I went online and discovered many mattresses today, particularly those of the pillow-top variety, don’t need to be flipped and thus don’t require a boxspring anymore. My first thought, of course, was: IKEA! They don’t believe in box springs either! Which would have been an excellent solution, if only my new bed frame had had a center rail—an integral structural support to the thin slats sold at IKEA. Not eager to test out their buckling potential, I looked into: a single sheet of plywood, which was nixed for its apparent susceptibility to mold growth, or a bunky board, except that they are designed to only be used in addition to slats (which made me question why people buy them at all?). This left me with only one option: it was time to make my own bed slats.

Step 0: Googling

I started researching making my own bed slats and found this excellent slat tutorial.

Step 1: Acquiring Tools

You know what’s awesome about doing all your previous DIY projects in your Stepdad’s back shed? Power tools. Do you know what my apartment doesn’t have? Power tools. It does, however, contain a wimpy (albeit visually appealing) toolbox! But, given the scope of this project, and even though I had some woodworking knowledge under my belt, doing this on my own was going to require purchasing a few things.

With the number of DIY projects starting to build up in my apartment, I decided it was time to invest in a power drill of my own. Turns out, a power drill/portable saw combo at Home Depot only costs $10 more than just a power drill. Considering I was already set to spend the money, naturally, I bought the combo. It was the cheapest brand, Ryobi, but at $99 I wasn’t being picky. I double-checked reviews online, compared the features to the other drills around it, made sure the set came with a lithium-ion battery (not nickel-cadmium, which was the former battery standard but is now being phased out), and that the battery pack would work with any future Ryobi power tools I chose to purchase (next buy: power sander!).

But once you’re the proud owner of a fancy new power drill, you still need two things before you can actually use it: drill bits and screws. I opted for a slightly larger drill bit kit because I wanted to make sure I had a set that included all the basic screwdriver heads. Because I had no idea what kind of screws I’d need for all my drill powered future projects, I settled on this assorted wood screw pack to get me started. I also purchased a variety pack of nails just in case this whole plan blew up in my face and I had to resort to my good ol’ hammer. (For more tips on what you should have in your toolbox, check out Michelle’s suggestions here.)

Note: I have yet to use my portable saw but my vastly more experienced Stepfather strongly suggested I buy myself a Work Mate before using it. It’s a foldable and portable work table with clamps that you can use to saw things more easily (read: without hurting myself).

Step 2: Acquiring Materials

Chances are, wherever you go for wood, they are going to have an overwhelming number of options. There are several key decisions that you will have to make:

Note: Before you go to a lumber supplier (in my case: Home Depot), it is important to measure–actually measure with a tape measure and everything. Don’t be rushed, and don’t skip this, or you’ll end up making the same mistake I did.

First thing you have to decide is what type of wood you want. For a project like this, where no one will be seeing the wood, you can go with a cheaper soft wood like pine or Douglas fir.

Next, you need to decide on what thickness and width you want your wood to be. When I think about lumber, “2-by-4” is more of a name than an actual description. Turns out it’s actually both. The first number is the thickness of the wood and the second is the width. So a 2×4 is 2” thick and 4” wide. Unfortunately, to be extra confusing, lumber is actually identified by what they call nominal lumber sizes, meaning that it is labeled as the size it was before the wood was planed and cut. Therefore a 2×4 was 2” thick and 4” wide. However, now as it lies in front of you, the wood is only 1.5” x 3.5”. Not confusing at all, right? I totally didn’t know that until I was researching for this article, so of course I took the length of my bed (72”) and decided I’d need eight 6″ wide boards. With each of the eight boards spaced 3″ apart this would give me: 48″ of wood + 24″ of space = 72″. When I got home and realized the real measurements of the wood, my 3” between each board turned into 3.5” but it still worked. I wanted the slats to be as thin as possible for the mattress to sit on while still being strong enough to hold it up without bowing, so I went with 1” thick wood. Don’t be afraid to ask for help! The blog post I was following had me looking at 2×12 boards, but the employee helping me saved me a ton of money by suggestion I use 1×6 boards instead.

The next thing you need to figure out is length. My 1×6 boards were each 72” long. (Again, the blog had suggested 16’ (192”) boards, but these were way more manageable and cheaper.)  72” is a lot longer than my full bed, so I needed to trim them down to size. I may now be the proud owner of a portable saw, but I still had the friendly folks at The Home Depot cut my wood for me. The first time I tried this, however, I had been lazy and rushed in my measuring, so the super quick measurements I scribbled down were actually wrong. When I got my perfectly trimmed 52.5” boards home, I discovered that they were too short by 1.5”. One thing the blog had right, which I ignored, was the common bed sizes: if I’d listened to them regarding the width, I would have cut my wood correctly (to 54”) the first time and not wasted $30.

When buying wood, it’s also important to check for defects (like these common wood defects) in each board. When I got home with my second round of correctly cut 54” wood, I realized I had one “weak” board, meaning that the board was easier to bend in the middle than the rest. I already had my boards spaced 3.5” apart and I didn’t want to lose a whole board and risk putting too much weight on the remaining ones. Instead, I put the weak board on top of the metal frame on the end, where it would be more supported and have the least amount of pressure on it.

bed 2Step 3 (which should have been Step 1): Designing using your vast structural engineering knowledge… or what you learned from Google

So, at first, the plan (devised from the blog I’d found) was just to get a bunch of boards and lay them across my frame. This would have been great except that, unlike their example, my bed frame didn’t have anything on the sides to keep the slats from moving or, worse, slipping off. Not wishing to experience this in the middle of the night, I had to do a little extra planning:

Let Me Fix You- Box Spring to Bed Slats

Thanks to my earlier wood measuring error, I had a few extra boards to work with, so I decided to add two support boards to keep the slats from moving and/or slipping off the frame. Once flipped over, the supports would hit against the metal on the frame, thus keeping the slats in place, and look like this:

Let Me Fix You- Box Spring to Bed Slats (1) If only I had made these drawings BEFORE I started and not just for this article. Add that to the lessons-learned list.
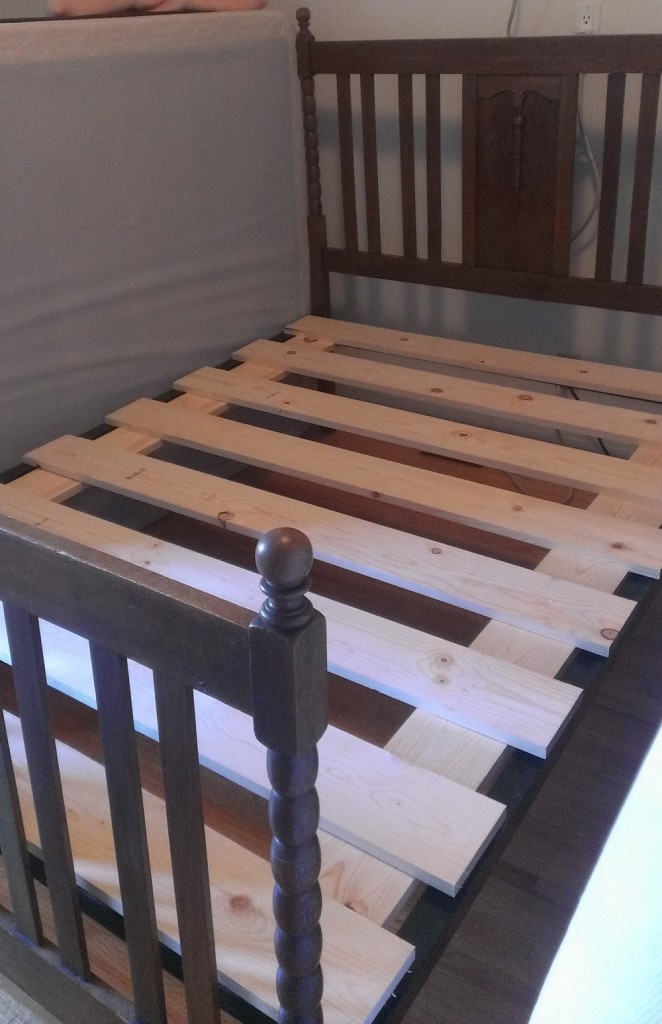
This was the final product:

Bed Slats square

After a month of excellent sleep, without injury or sagging, I think it’s safe to call it a success!

The UE Review: Cooking Chicken Breasts

When we started UE, one of our missions was to test our how-tos (or ones we found around the web) and publish follow-ups from the UE perspective. Today we are not going to test one of our own articles but a recipe we found on one of the websites we follow, The Kitchn.

A little background on my experience with chicken: My mother is still so frightened of “pink” (undercooked) chicken that she dices her chicken breasts up into quarter-inch squares that she then cooks to death. (Mom, I love you.) I fondly called this “cubed chicken” and mocked it all the way up until college when I realized—having only learned the one way—that I too would cook my chicken like this. (Mom, I still love you.) This inexperience, and my already lazy cooking habits, led me to eventually quit cooking the bird—or any meat really—altogether. I have since faced my fears of meat but not my cutting habits, only graduating to slightly larger “chunks.”

But today is the end of all that because today I learn how to cook chicken breasts without cutting them at all.

THE RECIPE: ”How to Cook Moist Tender Chicken Breasts Every Time”

INGREDIENTS:

I started by collecting the following:

  • 1 to 4 boneless skinless chicken breasts

I was cooking for four (no pressure) so I used two boneless skinless chicken breasts. These breasts were about an inch and a half thick and frozen.

  • Salt and freshly ground black pepper

If you don’t have “freshly ground” black pepper lying around, pre-ground pepper should be fine. I, for one, used to hand mash peppercorns between two paper towels with the butt of a knife because I was too lazy to buy ground pepper or a pepper grinder (don’t ask me why I had whole peppercorns) …but I don’t think many people will have this problem. (Just in case: tips for finding a the right pepper mill and the different kinds of peppercorns.)

  • 1/4 cup flour

Check.

  • 
1 teaspoon freshly chopped herbs (optional)

Meh. It said optional and I was too lazy to go to the store. I considered some dry herbs from my cupboard, like an “Italian Spice Medley,” but decided to just skip it altogether.

  • Olive oil

I recently learned to cook with oil, instead of water, and it changed my life. (A great breakdown of the different types of kitchen oils.)

  • 
1/2 tablespoon butter

I’ve been convinced in the past year that butter really is that much better than margarine. (If you don’t trust me, at least read what best-selling author Michael Pollan has to say about it.)

Next step, proper kitchen utensils:

EQUIPMENT:

  • 10-inch sauté pan with lid

In this case, the lid is essential. As for the 10-inches, just make sure your chicken fits comfortably in the pan. If you don’t have a sauté pan, these tips might help you find the perfect one. Considering that most of my cookware came from Ikea, I may not be the best source for recommendations, but Amazon, Marshall’s, Costco, or thrift stores, can all be excellent sources for quality pots and pans (and other kitchen items).

Clearly a pan is not the only thing you are going to need. So I’m going to add:

  • Sharp knife capable of cutting chicken

I reiterate the above locations for those in need of a knife set.

  • Spatula

Having burned myself on many a metal spoon, I cannot recommend a good wooden spoon / spatula enough—they don’t transfer heat!

  • Cutting Board

Your choice between wooden or plastic. If you’re really lazy, you can just use a plate. If you can’t stick your board in the dishwasher, make sure you follow these steps to keep it clean.

  • Three Medium-Sized Plates

I really can’t justify putting in a link here, I hope you own plates.

INSTRUCTIONS:

Defrosting frozen chicken: An intelligent, pre-planning person might have remembered to set their frozen chicken breasts out in the morning to ensure that they were properly defrosted by the evening. I, however, was not that person. So, my chicken, having been set out a mere three hours before, was still half frozen by the time I went to cook it. I tried to rectify this by massaging it under hot water from the faucet. (Apparently, according to the USDA, both of these methods are unsafe and one should only defrost their chicken in the refrigerator, cold water, or the microwave. Oops. Still alive.) I moved on to the microwave. I basically just started hitting buttons (like “Defrost” and “Chicken” and “Yes”) until it started working. But, if your microwave doesn’t have a defrost setting, two minute increments on 50% power would probably be an okay choice—then again, remember how many times I’ve cooked chicken in my life and take my advice at your own risk.

Start with your chicken on your cutting board…

  1. Pound the chicken breasts to an even thickness with the handle or flat of a knife.

Okay, I forgot to do this but, to ensure even cooking, this would probably be a good thing to do. If there is any excess fat (the white stuff) on your chicken breasts, feel free to trim it off.

  1. Lightly salt and pepper the chicken breasts.

Don’t be like me and touch your salt and pepper shakers with your raw chicken covered hands—attempting to wash them is not as fun as it sounds.

  1. Mix about a half teaspoon of salt in with the flour along with a little pepper. Chop the herbs finely, if using, and mix in as well.

Mix this flour mixture on one of your three plates. The other two are for your chicken—one for raw, one for cooked. I didn’t measure but be careful not to pour too much flour, anything you don’t use will be thrown out. Having just salted and peppered my chicken, I didn’t bother to mix in any salt and pepper (and my chicken still passed a taste test) but to each their own. As I stated above, I skipped the herbs.

  1. Quickly dredge the chicken breasts in the flour, so that they are just lightly dusted with flour.

I don’t know why this has to be done “quickly.” I took my time. Take your breasts and dunk each side in the flour. I scooped even more flour on top and gave it a good pat to make sure they were really covered.

  1. Heat the sauté pan over medium-high heat. When it is quite hot, add the olive oil and butter. Let them melt, and swirl the pan.

  1. Turn the heat to medium. Add the chicken breasts. Cook for just about 1 minute to help them get a little golden on one side (you are not actually searing or browning them). Then flip each chicken breast over.

“Turn the heat to medium.” Oops. So, being unable to read, I kept my heat on high and was assaulted by crackling oil. But my chicken still turned out fine. (I can’t say the same for my blackened pan.) Being paranoid of salmonella, I didn’t follow the one minute rule. Instead, I waited until each side was golden brown (more golden than brown).

  1. Turn the heat to low. Put the lid on the pan. Set a timer for 10 minutes, and walk away. Do not lift the lid. Do not peek.

My feelings on this: “Whaaaa? No peeking??? Like none—zero? But, what if I want to make sure it’s working? Ugh.”

  1. After 10 minutes have elapsed, turn off the heat. Reset the timer for 10 minutes and leave the chicken breasts in the pan. Again, do not lift the lid. Do not peek.

“STILL!? Sigh, fine.” When it comes to cooking, trust is not something I do well.

  1. After the 10 minutes are up, take the lid off, and tada! Soft, tender, juicy chicken breasts that aren’t dried out in the least. Doublecheck them to make sure there is no pink in the middle. Slice and eat.

“OMFG IT ACTUALLY WORKED!” Tender, soft, juicy, NOT PINK, tasty chicken breasts. I sliced each breast in half and served.

Pro Cleaning Tip (From someone more Pro than me):

If you’re like me and burned the shit out of your pan, try out the following technique I recently learned from a friend:

  1. Make sure you drain any excess oil and then put the pan back on the burner, on high heat, and wait a minute until it gets hot (or just do this right after you are done cooking).

  2. Put the pot under running water, angling the pot AWAY FROM YOU, and scrub with a long-handed scrubby brush (not a sponge). Don’t be alarmed if the oils in the pan crackle and steam when they hit the water.

  3. Scrub, scrub, scrub.

  4. All clean!

This is part of The UE Review series.

ChickenSquare

Photo by Anastasia Heuer

Where To Go When You Gotta Go?

Maybe I have high standards when it comes to public restrooms: clean. But I refuse to sit down on a grody ass toilet. Combine this with my small bladder and a penchant for road trips, and finding suitable bathrooms can get rather tricky.

I tried to give fancy technology a chance, with apps/websites like: Have2P, WhereToWee, WC Finder, and Imodium’s Bathroom Finder. (And while I did enjoy that Charmin’s SitOrSquat asked me if I had been potty trained, as a ploy to get my birthday, I was less than charmed with its attempt to access my Facebook info.) Overall, I found all these lists to be weak alternatives to logic. Because no, I do not consider a list of all the restaurants in town to be a useful restroom map. If I wanted to spend $10 on a meal just to pee, I wouldn’t be looking up bathrooms in the first place.

So I use the following guide instead:

1) PUBLIC BUILDINGS (Libraries, City Halls, etc.)

Personally, I consider libraries the absolute best public restroom option. I’ve always found them easy to find, free, and blessed with great parking. Thank our well spent tax dollars for providing you with this clean, guilt free bathroom location.

This can also apply to any public government buildings (City Halls, County Court Houses, etc.). Be warned, sometimes these buildings, particularly in larger cities, may require you to go through some sort of security. Another option, if you’re not intimidated, is to walk into any police station and ask to use their restroom. (I’ve never tried this last one myself, but it’s definitely worth a shot if you’re desperate.)

Keep in mind though, depending on where you are, the downside to all of these is their hours.

2) GAS STATIONS / CONVENIENCE STORES / REST STOPS

These are not my go to spots (see my standards above) but they are usually the best (and sometimes only) road option.

If you have the choice between a rest stop or a gas station, ALWAYS choose the rest stop. Rest stops were made for this activity! If you are lucky enough to find yourself in one that also includes food sellers and kitschy stores, bask in the comfort and enjoy its (hopefully) clean bathrooms.

If you’re stuck choosing between a myriad of gas stations, two good rules: (1) a convenience store increases the chances for a clean bathroom exponentially, (2) if the gas station looks 90% sketchy their restroom is probably going to be 99% gross.

3) CHAIN COFFEE SHOPS – Starbucks, Peet’s Coffee, Coffee Bean etc.

I’m all about the independent coffee shop, but you can’t always guarantee they’ll have a public restroom. So, for purposes of alleviating your bladder, you might want to stick to the chains. I usually go for Starbucks (they say there’s one on every corner for a reason.) If their bathroom needs a key, prepare yourself for a $3 drink surcharge or that awkward I’m just here cause I need to pee moment at the counter. Good rule: the smaller the town, the less likely the bathroom will require a key.

4) LARGE RETAIL STORES - Target, Barnes & Noble, Kohl’s, Costco (if you’re a member), grocery stores, etc.

Ranked below coffee shops only because these might not be your fastest options. Bathrooms in these stores can sometimes be buried in far corners, on 2nd floors, or in basements. But if you don’t mind walking (and even a little shopping) these can be great, clean options.

Hate talking to people? If so, I don’t recommend using a grocery store. Their bathrooms are usually inconspicuous and you’ll often have to ask someone to find it. (Though, I’ve found Whole Foods to be the exception to this rule.)

5) RESTAURANTS

If all of the above have failed you, consider any of the following, but be warned, you might have to pay for these options:

Fast Food Chains

Swift and easy to find, these are a standard bathroom option, particularly when traveling. They will probably be the cheapest if you are forced to buy something (remember most McDonalds still have a $1 menu.) But, like gas stations, your basic fast food chains can rank pretty high on the disgusting scale.

I like to lean towards the slightly classier options: Chipotle, Panera, Panda Express etc. I usually approach Panera like I approach Starbucks: if I can sneak in great, if not (or if my guilt has set in), I’m quite partial to their strawberries and cream scones.

Sit Down Restaurants

Unless you’re planning to eat at said restaurant, accessing these bathrooms can be difficult. If you’re attempting to just run in, aim for chains (guaranteed bathroom and lowered guilt factor), establishments without a dress code, and places with lots of families. I like the Olive Garden, bathrooms are usually located right by the front doors and long wait times provide excellent crowd cover.

Do you have a favorite place we missed? Let us know below! 

bathroom

Photo by Meaghan Morrison

No Dryer? No Problem.

I don’t know about you, but I am constantly plagued with wet or damp clothing that I never have enough time to deal with. I always seem to be out of time with a dryer that is nonexistent, broken, taken, or—like in my last apartment—seemingly incapable of drying clothing.

So, in the absence of self-drying clothing, I present you with the following five dryer alternatives for your dryer emergencies:

1. Direct Sunlight

The old school method: lay/drape/hang your clothes out in the sun and watch the magic happen! And by watch I mean go do anything else for six hours because—depending on the amount of sunshine, humidity levels, and temperature—this approach can be painfully slow. Keep an eye on the sun (remember it moves) and make sure to rotate (and/or flip over) your clothes at least once.

If you want to get fancy, use a clothesline. You might be able to find one in your backyard if you live in an older house/apartment building, but if not you can always jerry-rig one out of chairs/trees/fences/poles and some string/shoelaces/ribbons/computer cords. Then drape or clip your wet apparel on the line and let Mother Nature do her work. No super cheap clothespins lying around?  Binder clips, chip clips, and hair claws make for great alternatives.

2. Fan

While the outdoors is always best for maximum wind/sun exposure, if you’re without a yard, balcony, or trustworthy neighbors, you can also take advantage of the sunshine within your home and speed up the process with your favorite fan(s). Personally, I like to use hangers and a metal clothesline (aka my shower rod) or an awesome drying rack. But if that doesn’t cut it just hang your clothes on, or tucked into, other ledges around your home (i.e. dresser drawers, door handles, moldings). NEVER drape wet clothing over lamps. (Let’s just say, I’ve tried it… Two words: burn marks.)

The advantage of this method is that it does not require the sun (making it your best overnight option) and it is entirely environment controlled. Unfortunately, if you’re drying a lot of clothes, this method can take quite a bit of time. If I need dry clothes within an hour or two, I take a more direct approach: draping the clothes straight on to my fan. (This is probably definitely a fire hazard so I’m not recommending it.) Instead, try hanging what you need on the back of a chair, and pointing your fan directly at it to produce the same results.

3. Blow Dryer

You’ll need to own a blow dryer to embrace this option—so guys, you may be out of luck. This is my go to option under pressure—fast, efficient, and effective. It is, however, more labor intensive than any of the other methods. But it can also be a great approach for dealing with any unfortunate liquid mishaps. This will work with your clothes on or off, but for very damp clothing, off is better. I usually stick my blower right into an arm or leg, hold the other end closed, and let it fill up with air, rotating between sections every 10-15 seconds to make sure nothing burns. But again: fire hazard. So instead, let’s both try hanging our clothes in the shower and following the tips recommended by Wardrobe Advice.

4. Heater

This works better in the winter months because let’s be honest, no matter how badly you need that shirt, who wants to turn on the heat in July? (Plus, if it’s summer, umm sun?) I find the heater has a significant set it and forget it advantage over the blow dryer because, as long as you position your clothes just right (or weigh them down) to keep them from blowing off, you can enjoy your cereal from across the room. (Keeping an eye on them for rotation and safety of course.) This method is also especially effective for larger, or heavier articles of clothing (i.e. jeans).

5. Car Heater

Does it really get better than your own personal, traveling dryer? If you own a car, and are absolutely desperate, this may be your best option under extreme time pressure.

First, check and see if your car has a heater vent in the center console (the vent for the back seat). If so, drape your article of clothing in front of the vent (rotating every few minutes for maximum coverage) and voila! Your very own on-the-go dryer.

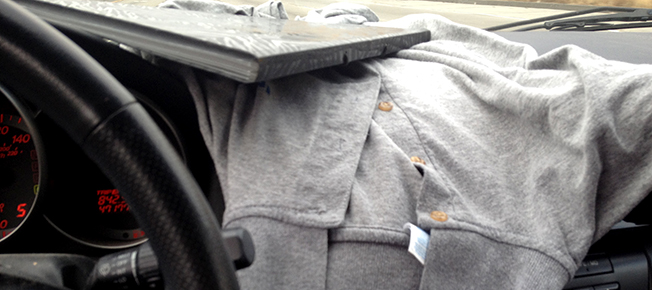
But, if you’re like me, and don’t have a handy back seat vent, you’re stuck with the dashboard vents. MAKE SURE you take the appropriate precautions for your personal safety and the safety of others before trying this—i.e. don’t be stupid and hold the shirt on your heater while you are driving.

In the above photo, I used a handy expanding file folder (while driving in a straight line) to keep my desperately needed shirt in place. This is clearly not the safest option. Think about using clothespins (or any of the above clothespins alternatives) to keep your clothing attached instead. There is a rotation factor here, so please PULL OVER (or make sure you are stopped) when you rotate your clothing. No dryer emergency is worth a car accident.

Bonus Tip: Need to get wrinkles out?  Hang up your shirt up as close to the shower as you can without getting it wet. Turn the water on to the hottest setting, close the bathroom door, and let the steam give you a wrinkle free shirt in about ten minutes.

dryerhero

Photo by Anastasia Heuer

Disclaimer: This article is meant for your entertainment. You can read the UNDERenlightened’s full disclaimer in our User Agreement.

Welcome to the UNDERenlightened

A few months ago, a friend of mine invited me over for dinner. I can easily say that this particular friend is one of the smartest people I know, so when she told me that she had gotten her license suspended for forgetting to pay a cell phone ticket, I was—well, shocked. She’d assumed someone would mail her the ticket, and when they didn’t… Sure enough six months later, she was pulled over for something arbitrary and informed that not only was her license suspended, she also had a giant unpaid fine. Oops.

The thing is, I had absolutely no room to talk. Just the year before, I had found myself in a similar situation. Who knew you needed to call the gas company after you moved into a new apartment? (A fact I’d managed to miss in all my previous apartments.) Turns out saying, “What do you mean? You don’t just send me a bill?” doesn’t magically turn your hot water, heater, or stove back on… for a week! I definitely learned that lesson.

I shared this story with my friend and we both felt profoundly less dumb. Then I asked her, “Wouldn’t it be awesome if there was a place where people could share all these stories, so that other people could learn from them before they made the same mistakes?”

And the UNDERenlightened was born.

Our mission is to create a community that is universal and personal, where knowledge and experiences can be shared without assumption—a place for all the things life forgot to teach you.

We are a community of writers, dreamers, and thinkers committed to the belief that, through sharing our individual experiences and knowledge, we are creating a place where no one has to feel embarrassed, scared, or overwhelmed about anything they do not yet know.

Together, we will share our stories, life lessons, and how-tos so that we can help to enlighten one another.

Here’s how we are going to do this:

Enlightenment should be accessible to everyone no matter their age or experience level.

It’s time to stop pretending like we have a handle on this whole adulthood thing. No one has it all figured out! There are hundreds, thousands, millions of things we don’t know about life and, personally, I wouldn’t mind a little help.

We aim to throw out the assumption that, at any age, you should already know how to do something. We want to be a resource that makes no presumptions about our community’s prior knowledge. Our articles are designed to make allowances for even the most UNDERenlightened readers. We make no judgments. We are your allies. And if we are giving you instructions on how to hang a large picture frame, we’re not going to assume you have a tool kit. Instead, we’ll very nicely point you towards this $7.99 set at Ikea.

The power of shared knowledge and experience can make life just a little bit easier.

Let’s say you get locked out of your apartment tonight. Oh sure, you think you know what to do: “I’ll just Google a locksmith. — But, wait, crap: my phone is inside my locked apartment. Ok, that doesn’t matter, I’ll call someone on a pay phone. We still have those right? How do I find one? And when I do, whom do I call?”

We believe the best way to learn is from each other, through our follies and our triumphs. One shared horror story that answered all—or even just some—of those questions could save the rest of us a world of potential misery. (Good thing one of our contributing writers already has had three different lockout experiences she can draw from! You can read her advice here.)

Learning should be fun, mistakes should be funny, and lessons should be valuable.

There are plenty of other how-to resources out there, and if you want to read a formulaic article about how to use bleach, go to About.com. But we know stumbling through this whole adulthood thing can get pretty ridiculous, so if you want to read about the sardonic experiences of a self-admitted first-time bleach user trying to follow those About.com instructions, you’ve come to the right place.

Our enlightenment should be tested and questioned.

If enlightenment was straightforward, we wouldn’t be here. To ensure that we are providing our community with the best enlightenment possible, we will periodically ask an UNDERenlightened writer to try out one of our how-tos and publish a follow-up. We also encourage you to test our how-tos and tell us about it!

The UNDERenlightened is first and foremost a community and we are here to help each other.

Want to suggest something for us to talk about? Use our NEEDenlightenment? form and let us know! From the silly to the serious, if you don’t know how to do it, we’re here to help.

Have something that you want to share? Join the UNDERenlightened team!

The other day, while I was trying to answer one of the eight million questions I was facing, I thought, “I SO wish I had an UNDERenlightened article for running the UNDERenlightened.“ Daily, we come across ideas for articles—how to tie a tie, how to get a bikini wax, and what to say to a friend who has been diagnosed with cancer—are just a few of the things you are going to see over the coming weeks. Last month, one of our writers had her wallet stolen. As terrible as this is, my first thought (and text) was, “OMG, you can write an UNDERenlightened article about that!” (Keep an eye out for that early next week.)

Thank you for taking the time to check us out. I am so proud of the articles you are going to be seeing over the coming months and of the team that is behind them. I hope you learn as much as we have from their experiences. We know we can’t prepare you for all of life’s hurdles, but we can try to make some of them a little bit easier to jump.