Tag Archives: Spotlight

Getting Started with Android

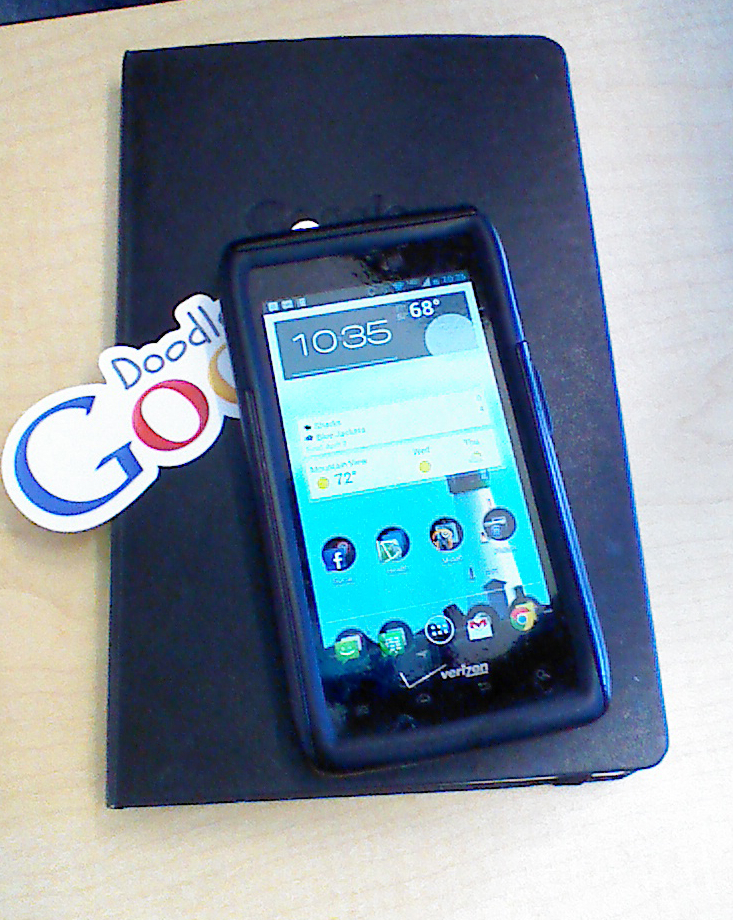
So, you’ve just picked up a bright, shiny new Android smartphone. Now what? Many people are wary of the highly customizable Android smartphones (in favor of the ubiquitous iPhone) because of the rumored learning curve; however, you can learn the system and you can make it work for you, instead of you needing to work around it.
Andriod_Square

Photo by Meggyn Watkins

The Basics

Some simple things to understand are the gestures: everything on the phone is accessed through tapping, swiping (sliding a finger across), or long-pressing (holding your finger on for a second) the screen.

Here’s some terminology to explain the Android environment:

  • Application: A program on the phone, usually represented by a small shortcut in your App Drawer or on one of your Home Screens.
  • App Drawer: This is an icon on your Home Screen (located in the Dock) that opens an area where you can search through your installed Apps. Notice that there are two tabs at the top of the App Drawer: one for Apps and one for Widgets.
  • Back: This physical button can not only be used to navigate backwards through visited web and App pages, but will also take you entirely out of an App and back to your previous App or your Home Screen.
  • Dock: A static bar at the bottom of your Home Screens for the App Drawer and four customizable shortcuts.
  • Home: A hardware button on your phone which will take you to your Home Screens from any App. Use this if you want to quickly exit an App!
  • Home Screens: You can think of these like your computer desktop. You can customize the background image by long-pressing the screen, and add App shortcuts to the Home Screens by long-pressing an App’s Icon in the App Drawer. The App Drawer will close, allowing you to drag the icon across the Home Screens to the location where you want to drop it.
  • Notification Pull-down: What was that pinging sound that your phone just made? If you drag your finger from the very top of the screen down towards the bottom, the Notification Pull-down will open. From here, you can select a notification to open its parent App, or you can swipe across a particular notification from left to right to ignore it.
  • Recent Apps: Not every phone has this button!  This is another hardware button that will launch a thumbnail view of your recently launched Apps. Use it to switch quickly between Chrome, Webster’s Dictionary, and Words with Friends (wait, are you cheating?), or to jump back and forth between your texts and a web search for movie times.
  • Menu: This is another hardware button. The Menu button is context-sensitive, so it will do different things (or possibly nothing!) in different apps. Google now encourages Apps to have an in-app Settings screen, so this button will be removed from future Android phones in order to provide users with a more fluid experience.
  • Widget: This is an advanced Android feature. From the Widgets tab of the App drawer, drag and drop the Widget you want onto a Home Screen. Widgets are often interactive and will sometimes update depending on location, weather, or current applications, and can even launch Applications or web pages!

Now I know how to interact with it. But how do I use it?

Right out of the box, many popular Android phones (like the Galaxy S III and the HTC One series) include a simple tutorial to help you sign into Google—they may even explain some of the above vocabulary. This will give you instant access to your all-important Gmail, the generally ignored Google+, the misunderstood Google Talk instant messenger (and soon Google Babel?), and the powerful Play Store. Of course, there’s also a generic Email app so you can access Yahoo!, Hotmail, or whatever flavor of email you prefer (for those of you who have resisted the Google hive mind). Thanks to the Google integration, some things will be provided automatically.

Here are some ideas to consider when customizing your shiny new smartphone:

  • You now have access to all your contacts stored in the Gmail web client. Any time you add a contact, be sure to select Google Contact, as this will back up the newly created contact so you can’t accidentally lose it! You can see them from the Contacts or People app, depending on your phone.
  • If you like to send surprise pics to your lover, be sure to open Google Settings and turn off Instant Upload in your Google+ settings. Or don’t, if you’re into that sort of thing…
  • The Play Store allows you to download apps, music, e-books, magazines, and videos. You can search within each section or across the entire Play Store in order to find whatever you like!
  • One of the best features of Android is Google Maps, which you can download from the Play Store. Enabling location access from the Settings menu will allow Google to customize search results for you and will provide you with turn-by-turn voice navigation as an added feature for free.
  • Of course, it wouldn’t be Google without integrated Search capabilities. You can use the Search Widget to launch a Voice Search and simply speak your command or type in a search. If you have one of the newest devices, then the Search App becomes something more—Google Now. Google Now allows you to opt-in to all sorts of extra notifications (called Cards), from updates on your favorite sports teams to traffic warnings for events in your calendar.
  • Your Android can take pictures and videos, but it’s what you can do with those pictures and videos that’s really interesting! You can go straight from taking a picture to viewing the Gallery by tapping the image preview in the Camera app. From the Gallery, you can  Share that picture through email to a friend, upload it to imgur for a quick post to reddit (if you have the imgur app), or launch Facebook to share it with your social circles for immediate judgment.
  • You are always logged in. Unless, of course, you explicitly sign out. The upside is that you always receive information as it happens! That’s also the downside. Having every app logged in all the time will take your battery from 100% to 0% in no time flat (I’m looking at you, Facebook for Android). Stay logged into the important things, but if possible, set a less-frequent notification refresh interval for everything else in their settings.

Android’s myriad Apps and Settings can let you customize the exact experience you want from a smartphone!  Stay tuned for more tips and tricks on tech and Android from the UE. And post a comment if you have any questions!

A Fanfiction Primer: What is This Nonsense, Anyway?

Fanfiction. So maybe you’ve heard of it? You might have read this article. You certainly know that 50 Shades of Gray came from a Twilight fanfic. But for all it’s been talked about in the media lately, you may not be exactly sure what it is. A dark hole in the Internet? A lightly disturbing and invasive hobby? An odd, obsessive escapism for people who watch too much TV?

All of these things are true. And not. Much like the rest of the Internet, fanfiction is an outlet for expression, a tool that can be used in many, many different ways. And much like the rest of the Internet, some of those things can be very creepy. But some of them, if you know what you’re looking for, can be absolutely inspiring.

Fanfiction, or stories written by fans featuring characters and universes that have already been published or produced, has actually been around longer than the Internet. In the ancient days of woolly mammoths and communication via the postal service, fanfiction was limited to newsletters sent to fans of certain content. However, with the invention and popularization of the Internet, fanfiction has become a well-known phenomenon.

There’s an art to communicating the essence of a character, relationship or a story, manipulating an existing canon to create a new outcome, and telling the future of a story in such a way that it is of the source-content but also separate from it. Like all things on the Internet, some of it is terrible, and some of it is mediocre and forgettable. But some of it, like all literature, will make you want to live your life differently and see something in a new light. And, in much the way all good writing does, it can make your heart hurt.

Fanfiction is also a great way to be exposed to ideas and concepts that don’t often make an appearance in mainstream media. Because fanfiction is so popular, free, and accessible, it includes many facets of society that suffer from underrepresentation and erasure in mainstream media. Sexuality, gender, race, disability, prejudice, and so many other things that are part and parcel of the human experience but are poorly represented in mainstream media can be found in abundance in the world of fanfiction.

Many authors, however, particularly older ones, are not okay with fanfiction. They think it’s invasive and an assault against their brand, their creation, and their intellectual property. And there are some hairy ethical lines when you consider the sheer number of novels coming out at the moment that used to be fanfiction of a sort. Some authors are fine with it as long as you don’t make any money off of their work. At the end of the day, it depends on why you’re reading fanfiction. A number of authors, such as John Green, have admitted to writing fanfiction of their own. It’s up to you how you deal with the opinion of the creator of your source content, but whatever you decide it is something to be aware of.

Whatever the authors may think, one thing is certainly true: fanfiction readers and writers love the content from which their stories derive. Some of them are looking for closure on a plot arch they disagree with. Some are looking to see their favorite characters embark on a beautiful, romantic relationship. Some are looking to get some fulfillment and closure on abruptly canceled shows, or cliff hanger novels. If you’re a Harry Potter fan, you remember the years and years and years and years (okay, maybe just three, but if felt like forever, alright?) between Harry Potter and the Goblet of Fire and Harry Potter and the Order of the Phoenix. What else was there to do during that period but think about what might happen?

However, it would be wrong for me to let you go wandering around out there without giving you this warning. Beware the porn. Yes, the purple prose, the wide variety of kinks, the characters that you never, ever, ever thought should ever engage in sexual activity. It’s all out there. If you aren’t into it, beware anything tagged Explicit, Mature, NSFW (Not Suitable for Work), or PWP (Porn Without Plot, or Plot, What Plot?). If you are into it, well…enjoy!

So you’re looking to read (or write!) some fanfiction now? Maybe we’ve got you thinking about a conversation you wish two characters would have on your favorite show. Maybe you’re thinking about that last book you read. An event was mentioned and never shown, but you’ve got an idea how it happened. So what are your next steps?

Head to the Internet, of course! Fanfiction.net is a good place to start. It’s been around forever, so what you’re looking for is likely on it in some capacity. It’s a pretty solid place to get your introduction to fanfiction. Another great place is Archive of Our Own, which is, as they say on their home page, “a fan-created, fan-run, nonprofit, noncommercial archive for transformative fanworks, like fanfiction, fanart, fanvids, and podfic.” The site is still in beta testing, but there are hundreds of thousands of works from all kinds of source content. If you’re familiar with Livejournal, there are plenty of fanfiction communities that use that site for hosting as well, and can be found with a simple Google search.

Whatever you’re looking for, you’ll probably find it. From AUs (Alternative Universes, which feature your favorite characters in a new plot, universe, or setting), to novel-length prequels and sequels, to resurrections of your favorite characters, it’s all out there on the Internet, waiting for you to read it. And if it isn’t, well, you can always write your own!

fanficsquare

Photo by Anastasia Heuer

The UE Review: Cooking Chicken Breasts

When we started UE, one of our missions was to test our how-tos (or ones we found around the web) and publish follow-ups from the UE perspective. Today we are not going to test one of our own articles but a recipe we found on one of the websites we follow, The Kitchn.

A little background on my experience with chicken: My mother is still so frightened of “pink” (undercooked) chicken that she dices her chicken breasts up into quarter-inch squares that she then cooks to death. (Mom, I love you.) I fondly called this “cubed chicken” and mocked it all the way up until college when I realized—having only learned the one way—that I too would cook my chicken like this. (Mom, I still love you.) This inexperience, and my already lazy cooking habits, led me to eventually quit cooking the bird—or any meat really—altogether. I have since faced my fears of meat but not my cutting habits, only graduating to slightly larger “chunks.”

But today is the end of all that because today I learn how to cook chicken breasts without cutting them at all.

THE RECIPE: ”How to Cook Moist Tender Chicken Breasts Every Time”

INGREDIENTS:

I started by collecting the following:

  • 1 to 4 boneless skinless chicken breasts

I was cooking for four (no pressure) so I used two boneless skinless chicken breasts. These breasts were about an inch and a half thick and frozen.

  • Salt and freshly ground black pepper

If you don’t have “freshly ground” black pepper lying around, pre-ground pepper should be fine. I, for one, used to hand mash peppercorns between two paper towels with the butt of a knife because I was too lazy to buy ground pepper or a pepper grinder (don’t ask me why I had whole peppercorns) …but I don’t think many people will have this problem. (Just in case: tips for finding a the right pepper mill and the different kinds of peppercorns.)

  • 1/4 cup flour

Check.

  • 
1 teaspoon freshly chopped herbs (optional)

Meh. It said optional and I was too lazy to go to the store. I considered some dry herbs from my cupboard, like an “Italian Spice Medley,” but decided to just skip it altogether.

  • Olive oil

I recently learned to cook with oil, instead of water, and it changed my life. (A great breakdown of the different types of kitchen oils.)

  • 
1/2 tablespoon butter

I’ve been convinced in the past year that butter really is that much better than margarine. (If you don’t trust me, at least read what best-selling author Michael Pollan has to say about it.)

Next step, proper kitchen utensils:

EQUIPMENT:

  • 10-inch sauté pan with lid

In this case, the lid is essential. As for the 10-inches, just make sure your chicken fits comfortably in the pan. If you don’t have a sauté pan, these tips might help you find the perfect one. Considering that most of my cookware came from Ikea, I may not be the best source for recommendations, but Amazon, Marshall’s, Costco, or thrift stores, can all be excellent sources for quality pots and pans (and other kitchen items).

Clearly a pan is not the only thing you are going to need. So I’m going to add:

  • Sharp knife capable of cutting chicken

I reiterate the above locations for those in need of a knife set.

  • Spatula

Having burned myself on many a metal spoon, I cannot recommend a good wooden spoon / spatula enough—they don’t transfer heat!

  • Cutting Board

Your choice between wooden or plastic. If you’re really lazy, you can just use a plate. If you can’t stick your board in the dishwasher, make sure you follow these steps to keep it clean.

  • Three Medium-Sized Plates

I really can’t justify putting in a link here, I hope you own plates.

INSTRUCTIONS:

Defrosting frozen chicken: An intelligent, pre-planning person might have remembered to set their frozen chicken breasts out in the morning to ensure that they were properly defrosted by the evening. I, however, was not that person. So, my chicken, having been set out a mere three hours before, was still half frozen by the time I went to cook it. I tried to rectify this by massaging it under hot water from the faucet. (Apparently, according to the USDA, both of these methods are unsafe and one should only defrost their chicken in the refrigerator, cold water, or the microwave. Oops. Still alive.) I moved on to the microwave. I basically just started hitting buttons (like “Defrost” and “Chicken” and “Yes”) until it started working. But, if your microwave doesn’t have a defrost setting, two minute increments on 50% power would probably be an okay choice—then again, remember how many times I’ve cooked chicken in my life and take my advice at your own risk.

Start with your chicken on your cutting board…

  1. Pound the chicken breasts to an even thickness with the handle or flat of a knife.

Okay, I forgot to do this but, to ensure even cooking, this would probably be a good thing to do. If there is any excess fat (the white stuff) on your chicken breasts, feel free to trim it off.

  1. Lightly salt and pepper the chicken breasts.

Don’t be like me and touch your salt and pepper shakers with your raw chicken covered hands—attempting to wash them is not as fun as it sounds.

  1. Mix about a half teaspoon of salt in with the flour along with a little pepper. Chop the herbs finely, if using, and mix in as well.

Mix this flour mixture on one of your three plates. The other two are for your chicken—one for raw, one for cooked. I didn’t measure but be careful not to pour too much flour, anything you don’t use will be thrown out. Having just salted and peppered my chicken, I didn’t bother to mix in any salt and pepper (and my chicken still passed a taste test) but to each their own. As I stated above, I skipped the herbs.

  1. Quickly dredge the chicken breasts in the flour, so that they are just lightly dusted with flour.

I don’t know why this has to be done “quickly.” I took my time. Take your breasts and dunk each side in the flour. I scooped even more flour on top and gave it a good pat to make sure they were really covered.

  1. Heat the sauté pan over medium-high heat. When it is quite hot, add the olive oil and butter. Let them melt, and swirl the pan.

  1. Turn the heat to medium. Add the chicken breasts. Cook for just about 1 minute to help them get a little golden on one side (you are not actually searing or browning them). Then flip each chicken breast over.

“Turn the heat to medium.” Oops. So, being unable to read, I kept my heat on high and was assaulted by crackling oil. But my chicken still turned out fine. (I can’t say the same for my blackened pan.) Being paranoid of salmonella, I didn’t follow the one minute rule. Instead, I waited until each side was golden brown (more golden than brown).

  1. Turn the heat to low. Put the lid on the pan. Set a timer for 10 minutes, and walk away. Do not lift the lid. Do not peek.

My feelings on this: “Whaaaa? No peeking??? Like none—zero? But, what if I want to make sure it’s working? Ugh.”

  1. After 10 minutes have elapsed, turn off the heat. Reset the timer for 10 minutes and leave the chicken breasts in the pan. Again, do not lift the lid. Do not peek.

“STILL!? Sigh, fine.” When it comes to cooking, trust is not something I do well.

  1. After the 10 minutes are up, take the lid off, and tada! Soft, tender, juicy chicken breasts that aren’t dried out in the least. Doublecheck them to make sure there is no pink in the middle. Slice and eat.

“OMFG IT ACTUALLY WORKED!” Tender, soft, juicy, NOT PINK, tasty chicken breasts. I sliced each breast in half and served.

Pro Cleaning Tip (From someone more Pro than me):

If you’re like me and burned the shit out of your pan, try out the following technique I recently learned from a friend:

  1. Make sure you drain any excess oil and then put the pan back on the burner, on high heat, and wait a minute until it gets hot (or just do this right after you are done cooking).

  2. Put the pot under running water, angling the pot AWAY FROM YOU, and scrub with a long-handed scrubby brush (not a sponge). Don’t be alarmed if the oils in the pan crackle and steam when they hit the water.

  3. Scrub, scrub, scrub.

  4. All clean!

This is part of The UE Review series.

ChickenSquare

Photo by Anastasia Heuer

Drinking on the Cheap: Wines

So, you need to buy some wine. You’ve been invited to a dinner party and asked to bring a bottle of wine, or you want to buy a decent bottle for a friend. Problem is that you don’t know anything about wine (we can help with that) and while you don’t want to spend $80 on a nice bottle, you don’t want to look cheap either. Well, good news! You can get good wine without blowing a day’s pay. The number one rule about wine (contrary to what the fancy-pants “connoisseurs” would have you believe) is that it doesn’t always matter what the wine costs.

Where does one find these awesome cheap wines? Anywhere from your local grocery store to BevMo!, Trader Joe’s, Costco, or Target.

BevMo! is great if you don’t know what you want, because they have a little blurb about the wine on the shelf tags, with descriptive words like buttery, fruity, or earthy and a rating from Wilfred Wong, their own personal taster (who seems to have good taste in my experience). These descriptions usually try to embrace the experience of the wine, not necessarily exactly how they taste, so I would suggest going for whatever sounds good to you. BevMo! also has a pretty knowledgeable staff, so talk to them if you need help—they answer questions from novice drinkers all day, so no question is too weird for them. Their 5-Cent Sale is fantastic and available at most branches at least twice a year (plus there’s always a rotating selection of valid 5-Cent wines on their website), so you can buy one bottle that looks good and get the second for 5 cents. I like this sale because it’s a little easier to justify buying a $20 bottle when you get two for $20.05.

Trader Joe’s gets the overstock from wineries making room for new bottles, so their wines are awesomely priced. They have the famous stereotype-crushing “Two-Buck Chuck” Charles Shaw wine that’s now, contrary to the nickname, $2.50. Charles Shaw does make great award-winning wines, beating out higher-priced competitors, and it is a great, reliable wine for a dinner party. I probably wouldn’t give it as a gift though, since it is well-known for being an inexpensive wine.

Now that you know where to go, what the heck kind of wine should you get? It’s always good to match the wine with the food being served if you’re buying for a dinner party or event. Rule of thumb: white dinner wines with fish and lighter foods; red wines with red meat and hearty foods; and, leave the syrupy dessert wines for after dinner. A great website to bookmark is WineToMatch.com, where you can enter a description of your meal, and it will recommend wines to pair. Chardonnay (a crisp and sometimes buttery white), Pinot Noir (a lighter, fruity red), and Cabernet Sauvignon (a dense red) are good go-to wines for gifts, because they’re so popular and easy to find. A few good labels to look for are Yellow Tail (ignore their silly commercials), Sterling Chardonnay, and Ravenswood Vintner Blend series. [For more information on the different types of wines check out: "Wines: Understanding that Shit."]

It really boils down to what you like. Taste everything, and don’t be afraid to buy a bottle just because you think the label is awesome or it’s got a fun name (especially if it fits with your fellow guests’ or gift recipients’ sense of humor). If it looks good, go for it! Keep a wine journal, or a list of wines you’ve tasted, and write down what you thought of them. Find a wine you like and use that as your go-to. Your own favorite wine will make a great gift to give: it might be something they hadn’t tried yet and it makes the gift a little more personal. You may not love every wine you try, but at least if you stick to the less expensive ones, it’s not a big loss and you can always use it for cooking!

CheapWineSquare

Photo by Meaghan Morrison

Five Outfits Every 20-Something Needs in Her Closet

Ladies, your twenties are all about finding out who you are and making tons of decisions. Among those, trying to come up with outfits every day, sometimes multiple times a day, risking that moment of dread that happens as you peruse your belongings: All your dresses are too casual or too fancy. It’s too cold for bare legs, but still too warm for tights. Your jeans are a decade old, and nothing matches!

If this sounds anything like your inner thought process, listen up, because these five staples are a great starting point for every 20-something’s closet.

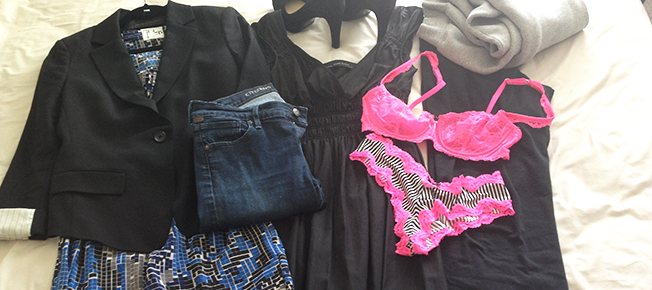
1. An interview outfit.

I don’t know about you, but I spent a lot of time in my early 20s interviewing for jobs. There’s nothing more exciting than getting that call—but then it hits, that punch to your gut when you realize you have nothing to wear. Eliminate that panic by having a go-to interview outfit. This way, you can focus all your attention on mentally prepping for your interview (and updating your portfolio), instead of wasting effort on scrambling to put together an outfit.

But, not every job is going to require the same kind of outfit, so make sure you know what your industry dress code is. I once got the advice that you should be dressing for the job you want, not the job you’ll get. For example, I go to work every day wearing jeans, but my designated interview outfit is a dress, boots, and a blazer.

Pro Tip: Don’t be afraid to show off your personality with your accessories (purse, shoes, jewelry), but do keep your interview outfit on the conservative side. Too-short hemlines and cleavage-baring necklines aren’t professional: there’s a place for them, but not at an interview!

For a more in-depth look, check out “Hirin’ Attire: Job Interview Wardrobe Tips.”

2. An LBD and FMPs.

My two favorite acronyms: Little Black Dress and Fuck Me Pumps. Don’t roll your eyes. Just accept it for what it is. Every woman should have them.

No matter your style, a little black dress is an important wardrobe item. It can be used for practically any event – dates, nights out on the town with the girls, dinner parties, weddings, etc. The dress can reflect your personality: there’s no “right” LBD, just the right one for you.

FMPs are equally important. These are the shoes that make your legs look amazing, and you feel like a super model in them. These are the shoes that your date sees and immediately thinks about defiling you… with the shoes on. Even if you think heels aren’t necessarily for you, give them another try. Heels come in all kinds of heights and styles, and I’m sure you can find a great pair that gives you that extra boost.

Pro Tip: Invest in a pair of Dr. Scholl’s cushioned insoles for your FMPs. They will change your thoughts about heels and discomfort forever.

3. Jeans that show off your assets.

I’m sure you already have jeans in your closet, but everyone should have a great pair that can make any outfit.

Keep the following in mind:

  • First, they should be dark wash. Light wash jeans were all the rage in the 80s; medium wash in the 90s; but, dark wash jeans are here to stay. They’re the most flattering: they’re slimming and stream-lining, and they can be paired with any top in all the lands. Dress them up with a silky top for night, or wear a tank top, and flip flops for a warm day.
  • Second, they should be tailored. Make sure you get jeans that fit. No matter what your body type is, there is a pair of jeans out there for you, waiting for you to find them. When you try them on, make sure you use a 360° mirror to check out what you look like from every angle. If they’re long, pay a few extra dollars and get them hemmed. It really does make a difference.
  • Last, they should be nice. Use your own discretion as to what that means, but I have converted even my most frugal friends to the ways of designer jeans, because they fit better and last longer. Designer jeans are made from better material, so they won’t wear out in a few months like non-brand ones.

Pro Tip: If you’re not willing to shell out big bucks (or you simply can’t afford it), places like Loehmann’s or Nordstrom Rack frequently have great brands on sale. Or, go try on an expensive pair in the store to find the size/style for you, then buy them cheaper online at Bluefly, Overstock, or eBay. Used clothing stores like Buffalo Exchange or Plato’s Closet are also good places to try if you don’t mind doing a little hunting.

4. A matching set of sexy bra and underwear.

As a 20-something, it’s highly likely you are either dating or in a relationship. And there may come a point where you’ll take your clothes off in front of someone else. When the time comes, don’t be wearing old, threadbare, or mismatched underwear. It’s important to have a sexy set that makes you feel confident—something that you’d want to show someone else.

It doesn’t have to be expensive, and it doesn’t have to be crazy risqué. No need for a red, lacy, see-through set: just have something that makes you feel sexy and self-assured. I actually feel more attractive when I wear matching underwear, so I’ve invested in several matching sets for a daily basis. But, I still have a different “fancier” set for special occasions.

5. A cozy pair of sweats.

In stark contrast to fancy undergarments, it’s equally important to have a cozy pair of sweats to wear around the house. Your twenties can be hectic, and sometimes, my favorite activity is just staying in all day and catching up on TV. The best thing for those days is a pair of comfy sweats.

I have a friend who was in such dire need of them (and so ready to get out of her jeans), she stopped in the middle of a road trip to get a pair from Target. She now changes into them as soon as she gets home from work each day.  Your sweats should be the most comfortable thing you can imagine putting on after a long day at the office. Or the perfect thing to wear while reading on the couch, drinking tea, and snuggling with your dogs (you just got an insider look at my Saturdays).

Because, really, your 20s are all about finding what makes you comfortable and learning how to balance that with how you present yourself to the outside world. And, while learning how to be your best self, it’s important to look the part.

OutfitsHero

Photo by Charlotte Lewis

Learning to Live Gluten Free

Chances are, if you walk around any grocery store, you will see signs of the gluten-free movement. Some stores have entire sections; others have bright, noticeable labels to help you find products free of wheat, barely, rye and other gluten ingredients. What you may not know is that these products are not just a side effect of the latest fad diet; it’s how millions of people around the country with gluten intolerance and celiac disease manage their condition.

I won’t go into terrible detail here on symptoms and diagnosis, or what it’s like to react to gluten. Gluten intolerance symptoms are very specific, not only to the person but also to the amount of gluten ingested, and many people’s symptoms also change over time. But for the curious, you can check out this pretty comprehensive list.

What I am more interested in explaining here is the “how.” How do you live without gluten and not hole up in your apartment, destined to never eat anything other than fruits and vegetables grown in your own backyard…? Fine, that’s a little overboard, but it really can be tough at first. However, it is doable and, with a little work, can easily become just another part of your daily life.

Do Your Research

You must do research in order to understand how to live with this disease. But don’t just go and scour the big bad west of the Internet without a bit of planning and a cautious eye.

There are many exaggerations, lies, and outright scams out there when it comes to anything medical (or, I guess, any topic created). This problem especially applies to gluten intolerance because it has become such a fad to not eat gluten. So instead, here are some tried and true resources to get you started on the right track.

There’s much more out there, and some of it is quite good. Just make sure it’s coming from a reputable source before believing it.

Learn to Love Food Shopping

Raise your hand if you like food shopping. If you’re like me, your hand is firmly plastered to your side because the idea of going into the grocery store at least once a week for tons of specific things is, well, akin to a dental appointment. I’m with you. I feel your pain. And I promise, it gets easier.

Food shopping is important because (1) you need to buy a lot of fresh foods to stay both healthy and gluten-free, and (2) that’s the only way you are going to eat anything that isn’t bland meat, fruits, and veggies.

Whole Foods, Trader Joe’s, Giant Foods, and Wegmans all have great selections of gluten free products—from pasta to breads to baking goods—it’s all there. Just make sure you also learn to read labels. Many sauces, oils, and even spices have gluten. If in doubt, ask an employee, or consult a trusted list, before you buy.

Cook? Yes, You’ll Have To Do That, Too

For some of you, stepping into the kitchen may bring pure joy. But if you’re the kind of person who prides yourself on your PB&J skills with a side interest in boiling water, then this may take a bit of extra effort. But it’s totally worth it.

There are many great recipe sites and books out there, sharing both original concoctions and plays on traditional meals with the right substitutions. You may not be very good at them at first. That’s fine. It will get easier, just like cooking does in general. Eventually, you will love how easy it is to make your favorite recipes without any gluten at all.

Pro Tip: If you share a kitchen with those who are blessed with a tolerance for gluten-y goodness, it’s good practice to have a separate set of cooking utensils, pots and pans, and baking sheets. Gluten contamination happens all too easily on these surfaces. Also be sure to extensively clean your kitchen counters and other prep areas before and after every use, and also thoroughly clean any shared plates, utensils, or cups. While those who are not as seriously affected by gluten may not find these small contaminations bothersome, those with full-blown celiac disease often get sick from even the smallest interactions. It’s a good habit to learn.

You Have to Be Pickier About Where You Eat Out

The good news is that you don’t have to give up restaurants, happy hours, and late night munching. The bad news is that your favorite spots may or may not still be viable for you. Many more restaurants and other eateries now cater to those of us who can’t eat 98% of their food anyway. Pizza places, burger joints, and sit-down establishments are now dedicating parts of their menus to us. But even then, there are few things to keep in mind.

Here’s how to find the best places that will handle your requests with ease:

  • Call ahead and ask for a manager. They will be able to tell you any accommodations they offer and how broad their options are. While some restaurants have dedicated separate menus, others just modify a couple of their recipes by substituting something for something else. These may be good options, but still be wary. Their kitchen staff may not be as attentive and you’ll need to be extra vigilant in making sure they do it right.
  • Try to be familiar with the menu beforehand. This will save you review time and allow you to more specifically handle working with the staff so that you don’t slow down the whole process. Also, it cuts down on surprises.
  • Tell your waiter or waitress as soon as you are seated that you have a gluten allergy. She’ll ensure you have the proper menu and will tell you if there’s anything you should be aware of. This will also give you more time to work out the details while the rest of your party has time to make their selections. Often, this will even prompt a manager to come over, who will likely be more familiar with the processes of the kitchen and handling food sensitivities. Some restaurants even make this a policy.
  • Be wary. I hate to say it, but no matter what, eating out is a risk for those with gluten sensitivity. Your food is being prepared in the same place as food with gluten, by a busy and sometimes overworked kitchen staff. While there is still a good chance you will have a perfectly fine experience, be ready for the possibility of contamination and side effects. If your symptoms are severe, be extra careful and consider ordering something entirely from scratch that you know will be gluten free. If the chef says that he can’t guarantee that there won’t be contamination, consider whether this will be okay for you. The risk sometimes may be too high.

If you’re not sure where to start looking for gluten-free friendly establishments, check out the Gluten Free Registry. (It’s comprehensive and covers most of the country.) While it is sometimes a bit outdated, and includes old restaurants or forgets new ones, it’s a great starting point and often will help you think of other places that haven’t even crossed your mind.

Learning to live gluten-free may seem overwhelming, frustrating, and downright unfair, but it will get easier. If you stick to your new habits, are extra vigilant, and are above all patient with yourself and those around you, then the habits and routines will fall into place naturally. Gluten-free living doesn’t need to be hard, it just needs to be done right.

GlutenFreeFullSize

Photo by Jennifer Dorsey

How to Make a GIF

In 1987, a new type of image format, known as 87A, was released by CompuServe. This type of format allowed for a broad range of colors and the ability to loop. It would eventually become what we know today as an animated GIF, or Graphic Interchange Format. Today the GIF is still used in a variety of online settings, such as moving graphics for a site or part of a meme or a piece of art in itself. But what do you have to do to make a GIF?

To make a GIF, you’re going to need a few things:

1. A collection of images you wish to animate or a video

2. A copy of Adobe Photoshop

Once you have these, it’s time to get to work!

carrey

conantypes

The first thing to do is prepare your source material. Depending on the kind of GIF, your images will come from different places.

Slideshow/Looping GIFs

Some GIFs are just loops of still images without a lot of real animation. This is probably the most basic type of GIF to make. The first thing you want to do is gather all of your images in one folder, preferably in the order you want them to appear in your GIF. It is important that they are all sized as big as you want your GIF to be, otherwise you will have to do this manually in Photoshop.

Next, open Photoshop and create a new file (set the image size to whatever the size of your GIF will be).

Place your images into new Layers by using File > Place. You will see your images appear as individual layers on the right. Make sure they are in the correct order if they aren’t already. The bottom layer will be first in the animation, but you can adjust it however you wish.

A

If you are using CS6, click on a tab at the bottom called Timeline. If you are on an older version of Photoshop, you must go to Window > Animation to see this.

B

Select Make Frame Animation in order to get to the right mode. It should create a frame of your topmost image.

C

Next, pull the Animation drop-down menu and select Make Frames from Layers. This will make a new frame from each layer. This includes the background layer, so delete this if you don’t want in your animation.

“But my animation looks all choppy!” You might be saying.

carreychews

Refining Your GIF

At this point, you have several options. You can save it at this point, but you may need to refine the timing. The main tools you will use at this point are the delay and tweening. For this example, you should only need to set the delay. It is normally defaulted to a 0 second delay, and set to repeat only once. Change this to repeat forever if you want it to loop. Beneath each frame, you will see a triangle. By clicking this, you can set how long each frame should last. If you select all of your frames, you can adjust them all at once as well.

Tweening is used in GIFs to smooth the transition between two or more frames. It creates a more fluid transition between your images if they are not already optimized for animation.

D

To tween an image, select two frames that are side by side and click the Tween button by holding Shift. The menu that pops up will ask how many frames to create between your frames.

Using too many can make your images appear ghostly, but not enough might not do anything at all.

NoTweening

No Tweening

Tweening

Some Tweening

TweeningBad

Too Little Tweening

TweeningTooMuchToo Much Tweening

You will notice subtle differences between the above images, and depending on what effect you are trying to achieve, there are different solutions possible. Remember, if you tween your frames, you will probably have to adjust your delays as well.

Video Clip GIFs

But the real reason you’re here is to learn how to make all those funny meme GIFs from various films and TV shows!

wonka

Another method of making a GIF is to convert a video file to frames. This is probably one of the most common types of GIFs, and is very popular in meme culture. It is also very easy to make once you have access to the video you want.

cumberbatch

The only difference in the process is how you obtain the images. Instead of placing images, you must import a video clip into Photoshop. (It is important not to use a very long video, or it will take a long time to load: under 10 seconds is usually a safe bet).

[File > Import > Video Frames to Layers... GIF]

A pop-up menu will allow you to trim the specific portion of your clip you want to use. This will automatically convert your clip to frames, and then you can edit the delay and tweening if you wish.

IMAGE_E

Saving Your GIF

Lastly, you will have to save your file to the proper format. Instead of using the normal Save feature, use Save for Web or Save for Web and Devices.

[File > Save for Web... GIF]

This menu gives you options to select the proper format, plus different sizing and optimization functions. This tool is designed to allow you to keep your full Photoshop project saved at the highest quality so you can then save multiple versions of your work in various formats. To make sure your GIF remains animated, select GIF from the formats and click Save below. The file size will be much larger than a normal JPEG.

IMAGE_F

That is all you have to do to create your GIF! Note that the speed of your GIF may be different than what you viewed in Photoshop, so you may have to play around with different settings to get precisely what you want.

videogif

Another interesting feature (new to CS6) is the ability to make transparent GIFs. These function in the same manner and are created the same way, however, they utilize the transparent background that can be used in other Photoshop projects. By using these in your GIF, you can make an animation that can be layered onto a website and you can still see the background through it.

transparent

Animated GIFs are seen by some as an emerging art form in itself. With this knowledge, you can easily play around with them and see for yourself, or just give a cat some laser beams!

laserhipstercat

And that is all there is to it!

rickman

6 Ways to Make Friends in a New City

I’m a very outgoing person but I’ve realized that once you enter “adulthood,” dynamics change entirely. Aside from childhood or college friends, some of whom you may just outgrow, I had no clue how to make friends. How did couples meet each other and go on ski retreats to the Poconos? This happened, right?

Despite my general anxiety of meeting new people, I decided to leave my roots in Kansas (yes, I know) and move to New York. And again in 2012, I decided to quit my job and New York City, and I moved to Bangalore, India. While my future memoir will describe this move as a glamorous and inspirational change, I’ll let you in on a secret (which now makes us good friends!): I was terrified of leaving all my friends and that I would never be able to connect with anyone ever again.

I may have a penchant for the dramatic, but I understand how scary it is meeting people in a new city or country.  Therefore, on my one-year anniversary of the “Shilpa Moves Abroad” saga, I offer you six practical tips that have helped me replace my book at dinner with a conversation.

1. Register for Meet-Up groups:

This one may seem very obvious, but you’ll be surprised how many people feel ashamed or too shy to sign up for expat clubs or various meet-up groups. It may feel like Internet dating for platonic friendships, but everyone attending the events also has the intention of meeting new people; essentially, it’s like the first day of kindergarten, except for adults.

2. Take a fun class:

Shy about going to a bar or dinner alone? Joining a group class is not only a fun way to learn a new skill or craft, but also great for continuously engaging in fun activities with others, long term.  Classes meet consistently, so you can even build up the courage to start talking to other classmates over time: it’s not a “one shot” moment. The real benefit is that everyone there already shares a similar interest and the commitment to exploring it fully.

3. Join a gym:

To be frank, I only started going to the gym to meet people and to feel less hypocritical about working for a health awareness website.  Aside from the health benefits (blah blah blah) of a gym, what health mags won’t tell you is that gyms are teeming with young people! I live relatively isolated from the “cool” parts of town, but I ended up making a great friend at the gym who lived in my building, was from New York, and could bench press 180 — what a triple threat!

4. Go to that random party where you only know one person:

Congrats, you made one friend! Now the key to multiplying them is to take him/her up on any offer to go to a house party, a dinner party, or a random bar where you won’t know anyone else. If you enjoy one person’s company, chances are you’ll meet and enjoy his or her friends as well.  Party crashing is the new networking.

5. Sign up for networking groups / listservs / professional Google groups:

Speaking of networking, you should continue to do that! Aside from the obvious benefits of meeting mentors and industry connects, you will also meet equally ambitious people who can become lifelong friends.  I am a part of numerous business listservs that host Happy Hours, panel discussions, and gala events.

6. Volunteer:

Whether you join an organization or sign up for a one-day effort, a few hours of your time to give back to the community can give you the warm fuzzies and possibly a friend! When I first moved to New York, I volunteered by counseling rape victims in the ER. Due to the difficult nature of work, we had an intense four-day training session where I met a girl who ended up being a friend well after our volunteer duties ended. Showing passion for a common cause lays a strong and healthy foundation for friendship.

The ultimate theme in these tips is to keep putting yourself out there. Obviously, you’ve taken a big step and left old comforts for a new city and new adventures. You will meet and engage with people whom you’ve never been exposed to before — provided you are willing to take on any experience and encounter with a grain of salt and a possible tequila shot.

Make New Friends Square

Photo by Remi Coin

St. Patrick’s Day: Where you come from?

St. Patrick’s Day—just another excuse for decent folk to get shitfaced and deface the world with obscene amounts of green. But that saint part isn’t in the title for show: Saint Patrick was a real dude who roamed around Ireland in the 5th century spreading Christianity to the pagan Druids. So how did a chaste saint influence a now not-so-chaste day of celebration? Join me for a little historical adventure.

Saint Patrick was like most saints: pious and devout. Born Maewyn Succat in Roman Britain, he was captured by Irish bandits at the age of 16, and sold to a druid in Ireland. For the next six years, he lived as a slave before a mysterious voice told him to escape. It said, “Very soon you will return to your native country. Look, your ship is ready.” Patrick diligently followed this voice, walking a measly 200 miles across the Irish countryside to catch a (pirate) ship back to Britain.

He then headed over to France for formal priesthood training and eventually left as a bishop, with instructions from the Pope to return to Ireland and convert the Irish peoples to Christianity. He spent the rest of his life wandering Ireland, converting everyone he could, and while it’s not clear what year he died—460 or 493 A.D.—historians all agree on the day he died… March 17th.

Fun Fact: He was also the first person ever to publicly condemn slavery.

How did we get from saintly Patrick to intoxicated Shamrock Day?

It wasn’t until 1000 years after his death that Luke Wadding (just some scholar) would champion the church to put an official feast day on the liturgical calendar. Even then, March 17th continued to be a minor holiday in Ireland until the 1970s.

Blame America for really revving up the green themed party (some even argue that St. Patrick’s Day was actually invented by Irish-Americans). Back when there were only 13 colonies, the first St. Patrick’s Day parade was held in New York City as a nod to Irish soldiers serving in the English military and, by 1848, it had grown to be the largest parade in the world. In America, St. Patty’s Day started and continues to be not just about the religious aspect of Saint Patrick, but a celebration of Irish heritage. How does this translate into green beer, green rivers and this?  Your guess is as good as mine.

Ireland has since come around, making it a public holiday (1903), making a law that forced bars and pubs to close for the day (1905), repealing said law (1970s), and finally creating their own St. Patrick’s Day Festival (1996) that sprawls for five days.

But why all the green?

The symbolism of the green comes from an anecdote about good ol’ Saint Pat. It is said that he taught the concept of the holy Trinity with a three leafed shamrock. The green of the shamrock then became associated with Irish Catholics. Since Ireland’s population is predominantly Catholic, this spread throughout the world, inexorably linking Ireland with green. It also helps that Ireland is literally green themed (cough: rich green landscape), hence its nickname the “Emerald Isle.”

Fun Fact: St. Patrick’s Day was originally associated with the color blue (St. Patrick’s blue), the connection being Ireland’s coat of arms which are blue and gold.

Extra Credit: The green in Ireland’s flag symbolizes Catholics while the orange is associated with Protestants (William the Orange), and so when the flag was adopted in 1919 it was meant as a sign of peace between the two factions.

Wait, St. Patrick’s Day is not always on March 17th?

Mostly, but no. When St. Patrick’s Day falls during Holy Week (the final week of Lent) it gets booted to a later date because solemnities are more important than feasts. Most recently it was moved in both 1940 and 2008 for this reason, but don’t worry: it’ll stay on the 17th for another 150 years (until 2160). And this only really counts if you’re celebrating the religious aspect of the holiday rather than the cultural one.

GreenBeerHero

Photo by Meaghan Morrison