Tag Archives: cooking

So You Want to Throw a Dinner Party

My friends and I are entering the period of our lives where we have spaces with significant others, few to no roommates, and the horrible decision of owning a dining table for more than three people and a pile of books. Dinner for two or four isn’t such a big hassle, but when everyone wants to come over, eat, drink, and play games it can start to get out of hand.

The Guests

How many of your friends can you comfortably seat? Whether it’s around your dining table or apartment, it’s better to be able to provide a chair so that everyone can eat at the same time. Are these people who will get along? Will they hover in the kitchen? Consider who makes a great guest for eating—they’re not always the same people you want to have over for drinks or dancing. Keep the number of guests reasonable for noise too. It can be hard to yell over people, and too many people can make that a challenge. Start small!

The Table

Put all your leaves in. Adding the extra space in later for plates, napkins, glasses, platters of food, finished plates, and assorted elbows will be a godsend when you’re in the middle of cooking and entertaining. My boyfriend and I like placemats, as they’re easy to clean (throw them in the wash with your clothes), and they give a visual space for where everyone should sit and put all their eating crap. Set out dishes in advance too, along with flatware and glasses. It’s nice to not have to scramble for everything at the last second, or have to direct guests where to get their utensils and plates while you’re finishing up the meal. I like to not assign seats, because two of your guests might be having a great conversation that you would’ve never considered, and now they want to talk all night about it (but no one else does).

The Food

What’s easy for you to make? Can you do a lot of it? Sometimes I get into the trap of thinking that Dish A would go really well with Dish B, with a side of Dish C. But all of these plates are hard work or require recipes I’ve never really done before—and when everyone is waiting for their food, scrambling to make sure that your food is edible (and hopefully tasty) is probably the worst thing to worry about. So, keep it small and easy! I’m guilty of generally not following this on a day-to-day basis: I like to look up recipes that sound delicious, try to make it for a few people, and fail miserably. When I’m going to entertain, I definitely try to keep it simple.

Start with an appetizer that takes a very little preparation, maybe something you can do in the morning or the night before. Salads are an easy choice: throw some mixed greens with a relatively neutral dressing or even serve the dressing on the side. Add tomatoes, fresh fruit slices, or nuts to add texture to the salad. Alternatively, soups are easy to make earlier in the day or the night before. Just bring it up to simmer and serve hot with some fresh bread. If either of these is too much work, you can always settle with a cheese platter—put some bricks of cheese on a wooden cutting board with some knives and crackers, maybe a few slices of cured meats. Personally, I like crostini types of snacks. Get a nice baguette and slice it into thin rounds. Brush with olive oil or butter and toast in your oven until crispy. Top with a bit of cheese, or meat, or a spread of your choice. A bit of smoked salmon, herb cream cheese, and a sprinkle of chives makes it perfect for me.

As for the entree, what’s good for everyone? Ignoring dietary restrictions, fish and chicken are pretty easy to just throw in the oven, pull it out, and serve when it’s time. I like to go with a recipe that’s pretty heavy on the aromatics, but it’s not for everyone! To me, lots of garlic, onions, and herbs help to make a kitchen feel homey, and there’s nothing quite like opening the oven door and hearing everyone groan with anticipation. For a bit more of an active cooking experience, you can always grill or pan-fry your main course—this is more along the lines of what I generally do. Sear some steaks in a pan or a grill and top it with butter, or work to build a more nuanced dish like chicken marsala (a personal favorite). Either way, I’d aim to do about one large serving per person, with extras for the folks you know who like to have extras (mostly me), and you’re set!

But wait! Side dishes? Make them in advance if you can. Or have them be as very little maintenance if possible. Salads if you didn’t have one for an appetizer are great here, as are various potato preparations: mashed, baked, and gratin are fantastic ways to serve a side starch. If your entree is pretty heavy, keep your side relatively light! And vice versa. You want everyone to have room for dessert, of course.

After everyone’s done with their main course and has been settled for a bit, I like to bring out dessert. Unless you’re into baking and pastries, I’d definitely grab a cake or a few pastries from your favorite bakery. It’s a lot of work to make your own desserts, and the precision can be taxing when you consider that you’ve made so many other things for this party (even if you didn’t do it all yourself). Something easy to cut like a pie or a cake works well for dessert, especially if it highlights seasonal fruit. Ice cream and coffee are also fantastic and absurdly simple. Carve out a couple scoops and serve with a small cup of joe.

The Drinks

While we’re talking about beverages, what do you serve for the rest of the dinner? It really depends on your crowd and your personal tastes. We have a stocked wine rack and a decent amount of hard liquor, so it’s easy for our guests to have whatever they’re feeling like imbibing.

I’m a bit of a wine snob (I’m sorry), and it’s nice to have a general progression of lighter wines to bolder ones as the meal goes on. A rosé is a good halfway point for avid white and red wine drinkers, and generally fits nicely for an appetizer into a main course. Aiming for bold reds through the entrée typically works best, unless you’re serving white-fleshed fish or lighter chicken preparations.

This being said, serve whatever wine you think tastes best! It’s the expectation that you serve white wine with fish and chicken, but no one is stopping you from having lovely glass of gewürztraminer with a steak or a fantastic glass of pinot noir with halibut.

If your guests are into cocktails or straight liquor, it’s nice to have some glasses available and some ice on hand for said drinks. I urge guests to keep it simple. We’re not in a bar, and I won’t have slices of lemon, lime, or orange, or mint or basil leaves on hand just because you want a specific cocktail. I generally assume that if someone is drinking a specific boozy drink, they’ll be drinking it all night. I treat beer the same way: have a small selection of beers you know people like, and if they’re drinking it, odds are that they’ll drink it all night.

It’s also great to have some non-alcoholic, non-water drinks on hand for designated drivers, guests with allergies, or generally otherwise opposed to liquor. Sparkling juices and seltzers can be nice alternatives to soft drinks, and they’re tasty too. Water should also be readily available, for cleansing the palate and sating thirst (I keep a Brita in the fridge for this purpose).

Whatever Comes After…

Is whatever you want! Some dinner parties end with the end of dessert, and others go on to play games, watch TV or movies, and whatever else you and your friends do. It’s probably better to avoid any strenuous activities right after all that food, though. I personally insist on cleaning up after myself—my guests are just that, guests. But if they’re insistent and you’re tired, might as well take advantage of the free labor!

Don’t stress out (unless you like it), and try to have fun! Your guests will have a good time if you are, and it’s not worth it to go crazy over a night of cooking (and drinking). You can always clean up tomorrow, eat the leftovers and relax after everyone’s gone. Good luck!
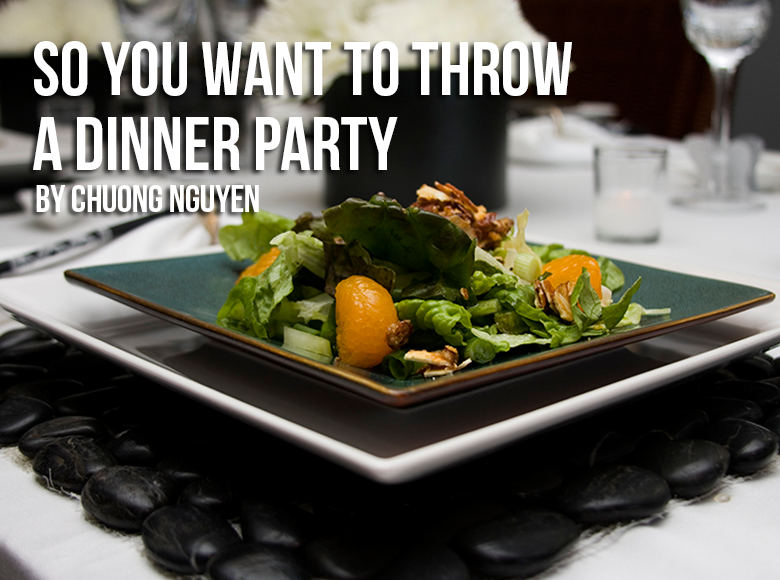
Photo by Meaghan Morrison

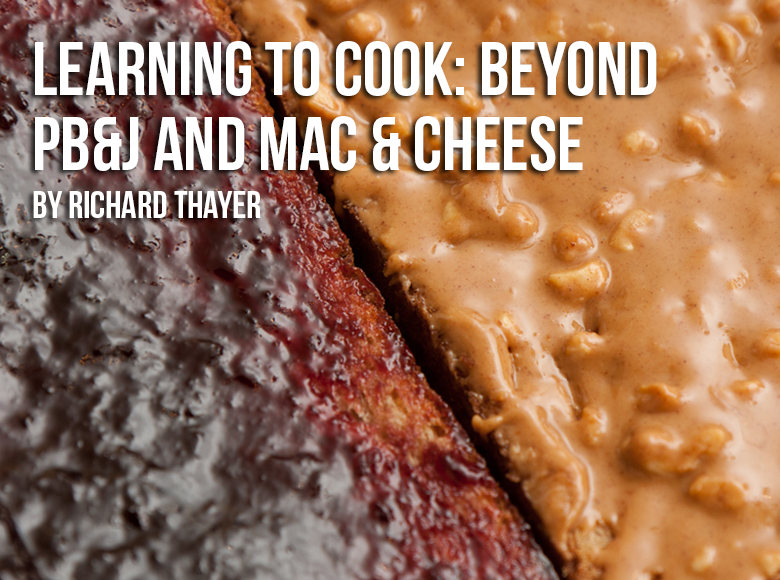
Photo by Meaghan Morrison
Picky Eating and Overcoming the Fear of Fine Dining

I’ve been a picky eater ever since I can remember. I don’t like vegetables or most fruit. I generally don’t like green foods. I absolutely hate the fibrous crunch of lettuce, celery, broccoli—you name it. Going out to eat in my high school years with friends was basically me ordering a dish, picking off 50% of the contents, and eating what little remained, unless I was fortunate enough to find the one dish that wasn’t covered in a salad and coleslaw. So how did I fall in love with food? It seems unlikely, considering that I entirely hate a major food group.

My family went on vacation the summer after my sophomore year, and my mom desperately wanted to eat at this restaurant she’d seen reviews for. It was her birthday, and I was dragged along, slightly against my will. What was wrong with just going to the Outback for another Bloomin’ Onion and some of their ridiculously portioned cheesecake slices? What about their awesome dark brown bread they served with a huge knife running through it?

I didn’t know it, but I was about to lose my footing. Birthday dinners would never be the same for me.

I swooned after one bite of something utterly and impossibly amazing. One little piece of steak. It looked so sad on this large white plate, all by itself. I pitied it, put it on my fork, and put it in my mouth. What I tasted was this juicy, creamy, melt-in-your-mouth slice of heaven. Just barely crispy on the edges, but succulent all the way through, it teased every sense out of my feeble teenager mouth. It was heavenly, and suddenly Outback seemed boring, for peasants only. I was awestruck that something so small could pack such a punch, bring up so many wonderful food-related feelings. When the time came to order dessert, I decided to be adventurous and ordered something with fresh fruit. A raspberry “napoleon”: chantilly cream layered with fresh berries with crispy pastry tuilles in between. The order shocked my parents. I astounded them again when I ate bite after bite of my dessert (previously, I’d only been interested in artificial fruit flavors).

From then on, there was a small obsession with finding a perfect bite to meet that piece of meat. Now that my parents were not as worried about me finding something to eat on any given menu, we tried new restaurants. I was enjoying new flavors, but I kept running into all of these pesky vegetables. They were on every entrée, present as a garnish on every appetizer. Sometimes, they even made it to dessert, which disgusted and horrified me. About a year after the best piece of steak ever, my mom grew tired with me leaving half the plate behind. She told me, “Finish your plate or you can pay for your share of the food,”—and with those prices, I was horrified. When a dish was a solid week’s worth of earnings at my then-shitty-semi-retail job, avoiding the vegetables was clearly not worth it when I wanted to go to Disneyland over Spring Break.

So I put the piece of asparagus in my mouth, chewed briefly, and swallowed. And it wasn’t love. It was still mild disgust, but the idea of paying for something and not eating it (at least at a high price point) started to gall me. Bite after bite, frown after frown, the vegetables went away and the plate was empty. It wasn’t the worst thing ever, but it wasn’t something I’d choose to do on an everyday basis. My family found it entertaining, that I would break such a hard-and-fast eating rule for a fancy meal.

I’d like to say that day changed something in me, but it didn’t. I still don’t like greens, though I’ve compromised and started to enjoy some fresh fruit more often. The love of food, great food made with immense care, pushes me to keep trying new and exciting things. So I keep trying different restaurants with exotic menus and preparations. And I’ll have you know, I recently ate a large slice of cucumber with eggplant relish and didn’t throw a tantrum (or throw up).

Photo by Sara Slattery

Photo by Sara Slattery

Learning to Cook: Beyond PB&J and Mac & Cheese

I have always loved to cook, but never really devoted myself to the art before. I could cook simple things that most know how to make: eggs, mac & cheese, and sandwiches. Anyone can slap a few pieces of ham between some bread and call it a day, but I decided to take it several steps forward. My recent foray into cooking culminated with a somewhat experimental dinner party.

Living on your own, you quickly find that you have to develop certain skills you used to take for granted. Cooking is an amazing skill to possess, but is easily overlooked if you have spent your life being fed by your parents. Many people only learn enough about cooking to get by day-to-day. However, the art of cooking can go much deeper, and have a much bigger impact in your daily life.  There are many reasons to learn to cook, including health and nutrition, enjoyment, and saving money. Eating out all the time can be expensive and unhealthy. In addition, learning to cook gives you a stronger connection to your meal. Preparing and eating a meal you have worked hard on gives a sense of accomplishment that would otherwise be replaced with boring empty calories from fast food. It is also a great way to impress guests with your gourmet recipes!

Probably the most daunting part of cooking is getting started. Depending on what you want to cook, you will need the right tools. Some basic necessities are a few good knives, a stove, and some pans. Ideally, you would want other accessories, such as cutting boards, spatulas, wooden spoons, and whisks, among others. If you are serious about cooking, your set of knives will be your best friend. If you buy good beginner knives, such as Wusthof brand, and properly maintain them, they can last throughout your culinary career—or just serve your personal cooking needs. However, there are cheaper models on the market for under $20 that will work for everyday cooking. You can probably find most utensils you’ll ever need at Bed, Bath & Beyond or a similar store. My dinner party only really required these basic tools and, except for the addition of a crème brulee torch, I already had everything I needed.

Here’s the fun part—selecting your menu and ingredients! The most important thing to remember is: the fresher, the better. Certain cuts of meat can be frozen; however, some, such as ground beef, should not. When at all possible, use fresh ingredients or plan accordingly when items need to be frozen. If you want to stick to simple and quick meals, try to find recipes that consist of five ingredients or less. This will make meals easier to prepare without breaking the bank and without sacrificing flavor. In fact, too many flavors can just as easily ruin a meal as not enough. My advice would be to try to plan out what you want to eat for that week and make a trip to the store once a week to get what you need. Some recipes can make enough to last several days, as well, so keep that in consideration so you don’t cook too much (especially if you’re only cooking for one).

To prevent culinary boredom, I try to vary my recipes by complexity throughout the week. On a day when I might have less time to prepare, I may limit myself to simple meals with little preparation time, but on a weekend, I may try something fancier. (These would be the days to invite others over to show off your culinary expertise.) If you are interested in hosting a dinner party like I did, portion sizes are very important. I didn’t take course selection as seriously, and in the end I had way too many dishes to serve, and not nearly enough people to serve them to. It meant I had a lot more work to do beforehand, which ended up as leftovers. Remember, simple is not necessarily a bad thing!

Another important issue to keep in mind is nutrition. While it’s almost always healthier to cook for yourself instead of eating out, that doesn’t mean every fancy recipe you discover is going to necessarily be good for you. It’s important to vary the types of food you prepare, including different colored vegetables and fruits. It’s easy to grab just the foods you feel familiar with, but learning to cook is the chance to explore and experiment with flavor. And since you’ll be prepping it all yourself, you are always free to perform taste tests as you go, just to make sure you’ll like it. I also try to challenge myself as often as possible by cooking something I have never eaten. Try exploring different cultural cuisines or perhaps a traditional meal from your own culture you have never tried. For my party, I combined British and French foods such as rainbow trout with capers, scotch eggs, leeks, a frisée salad, and a summer pudding and crème brulee for dessert.

Cooking is a skill everyone should learn. The level of complexity is entirely up to you, and you’ll be healthier and more satisfied with your meals. Definitely pick up a copy of The Joy of Cooking  by Irma S. Rombauer. This tome is a staple in the cooking world and gives you basic information about cooking, nutrition, and etiquette. In addition, it has thousands of recipes ranging from quick meals to huge dinner events. It even has a section with menus for different occasions such as holidays and birthdays. It’s debatable whether you need actual cookbooks for your recipes, especially with the internet, but I find it helps to have the book out in the kitchen instead of trying to print things out as you go. For my French and British dishes, I relied heavily on My Paris Kitchen by David Lebovitz and Gordon Ramsay’s Great British Pub Food. Always research what you’re cooking, though, cookbook or not. It’s always helpful to find other people’s results with a certain dish, and potentially learn any problems they might have run into. Know what your ingredients are, and what to expect from the cooking process. Lastly, always remember to taste, and try new things, and find what flavors and foods you enjoy.

Photo by Andy Sutterfield

Photo by Andy Sutterfield

Saucepan Recipes That Are Easier Than You Think

Cooking, for whatever reason, can be intimidating. Maybe it is the fire and knives? Maybe it is the possibility of poisoning yourself or your loved ones? Or maybe it’s just because being a chef seems like a glamorous career for geniuses. The thing is, though, it’s not as hard as it seems. Like any other skill, it just takes some learned skills, practice, and the willingness to make a few mistakes.

I consider myself a chef, though I am not “in the industry,” which was my response when a waiter at an upscale brunch place asked me where I worked after seeing my culinary-inspired tattoo. And, you know what? That’s okay! People are quick with an apologetic, “Oh, I’m a terrible cook!” when it’s time for the staff meeting potluck. Instead, I challenge you to appreciate the effort you put in to feeding yourself! Let me start you off with three intimidating foods that are easier than they sound, and all of which can be cooked in a saucepan. Which is a pot, by the way. A small pot, that in restaurants might be used for sauces, but in many 20somethings’ kitchens is mostly used for 1-2 servings of Annie’s mac and cheese.

1. Boiled Egg

Why Make It?

Have you ever sliced a hard-boiled egg with fresh ground pepper for a mid-morning snack? Piped some tasty egg yolk and mayo mixture into delicious deviled eggs? Slurped a warm soft-boiled beauty with your miso-filled ramen bowl? They are well worth the effort.  Though this first dish might be like skating through easy-town for some readers, I do give some tips and tricks (one I just learned last week!) to make things easier, so check it out.

The Technique

You will need a saucepan, a medium sized bowl, and eggs for this.

Place the eggs in your saucepan and fill it with enough water to cover the eggs about an inch. Don’t go running for a ruler; I usually just approximate with the first joint of my index finger.

Cover the saucepan and bring it to a boil. It is important to boil the water with the eggs already inside because 1) the cook time accounts for the cooking they’ll do as the water boils and 2) if you drop them into already boiling water, they will crack and not be beautiful and perfect.

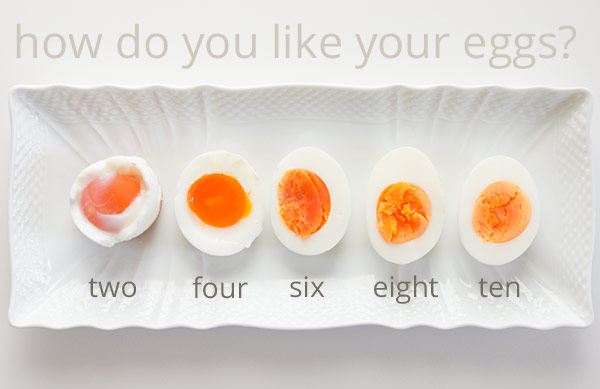
When the water is boiling, turn off the heat and move the saucepan to a cool burner, leaving the lid on to keep the heat in. Set the timer for your desired egg done-ness using the following useful chart from No Recipes (this site has an extensive egg boiling article—definitely worth a read!):

Saucepan Recipes That Are Easier Than You Think

Photo via No Recipes

2 minutes – The white isn’t fully set, and the yolk is totally raw

4 minutes – The white is fully set, but the yolk is thick and runny

6 minutes – The white is fully set, and the yolk is mostly set but still a little runny in the middle

8 minutes – The white is fully set, and the yolk is set but tender

10 minutes – The white is fully set, and the yolk is fully set

As you wait, prepare your ice bath: fill the medium-sized bowl with cold water and ice cubes. I usually leave it in the sink so I can do a quick dump. I hold the lid partially on to keep the eggs in the saucepan while I dump out the water, then I move the lid out of the way to dump the eggs right into their ice bath. This is because I am lazy about dish-washing; a colander would suit just fine.

After a minute or two in the ice bath, they will be cool enough to touch. I pick them up, bang them on all sides with the back of a spoon to make cracks all over the shell, and put them back in the water. If I want one right away, I might pull it out and peel it then and there, but ideally they should sit for a bit so the water can get under the shell and loosen it to make peeling easier. And you’re done!

Tips and Tricks

By far the biggest issue for egg boiling is the peeling. If you’ve ever found yourself attempting to peel and egg and instead removing chunks of tasty white (that’s food in there!), you know what I mean. This is especially annoying if you want to serve these to people and want them to look smooth and flawless.

My mom always told me to just use older eggs (as in, near their expiration date). This does work for science reasons that I don’t understand just yet. But if you can’t wait that long (and who can?), there is another trick. Before cooking your egg, take something with a small but rounded edge (I used the butt of my rolling pin handle). Take your raw egg in one hand and hold the rolling pin steady with the other. Whisper a short prayer to your deity of choice, and then tap the wide butt end of the raw egg gently against the tip of the rolling pin handle. You want to hear a tiny crack that breaks a bit of the shell but not the membrane of the egg. I was sure this would end in a mess and tears, but it totally worked and made peeling at the end a lot easier.

2. Jam

Why Make It?

When most people picture jam-making, they picture a kitchen full of Laura Ingalls Wilders, out in the middle of nowhere, all wearing kerchiefs over their hair and wiping sweat from their brows with their forearms as they use both hands to stir an enormous, thick vat of goo that will last the winter. But that is not at all an accurate depiction of the time and effort involved! Jam is actually fairly quick and easy to make, especially if you are only making a couple jars and do not plan on proofing (sealing the lids so they can sit out at room temperature for ages). And with the delightful ability to mix flavors to your own personal preference and look like a gourmet BAMF, there is no reason not to.

The Technique

First, supplies: To make jam, you’ll need some sterile* mason or Ball jars (with the flat lids and twist rings), fruit, sugar, lemon juice, and pectin (available at most larger grocery stores, in the baking aisle, by the Jello). Choose the No Sugar Needed Pectin—it works the best even if you do use sugar (which you will, I imagine).

You’ll also want a pot and probably a funnel, to ease more jam into the jar.

* To sterilize them, boil the jars, lids, and rings in a big pot before you put the finished jam inside. This kills all bacteria. Washing the in dishwasher will do the trick too.

Now, recipes: Different jam recipes have different ratios, so I’ll start with a specific favorite of mine: strawberry lavender. For lots of recipes, proofing times, and just generally great advice, check out PickYourOwn.org, a website with terrible design but a lot of knowledge. It walked me through my first canning experience.

Strawberry Lavender Jam

Buy/pick some strawberries! You’ll need about twice as many cups of whole strawberries as you want cups of complete jam. So if you want 6 cups of jam, you’ll need 12 cups of whole berries.

Wash them, hull them (cut the leaves and white part out with a small knife), and cut them into pieces. The smaller you cut them, the faster they will break down in the jam.

Prepare your sugar by blending 4 cups of sugar in a food processor with 4 tablespoons of edible lavender buds (available at specialty spice stores). I do this one cup at a time ‘cause my food processor is small. You could also probably get away with chopping up the lavender very finely as well.

In your saucepan, mix ¼ cup of your lavender sugar with 1 ½ packages of pectin (SureJell or another brand, doesn’t matter). Feel free to play with this amount as you cook. As you make more jam, you’ll find the perfect ratio for you.

Cook this mixture over medium high heat for about 5-10 minutes, until the mixture is at a full boil (remains boiling even when you stir).

Add the rest of the sugar and allow it to come to a boil again. Don’t raise the heat too high, though, as that creates more foam. Keep at a full boil for 1 minute. Speaking of foam, feel free to scoop that off and toss it in the sink. It’s just bits of jam with too much air.

Remove from heat and test for thickness. Do this by keeping a teaspoon in a glass of cold water. When you take the saucepan off the heat, dip the spoon to get a bit of jam and let it cool to room temperature. If it looks thick enough, hooray! If not, add a little more pectin and cook a bit longer.

When the jam is cooked to perfection, use a funnel to move it into the jars. If you plan to use and eat or give away the jars to people who will use or eat them right away, you don’t need to proof them. If you want to save them, then…

Proofing!

If you want to make more than a jar or two, you’ll likely want to proof (or seal) your jars to get rid of all bacteria and allow them to sit safely on the shelf without going bad.

To proof them, fill with jam, screw on the lid and ring, and place them into a big pot of boiling water. There should be a few inches of water over the top of the lid. Depending on the jam, they will need to proof for different amounts of time—check online. When the time’s up, remove them from the pot and let them sit out and cool overnight at least. Within 30 minutes, you should hear a “pop” to tell you the can has properly sealed—if not, keep it in the fridge and eat it soon. Aside from a big pot, you’ll probably want something to lift them out of the boiling water (I used big tongs once, but then I went to Target and got an actual jar lifter and it was fantastic).

Tricks and Tips

Jam-making includes a lot of equipment and, for that reason, it’s super helpful to have everything lined up and ready to go. Make sure you have your sugar and pectin measured out and lots of oven mitts and hot-thing-holders on hand. Your jars, lids, and twist rings should be clean and ready, too.

You also want to be aware of temperature. Pouring hot jam into a cold jar could cause the glass to break, so you will want to sterilize your jars while prepping your jam. I usually do this by allowing the jars to boil away for about 10 minutes in a big pot on the stove while I’m cutting up the fruit. If I’m just making a few jars worth and not planning on proofing, I wash the jars in hot water to warm up the glass while the jam thickens.

Depending on the fruit you are using, your jam will be different consistencies at different temperatures. I found, for example, that blackberries thicken up nicely in the saucepan and stay at a similar consistency in the fridge. Strawberries and prickly pears (the fruit of cacti), however, don’t seem to thicken much in the saucepan, causing you to bite your nails and continue adding pectin, which all comes together strongly when the jar is cooled, making your jam a bit stiffer than desirable. So don’t worry if it doesn’t thicken like you think it should—it could just be the type of fruit. Do more research online.

Finally, note that pectin will lose its magical thickening abilities if you up the recipe too much, so work in small batches. The recipe I provide above is about as much as you want to do at one time in one pot. But there is no reason not to have two pots going at once!

3. Pastry Cream

Why Make It?

Pastry cream, though super delicious, probably seems like something that Julia Child or Martha Stewart would make, not you. What do you do with it anyway? Well, if you’re like me, you use it to impress your friends and neighbors! Obviously pastry cream is integral for tasty pastry creation, if you’re working on fruit tarts or Danishes or donuts. But it is also an integral ingredient in a very simple, very fun, very beautiful dish know as a trifle. This dish is meant to be made ahead and then refrigerated, making it easy to bring to potlucks and get-togethers, impressive and convenient to serve at a dinner party, and fun to assemble and eat with groups for a bridal or baby shower or a birthday party.

Pastry Cream Recipe

You’ll need:

  • 2 cups of milk/cream (I usually combine 1 cup of whipping cream and 1 cup of milk; half and half works too)
  • ½ cup sugar
  • Pinch of salt
  • 5 large egg yolks (save the whites – you can make an omelet later!)
  • 3 tablespoons cornstarch (flour is fine too)
  • 4 tablespoons of butter (1/2 a stick)
  • 1½ teaspoons vanilla extract


Before you start cooking, prepare an ice bath to quickly cool your pastry cream. Get two large bowls, one slightly (but not much) bigger than the other. Fill the bigger one with cold water and ice and float the small inside the larger. Finally top it off with a mesh strainer balanced on the top. Put this ice bath to the side for the end of your recipe.

Heat the cream/milk in a saucepan until simmering. Watch out! Milk comes to an overflowing boil within seconds of starting to simmer. Keep an eye on it.

Whisk the sugar, pinch of salt, and 5 egg yolks together in a large bowl. You want to whisk for a good long time, until the mixture turns more of a paler yellow than the brighter yellow it started out as. Add in the cornstarch/flour.

If the milk has started to simmer by now, please, feel free to remove if from the burner and turn off the stove.

Now it’s time to combine the two mixtures. Be careful—doing this too fast will cook the eggs. You are going to do a process called tempering, in which you add a little bit of the hot milk/cream to the egg, sugar, flour mix to slowly warm it up. Drizzle about a tablespoon of hot liquid into your bowl and immediately whisk it to spread the heat evenly and avoid cooking one small spot. Repeat this a few times—you should be whisking for as much of this time as possible. I usually add about 1/3 of my cream this way.

When the mixture seems to be fairly warm, use a spatula to scrape the mixture back into the saucepan with the rest of the hot milk/cream. Return it to medium heat. Using a whisk or silicon spatula or wooden spoon, stir constantly while the mixture cooks. You are heating up the cornstarch/flour so it thickens the mixture, plus kills any bacteria in your eggs.

Continue whisking, even though you are super bored, for about 5 minutes. It could take longer or shorter, depending on the temperature of your ingredients. If you let it sit, you will scorch the bottom of the pastry cream. You’ll know it’s time when you see these cool-looking, thick bubbles of pastry cream in the saucepan. When you see that, continue for 30 seconds to a minute longer, then remove saucepan from the burner.

Off the stove, add in your butter and vanilla, and stir to combine.

Now, turn to your ice bath. Use a spatula to scrape the custard into mesh strainer, to get rid of any lumpy bits. It won’t fall through on its own, so you’ll need to hold the strainer and use the spatula to push it through.

Allow it to sit 10-15 minutes and cool a bit, then take plastic wrap and cover the bowl. Make sure the plastic wrap comes down inside the bowl, pressing against the top layer of pastry cream and coming up the inside sides of the bowl. Sounds weird, but this keeps the pastry cream from developing a skin. Allow it to set for at least 3 hours in the refrigerator.

Tips and Tricks

Believe it or not, this is one of the easiest fancy things to make. As long as you don’t add your hot milk to your cold eggs too fast or cook the final product without stirring, your pastry cream will be delicious.

To play with other flavors, consider soaking herbs in the milk/cream while it heats. Mint is delicious, but basil and even rosemary create a really unique and tasty final product. Make sure you remove the leaves before combine the milk with the eggs and sugar.

You can also add chocolate chips at the end with the butter and vanilla for a tasty chocolate-y flavor!

And that’s it! Hopefully you will be breaking out your saucepan for more exciting things this weekend!

Holiday Cooking for People Who Think They Can’t Cook

Shit! You have three days to come up with a holiday dish and you have no idea what you are going to make. You start questioning why you even agreed to provide something in the first place. Never fear, there are a few easy dishes you can turn to throughout the winter festivities that require little to no actual cooking skill. I swear!

Soup

First, meet your new best friend: the blender. No really. With the magic of your blender, you can make delicious soup!

I don’t know why soup is so impressive to people, because it’s not actually hard to make at all, but I’ve found it to be quite the crowd pleaser.

There are so many variations so my advice is to start with one element at a time and taste each step of the way.

The process is pretty simple:

  • Take some veggies that seem like they would be good together in a soup (or whatever you have in your refrigerator)
  • Pulverize them in the blender.
  • Then heat up the puree with veggie stock. (I like my soups thicker so I prefer to see the veggie puree and slowly add broth until I get the consistency I want. It ends up being about ¼ stock and ¾ puree most of the time but this is not a science, there is flexibility.)
  • You can add various spices for flavoring.  (I liked adding cayenne pepper because it gives it a kick. Some people really like nutmeg for sweet potato and squash.

That’s it.

You don’t have to worry about “messing it up” if you just go pinch by pinch and taste test as you go. If you think it tastes good, it probably tastes good.

I’ve made  it’s pretty easy to make fancy soup while binge watching Breaking Bad, i.e. you can totally split your focus and not panic.

My suggestion: Butternut Squash soup. It’s in season right now, super simple, and very tasty. Try this recipe from BlenderBabes. And don’t worry, you can totally skip the cream and keep it completely vegan.  You won’t even miss it. No need for dairy substitutions.

No-Bake Baking

If soups aren’t your thing, I recommend looking to dessert. Even if you constantly burn things, there are many no-bake recipes that work for the holidays (but, if you do want to try your hand at baking, read this). Both Banana Pudding or No Bake Nutella Cheesecake don’t even require turning on an oven. Plus, you can even make the Graham Cracker Crust with your trusty blender.

Graham Cracker Crust:

  • Turn graham crackers into dust using blender
  • Add butter until it looks like “dough.”
  • Then press the crust into a cake pan.


Voila, crust.

Things you don’t want to skip: You have to make sure you have time to refrigerate both the Banana Pudding and the cheesecake or else they are goop. I also don’t recommend skipping the heavy cream in the cheesecake. I tried using a substitute this year and it didn’t work well. The cream cheese and the nutella just didn’t set as well and it was more blob than cheesecake (though they still tasted delicious).

Breakfast Strata

I love this recipe. It’s so simple and so delicious.

The Process:

Take any amount of the following:

  • Eggs
  • Cheese
  • Bread
  • Veggies and/or Meats options


Put it in a glass-baking dish and cook for 20 minutes. Done. I’m serious, there are no ratios, just add those three things. You can’t possibly screw it up and people will think your like Jacques Pepin!

If you’re sure you can’t cook…

My next best suggestion is to look up some special cocktail recipes. Liz Kerin tested some of her favorites for the holidays here!

But, if all else fails; there’s no shame in buying something. I’m not a big fan of faking it but if you have to, go for something that will inspire nostalgia in your guests. For me, that’s picking up some Magnolia cupcakes to remind my friends of our time in New York.  If I was in my hometown, I would die if someone brought a fruit tart from the bakery by my house. While I appreciate someone’s home-baked goods, one surprise dish from a place I love can brighten up the meal.

Whatever you decide to do, I promise that as long as you are excited about what you are bringing, you and your food will be welcomed with open arms. You’ll make new friends when everybody asks you how you made it and even if you didn’t, you get to tell them about a cool new restaurant or bakery in your hometown. You will still be part of the life of the party, no matter what your cookery skill level is. Promise.

By Rob Adams

By Rob Adams

Holiday Baking Bliss

For many people, cooking and baking can be anxiety-inducing enough, without the added worry of subjecting your dish to your friends and loved ones for scrutiny. If you don’t find holiday baking bliss in here, let’s at least shoot for something below a panic attack when the next potluck invite comes your way.

When I was 11 years old, I made brownies in my best friend’s kitchen using my mom’s battered old copy of The Joy of Cooking. Let me tell you, Irma S. Rombauer doesn’t coddle you along. If you are reading her recipes, she assumes you know some basics. Except, well, I was 11, and my friend was 12, so we knew nothing. Which is why, after melting our Hershey’s bars in the microwave to get that rich, chocolaty goodness, we just dumped the mess into our batter, which (little did we know) instantly curdled our eggs—ultimately creating brownies that tasted like a chocolate omelet. This perhaps sounds better than they tasted, which was God-awful.

Now, most cookbooks and recipes that you will read nowadays know better than to assume that little girls and boys grew up learning how to “Do Things Properly,” but just in case, let me take a moment to impact some basic kitchen wisdom.

Measuring

  • Liquids should be measured in a liquid measuring cup, preferably Pyrex brand because they will live longer than you will.
  • Solids can be measured in measuring cups, but make sure you adhere to additional rules
    • Flour (and really, powdered sugar as well) should never be scooped up from the bag with the measuring cup. Instead, spoon it into the cup one scoop at a time with a regular tablespoon. When you have a little hill over the top of the measuring cup, tap the back of a butter knife on top and smooth it out. This is to make sure you do not compact the flour.
    • Brown sugar, on the other hand, must always be compacted. Press it into your measuring cup with your fingers or a spoon so that when you dump it out, it somewhat holds the shape of the measuring cup.
    • Granulated sugar (which is the baking name for plain ol’ white sugar), chocolate chips, baking soda/powder, peanut butter, whatever else can all be simply scooped with your measuring cup.
  • Though spices can be estimated, please do not estimate baking powder or soda. Adding too much or too little can keep your baked good from rising properly. These powders react with the liquids of your recipe to create air bubbles, which elevate your batter. Not enough powder and you have too few air bubbles. Too much powder and you get too many bubbles, which pop each other, collapsing the dish. And what’s the difference between baking powder and baking soda, you ask? Baking soda is a basic (as in pH) sodium bicarbonate, which needs some sort of acid in the recipe (often lemon) to react while baking powder is baking soda with a dry acid mixed in, which activates when wet.


Mixing

I have been watching Gordon Ramsey’s Ultimate Cookery Course, which has been utterly delightful and extremely informative. He knows his stuff. But I was appalled when he was making blondies (cookie dough in a single casserole dish) and just threw all the ingredients willy-nilly. Dumb idiot, that’s not going to rise! And it totally didn’t! And still, it was on TV! Let’s not make the same mistake:

  • Mix “wet” ingredients (butter, sugar, eggs, milk, melted chocolate, vanilla, etc.) separately from “dry” ingredients (flour, baking soda/powder, cocoa powder, spices, etc). This is critical for the dry ingredients, so that the baking soda/powder gets fully distributed throughout the flour (remember, those air bubbles are everything for presentation). It’s also beneficial for the wet ingredients as well, which sometimes need a pretty thorough beating, which you don’t want to give them when dry ingredients are in there, too.
  • “Why can’t I mix dry and wet ingredients for too long?” you whine. Well, when you mix dry and wet ingredients together, you are forming the glutinous bonds that will hold your treat together. If, however, you form too many glutinous bonds, your treat will be super tough and unpleasant and all your friends will hate you. Typically, recipes counsel you to mix “until just combined,” which I will repeat. It’s mixed when it looks homogenous.
  • Tempering. This is a scary word to some and it is part of Intermediate Baking. But not to fret. I taught 4th graders how to do it and I can teach you too. This is the skill that was missing from my repertoire during the infamous Omelet Brownie Debacle.
  • Here’s the situation: you have a hot thing (usually chocolate or hot cream) to which you need to add to a room temp or colder thing (usually containing eggs). What you want to do is slowly raise the temperature of the eggs by adding just a bit of that hot liquid (like 1-2 tablespoons) to your cooler thing, while whisking constantly. This will warm the little eggies up gently. Scoop up more of that hot liquid (go ahead and use ¼ cup this time) into the now-less-cold liquid and keep whisking. Keep doing this until both are completely combined and you are ready to continue the recipe!


Mise En Place

This is a French phrase that means “everything in its place” and it is the crux of kitchen bliss. Not only does it mean that your kitchen is somewhat organized when you set out to cook, it also means that you are ready mentally and physically.

That means that you have read the entire recipe already. That way, when you get to the phrase “chill overnight or for 8 hours,” you won’t start swearing because your party starts in 30 minutes. Seriously, read the whole thing as soon as you decide it’s what you wanna make.

Make sure you have your ingredients ready to go. Have your butter and eggs out on the counter (they ideally should get to room temp, anyway), have your measuring cups clean and ready, have your pan greased and your oven pre-heating. If you want to be super smooth, put pre-measured ingredients in little prep dishes. This will make everything so, so much smoother. Little things like this can make the difference between sipping your wine while tapping your foot to jazz and getting flour in your hair just as you start screaming!

Let’s Bake!

For the holidays, people love certain seasonal staples. Cooking/baking “in season,” meaning the produce is freshest at this time of year, will absolutely boost the taste of your food, especially if you buy from your local farmer’s market.

Try baking with the following produce, in season during autumn and winter:

  • Citrus fruits (clementines, oranges, lemons, limes, tangerines)
  • Kiwis
  • Pears
  • Apples
  • Persimmons
  • Dates
  • Chestnuts
  • Squashes (acorn, spaghetti, butternut)
  • Cranberries
  • Jujube
  • Pumpkins
  • Pomegranate


Recipes to Try

I have not tried all of these recipes but don’t let that stop you! Find something that looks doable and delicious and you’ll be achieving baking bliss in no time!

  • A delicious, unique collection of recipes can be found at mom.me
  • Two recipes with pomegranate seeds: Chocolate Pomegranate Clusters and Orange Pomegranate Bread
  • 15 fantastic pear recipes from one of my go-to recipe sites, Real Simple
  • Chestnuts can be intimidating, but also delicious and unique! Plus, Trader Joes sells them all ready to go! Try Chocolate Chestnut Torte or Chestnut Cupcakes (for piping frosting on all pretty, spoon it into a Ziplock baggie and cut off one of the corners for an instant piping bag!)
  • Persimmons make fantastic bread and cookies, but be careful! Fuju persimmons are squat and flat at the bottom and can be eaten like a stone fruit, when orange and slightly softened. Hachiya persimmons, however, will leave a dry, cotton-y taste in your mouth and taste super tart if not ripened to mushy softness. The latter are the most commonly used for baking and taste fantastic when allowed to fully develop. Try them in cookies and bread.
  • Check out this tasty compilation of sweet squash based desserts!
  • Cranberries pair beautifully with sweet flavors. Try Pear Cranberry Crisp or Cornmeal Biscotti with Cranberries and White Chocolate
  • If you are feeling exotic and adventurous, try a dessert with the Chinese winter fruit jujubes, like the Jujube Tart with Walnut Cream. The jujube has the consistency and taste of an apple and looks wrinkled like a date. A larger farmers market should have them.


Contingency Plans

Help! Help! My dish failed and I have 30 minutes until my event! Okay, okay! Try this!


You are now ready to prepare and consume a delicious holiday treat that will impress and satisfy your friends and neighbors and banish your enemies into a vortex of shame at their inferiority. Go forth and bake!

Photo by Andy Sutterfield

Photo by Andy Sutterfield

Food on the Cheap

Once upon a time, I made a rash, but good, decision. I decided that I really wanted to live near my university instead of commuting four hours every day. But, I also knew that getting a job there would be hard without a local address. So, I did the fairly irrational thing: I moved there without having a job lined up. I had enough savings to pay my rent for a few months—except, oops, I totally forgot to budget for the other costs of living! Like food.

Photo by Sara Slattery

Photo by Sara Slattery

Food is kind of a big deal so I did some research, looked at basic nutrition, and then bought what was the cheapest. This was not at the “nice” grocery store with the nut bar and open bins of nutritional yeast and gluten-free oatmeal. This was at Grocery Outlet or Food Maxx. This was the “ethnic” Mexican, Vietnamese, or Indian market. This was the last half hour of the farmer’s market when the person behind the table wants to get rid of the last bag of oranges.

I took a notebook with me and, over a couple of shopping trips, saw what was cheapest and weighed that against my personal needs. For example, I find large grocery stores very overwhelming, so I get some stuff at Trader Joe’s that is the same price almost everywhere: milk, eggs, butter, bread, frozen vegetables—even organics, if I wanted them. I’m not including prices because they vary widely, and the best thing to do is compare prices at whatever is local to you!

In an attempt to balance my nutrition, I tried to have a carb, protein, and vegetable or fruit with every meal. For breakfast: hot rice pudding and fruit, or toast and an egg with frozen sautéed spinach, or just some oatmeal and brown sugar if I was feeling especially lazy. The oatmeal packets at the store are ridiculously easy to recreate. Lunch or dinner was maybe Spanish rice (rice, spices, canned tomatoes) and bean tacos, lentil and rice soup, black bean burgers, homemade French fries, pudlas, or stir-fry.

The Staples for a Cheap Kitchen

When I was living on the cheap, I filled my pantry with basic staples in bulk because they will spoil the slowest!

  • Dry rice
  • Dry lentils
  • Dry beans
  • Other dried goods (oats, bulgur, etc.)
  • Large bagged spices

I found that the following brought a lot more variety into my meals, so I bought as much as half my freezer and cupboards could hold! Discount and bulk stores, for the win!

  • Flour
  • White/Brown Sugar
  • Pasta
  • Potatoes
  • Frozen, dried or canned fruit and vegetables
  • Olive oil for cooking
  • Bouillon Cubes
  • Tofu
  • Eggs

Since we all have our own preferences and dietary restrictions, don’t feel limited because you can’t follow my examples above.  There are a lot of cheap alternatives for you to consider when stocking your own cheap kitchen:

  • Bulk Tea (instead of soda)
  • Corn Tortillas (instead of flour tortillas)
  • Bread ($2 for 12 servings!)
  • Fresh vegetables (when in season!)
  • Coffee (because everything is cheaper than Starbucks)
  • Mozzarella and Feta (the cheapest cheese I’ve seen)
  • Bacon Ends or Ham Hocks (great for flavoring soups and stews)
  • Meat and Fish on sale (throw it in the freezer if it is about to expire!)

Did you notice what’s not on here? I considered dairy, meat, and pre-processed foods “special items” because, when comparing price-per-ounce, they were way more expensive than other protein and carb sources like beans, rice, flour, and frozen/canned produce. Except for the occasional cheese wedge or free pizza, I didn’t see a lot of meat or dairy. It’s weird, but I was so into making affordable stuff actually taste good that I didn’t even miss meat. The key to cooking deliciously on the cheap is spices, spices, spices. I experimented with what I liked and started to add it to everything!

All this dried food requires a lot of cooking. I learned that it’s best to soak beans overnight to soften them, lessen gastrointestinal issues, and decrease cooking time! I just put some beans in a bowl, cover with water, and let them sit overnight. The next day, simmer until soft. I then discovered that it’s prudent to invest in a rice cooker if you like rice, and a crockpot if you hate standing over a stove. These meals usually come out to be cheaper per serving than frozen or boxed meals, and way more nutritious. It makes sense to try to safeguard your health when you can, because hospital bills in the future are definitely not frugal!

If you do like farmers’ markets, vendors usually lower their prices or are much more willing to haggle during the last half hour. They often don’t have long-term storage for their produce, so it’s better for them to get rid of it before it spoils. If you can pick from multiple markets, try them all, especially the ones in the less swanky parts of town: honestly, I’ve found the prices are much better there. I’ve seen the same vendors at multiple locations, and their lowest prices are usually in cities and more working-class parts of town, not the suburbs or the ladies-who-brunch neighborhoods.

I hope this article gives you some insight into eating cheaply without resorting to McDonald’s and Top Ramen! Some great resources with tips and recipes I’ve found include Budget Bytes, Broke Ass Gourmet, and Poor Girl Eats Well. If you’ve got any of your own suggestion, share them in the comments. Bon appétit!

Adventures of an Aspiring Chef: The Produce Challenge

A couple months ago, I wrote an article about figuring out how to cook chicken. Since then, I’ve been challenging myself to become a better chef. This past month, the challenge was to purchase five produce items that I wouldn’t normally buy and figure out how to cook them:

  • a turnip
  • an eggplant
  • a spaghetti squash
  • a bag of Brussels sprouts
  • two pears

Let the games begin.

THE TURNIP

Okay, so first I’ll admit I didn’t cook the turnip. But I tried to! Do you know how hard it is to find good turnip recipes? I wasn’t in the mood for anything in the soup variety, anything involving mashing, or anything remotely close to fries, so I settled on a nice cheesy turnip gratin—which sounded delicious until I realized a modest-sized block of Gruyere cheese (only enough for this one recipe) was $12. Yes, I know good things cost money, but $12 worth of a cheese I don’t even know if I like? Suffice to say, the neglected white and purple ball of guilt is still sitting in my refrigerator… fine, I’ll get some Gruyere at the store tomorrow.

EGGPLANT PARMESAN

I’m pretty sure the only thing I’ve ever eaten with eggplant in it was eggplant parmesan. I figured that was a good place to start. I found  this seemingly easy, highly rated recipe (two criteria I always look for) and got to work.

Ingredients:

AllRecipes.com

What I Used

My Commentary

3 eggplants, peeled & thinly sliced

1 eggplant, sliced

I probably should have peeled the eggplant, but I forgot I owned a vegetable peeler, and peeling without one… not so easy. I also didn’t “thinly” slice my eggplant, but I’ll be better about that next time. The thicker pieces didn’t cook as well and ended up being a bit tough and chewy.

2 eggs, beaten

2 eggs, beaten

I don’t know how this lady thought 2 eggs would cover 3 eggplants. I needed both just to coat my 1 eggplant. In the future, with even thinner slices—meaning more sides to coat—I will probably need 3.

4 cups Italian seasoned bread crumbs

A container of Italian seasoned bread crumbs.

Have enough to use “as needed.”

6 cups spaghetti sauce, divided

A jar of spaghetti sauce.

This is what “divided” means in cooking. I just poured from the jar, again, “as needed.” I ran out of sauce really quickly, though, so I probably should have used 2 jars.

1 (16 ounce) package mozzarella cheese, shredded and divided

A ball of mozzarella that was on sale at Ralph’s.

I think it was 16 ounces…

1/2 cup grated Parmesan cheese, divided

Poured from my Costco jar of pre-grated Parmesan.

Clearly there is an “as needed” trend going on here.

1/2 teaspoon dried basil

Oops.


Directions:

AllRecipes.com

My Commentary

1. Preheat oven to 350°F.

To reduce potential bitterness, the comments suggested sweating the eggplant by sprinkling them with salt, letting them sit for 30 min, rinsing with cold water, and patting dry with a paper towel. I did none of this and did not notice, but I still might try it next time.

2. Dip eggplant slices in egg, then in bread crumbs. Place in a single layer on a baking sheet. Bake in preheated oven for 5 minutes on each side.

Add foil to your baking sheet for easy clean up. Bake for 10 minutes on each side, as suggested by the comments and my own experience.

3. In a 9×13 inch baking dish, spread spaghetti sauce to cover the bottom. Place a layer of eggplant slices in the sauce. Sprinkle with mozzarella and Parmesan cheeses. Repeat with remaining ingredients, ending with the cheeses. Sprinkle basil on top.

I did this until I ran out of sauce. Then I just kept layering eggplant and cheese, it all worked out in the end. Forgot about the basil, which might have been a nice touch.

4. Bake in preheated oven for 35 minutes, or until golden brown.

I had to bake mine for at least 45 minutes and most of the comments suggested something in the 40-60 minute range. Be your own judge of this. Undercooking might lead to tougher eggplant: I wish I had cooked mine even longer.

All in all, this turned out to be a success. I’d do it again with thinner slices and a longer baking time. I ended up serving it by itself with some salad, but next time I’d serve it over some plain spaghetti (which is what I did with the copious leftovers and it was delicious). The breaded eggplant was definitely the best part so now I’ve got big plans to make these breaded eggplant sticks with my next eggplant.

BROWN SUGARED ROASTED BRUSSELS SPROUTS

Emily Knight did a whole piece for UE on the excellence of Brussels sprouts. She also dazzled me with them in person a couple years ago and wrote up the recipe on her blog. I tried to replicate to her success with my bag of Brussels sprouts.

Ingredients:

Directions:

Brussels sprouts

1. Preheat the oven to 400°.

Olive oil

2. Prep the Brussels sprouts by cutting off the icky end bit, slicing them in half, and then rolling them around in a bowl with some olive oil.

Brown sugar

3. Sauté the Brussels sprouts for about 5 minutes with plenty of brown sugar and more oil so they can get soft and sweet.

4. Spread the Brussels sprouts out on a baking tray and cook for 30 minutes.

This seemed so easy that I’m actually impressed that I screwed it up. See, when Emily said “plenty” of brown sugar, I channeled all my childhood memories of horrible boiled Brussels sprouts—and put in a copious amount of brown sugar. So much brown sugar, there was in fact a caramelized liquid to drizzle over the sprouts before I baked them. Sounds like a recipe for awesome, right? Not so much. Unfortunately, and I can’t believe sweets-loving me is saying this, this made them too sweet and not nearly as good as Emily’s. But this will definitely not be the last time I attempt this side dish.

SPAGHETTI SQUASH SPAGHETTI

I’d been intrigued by spaghetti squash since my neighbor first introduced me to it. As a lover of noodles, I’ll admit, I was a little skeptical. But after hearing several friends repeatedly rave about the dish, I was ready to give it a try.

Before you even get to making the spaghetti sauce, you must first “prep” the spaghetti squash:

Directions:

1. Cut the squash in half (AKA hack the shit out of this tough squash until it splits in half).

2. Remove the seeds / pulp. Pumpkin carving flashbacks are optional.

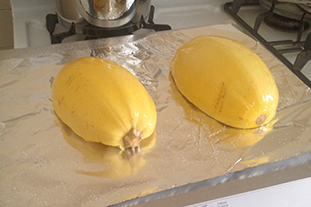
3. Douse with olive oil, salt, and paper and then turn flesh side down on a foil covered baking sheet and cook for 30-40 min at 450°F.

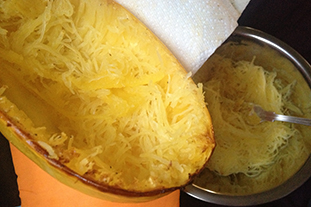
The “spaghetti” comes out like buttah when scraping it with a fork and has the consistency of angel hair noodles. I may have overly enjoyed this step, but noodles are being created from squash, it’s meant to be enjoyed.

Making the Sauce:

Spaghetti is one of the few things I’ve actually been able to cook for years, though it’s really not that hard when you are just cutting up vegetables and stirring in jarred tomato sauce. This time I decided to add ground beef, which I’d only ever cooked once before.

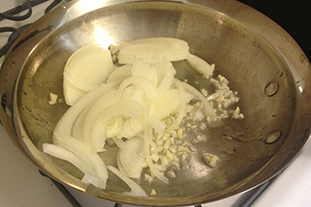
For anyone who, like me, feared ground beef, it’s actually even easier than chicken. I put some olive oil in a frying pan, added the garlic and onion first, gave them a minute or two, and then added the ground beef. Brown the ground beef (until you see no more pink) and add in the zucchini when it’s almost done. Continue cooking until you see no more pink in the meat, then add the jar of sauce. I usually let the whole thing come to a boil and then simmer for a few minutes. But really, you can eat it as soon as it’s hot. I also usually add in the chopped tomatoes last, so they retain some of their original consistency when I serve. Seeing as how I made this entire recipe up, it’s really a use-what-you’ve-got-and-go-with-it situation.

Serve your sauce over your spaghetti squash “noodles.” I added some grated Parmesan cheese and had to salt and pepper my “noodles” a bit more (so I’ll probably add salt and pepper to the squash post–baking-and-forking next time), but otherwise I’d say this was every bit delicious as I had heard. I barely noticed that I was eating squash, in fact, I might have even liked it more than pasta but don’t tell anyone.

FRUIT CRUMBLE

With all the use I’d been giving my oven, I’d yet to bake a dessert in it. This was clearly not okay! I decided to rectify this with my pears and some remnant raspberries I had left in my refrigerator. I Googled pear and raspberry crumble, found this, and went to town.

Ingredients:

CanadianLiving.com

What I Used

My Commentary

FILLING

4 cups sliced peeled pears

Two sliced, unpeeled, pears

I didn’t even notice the skin, but now that I’ve found my peeler, I might peel next time.

2 cups frozen raspberries

a handful of fresh raspberries

Unfortunately, when I went to get my raspberries, I realized many of them had gone to the other side and I found myself with far fewer than I’d anticipated.

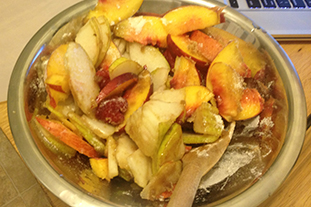
a nectarine

To compensate, I added in a nectarine.

a couple grapes

This is where I went a bit off the rails, but I was bolstered by this grape and pear crisp recipe (and I was still lacking fruit!). You’ve got to work with what you’ve got!

1/3 cup packed brown sugar

1/3 cup packed brown sugar

2 tbsp all-purpose flour

2 tbsp all-purpose flour

1/2 tsp nutmeg

Yeah, I don’t keep nutmeg on hand. Probably should.

TOPPING

3/4 cup all-purpose flour

3/4 cup all-purpose flour

3/4 cup packed brown sugar

3/4 cup packed brown sugar

3/4 cup quick-cooking rolled oats

3/4 cup quick-cooking rolled oats

1/3 cup butter, melted

1/3 cup butter, melted

Melted in the microwave.


Directions:

CanadianLiving.com

My Commentary

1. In large bowl, gently toss together pears, raspberries, brown sugar, flour and nutmeg. Spread in 8-inch square glass baking dish.

I did this with my fruit additions and omitted the nutmeg.

2. In separate bowl, stir together flour, brown sugar and rolled oats. Drizzle with butter; stir until crumbly. Sprinkle over fruit.

3. Bake in 350°F oven until golden and bubbly and fruit is tender, 45 to 60 minutes.

Watch one episode of Breaking Bad, then eat.

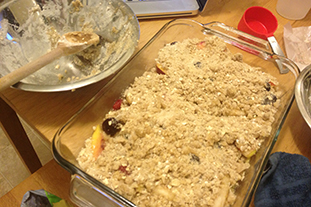
I served this warm with some whipped cream and had to hold myself back from going for seconds.


Cooking used to be so daunting to me but when I remind myself of these simple rules/guidelines, it’s just another tasty challenge:

More Meals = More Practice

Make dinner every night. Even when I don’t feel like it, I cook. By doing this I learned (1) cooking is not nearly as hard as I thought it was, (2) it is possible to do it both well and quickly, and (3) it’s a great, fun way to switch gears after a long day even if it feels like a chore when you first start.

Improvise AKA Get Creative

Don’t make cooking harder than it needs to be, follow the instructions, but don’t be afraid to switch ingredients or adapt recipes to your equipment/time/skill level. I usually combine several recipes and look closely at reviewers comments and see what their experience was like.

Don’t Skimp on Essentials

Substituting and improvising can be a wonderful adventure, but skimping on essentials like oil, butter, eggs, milk and cream can severely effect the taste of a meal (and not in a good way). If it says it wants A WHOLE CUP OF ACTUAL BUTTER, put in a damn cup of ACTUAL butter!  Not margarine, not half a cup, not anything else. I could start linking to all the articles and arguments about butter being better for you than all of its substitutes but I’m going to go with this line from Michael Pollan: “Eat food, not food products.” Or this line from me: “It tastes so much better.” Eat in moderation, exercise, be smart, and put down all the junk food before you blame butter.

Leftovers are your friend

Always make enough to take for lunch the next day and, if possible, even more to keep in the freezer. If you don’t eat it for lunch, it can be there for another dinner. There’s nothing better than coming home from a long day and turning some frozen leftovers into a new 15 minute meal.

How to Order Meat & Eggs

Confession—I love meat, but I don’t eat beef. However, my street cred in understanding meat comes from dating ardent beef-eaters (I grew up in the Midwest, y’all), much to the dismay of my Hindu mother.

Photo by Sara Slattery

Recently, I dated a gentleman who was well-versed in beef and beer. Dinner conversations generally involved the words yeast, fermentation, and rare, which in hindsight points to signs that we were probably destined to break up.

So, while the only beefeater I prefer is gin, I will thank my relationships for imparting some worldly knowledge. I’ve eaten dinner with enough weirdoes to learn my restaurant etiquette, so you don’t have to!

Here’s my breakdown on the different ways to order steak and eggs (my specialty!) at a restaurant, without looking like a complete vegetarian.

STEAK:

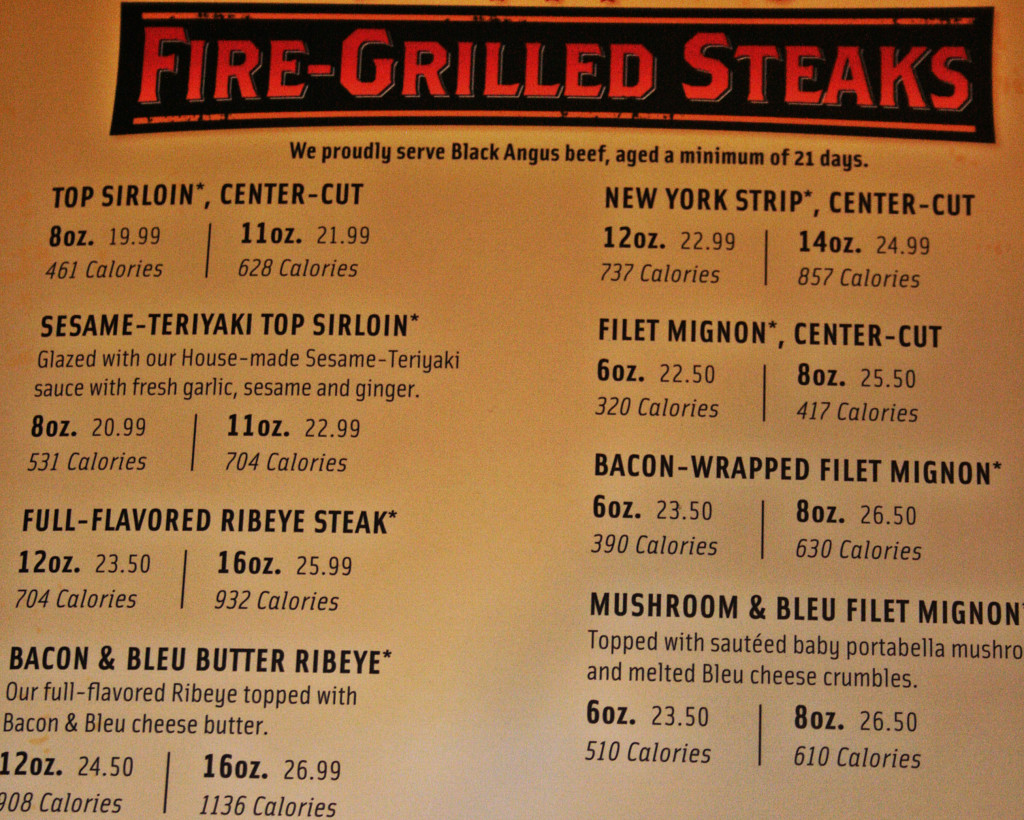
First of all, steaks are any piece of meat that is considered a “fast cooking” cut: a cut that does not require long time to cook. Flavor and tenderness tend to have a mutually exclusive relationship; generally, the more lean or tender the steak is, the less flavor it has, because the flavor really comes from the fat. In addition, the muscles that do the most work such as the legs and neck tend to be more lean and tough as compared to their “lazier” counterparts.

Now, let’s put the grade and type of beef aside. There are two ways to tackle steak: cut and temperature. Let’s start with the different cuts or, to be crude, the areas of the cow which are available for your carnivorous pleasure. Depending on the cut, the tenderness, flavor, and cooking method can vary widely, but I’ve listed the popular ones below.

  • Forequarter cuts: These cuts are near the front of the cow, or “forequarters.”
    • The Rib: Pretty self explanatory: this meat can be short ribs, prime ribs, and rib eye steaks. The cow’s muscles near the ribs generally do not work hard or exercise; therefore, there is a great amount of marbling (intramuscular fat), making the meat relatively tender.
  • The Loins: Now, the hindquarter cuts can be broken down into three type:
    • Sirloin: While less tender than short loin, sirloin is generally more flavorful. It can also be further divided into top sirloin and bottom sirloin.
    • Tenderloin: This can be considered a sub-type of the loin. Staying true to its name, it is the most tender. Filet Mignon is a form of tenderloin. This comes from two relatively small pieces of tenderloin muscle in cattle, making the coveted steak pricier than its counterparts.
  • Miscellaneous: Other steaks like the chuck, round, and flank come from their respective areas and tend to be the tough cuts.
    • Chuck: A cut from the neck to the ribs. Many times, this steak includes shoulder bones and is generally is less expensive than its rib-based steak counterparts.
    • Rump Steak: Take a guess where this meat comes from! The rump meat is tough and is generally roasted.
    • Round Steak: This lean meat is from the thigh of cattle; due to the lack of fat, it does not tenderize quickly, so it is more suited to slow cooking methods such as roasting.
    • Flank Steak: This substantially tough steak is long and flat. The meat requires marinades and other slow cooking methods and are not ideal for steaks.

Now that you’ve figured out what part of the cow you’re eating, how would you like it served? High-end steakhouses may have their own variations, but here is a general guideline to temperature:

  • Rare: Cool, red center
  • Medium Rare: Warm, red center
  • Medium: Hot, red Center
  • Medium Well: Hot, pink Center
  • Well: No pink, brown

Photo by Sara Slattery

EGGS:

Now let me introduce my expertise—eggs. As a meat eater with a pretty strict vegetarian family, eggs are the only dishes that count as a free pass for everyone in my household to foray into the animal kingdom. In fact, most of my family turns a blind eye to eggs as long as the dish meets strict scientific requirements or, you know, doesn’t “smell eggy.”

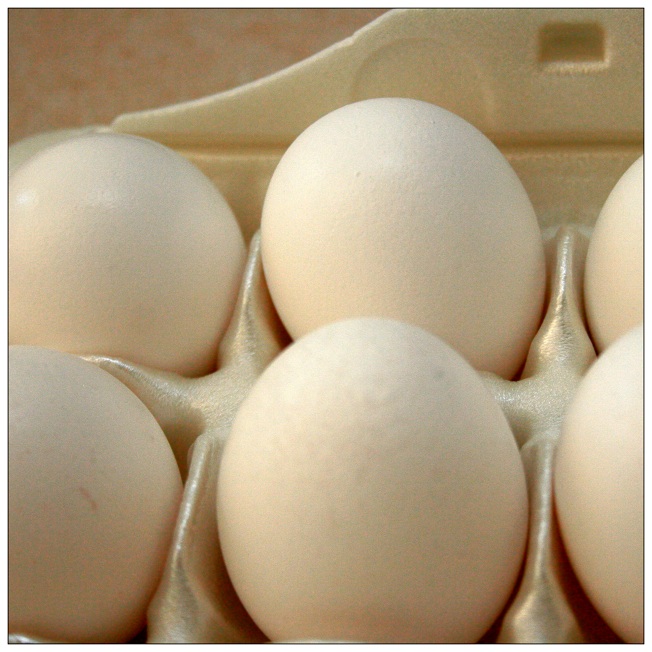
  • Scrambled: The most common type of egg preparation, scrambled eggs are basically the yolk and the whites (unless you specify whites only!) beaten briskly to incorporate air and constantly stirred in a pan to produce large puffy curds of egg.
  • Over easy/medium/hard: These are all fried eggs that refer to the consistency of the yolk. For example, over easy implies a runny yolk with solidified whites, but over hard means to cook on both sides ‘till the yolk hardens.
  • Sunny-Side Up: A caveat of fried eggs, sunny-side up refers to one side of the eggs being fully cooked, while the yolk remains runny.  Crack an egg over low heat and let one side cook without flipping or pushing it around the pan. The difference between an over easy and a sunny-side up egg is that in preparing sunny-side eggs, you let only one side fry, while any “over” preparation requires you to flip the egg to the other side to cook the egg whites.
  • Poached: A poached egg has a smooth unbroken yolk that is surrounded evenly by a casing of eggs whites.  The preparation involves submerging the yolk in water, as opposed to letting it cook straight on the pan. Crack an egg into a bowl, without breaking the yolk, before sliding the contents into a pan of simmering water for cooking. Wait until the egg white has solidified, but the yolk stays soft. The key to success here is getting the freshest eggs possible and timing it right!
  • Boiled: Boiled eggs remain in their shells until they reach your plate. Despite the name, boiled eggs should not actually be boiled throughout the entire cooking process. Instead, bring eggs (with shell intact) to a boil and then remove them from the heat. For soft- or medium-boiled, let them stand for 2-3 minutes; but for hard boiled, let the eggs sit in the boiling water for 12 minutes. After your remove the eggs, plunge them immediately into a bowl of ice water to facilitate peeling off the shell.

While there is a wide spectrum and range that varies from country to country and restaurant to restaurant, this serves a general guide to understanding the steak and egg lingo.  The real key takeaway is that if you know how to order eggs and meat, you should definitely ask me out.

The UE Review: Cooking Chicken Breasts

When we started UE, one of our missions was to test our how-tos (or ones we found around the web) and publish follow-ups from the UE perspective. Today we are not going to test one of our own articles but a recipe we found on one of the websites we follow, The Kitchn.

A little background on my experience with chicken: My mother is still so frightened of “pink” (undercooked) chicken that she dices her chicken breasts up into quarter-inch squares that she then cooks to death. (Mom, I love you.) I fondly called this “cubed chicken” and mocked it all the way up until college when I realized—having only learned the one way—that I too would cook my chicken like this. (Mom, I still love you.) This inexperience, and my already lazy cooking habits, led me to eventually quit cooking the bird—or any meat really—altogether. I have since faced my fears of meat but not my cutting habits, only graduating to slightly larger “chunks.”

But today is the end of all that because today I learn how to cook chicken breasts without cutting them at all.

THE RECIPE: ”How to Cook Moist Tender Chicken Breasts Every Time”

INGREDIENTS:

I started by collecting the following:

  • 1 to 4 boneless skinless chicken breasts

I was cooking for four (no pressure) so I used two boneless skinless chicken breasts. These breasts were about an inch and a half thick and frozen.

  • Salt and freshly ground black pepper

If you don’t have “freshly ground” black pepper lying around, pre-ground pepper should be fine. I, for one, used to hand mash peppercorns between two paper towels with the butt of a knife because I was too lazy to buy ground pepper or a pepper grinder (don’t ask me why I had whole peppercorns) …but I don’t think many people will have this problem. (Just in case: tips for finding a the right pepper mill and the different kinds of peppercorns.)

  • 1/4 cup flour

Check.

  • 
1 teaspoon freshly chopped herbs (optional)

Meh. It said optional and I was too lazy to go to the store. I considered some dry herbs from my cupboard, like an “Italian Spice Medley,” but decided to just skip it altogether.

  • Olive oil

I recently learned to cook with oil, instead of water, and it changed my life. (A great breakdown of the different types of kitchen oils.)

  • 
1/2 tablespoon butter

I’ve been convinced in the past year that butter really is that much better than margarine. (If you don’t trust me, at least read what best-selling author Michael Pollan has to say about it.)

Next step, proper kitchen utensils:

EQUIPMENT:

  • 10-inch sauté pan with lid

In this case, the lid is essential. As for the 10-inches, just make sure your chicken fits comfortably in the pan. If you don’t have a sauté pan, these tips might help you find the perfect one. Considering that most of my cookware came from Ikea, I may not be the best source for recommendations, but Amazon, Marshall’s, Costco, or thrift stores, can all be excellent sources for quality pots and pans (and other kitchen items).

Clearly a pan is not the only thing you are going to need. So I’m going to add:

  • Sharp knife capable of cutting chicken

I reiterate the above locations for those in need of a knife set.

  • Spatula

Having burned myself on many a metal spoon, I cannot recommend a good wooden spoon / spatula enough—they don’t transfer heat!

  • Cutting Board

Your choice between wooden or plastic. If you’re really lazy, you can just use a plate. If you can’t stick your board in the dishwasher, make sure you follow these steps to keep it clean.

  • Three Medium-Sized Plates

I really can’t justify putting in a link here, I hope you own plates.

INSTRUCTIONS:

Defrosting frozen chicken: An intelligent, pre-planning person might have remembered to set their frozen chicken breasts out in the morning to ensure that they were properly defrosted by the evening. I, however, was not that person. So, my chicken, having been set out a mere three hours before, was still half frozen by the time I went to cook it. I tried to rectify this by massaging it under hot water from the faucet. (Apparently, according to the USDA, both of these methods are unsafe and one should only defrost their chicken in the refrigerator, cold water, or the microwave. Oops. Still alive.) I moved on to the microwave. I basically just started hitting buttons (like “Defrost” and “Chicken” and “Yes”) until it started working. But, if your microwave doesn’t have a defrost setting, two minute increments on 50% power would probably be an okay choice—then again, remember how many times I’ve cooked chicken in my life and take my advice at your own risk.

Start with your chicken on your cutting board…

  1. Pound the chicken breasts to an even thickness with the handle or flat of a knife.

Okay, I forgot to do this but, to ensure even cooking, this would probably be a good thing to do. If there is any excess fat (the white stuff) on your chicken breasts, feel free to trim it off.

  1. Lightly salt and pepper the chicken breasts.

Don’t be like me and touch your salt and pepper shakers with your raw chicken covered hands—attempting to wash them is not as fun as it sounds.

  1. Mix about a half teaspoon of salt in with the flour along with a little pepper. Chop the herbs finely, if using, and mix in as well.

Mix this flour mixture on one of your three plates. The other two are for your chicken—one for raw, one for cooked. I didn’t measure but be careful not to pour too much flour, anything you don’t use will be thrown out. Having just salted and peppered my chicken, I didn’t bother to mix in any salt and pepper (and my chicken still passed a taste test) but to each their own. As I stated above, I skipped the herbs.

  1. Quickly dredge the chicken breasts in the flour, so that they are just lightly dusted with flour.

I don’t know why this has to be done “quickly.” I took my time. Take your breasts and dunk each side in the flour. I scooped even more flour on top and gave it a good pat to make sure they were really covered.

  1. Heat the sauté pan over medium-high heat. When it is quite hot, add the olive oil and butter. Let them melt, and swirl the pan.

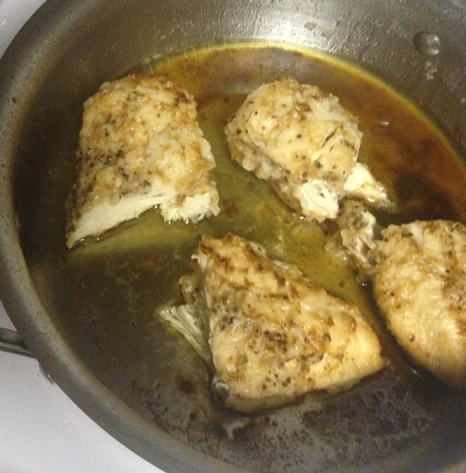
  1. Turn the heat to medium. Add the chicken breasts. Cook for just about 1 minute to help them get a little golden on one side (you are not actually searing or browning them). Then flip each chicken breast over.

“Turn the heat to medium.” Oops. So, being unable to read, I kept my heat on high and was assaulted by crackling oil. But my chicken still turned out fine. (I can’t say the same for my blackened pan.) Being paranoid of salmonella, I didn’t follow the one minute rule. Instead, I waited until each side was golden brown (more golden than brown).

  1. Turn the heat to low. Put the lid on the pan. Set a timer for 10 minutes, and walk away. Do not lift the lid. Do not peek.

My feelings on this: “Whaaaa? No peeking??? Like none—zero? But, what if I want to make sure it’s working? Ugh.”

  1. After 10 minutes have elapsed, turn off the heat. Reset the timer for 10 minutes and leave the chicken breasts in the pan. Again, do not lift the lid. Do not peek.

“STILL!? Sigh, fine.” When it comes to cooking, trust is not something I do well.

  1. After the 10 minutes are up, take the lid off, and tada! Soft, tender, juicy chicken breasts that aren’t dried out in the least. Doublecheck them to make sure there is no pink in the middle. Slice and eat.

“OMFG IT ACTUALLY WORKED!” Tender, soft, juicy, NOT PINK, tasty chicken breasts. I sliced each breast in half and served.

Pro Cleaning Tip (From someone more Pro than me):

If you’re like me and burned the shit out of your pan, try out the following technique I recently learned from a friend:

  1. Make sure you drain any excess oil and then put the pan back on the burner, on high heat, and wait a minute until it gets hot (or just do this right after you are done cooking).

  2. Put the pot under running water, angling the pot AWAY FROM YOU, and scrub with a long-handed scrubby brush (not a sponge). Don’t be alarmed if the oils in the pan crackle and steam when they hit the water.

  3. Scrub, scrub, scrub.

  4. All clean!

This is part of The UE Review series.

ChickenSquare

Photo by Anastasia Heuer