Tag Archives: cleaning

Let Me Fix You: The Pink Chest

When you live with someone who has a trunk obsession, you might one day find an ugly, ugly, ugly hot pink cedar chest sitting in your living room. Now, because you have taste (and they do too thankfully), the only way this atrocity can stay is if you take it back to its original wooden self. Bring. It. On.

Before I get started though, let me warn you that this is not so much a DIY instructional as it is story time: the trials and tribulations of someone who’s just gonna do stuff and hope for the best.

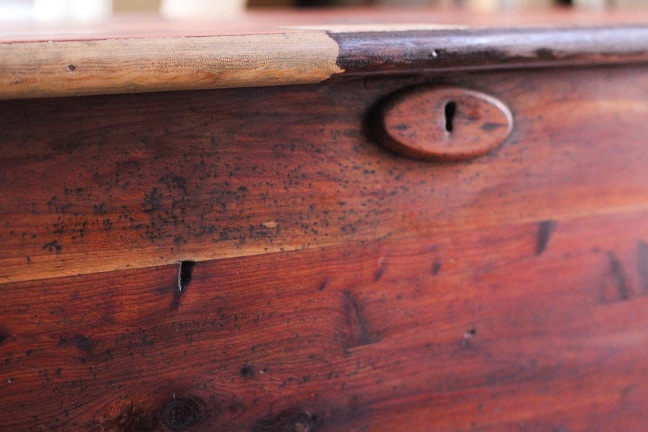
The paint job was straight up shit. Bad paint jobs mean one of two things: either the previous owner was a crap painter or they were trying to cover something up. You never know what you’re going to find, but with the beautiful, untouched cedar wood visible inside, there was a very good chance that treasure lay beneath.

The Stripping

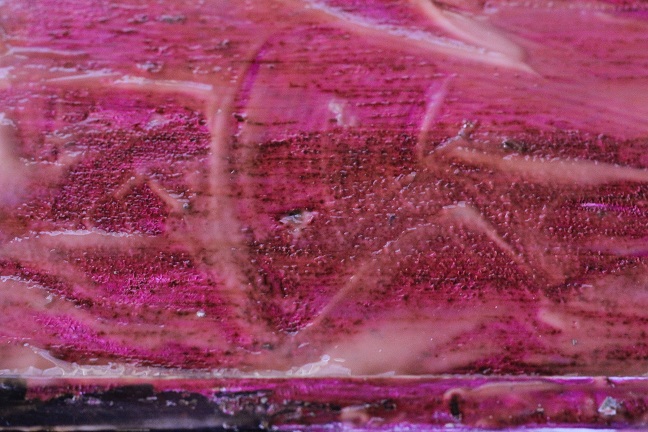
First I wiped the chest down with Murphy’s Oil Orange Multi-Use Wood Cleaner Spray (think Windex for wood). The goal wasn’t to clean it, just to get the crusty chunks of dirt off. I decided to start with the back of the trunk, figuring this is where I’d do the least damage if things went awry. In lieu of the regular, noxious smelling paint stripper I’d used years ago, I decided to try Citristrip because it claimed to be low on fumes yet high on results (since my work space was doubling as my living room).

The basic idea behind all paint strippers is that you apply a coat on top of the paint, wait, and then scrape the paint off. I poured out the Citristrip (which has the consistency of melted Gak) smeared it around, poured some more and smeared again. The directions suggested using a paintbrush, but I opted to finger paint with a pair of rubber gloves. And then I waited the requisite 30 minutes for it to do it’s mojo (and another 10 because, well, I forgot to check on it).

With Citristrip, you don’t see the paint bubble up like you do with the oh-so-fun smelling stuff, but the paint will discolor enough to let you know it’s working. You can keep it stripping for up to 24 hours, though I never left it on more than two. But the thicker it is and longer you leave it, the easier the paint scrapes.

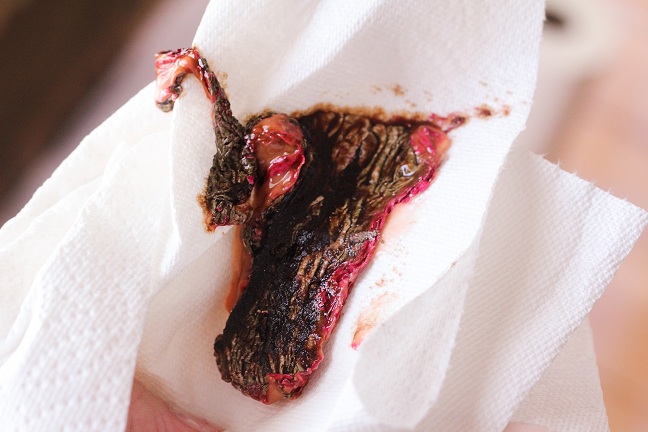
I used a 3” putty knife to scrape. I tried to follow the grain, scraping in one direction for the longest possible pass so that most of the paint ended up on my putty knife. Then I wiped it off on a paper towel, threw it into a plastic bag, and got ready for the next long swipe. Most of the paint scraped off like buttah. For the paint stuck in cracks and gouges, I used Ikea’s curved paring knife. Beware: aggressive scraping leads to wood shavings. If (and when) I saw strips of wood peeling off, I stopped and moved on.
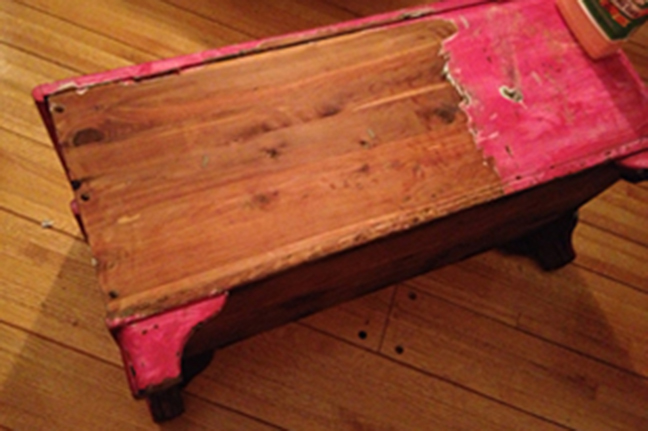
pinkchest_648x431

Because I was only working on a modest sized towel, and I like my furniture and my shiny hardwood floor, I had to be very careful about dripping and spraying. This meant I could only strip one side at a time instead of doing the whole thing at once.

The Scrubbing

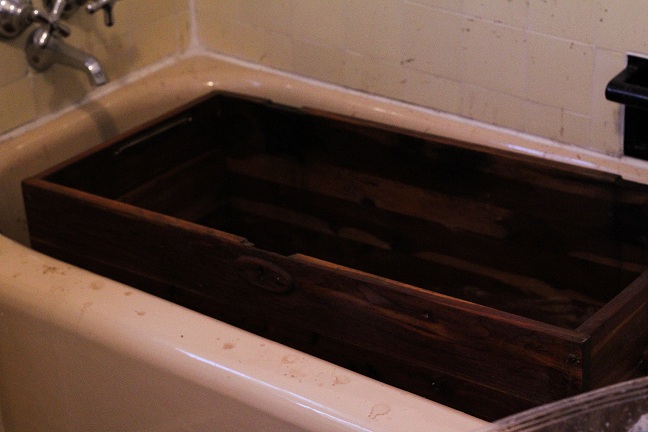
Even after you scrape off most of the paint, there’s still a goopy, residue left on the wood that just smears if you try to wipe it up with a paper towel. In my head this gunk was full of stripping chemicals that were going to hurt the cedar if they stayed caked on. So I washed each side individually after I stripped it and then I threw it in the bathtub (where it fit perfectly) to scrub it some more.

Originally I was using the Orange Cleaner spray with grade #00 steel wool (steel wool comes in several grades). But by the time I’d stripped 3 sides, I only had a 1/4 of the orange spray bottle left, so I moved on to the more economical Murphy’s Original Oil Soap. The steel wool not only picks up the gunk left by the paint stripper, but it also acts as a gentle sander. Unfortunately, the #00 was just a bit too fine which meant it would get matted with all the crud much more quickly. I almost went through the whole 12 pack, hence switching to the coarser grade #1 steel wool which was much better at lifting up stubborn paint.

The advantage of doing this in a bathtub (or if you’re lucky enough to be outside near a hose) is that there’s a constant supply of water and boy oh boy did that liquid blacken. The water that came off was nasty (a putrid diarrhea color) and it sprayed everywhere. Good news was that it smelled nice. It was probably in the bathtub for hour until the water finally ran beige.

The Sanding (or My Big Mistake)

I left the trunk to dry overnight and when I woke up in the morning it looked awful. I have scrubbed this thing to an ashy death, killing all the potential I spent hours scraping and scrubbing into existence… not really, but it felt like it. Having already read things like this, I was aware that this was another step in the process but it wasn’t any less horrifying.

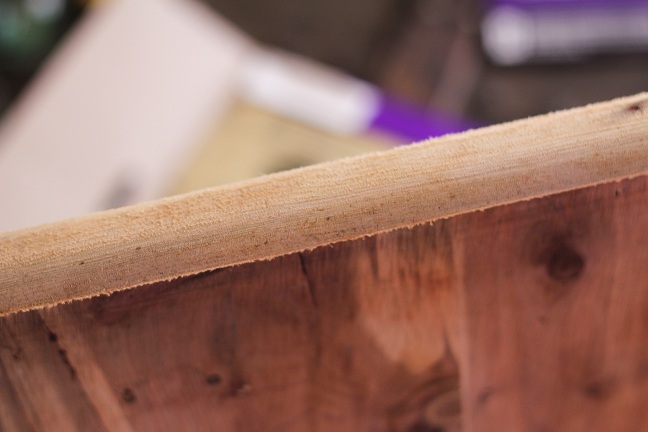
My naivety led to me to think that all the ashy discoloration would simply go away with some oil and that sanding was only for the rough patches. The wear and tear was cool, why sand that away? So I gave it a mild sanding with some 320 grit sandpaper (yes, sandpaper has grades too) and then I moved on to oiling. In retrospect, this was my big mistake, but more on that later. The only thing I actually sanded was the trim because it had this funky peach fuzz going on along with a faint greenish hue left by the original olive colored paint.

The Finish (But Not Really)

Now for what felt like the daunting part: choosing a finish. There were way too many choices, but I surmised the standards were oil, varnish, shellac and laquer. My biggest concern was ease-of-use in a small space, but I also wanted a natural shine, not a plasticy one, so I went with oil.

Typical oil finishes are Danish Oil, Teak Oil, Tung Oil and Linseed Oil. I didn’t want to stain the cedar wood, I just wanted to, ya know, “moisten” it. Linseed was crossed off simply because none of the pretty, DIY blog posts I’d read used it, Danish oils usually have some stain and other chemicals in them, and Teak tends to darken the wood, so the last man standing was: Tung Oil.

Turns out most stores don’t sell the real stuff (the one I found at Home Depot was a Tung “finish” that had more chemicals than oil in it) so I ended up buying Hope’s 100% Tung Oil from Amazon.

I snapped the rubber gloves back on, poured the honey-like oil on a rag (the size of a wash cloth courtesy of an old towel) and rubbed it in. The smell wasn’t amazing (burnt chestnuts?) but tolerable. I did two coats and let it dry.

For the sallow colored trim, I discovered that Minwax made stain pens with which I could essentially Sharpie my furniture. I picked the Red Mahogany color and even though it didn’t stain perfectly even, probably because I’d oiled it first, it gave the illusion of natural wear over the years.

Finally, I waxed the chest with Feed-N-Wax (because other people said to) and hoped that I was done.

The Real Finish

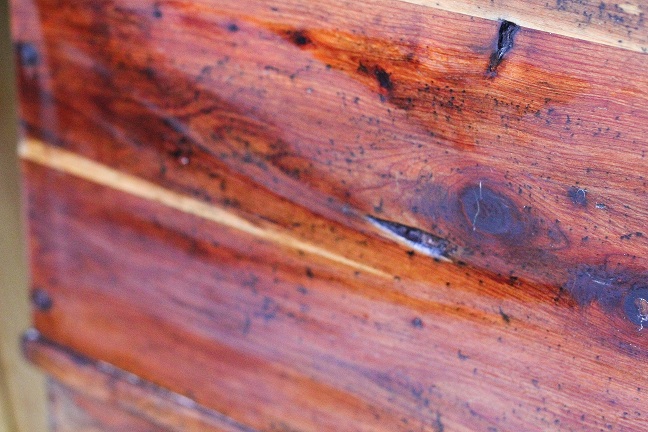
Unfortunately, even after the wax had dried, there were still noticeable parts of the lid that looked ashy/greenish/blah. Annoyed but determined, I found some 60 grit sandpaper in the toolbox and started sanding my little heart out. Not only did the sanding clear up the discolorations, it actually brought out more the wood grain than I expected.
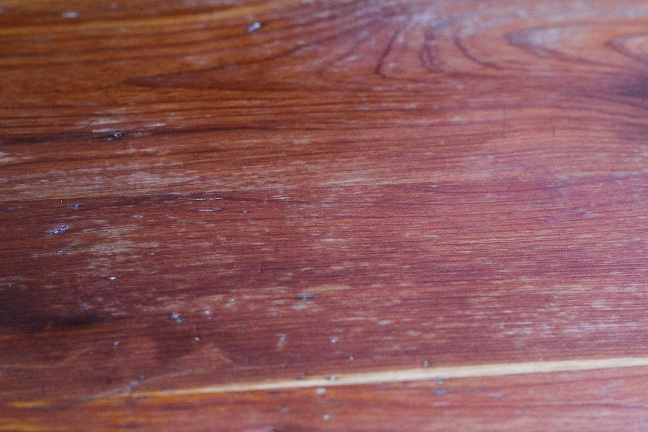
I’m halfway done with sanding and kicking myself that I didn’t do this earlier. What can I say, I’m an idiot perfectionist. The current plan is to try out a power sander and then oil it back up sans annoying imperfections. I might hold off on the waxing though, it dries matte and I’m not sure I like it. I know I’ve sanded away the shine, but I’m making the prettiest goram chest I can, even if I have to backtrack.I started this project having no idea what I was doing, but at the end of the day it’s all trial and error whether you have a manual or not. Just accept that you might screw it all up… or you might not. I’m still figuring it out.
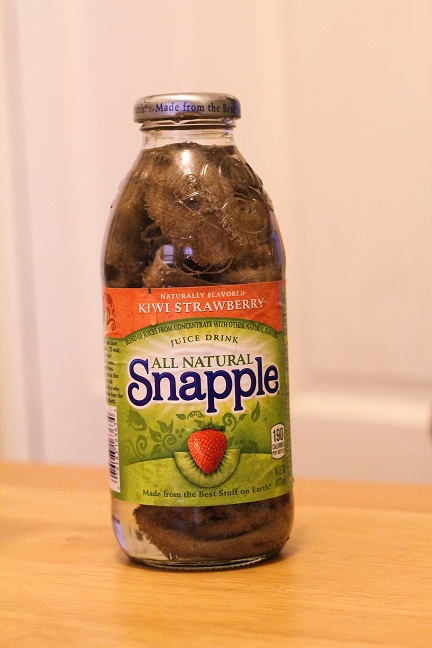
Extra Credit: Apparently, to avoid spontaneous combustion, this is how you dispose of oil soaked rags:

How to Paint a Room

Whether you are painting your dream house or just touching up your bedroom walls, painting can be a very enjoyable, yet daunting, activity for those unfamiliar with the process. This is something that you’re going to have to look at every day, so it is important to do a good job! If you have never painted before, here are the basic steps to help you get started.

Materials You Might Need

This is a basic list of the materials you will need. Every job dictates slightly different tools, but this will get you in the right direction. Talk to the color specialist at your local hardware store for better information about what tools are best for your specific job.

  • Paint/Primer
  • Brushes/Rollers
  • Trays
  • Plastic/Drop Cloths
  • TSP/Cleaning Supplies
  • Spackle/Putty Knife/Sandpaper
  • Ladders
  • Mineral Spirits/Solvents
  • Sand Paper
  • Imagination! (Not Optional.)

Prepping

Before you start painting, you’re going to need to prep your work area.

First, you will want to cover or clear the room of any furniture or other things you don’t want to get paint on. You can use plastic sheeting or drop cloths in order to protect your floor from splattering paint. To make it easier to navigate and prevent trip hazards, you may want to secure the sheeting to the floor with blue masking tape, also known as painter’s tape (or any other tape that won’t leave residue).

If you have a different color trim or need to achieve a nice, crisp line at the edge of where you are painting, you will have to use tape. Often, people use regular blue masking tape because it is relatively cheap; however, if paint is left on the tape for too long, it is very likely to seep beneath the tape and leave hairy looking lines along your edge. What you should use is a tape with some type of foam chemical laced on the edge that will form a seal that prevents any paint from leaking. I recommend using FrogTape, which is the original paint block tape. Any contact with water will activate the chemical, so painting over it with water-based paint will automatically activate it. To use it with oil-based paints, you have to manually activate the product with a damp cloth before painting. Tapes like these can be left up much longer, and your paint will not bleed. If you insist on using regular masking tape, be sure to remove the tape as soon as possible.

The next step is to prepare the surface on which you will be painting. Depending on what type of paint project you are working on, there are several things you may have to do.

For older walls, perhaps already painted once before, you may need to fill in any cracks or nail holes with spackle or nail hole filler. These can be easily applied with a putty knife and are usually around five or six dollars for a small tub. A popular type of spackle for painters is lightweight spackle. If your brand new tub of spackle feels practically empty, it is probably a lightweight spackle. The benefits are that it will dry much faster than regular spackle and, in many cases, they contain primer, making small patch jobs a breeze. Lightweight spackle is not very durable though, so I would only recommend it for small holes and cracks. If you’re working in a bathroom or place with a lot of moisture, use vinyl spackle or one that will dry flexible. These types of putties are less likely to crack when exposed to moisture. Once the putty is applied and dried, just sand it down to the level of the wall with some sandpaper.

Cleaning

The next step is to thoroughly clean the surface you will be painting. At the very least, give the wall a good cleaning with warm soap water, and then rinse it off. However, many people prefer to use Trisodium Phosphate (TSP for short), an all-purpose cleaner that also helps prepare the surface to be painted.

Priming

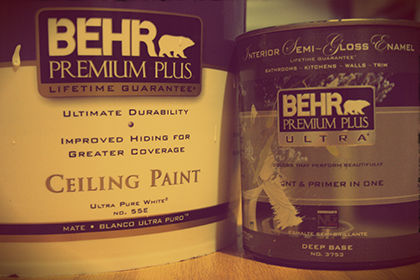
The last thing to do before painting is optional depending on several factors. Many people argue over whether you actually have to use a primer to paint your wall, but it all comes down to what is currently on your wall and what kind of paint you are using. A good rule to remember is that if it is a surface that has never been painted before, you need to prime it. Even with extra coats of paint, it just won’t stick as well without the high levels of titanium dioxide found in primer. (This is essentially what makes the primer adhere to the wall and your paint.) Today, most paints are labeled as “Paint and Primer in One,” which many people assume means they won’t have to prime. Typically, a Paint-and-Primer-in-One paint simply has added titanium dioxide, but it’s not nearly at the same levels as a true primer. What the Paint and Primer in One does is save you from re-priming the previously painted surfaces. However, if you are painting over a deep color and trying to achieve a light color, you will most likely need to prime anyway, otherwise your color will appear much darker because of the previous color underneath.

Painting

Once your work space is ready and your primer is completely dry (your can of primer will have instructions specifying how long to wait), you are ready to paint!

Now that you are all prepped, the actual painting process is actually pretty straightforward. Many people have different preferences regarding the order of things to paint, but traditionally you start with a brush on the edges of the wall and then use a roller to finish the main portion. Many paint manufacturers have different suggestions depending on what type of paint you use, as well. Be sure to read all of the information on your particular can of paint.

To begin, open your can of paint with a screwdriver or a paint can key (you can buy these at most hardware stores for a dollar, and they help preserve the integrity of your can’s lid). Use a stir stick or other stirring device to mix your paint up a bit to ensure none of the pigment has settled on the bottom. If your paint has been sitting for a while, it might even be necessary to have your can of paint shaken again. As long as the can is still in good condition and the can is more than half full, most hardware paint departments will be happy to shake your old can of paint, even if you didn’t buy it from them. Worst case scenario, you can shake the paint by hand in circular motions.

Next, pour some of your paint into a small cup or other paint carrying device. Use your angled brush and dip it about half way into the paint. Wipe off any excess paint, and then cover the edges of the wall. The benefit of the angled brush is you can get a closer, more even application of paint with less risk of getting the paint where you don’t want it. Reapply the paint on your brush occasionally, never letting it get too thin or too thick. If it is too thin, your wall will turn out splotchy. Too much, and it will not dry properly, potentially leading to many other problems later on. There are also smaller rollers designed to be used for this purpose; however, I personally find that a brush gives you a lot more control.

Now that you have finished your edges, you can move onto the main portion of the wall. Pour some paint into your tray (the deeper end). Place your roller into the tray and pull back, bringing some paint with you. You then roll the roller back and forth on the textured portion, ensuring you get a nice, even coverage of paint. If you get too much paint on your roller, it will not roll properly, and is liable to splatter paint back at you when you roll. Too little and you will have to reapply the paint to your roller more frequently. If you are right handed, start from the right end of the wall and work your way left. If you are left handed, do the opposite.

Many people assume the best application with a roller is vertical lines, but in order to get the best coverage and smoothest final product, you should actually apply the paint in a slight angled fashion resembling a narrow W or N shape, and finish with a straight line all the way to the top when your roller starts to run dry. This is so you don’t leave huge gobs of paint at the edge of the ceiling. Every time you finish one strip, your next should overlap by about half the size of the paint roller. To finish up you do a rollover, which is just rolling over the area you just painted with your roller, without applying more paint. This is only to help even out your paint and make sure you didn’t leave any areas particularly thick.

Drying

The last step is to sit back and watch paint dry. I’ll wait for you…

Okay, I guess you should clean up while you wait. It is actually very important for the integrity of your brushes that you clean them immediately after you finish using them. If you are using a water-based paint, this is as simple as using warm soapy water. If you are using an oil-based paint, you will need to use mineral spirits instead.

Last, make sure your brush is left to dry with the bristles hanging down so the water or mineral spirits drains out properly. (This is why paint brushes have holes on the end: so you can hang them up to dry!) The roller can also be cleaned with soap and water. If you have to use it again right after cleaning it, you can buy a roller spinner that will help dry it much faster. It’s important not to use a damp brush or roller, because that will potentially water down your paint.

Assess whether or not your paint job requires a second (or third) coat. If so, repeat. Happy painting and share your stories with us in the comments!

Photo by Sara Slattery

Photo by Sara Slattery

The UE Review: Cooking Chicken Breasts

When we started UE, one of our missions was to test our how-tos (or ones we found around the web) and publish follow-ups from the UE perspective. Today we are not going to test one of our own articles but a recipe we found on one of the websites we follow, The Kitchn.

A little background on my experience with chicken: My mother is still so frightened of “pink” (undercooked) chicken that she dices her chicken breasts up into quarter-inch squares that she then cooks to death. (Mom, I love you.) I fondly called this “cubed chicken” and mocked it all the way up until college when I realized—having only learned the one way—that I too would cook my chicken like this. (Mom, I still love you.) This inexperience, and my already lazy cooking habits, led me to eventually quit cooking the bird—or any meat really—altogether. I have since faced my fears of meat but not my cutting habits, only graduating to slightly larger “chunks.”

But today is the end of all that because today I learn how to cook chicken breasts without cutting them at all.

THE RECIPE: ”How to Cook Moist Tender Chicken Breasts Every Time”

INGREDIENTS:

I started by collecting the following:

  • 1 to 4 boneless skinless chicken breasts

I was cooking for four (no pressure) so I used two boneless skinless chicken breasts. These breasts were about an inch and a half thick and frozen.

  • Salt and freshly ground black pepper

If you don’t have “freshly ground” black pepper lying around, pre-ground pepper should be fine. I, for one, used to hand mash peppercorns between two paper towels with the butt of a knife because I was too lazy to buy ground pepper or a pepper grinder (don’t ask me why I had whole peppercorns) …but I don’t think many people will have this problem. (Just in case: tips for finding a the right pepper mill and the different kinds of peppercorns.)

  • 1/4 cup flour

Check.

  • 
1 teaspoon freshly chopped herbs (optional)

Meh. It said optional and I was too lazy to go to the store. I considered some dry herbs from my cupboard, like an “Italian Spice Medley,” but decided to just skip it altogether.

  • Olive oil

I recently learned to cook with oil, instead of water, and it changed my life. (A great breakdown of the different types of kitchen oils.)

  • 
1/2 tablespoon butter

I’ve been convinced in the past year that butter really is that much better than margarine. (If you don’t trust me, at least read what best-selling author Michael Pollan has to say about it.)

Next step, proper kitchen utensils:

EQUIPMENT:

  • 10-inch sauté pan with lid

In this case, the lid is essential. As for the 10-inches, just make sure your chicken fits comfortably in the pan. If you don’t have a sauté pan, these tips might help you find the perfect one. Considering that most of my cookware came from Ikea, I may not be the best source for recommendations, but Amazon, Marshall’s, Costco, or thrift stores, can all be excellent sources for quality pots and pans (and other kitchen items).

Clearly a pan is not the only thing you are going to need. So I’m going to add:

  • Sharp knife capable of cutting chicken

I reiterate the above locations for those in need of a knife set.

  • Spatula

Having burned myself on many a metal spoon, I cannot recommend a good wooden spoon / spatula enough—they don’t transfer heat!

  • Cutting Board

Your choice between wooden or plastic. If you’re really lazy, you can just use a plate. If you can’t stick your board in the dishwasher, make sure you follow these steps to keep it clean.

  • Three Medium-Sized Plates

I really can’t justify putting in a link here, I hope you own plates.

INSTRUCTIONS:

Defrosting frozen chicken: An intelligent, pre-planning person might have remembered to set their frozen chicken breasts out in the morning to ensure that they were properly defrosted by the evening. I, however, was not that person. So, my chicken, having been set out a mere three hours before, was still half frozen by the time I went to cook it. I tried to rectify this by massaging it under hot water from the faucet. (Apparently, according to the USDA, both of these methods are unsafe and one should only defrost their chicken in the refrigerator, cold water, or the microwave. Oops. Still alive.) I moved on to the microwave. I basically just started hitting buttons (like “Defrost” and “Chicken” and “Yes”) until it started working. But, if your microwave doesn’t have a defrost setting, two minute increments on 50% power would probably be an okay choice—then again, remember how many times I’ve cooked chicken in my life and take my advice at your own risk.

Start with your chicken on your cutting board…

  1. Pound the chicken breasts to an even thickness with the handle or flat of a knife.

Okay, I forgot to do this but, to ensure even cooking, this would probably be a good thing to do. If there is any excess fat (the white stuff) on your chicken breasts, feel free to trim it off.

  1. Lightly salt and pepper the chicken breasts.

Don’t be like me and touch your salt and pepper shakers with your raw chicken covered hands—attempting to wash them is not as fun as it sounds.

  1. Mix about a half teaspoon of salt in with the flour along with a little pepper. Chop the herbs finely, if using, and mix in as well.

Mix this flour mixture on one of your three plates. The other two are for your chicken—one for raw, one for cooked. I didn’t measure but be careful not to pour too much flour, anything you don’t use will be thrown out. Having just salted and peppered my chicken, I didn’t bother to mix in any salt and pepper (and my chicken still passed a taste test) but to each their own. As I stated above, I skipped the herbs.

  1. Quickly dredge the chicken breasts in the flour, so that they are just lightly dusted with flour.

I don’t know why this has to be done “quickly.” I took my time. Take your breasts and dunk each side in the flour. I scooped even more flour on top and gave it a good pat to make sure they were really covered.

  1. Heat the sauté pan over medium-high heat. When it is quite hot, add the olive oil and butter. Let them melt, and swirl the pan.

  1. Turn the heat to medium. Add the chicken breasts. Cook for just about 1 minute to help them get a little golden on one side (you are not actually searing or browning them). Then flip each chicken breast over.

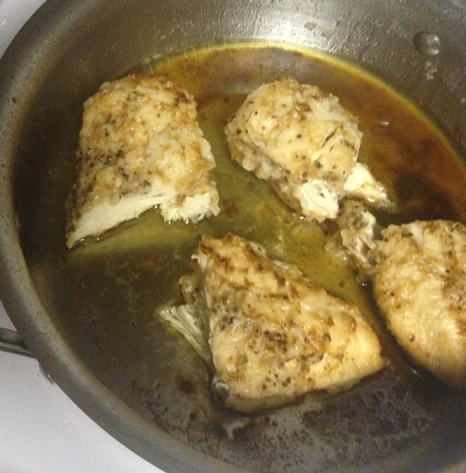
“Turn the heat to medium.” Oops. So, being unable to read, I kept my heat on high and was assaulted by crackling oil. But my chicken still turned out fine. (I can’t say the same for my blackened pan.) Being paranoid of salmonella, I didn’t follow the one minute rule. Instead, I waited until each side was golden brown (more golden than brown).

  1. Turn the heat to low. Put the lid on the pan. Set a timer for 10 minutes, and walk away. Do not lift the lid. Do not peek.

My feelings on this: “Whaaaa? No peeking??? Like none—zero? But, what if I want to make sure it’s working? Ugh.”

  1. After 10 minutes have elapsed, turn off the heat. Reset the timer for 10 minutes and leave the chicken breasts in the pan. Again, do not lift the lid. Do not peek.

“STILL!? Sigh, fine.” When it comes to cooking, trust is not something I do well.

  1. After the 10 minutes are up, take the lid off, and tada! Soft, tender, juicy chicken breasts that aren’t dried out in the least. Doublecheck them to make sure there is no pink in the middle. Slice and eat.

“OMFG IT ACTUALLY WORKED!” Tender, soft, juicy, NOT PINK, tasty chicken breasts. I sliced each breast in half and served.

Pro Cleaning Tip (From someone more Pro than me):

If you’re like me and burned the shit out of your pan, try out the following technique I recently learned from a friend:

  1. Make sure you drain any excess oil and then put the pan back on the burner, on high heat, and wait a minute until it gets hot (or just do this right after you are done cooking).

  2. Put the pot under running water, angling the pot AWAY FROM YOU, and scrub with a long-handed scrubby brush (not a sponge). Don’t be alarmed if the oils in the pan crackle and steam when they hit the water.

  3. Scrub, scrub, scrub.

  4. All clean!

This is part of The UE Review series.

ChickenSquare

Photo by Anastasia Heuer