Decorating on a Budget

Usually good style comes at a price: though minimalist decor is in right now, even that style is not minimal on your wallet. But what I have learned from a little experimenting is that you actually can design on a budget, if you get a little creative, and do things yourself instead of buying them. I tend to stay away from the lengthy, more complex projects, so I found some easy DIY projects that will make your simple home more exciting.

Bookshelves
Bookshelves

Photos by Christina M. Tedesco

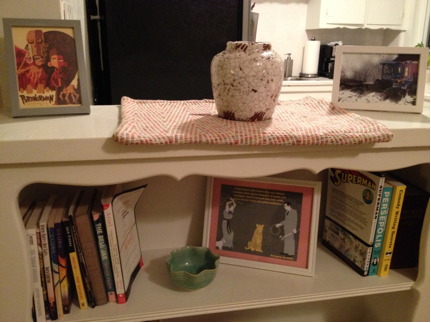
One way to spruce up your bookshelves is to de-clutter! Usually when things don’t look right, we instinctively add more to it; however, you can make your bookshelves look super cute by taking away all the busy stuff and only displaying a select group of things. Bookends come in handy here, whether you buy them or find something unique to hold the books in place. This way, you can spread your books throughout the bookshelf and add some things in between to please the eye (i.e. a small vase, a picture frame, a decorative bowl, etc.). This makes the whole shelf flow much better.

Instead of painting bookshelves, which takes time and money, I read an article about covering the insides with wallpaper. Now, wallpaper can also be a little expensive and difficult to work with, so an alternative is contact paper—it’s cheap, cute, and removable. Plus, if you get bored with it, you can keep switching it out with new designs!
Dresser

Photos by Christina M. Tedesco

DIY Dresser

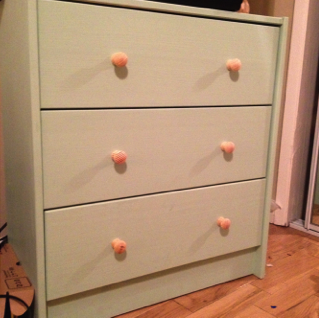
This one was exciting! I only needed a small dresser to hold some things I could not hang up. I found a solid wood dresser at IKEA for only $35. Choosing solid wood over other choices gives you the option of being a little more creative with it. I wanted to go for cute, but simple. I bought the smallest can of paint I could find for $5, assembled the dresser, and painted it. I also plan to order new knobs for it. Knobs can be pretty pricey, but it makes a difference! Urban Outfitters has super cute knobs for a good price. The total cost of my custom dresser came to $76.

Vase1

Photos by Christina M. Tedesco

Not Your Normal Vase

One thing I learned upon being a “grown up” is that flower vases can be surprisingly expensive! In this category, some thinking out of the box can go a long way. I had a cheap soap pump whose look I really loved, but the actual pump had stopped working. I threw away the pump and tied a ribbon around the top of the bottle. I arrange smaller flowers in there, and it makes a great piece to fill up an empty space.
Vase2

Photos by Christina M. Tedesco

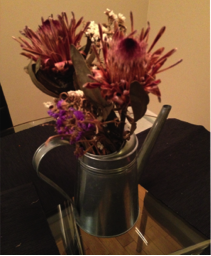
Changing out flowers in your vase based on the season is a great way to bring a theme and some color into your home. Right now is a perfect time for tulips, daffodils and any of the more vibrant flowers. I also use a tin watering can as a vase, this goes well with dried flowers or autumn flowers.

Plants

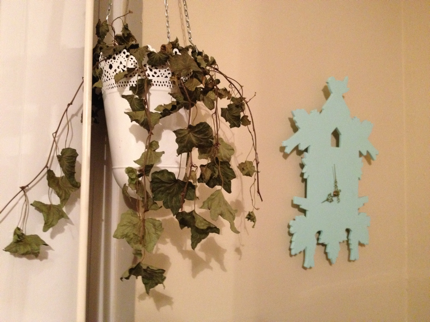
Another great way to brighten up a room is to grow or buy plants. Growing your own plants is fun and cheap, but definitely time-consuming. It takes a while for a seed to fully bloom, but it’s so exciting when you first see it start to poke through the dirt. A short cut for those lacking green thumbs, or patience, is buying your own plants: this way, you don’t have a bunch of pots with just dirt all around your house while you wait for a sprout. Though buying plants is a little more expensive than growing your own, you can look for cheaper ones at your local nursery. When buying plants or seeds, pay attention to how big they grow and the amount of sunlight needed. If you don’t have space outdoors for them, they can always liven up a windowsill.
Plant

Photos by Christina M. Tedesco

A great way to add some decor to the kitchen, and save some money on spices, is to have a windowsill spice garden! Mine adds a great aesthetic to my kitchen, and it definitely makes me feel good when I can cook with something that I’ve grown! Spice plants are only a couple bucks from a nursery and are small enough to sit on your windowsill.

Dress Those Walls

Dressing up your walls makes a big difference. But when buying pictures and frames, the money starts to add up. One thing to remember is that you can do something fun with a bunch of small pictures instead of hanging a big one.

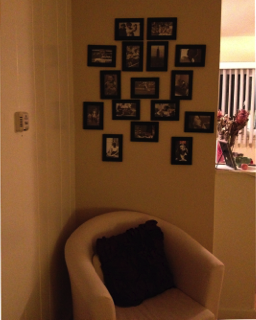
One of my favorite things I did with my current apartment was going online (in my case, to life.time.com) and finding 16 photos I loved. I cropped them to 4×6, then found frames at IKEA for only $2.99 per two pack. This total project cost me $24 and took up a big part of my wall. I just printed the photos on a normal printer: since the photos are pretty small and framed, it’s hard to tell that they’re on computer paper rather than (more expensive) photo paper.
Walls

Photos by Christina M. Tedesco

Posters

I love different film posters, and especially minimalist posters. Now, I know my limits, and I for-sure cannot make an awesome minimalist poster. But, I did play around in Photoshop with some photos and quotes from favorite movies and books and created my own 11×14 posters. I asked a co-worker in our art department to print them out for me, so I didn’t have to pay for printing! (If you don’t know anyone with a photo printer, I would highly recommend using Costco. If you don’t have a Costco Card, ask around: I’ve had lots of friends let me use theirs. Their prices are great and the quality of the photo is really nice.) At IKEA, I bought some 11×14 frames for $8 each.

Counter Space

Counters can seem plain and empty, but it’s easy to fill them up just using normal kitchen supplies, especially when you don’t have a lot of cabinet space. I really liked the idea of canisters with chalkboard labels, but I couldn’t find any cheaper than $8 each. But, on Amazon.com, I was able to buy a whole roll of chalk-paper to then affix to a $10 canister set I found on sale. You can cut out chalk-paper labels into your own designs or buy a paper-shape cutter and make the labels yourself. I also put the metal tins of my favorite tea out on my counter. It adds some color and the tins are actually really cute!

Keep in mind that you need to arrange your appliances in a way that makes use of your space, but you can also show off all your appliances at the same time. If you’re short on cabinet space, another decor idea is stacking your coffee cups against the wall. Or you can buy ceiling hooks, screw them under your cabinets, and hang up your mugs.
Counterspace

Photos by Christina M. Tedesco

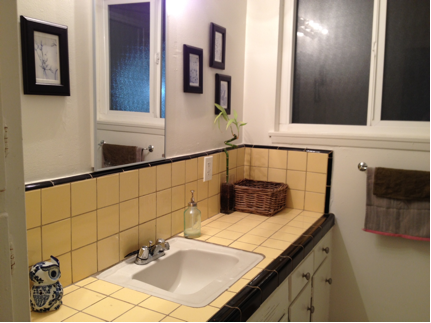
If you have counter space in your bathroom, there’s a lot you can do to keep it organized while adding flare. Plants and candle holders are one good way to add that extra something that your bathroom is lacking. Wooden baskets are useful for holding hand towels and will also make your counter look less empty. Pretty jars with lids hide away Q-tips, cotton balls, and other necessities. Finally, a nice soap pump always adds a good touch.

In my bathroom, I also have a lot of wall space, so I bought more frames and some postcards from IKEA to keep my walls from looking empty and boring.

There are plenty of simple DIY ideas out there to make a difference in your home but not in your wallet—all it takes is some experimenting and creativity! If you have some more suggestions for our readers, feel free to leave a comment: we’d love to hear your creative ideas!


Handjob Etiquette

The date is going well. You’re kissing, petting, and the hands are going south. Ziiiiip… Is it time for a handjob?
Why HJs?

If you have a penis, chances are you’ve been giving yourself handys since puberty. Hands are how we primarily interact with things, it is the default setting for all tool use, so it doesn’t really make sense why that wouldn’t extend to the use of your tool. It’s more a question of “’why not?’”

Some folks don’t like giving head, which is understandable. Some people don’t like receiving blowjobs (which I think is less understandable, but to each their own). There is a time and a place for handjobs—specifically when it’s too early in the dating process for anything more (i.e. oral or sex), but dammit, that end-of-date kissing was awesome and intense and neither of you want to stop.

Also, avoiding STIs and pregnancy are some key health reasons behind choosing HJs over an end-of-date BJ. It’s very difficult to catch something from an HJ. You can catch almost anything during oral sex that you can during vaginal/anal intercourse, so there is no health advantage with oral sex, over intercourse, other than avoiding pregnancy.

Oral and vaginal/anal intercourse are often considered to be much more intimate than an HJ. People might just not be emotionally ready for sex, but still want to fool around and trade orgasms.

Attitude

“I wanted a blowjob! What’s this bullshit?” or “Aw, man, I’m not getting sex tonight. This sucks!” are common and highly inappropriate responses to a person who is kind enough to lift and lower your love pump to climax, and will likely result in you not getting any further sex acts from this person.

Life is too short for bad sex, and the same can be said for handjobs. Semi-sexy -time should be honored, respected, and most importantly, enjoyed.

Cues to an HJ

When making out in a private or semi-private space, heavy petting can lead to heavy petting down south. This is about a half-step from an HJ. If they’re down there for more than a minute, go ahead and unzip. Don’t whip your dick out; let them dig it out in case they don’t want to dive under the underwear.

CAUTION: Beware of HST (handjob standard time). Count Mississippis if you have to. Make sure it’s actually been a minute, and not just your wishful thinking. Generally speaking though, hand-on-dick is a good indicator. Transversely, when your partner puts your hands on their genitals, you’re probably good to go. Rules of reciprocity imply that they’re down for what they’re doing to you.

Mid-HJ Etiquette

Givers:

  • Never look bored. Your hand might be getting tired, but don’t look up at your partner with the “Am I going to get carpal tunnel?” look in your eyes. Stay involved, stay interested, and your partner will feel that way. Encourage your partner to keep their hands busy as well.
  • Don’t just jerk the thing. As in all things sexual, there is an art to it. Alternate speed, grip, and grip strength. Find out what your partner likes, not what Cosmo says he likes.

Receivers:

  • Be involved with your partner. Use this time to at least apply your foreplay skills. I’m not going to give you general foreplay tips—that’s an entirely different article.
  • Give them a handy. I find I have a much better time when the lady kind enough to lend me a hand also has a good time. Same principle applies if your partner has a penis. Be nice to them; they’re being nice you.
  • The above is especially important because a dick is a simple mechanism. There is really a limit to how complex a technique one could use to jerk a penis. It only involves the hand, and it gets boring. Don’t bore your partner; keep them engaged. Keep your body close to theirs. If they’re turned on, their hand won’t tire as fast.

Cleanup

No one likes dealing with ejaculate. I’m a man, I’ve been around my ejaculate since puberty, and as soon as that shit leaves my body, I want to be as far away from it as possible. You don’t want to be caught unprepared to deal with jizz—you could turn what has been some very pleasant semi-sexy -time into an awkward “where-do-I-wipe-this?” moment that kills the entire encounter.

Be polite—this means not ejaculating on another person’s property without their expressed approval and enthusiasm. Some people are into it, but many aren’t. This is especially true if you’re in a car, and especially if this person has been nice enough to drive your ass around and tug your luxury liner into port. Ejaculation etiquette is paramount.

Don’t jizz on their cushions. Don’t jizz on the dash. I wouldn’t advise you try to jizz out of the door or window. Not only will you probably draw undue attention to yourself, if you miss you’ll make the inside of the car door look like Slimer’s albino cousin just left the building.

If it’s your own car, your partner might think you’re gross. Jizz on yourself, and again, your partner might think you’re gross. This isn’t a problem if you never want to have this person jerk you off again, but assuming you do, it helps that your partner not think of you as some sort of semen slob.

Kleenex isn’t ideal. And, unless the person jacking you off is a mother of three and is driving a wood-paneled station wagon, odds are they won’t be handy. If you’re a male in his 20s, having Kleenex in your car is conspicuous. It may look like you use Kleenex to mop up the aftermath of masturbatory missions ten times for every one time you use them to blow your nose. I know it. You know it. Unless your partner is woefully naïve, they will know it too.

There is an ideal solution: moist towelettes. Like the kind you get from a fast food restaurant. Let’s say this was a premeditated palm penis-polishing, but you didn’t want it to appear to be planned and risk losing the excitement of spontaneity. Before your date, go to KFC and order something small and see if you can get some moist towelettes. (I like to get the cornbread.) You can keep them on stock for months at a time. Just pop one into your pocket on your way to your date. Cleanup is quick, easy, and convenient—no awkwardness or ejaculatory acrobatics required.

Aim

You don’t have to be Robin Hood. When you’re squaring off manmeat-a-mano, stay on the mano. (Your partner is using their hand, so keep it on the hand as best you can.) Warn your partner—try to give them about three seconds to dodge, dip, duck, and/or dive as they wish. In my experience, they just shift their hand a bit to make certain they don’t get any on their hair or clothing.

After that, conveniently produce a moist towelette, and enjoy a bit of afterglow. (Don’t forget to return the favor if she/he so desires.) Kiss goodnight, and pat yourself on the back for a handjob well-received.

HJ3

Photo by Sara Slattery

Getting Your Brunch On

Having lived in New York City for almost seven years now, brunch has become a weekly staple in my life. Before moving here for college in 2005, I never really understood the concept of the word “brunch.” In my younger years, it was more of a fun combination word (breakfast + lunch).

BrunchHero

Photo by Anastasia Heuer

But then I discovered some things: I could eat a full plate of delicious breakfast food (and not just a quick bowl of cereal or a bagel before class/work during the week) alongside a lovely cocktail long before Happy Hour and not feel guilty whatsoever. I could do so after sleeping in until one o’clock in the afternoon (I hate when delis and fast food restaurants stop serving breakfast at eleven o’clock in the morning. What is that about anyway? For the record, I am not a morning person). All while catching up with anyone and everyone after decompressing from the work week.

When I talk to my family members in Florida about “brunch,” their reaction is often an intrigued “ohhhh,” with a raised eyebrow or side smile. It’s like they assume I’m trying to be fancy. That’s just not the case. People assume a lot of things about brunch—it’s expensive, pretentious, and difficult to coordinate. Those things can be true, but they don’t have to be! Every brunch is different depending on the restaurant, cuisine, group of diners, and the intentions of the individuals involved.

A couple things to keep in mind when planning a brunch date:

Beware the Food Coma: Sometimes I’m in the mood for a truly hearty and filling brunch. After a long week of eating on-the-go and stuffing my face with takeout, I like to sit and eat something that will fill me up and make me want to pass out in my bed afterwards. A few months ago, I had the Jerk Bacon and Eggs at Red Rooster in Harlem. The bacon and eggs are served in a skillet on top of beans with a side of grits. It was seriously delicious, but I went into a food coma as soon as I got home. This should not be your go to option if you have grand plans for an afternoon activity or an evening at the gym. Okay, maybe eating those grits, too, was overdoing it. Sometimes, though, you just need a day of food and rest. Let me tell you—after that four-hour post-brunch nap—I felt much better.

If you’re in NYC, my picks for “fill-you-up” brunches are great at Balthazar, Alice’s Tea Cup, and Kitchenette.

The Joys of the Boozy Brunch: My friends and I will often get together on a weekend to enjoy an excuse to start drinking well before five o’ clock. But, to really take advantage of this concept, one must find a restaurant with “unlimited” brunch cocktails, like mimosas, Bloody Marys, Arnold Palmers, bellinis, Irish coffees, and more. Generally speaking, your party has a 2-3 hours to drink up as many of those cocktails as you want.

I have grown to love a good Bloody Mary (especially when it’s spicy), and I had my very first one at the Sunburnt Calf on the Upper Westside. We ended up drinking for several hours before we had to leave (brunch ended at four o’ clock). Because the servers keep refilling your glass, be careful that you don’t lose track of just how many drinks you have consumed. I find this usually leads to either passing out by six o’ clock in the evening or getting an early start on that night’s “going out.” Either way, in my experience, it leads to a satisfying day… and night.

If you are in NYC, this and this are both lists of great spots for a boozy brunch. My favs are the Sunburnt Calf, Calle Ocho, and Yerba Beuna. They all offer the wonderful “unlimited brunch cocktails” option. Intermezzo is another “unlimited brunch cocktail” establishment that sometimes has a drag show later in the afternoons for those who like to keep the party going.

The “Prix Fixe” and The More Adventurous: Some restaurants have a “prix fixe” brunch menu that includes one or two brunch cocktails, coffee or juice, and an entrée. It’s the best of all things brunch in one tidy package. Others might try to wow you with their unique menu items or food combinations. These can be fun places to try but warn your guest in advance just in case they have picky pallets. In terms of a more adventurous brunch, in NYC, I recommend Talde. I’m still thinking about their brunch menu many months later. (Key Appetizer: Pretzel Pork and Chive Dumplings. I mean, who can resist?)

Don’t Forget about Price: Some of those upscale, four to five “dollar sign” restaurants can charge a pretty penny for brunch. Going to a bar-type establishment, or a “hole in the wall,” can give you a great meal and end with a modest bill. This varies greatly depending on the establishment. But you can do yourself a favor and plan ahead. Find out if a brunch place is for you by reading reviews on Yelp, or taking a pre-look at the restaurant’s menu online. This will also help you predict which kind of brunch you are in for.

No matter how you do it, brunch can be exactly what you need for whatever mood or occasion it happens to be.

Comment and let us know what your favorite type of brunch is! Do you have any great brunch spots in your area?

Camping Across the U.S.

For those of us in the United States, it’s often easy to forget that we live in a gigantic country. One pretty spectacular way to remind yourself of the vastness and diversity of our nation (cue the anthem and waving flag) is to camp across the States. When my husband and I moved from California to Maryland for grad school and then, two years later, moved back to California once we’d finished, we opted to camp our way across. Both times, it was beyond spectacular.

Here are some tips to help you both avoid our mistakes and see some amazing things:

1) Choose how you want to get where you’re going.

Highways in the United States are numbered in a super convenient way. There are two-digit interstates (major routes) and there are three-digit interstates (that spur off the two-digit routes). In general, two-digit interstates that run north-south are given odd numbers, and east-west interstates are given even numbers. The numbers get higher as you move west to east, and south to north.

With those major routes at your disposal, see if they run near where you want to go. I like to sit down with a paper map and a protractor, but you could just Google Map it. Google Maps has a ton of great features. You can build a map and keep working on it over time. You can avoid highways or tolls, or measure each leg of your journey individually. Use the Radius Around a Point map to see how far you can go outside of your route in a certain amount of time.

2) Figure out how long you want to spend on the road each day.

If you drive cross-country in four days, you’ll spend 10–12 hours behind the wheel each day. This is brutal. Consider how many hours you can tolerate in your car. A good rule of thumb is to aim to get to the campsite before 5 pm so you can check in and, depending on the season, set up your tent or sleeping area in the daylight.

This will make your life a lot better because you won’t wake up those camping around you (making for awkward greetings and no chance at free coffee from strangers in the morning), and it’s much harder to accidentally hit your travel buddy in the head with tent poles when the sun is still up. If you get up at 7am (which you probably will because you’re sleeping outside and hello, dawn) and get on the road by 8am, you can still get eight hours of good driving with a lunch break and a little sightseeing in each day.

3) Make a budget.

Even though it feels like this would be less expensive than flying, the costs can add up fast. Use your budget to determine how many days you can really afford to stay on the road. Your gas and toll costs will stay constant, but the longer you are out and about, the more you will spend on lodging, food, and campsites. Here are some things to take into account:

  • Gas Money. This is easy to calculate: (number of miles ÷ your car’s MPG) × average price of a gallon of gas. Going straight across from California to Maryland was about 3,000 miles, the average price of gas today is about $3.75, and my car gets about 28 MPG. Here’s how that calculated to get us straight there:
    Gas Money equation

And I bet you told your math teacher you would never use anything you learned in the real world.

  • Tolls. These can add up super quickly and vary by state. If you are on a tight budget, it’s definitely worth figuring this out. Crossing a state on the same highway will likely cause the maximum toll. Here is a link to all toll roads in the U.S., with most of the prices.
  • Cost of Campsites. These can range from $10–80 per night. You can always look this up ahead of time.
  • Cost of Food. Resist the urge to hop between Wendy’s and Mickey D’s the entire way. Why risk missing a pretty unique opportunity to sample regional cuisine? Don’t discount grocery stores as a good place to grab basic meal makings. With this in mind, you can easily get by for $10–20 per day per person.
  • Miscellaneous Costs. Cool pit stops, unforgettable meals, souvenirs, maintenance—you never know. It’s always good to have a nice bit of flex cash to cover what you can’t predict.

4) Think about what to bring.

Buying camping gear can be overwhelming, so unless you want to end up with astronaut ice cream and four different types of headlamps, start by thinking about what you’ll be dealing with, then build your kit from there.

  • Weather. You don’t need intense sleeping bags if you’re camping in D.C. in August, but you will want a tent because of bugs. And if it’s super rainy, a car-camping setup is sometimes best.
  • Food. If you do not need to worry about bears, then consider whether you need a cooler. Will you be making a grocery stop every day? Will you be going through a particularly hot part of the country? Planning ahead and grocery shopping can go a long ways toward reducing your food budget.
  • Light. Flashlights and lanterns are beyond useful. Headlamps are also excellent because if you do arrive past sunset, you’ll have both hands to set up your tent.
  • Bathing. Will your campsites have showers? Do you need to bathe in a natural water source? Consider what your toiletries are made of, and whether they are safe to go into rivers and lakes.
  • Navigation. Smartphones and the Internet mean you could reasonably leave on your trip without planning anything, but don’t forget a paper map. I use this huge book map of the U.S. because sometimes it’s nice to get the bigger picture, and you never know when your battery will die or you won’t have service.
  • Space. If you are in a small car, don’t get even more cramped with unnecessary gear. If you can’t extend your legs fully when you set out, you’ll be throwing things out the window onto the highway by day two, and I’m pretty sure you can get a ticket for that.

Bottom line: You need a place to sleep and mechanics to make food. This could be as simple as a tarp and a cooler, or as complex as this.

5) Make reservations ahead of time for popular campsites.

Places like Yosemite, Lake Tahoe, or Yellowstone tend to fill up right at the beginning of the season. Check out the state parks’ websites, KOA Campgrounds, or a campsite aggregate website, like this one, where you can search by map and reserve online.

6) Do something to make sure you don’t go stir crazy.

Make a really long playlist. Only listen to local radio stations. Make a photography challenge: I took pictures of all the state signs every time we crossed a border. Are you driving through a friend’s hometown? Ask what their favorite places are, and stop there. We stopped at a great bar in Iowa City, Iowa, because a good friend went to college there.

7) Know when you need a break.

Maybe it’s a torrential downpour. Maybe it got dark more quickly than you expected. Maybe you are exhausted or sick or need a hot shower. Maybe you got lost four times that day and do not, under any circumstances, want to share a tent with your travel buddy. This happens. If you can afford it, taking a night in a hotel is not the end of the world and won’t make the experience any less authentic.

I think more than anything, be relaxed! Enjoy sleeping outside and seeing some places off the beaten path. There are few opportunities to take this kind of trip, so take the time to make it fun.

CampingHero

Photo by Anastasia Heuer

Understanding STIs

My first introduction to STIs was when I was 14.

No, guys, not like that! My mother, a cardiologist, always believed in firmly and openly talking about health issues. While I can respect her openness and transparency, I’ll never forget her methods.

I came downstairs ­to wait for dinner while my mom was rustling about upstairs in her room. She then came running down the stairs like a little girl, holding ripped-out pages of an American Medical Association journal, all showcasing a wide range of STIs with detailed photographs of the most extreme outbreaks and symptoms.

“These will be the dangers you face in life if you don’t protect yourself,” she said morosely, before breaking into a laugh, and setting the table.

In case you weren’t lucky enough to consume images of genital warts with your meatloaf, I’ve taken the liberty to break down the various types of common STIs in the U.S. Also, since I host a sexual health web series, I decided that I should share my research with you, instead of just maintaining a questionable Internet search history on my computer. Unlike my mother, I don’t recommend reading this over dinner.

Chlamydia 

What it is & Symptoms:

Chlamydia is the popular kid at the party, as it is the most frequently reported STI in the United States.  It is a curable STI, spread through unprotected anal, oral or vaginal intercourse and exchange of body fluids. Known as the “silent infection,” many times, it remains symptomless. In fact, 50% of men and 75% of women with the infection actually show no signs.

However, if you do show symptoms, they can show up weeks after exposure, and may include burning during urination or abnormal vaginal or penile discharge.

Diagnosis & Treatment:

Generally, doctors will test urine samples or take sample secretions from a man’s urethra or a women’s cervix.  If you test positive, the doctor will prescribe antibiotics that will rid you of the disease within 1–2 weeks. However, you should be sure to take the medication for the entire duration prescribed. Repeat infections are very common, so refrain from any sexual activity ‘til your follow up test comes back negative.

If left untreated, chlamydia can result in urethritis for men or potential reproductive issues for women.

Dinner Trivia Fact:

Chlamydia has been around for a thousand years, but only in the 1960s was it finally classified as an STI. Talk about a drastic makeover.

Gonorrhea

What it is & Symptoms:

Gonorrhea is also a curable STI transmitted through unprotected oral, anal, and vaginal intercourse and body fluid exchange with someone infected. Symptoms can appear 2–5 days after infections, but in men, symptoms make take months to show up. In fact, some don’t even have symptoms.

Some male symptoms may include burning and increased frequency when urinating, discharge from the penis, and swollen testicles. In women, symptoms are generally very mild and vague, often mistaken for a bladder or a vaginal infection.

Diagnosis and Treatment:

Like chlamydia, gonorrhea is diagnosed through a urine sample and also treated with antibiotics. Generally, if you are positive for gonorrhea, you should also get tested for sister diseases, such as chlamydia and syphilis.

If left untreated, gonorrhea can spread to the blood and joints. For men, it can cause a painful condition in the tubes attached to the testicles, which can potentially lead to infertility. For women, it can spread to the uterus.

Dinner Trivia Fact:

Gonorrhea is also known as “the clap.” Many people believe the name came from the French brothels, known as the les clapiers, because the men who frequented them eventually ended up with the infection. So basically, blame the French. 

Syphilis

What it is & Symptoms:

Syphilis is a bacteria-based STI that is also curable. It can be transmitted through skin-to-skin contact with someone who is infected with syphilis sores. Symptoms can appear from 10–90 days after infection.  There are actually four stages of syphilis, with the first two being highly infectious.

    1. Primary: One or more sores show up where syphilis has entered the body, generally near the genitals. The sore is firm, round and painless, and can easily go unnoticed. It lasts 3–6 weeks and goes away on its own, regardless of treatment. However, it can then progress to the second stage.
    2. Secondary Stage:  Flu-like illness, a non-itchy rash covering the whole body or in patches, patchy hair loss, and white patches on the tongue or in the mouth are all symptoms.
    3. Latent stage: If secondary stage syphilis is untreated, it can turn into latent. Here, the primary and secondary stage symptoms all clear up, even though the syphilis remains in the body. This latent stage can last for years before progressing.
    4. Tertiary Stage: 15–30% of people infected with syphilis who don’t get treatment will go onto tertiary or late stage, where the disease can damage your brain, eyes, heart, blood vessels and bones. These problems can occur many years after the original infection.

Diagnosis & Treatment:

Syphilis is diagnosed through a blood test and may be cured with about two weeks of antibiotics depending on the stage that it was discovered in.  If left undiagnosed, syphilis can spread to the brain over a long period of time, hence its reputation for driving a person “insane.”

Dinner Trivia Fact:

Rumor has it that Christopher Columbus may have spread syphilis in Europe/Old World after catching it on his fateful trip to America in 1492. Suddenly, a t-shirt doesn’t look like such a bad travel souvenir.

Genital Warts

What it is & Symptoms:

Genital warts are generally caused by a strain of HPV, which spreads through skin-to-skin contact during unprotected oral, anal, or vaginal intercourse. Many times, warts will take six weeks to six months, or sometimes years, after infection to show up. It’s important to note that the strains of HPV that cause cervical cancer are not the same types that cause warts.

Genital warts can be so tiny that you don’t see them, and can resemble flesh-colored bumps or cluster together, looking like cauliflower. They are found on the tip of the penis, scrotum, vagina, or in or around the anus.

Diagnosis & Treatment:

Doctors can diagnose genital warts by examining them under a lens. There is no cure for HPV, but there are methods to treat visible warts that should only be done by a doctor. Doctors may give you a prescription cream, medication, or remove warts through surgery; however, since the virus itself cannot be cured, warts may return within 3 months of treatment.

Dinner Trivia Fact:

There are over 120 strains of HPV, but the body can clear most strains. Only certain types advance to cancer or warts. Basically, your body is a soldier! How’s that for a positive body image?

Genital Herpes

What it is & Symptoms:

Herpes is highly contagious and spreads through sexual fluids or saliva exchange with an infected person.

Herpes actually comes in two forms, the HSV1 and the HSV2 strains, which affect both men and women in the mouth or on the genitals. HSV1 strains are commonly known as cold sores that are found around the mouth; these are not the same as genital herpes, which are caused by HSV2 strains. Many times, herpes shows no symptoms, so those that are affected will not know. If you do have symptoms of genital herpes, some of them may include clear or white pearl-like blisters in the genital area and itchy, burning rashes. You’ll generally have an outbreak about 2-30 days after being infected.

Diagnosis & Treatment:

A doctor can diagnose herpes through a blood test or by taking a sample from your sore. Once you have herpes, it will never go away. You can only manage how frequently you have an outbreak.

For treatment, your doctor will give you antiviral medications, so you can stay symptom-free longer. After the outbreak goes away (usually 2–4 weeks), the virus lies dormant in the cells, and can reoccur when you have any reduced immunity.

Dinner Trivia Fact:

It’s estimated that 1 out of 5 Americans have genital herpes. This should make you look at your classmates at your high school reunion in a different light.

Important Note: if you test positive for any of these STIs, you should tell your partner and any previous partners that you may have potentially infected. For future sexual experiences, prevention is really the key. Take the necessary precautions by getting tested and discussing the results and options with your partner before engaging in sexual activity.

Shoot, if you need any help communicating, I can send some of my mother’s magazine images your way.

By Michelle White

By Michelle White

DIY Household Cleaning Products and Haircare

If you had asked ten-year-old me what baking soda and vinegar were good for, I would have peered into my mother’s kitchen cabinets, scrunched my face in confusion, and hazarded these guesses: “Baking soda goes in waffles to make them fluffy. Vinegar just smells bad.” And thus, I lived most of my life in darkness, never realizing the true power of these two lackluster kitchen staples.

CleaningSquare

Photo by Heather Griffith

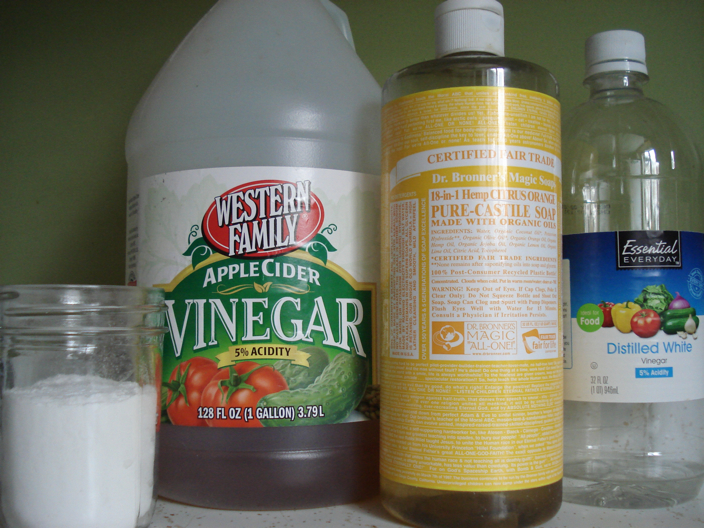
One look at the list of ingredients on any household cleaning product and your head will start to spin. (Unless you’re a chemistry nerd, in which case, you might actually understand what you’re reading.) Sometimes I wonder if it isn’t just a big hoax to get us to buy more petroleum-based products so oil companies can make money. Whether that’s true or not, you can bet your bottom dollar that you can save your bottom dollar by making your own cleaning products, and even shampoo, for a fraction of the cost of your usual products. The secret ingredients? Yup, baking soda and vinegar—they form the foundation for most of these recipes, with a few other household products playing supporting roles:

All-Purpose Cleaner

Use in place of Windex, 409, Mr. Clean, Lysol, or any other spray cleaner.

What you need:

- a spray bottle

- 2 cups water

- 2 cups white distilled vinegar

- 3 teaspoons liquid castile soap (like Dr. Bronner’s, sold at Trader Joe’s and some drug stores)

- 1 teaspoon of tea tree oil

Pour all ingredients into a spray bottle and shake well. If your spray bottle holds less than four cups of liquid, just cut the recipe in half. The castile soap and tea tree oil are optional, but they add cleaning and disinfecting properties.

Surface Scrub

Use in place of Comet, Scrubbing Bubbles, Soft Scrub, or any other abrasive cleaner.

What you need:

- a clean glass jar with a lid that seals tightly

- 2 cups baking soda

- ½ to 2/3 cup liquid castile soap

- 5 drops essential oil such as lavender, tea tree, rosemary or any scent you prefer

Mix ingredients together in the jar and store in a cool, dark place. (It should have the consistency of a goopy toothpaste.) Slap some of it on a sponge whenever you need to tackle some tough grime. The essential oil is optional, but will add antibacterial qualities.

Cheater version: add just enough water (start with ½ cup, and add ¼ cup at a time until the mixture is moist enough) to 2 cups of baking soda to form a wet paste and store in the jar. The baking soda will still work wonders, even without the soap and essential oil.

Toilet Bowl Cleaner

Use in place of Clorox, Lysol, Scrubbing Bubbles, or any other toilet cleaner.

What you need:

- 3 tablespoons to ¼ cup baking soda

- ¼ cup white distilled vinegar

Sprinkle the toilet bowl with baking soda and drizzle the vinegar on top. Let it soak for about a half an hour—go for a run, do some reading, get lost on Pinterest—and then scrub with a toilet brush.

Drain Opener

Use in place of Drano, Liquid-Plumber, or any other drain de-clogger.

What you need:

- ½ cup baking soda

- ½ cup white distilled vinegar

- 2 cups boiling water

Pour the dry baking soda down the drain, then vinegar. Cover with a small plate or jar lid and let sit for 10 minutes to a half an hour, and then pour boiling water down the drain. Don’t worry if your drain seems to “belch up” air bubbles: that’s totally normal.

Shampoo and Conditioner

Use the baking soda solution instead of shampoo and the vinegar solution instead of conditioner. It sounds weird, but trust me, it’s worth a try. Baking soda strips your hair of all of the grease and gunk, while vinegar detangles, seals your follicles, and makes your tresses shine.

What you need:

- 2 clean plastic squeeze bottles (reuse empty shampoo and conditioner bottles!)

- baking soda

- apple cider vinegar (not white distilled vinegar this time)

Into one bottle, mix 1 tablespoon baking soda for every 1 cup of water. Pour 1 tablespoon apple cider vinegar for every 1 cup of water into the second bottle. Make sure to shake each bottle before squeezing some of the solution onto your hair. Start with the baking soda solution: squirt some onto your hair, massage, and rinse. Use the same technique for the vinegar conditioner. (The intense vinegar smell goes away by the time your hair is dry, I promise. If you’re still nervous, add a drop of essential oil or vanilla essence to counteract the smell.)

Note: the ratio of baking soda to vinegar can vary between hair types. If your hair is too dry after using this ratio, try using less baking soda in your shampoo.

Recipes adapted mostly from Women’s Voices for the Earth and here and here on Grist.org. If this gets you on a DIY cleaning and personal care kick, the possibilities are endless! This primer on DIY household cleaners and this list of homemade self-care products are great places to start.

Getting Started with Android

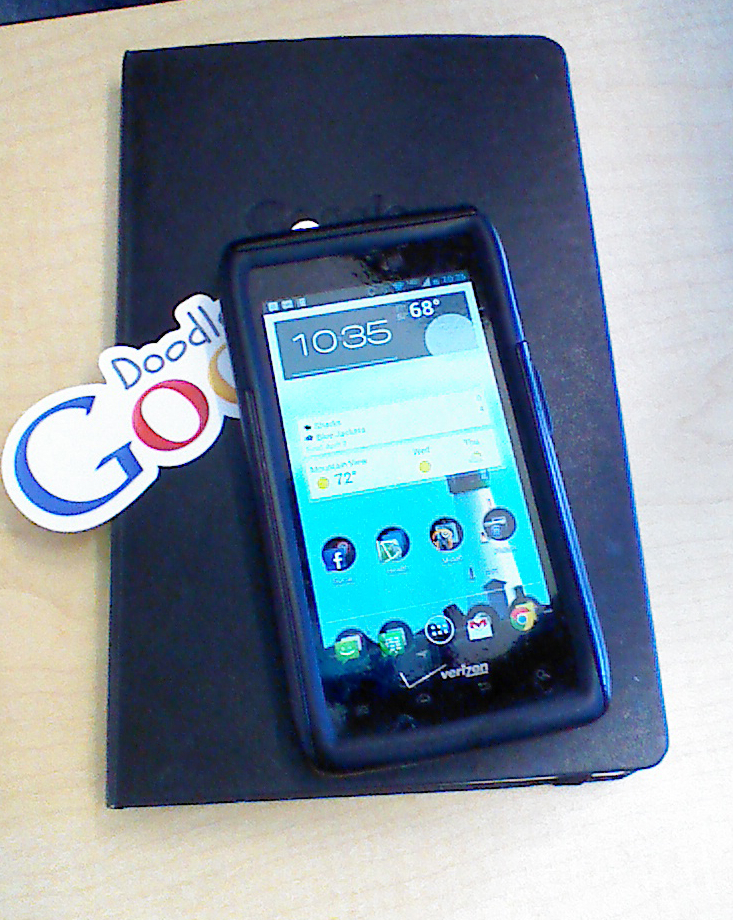
So, you’ve just picked up a bright, shiny new Android smartphone. Now what? Many people are wary of the highly customizable Android smartphones (in favor of the ubiquitous iPhone) because of the rumored learning curve; however, you can learn the system and you can make it work for you, instead of you needing to work around it.

Andriod_Square

Photo by Meggyn Watkins

The Basics

Some simple things to understand are the gestures: everything on the phone is accessed through tapping, swiping (sliding a finger across), or long-pressing (holding your finger on for a second) the screen.

Here’s some terminology to explain the Android environment:

  • Application: A program on the phone, usually represented by a small shortcut in your App Drawer or on one of your Home Screens.
  • App Drawer: This is an icon on your Home Screen (located in the Dock) that opens an area where you can search through your installed Apps. Notice that there are two tabs at the top of the App Drawer: one for Apps and one for Widgets.
  • Back: This physical button can not only be used to navigate backwards through visited web and App pages, but will also take you entirely out of an App and back to your previous App or your Home Screen.
  • Dock: A static bar at the bottom of your Home Screens for the App Drawer and four customizable shortcuts.
  • Home: A hardware button on your phone which will take you to your Home Screens from any App. Use this if you want to quickly exit an App!
  • Home Screens: You can think of these like your computer desktop. You can customize the background image by long-pressing the screen, and add App shortcuts to the Home Screens by long-pressing an App’s Icon in the App Drawer. The App Drawer will close, allowing you to drag the icon across the Home Screens to the location where you want to drop it.
  • Notification Pull-down: What was that pinging sound that your phone just made? If you drag your finger from the very top of the screen down towards the bottom, the Notification Pull-down will open. From here, you can select a notification to open its parent App, or you can swipe across a particular notification from left to right to ignore it.
  • Recent Apps: Not every phone has this button!  This is another hardware button that will launch a thumbnail view of your recently launched Apps. Use it to switch quickly between Chrome, Webster’s Dictionary, and Words with Friends (wait, are you cheating?), or to jump back and forth between your texts and a web search for movie times.
  • Menu: This is another hardware button. The Menu button is context-sensitive, so it will do different things (or possibly nothing!) in different apps. Google now encourages Apps to have an in-app Settings screen, so this button will be removed from future Android phones in order to provide users with a more fluid experience.
  • Widget: This is an advanced Android feature. From the Widgets tab of the App drawer, drag and drop the Widget you want onto a Home Screen. Widgets are often interactive and will sometimes update depending on location, weather, or current applications, and can even launch Applications or web pages!

Now I know how to interact with it. But how do I use it?

Right out of the box, many popular Android phones (like the Galaxy S III and the HTC One series) include a simple tutorial to help you sign into Google—they may even explain some of the above vocabulary. This will give you instant access to your all-important Gmail, the generally ignored Google+, the misunderstood Google Talk instant messenger (and soon Google Babel?), and the powerful Play Store. Of course, there’s also a generic Email app so you can access Yahoo!, Hotmail, or whatever flavor of email you prefer (for those of you who have resisted the Google hive mind). Thanks to the Google integration, some things will be provided automatically.

Here are some ideas to consider when customizing your shiny new smartphone:

  • You now have access to all your contacts stored in the Gmail web client. Any time you add a contact, be sure to select Google Contact, as this will back up the newly created contact so you can’t accidentally lose it! You can see them from the Contacts or People app, depending on your phone.
  • If you like to send surprise pics to your lover, be sure to open Google Settings and turn off Instant Upload in your Google+ settings. Or don’t, if you’re into that sort of thing…
  • The Play Store allows you to download apps, music, e-books, magazines, and videos. You can search within each section or across the entire Play Store in order to find whatever you like!
  • One of the best features of Android is Google Maps, which you can download from the Play Store. Enabling location access from the Settings menu will allow Google to customize search results for you and will provide you with turn-by-turn voice navigation as an added feature for free.
  • Of course, it wouldn’t be Google without integrated Search capabilities. You can use the Search Widget to launch a Voice Search and simply speak your command or type in a search. If you have one of the newest devices, then the Search App becomes something more—Google Now. Google Now allows you to opt-in to all sorts of extra notifications (called Cards), from updates on your favorite sports teams to traffic warnings for events in your calendar.
  • Your Android can take pictures and videos, but it’s what you can do with those pictures and videos that’s really interesting! You can go straight from taking a picture to viewing the Gallery by tapping the image preview in the Camera app. From the Gallery, you can  Share that picture through email to a friend, upload it to imgur for a quick post to reddit (if you have the imgur app), or launch Facebook to share it with your social circles for immediate judgment.
  • You are always logged in. Unless, of course, you explicitly sign out. The upside is that you always receive information as it happens! That’s also the downside. Having every app logged in all the time will take your battery from 100% to 0% in no time flat (I’m looking at you, Facebook for Android). Stay logged into the important things, but if possible, set a less-frequent notification refresh interval for everything else in their settings.

Android’s myriad Apps and Settings can let you customize the exact experience you want from a smartphone!  Stay tuned for more tips and tricks on tech and Android from the UE. And post a comment if you have any questions!

A Fanfiction Primer: What is This Nonsense, Anyway?

Fanfiction. So maybe you’ve heard of it? You might have read this article. You certainly know that 50 Shades of Gray came from a Twilight fanfic. But for all it’s been talked about in the media lately, you may not be exactly sure what it is. A dark hole in the Internet? A lightly disturbing and invasive hobby? An odd, obsessive escapism for people who watch too much TV?

All of these things are true. And not. Much like the rest of the Internet, fanfiction is an outlet for expression, a tool that can be used in many, many different ways. And much like the rest of the Internet, some of those things can be very creepy. But some of them, if you know what you’re looking for, can be absolutely inspiring.

Fanfiction, or stories written by fans featuring characters and universes that have already been published or produced, has actually been around longer than the Internet. In the ancient days of woolly mammoths and communication via the postal service, fanfiction was limited to newsletters sent to fans of certain content. However, with the invention and popularization of the Internet, fanfiction has become a well-known phenomenon.

There’s an art to communicating the essence of a character, relationship or a story, manipulating an existing canon to create a new outcome, and telling the future of a story in such a way that it is of the source-content but also separate from it. Like all things on the Internet, some of it is terrible, and some of it is mediocre and forgettable. But some of it, like all literature, will make you want to live your life differently and see something in a new light. And, in much the way all good writing does, it can make your heart hurt.

Fanfiction is also a great way to be exposed to ideas and concepts that don’t often make an appearance in mainstream media. Because fanfiction is so popular, free, and accessible, it includes many facets of society that suffer from underrepresentation and erasure in mainstream media. Sexuality, gender, race, disability, prejudice, and so many other things that are part and parcel of the human experience but are poorly represented in mainstream media can be found in abundance in the world of fanfiction.

Many authors, however, particularly older ones, are not okay with fanfiction. They think it’s invasive and an assault against their brand, their creation, and their intellectual property. And there are some hairy ethical lines when you consider the sheer number of novels coming out at the moment that used to be fanfiction of a sort. Some authors are fine with it as long as you don’t make any money off of their work. At the end of the day, it depends on why you’re reading fanfiction. A number of authors, such as John Green, have admitted to writing fanfiction of their own. It’s up to you how you deal with the opinion of the creator of your source content, but whatever you decide it is something to be aware of.

Whatever the authors may think, one thing is certainly true: fanfiction readers and writers love the content from which their stories derive. Some of them are looking for closure on a plot arch they disagree with. Some are looking to see their favorite characters embark on a beautiful, romantic relationship. Some are looking to get some fulfillment and closure on abruptly canceled shows, or cliff hanger novels. If you’re a Harry Potter fan, you remember the years and years and years and years (okay, maybe just three, but if felt like forever, alright?) between Harry Potter and the Goblet of Fire and Harry Potter and the Order of the Phoenix. What else was there to do during that period but think about what might happen?

However, it would be wrong for me to let you go wandering around out there without giving you this warning. Beware the porn. Yes, the purple prose, the wide variety of kinks, the characters that you never, ever, ever thought should ever engage in sexual activity. It’s all out there. If you aren’t into it, beware anything tagged Explicit, Mature, NSFW (Not Suitable for Work), or PWP (Porn Without Plot, or Plot, What Plot?). If you are into it, well…enjoy!

So you’re looking to read (or write!) some fanfiction now? Maybe we’ve got you thinking about a conversation you wish two characters would have on your favorite show. Maybe you’re thinking about that last book you read. An event was mentioned and never shown, but you’ve got an idea how it happened. So what are your next steps?

Head to the Internet, of course! Fanfiction.net is a good place to start. It’s been around forever, so what you’re looking for is likely on it in some capacity. It’s a pretty solid place to get your introduction to fanfiction. Another great place is Archive of Our Own, which is, as they say on their home page, “a fan-created, fan-run, nonprofit, noncommercial archive for transformative fanworks, like fanfiction, fanart, fanvids, and podfic.” The site is still in beta testing, but there are hundreds of thousands of works from all kinds of source content. If you’re familiar with Livejournal, there are plenty of fanfiction communities that use that site for hosting as well, and can be found with a simple Google search.

Whatever you’re looking for, you’ll probably find it. From AUs (Alternative Universes, which feature your favorite characters in a new plot, universe, or setting), to novel-length prequels and sequels, to resurrections of your favorite characters, it’s all out there on the Internet, waiting for you to read it. And if it isn’t, well, you can always write your own!

fanficsquare

Photo by Anastasia Heuer

The UE Review: Cooking Chicken Breasts

When we started UE, one of our missions was to test our how-tos (or ones we found around the web) and publish follow-ups from the UE perspective. Today we are not going to test one of our own articles but a recipe we found on one of the websites we follow, The Kitchn.

A little background on my experience with chicken: My mother is still so frightened of “pink” (undercooked) chicken that she dices her chicken breasts up into quarter-inch squares that she then cooks to death. (Mom, I love you.) I fondly called this “cubed chicken” and mocked it all the way up until college when I realized—having only learned the one way—that I too would cook my chicken like this. (Mom, I still love you.) This inexperience, and my already lazy cooking habits, led me to eventually quit cooking the bird—or any meat really—altogether. I have since faced my fears of meat but not my cutting habits, only graduating to slightly larger “chunks.”

But today is the end of all that because today I learn how to cook chicken breasts without cutting them at all.

THE RECIPE: ”How to Cook Moist Tender Chicken Breasts Every Time”

INGREDIENTS:

I started by collecting the following:

  • 1 to 4 boneless skinless chicken breasts

I was cooking for four (no pressure) so I used two boneless skinless chicken breasts. These breasts were about an inch and a half thick and frozen.

  • Salt and freshly ground black pepper

If you don’t have “freshly ground” black pepper lying around, pre-ground pepper should be fine. I, for one, used to hand mash peppercorns between two paper towels with the butt of a knife because I was too lazy to buy ground pepper or a pepper grinder (don’t ask me why I had whole peppercorns) …but I don’t think many people will have this problem. (Just in case: tips for finding a the right pepper mill and the different kinds of peppercorns.)

  • 1/4 cup flour

Check.

  • 
1 teaspoon freshly chopped herbs (optional)

Meh. It said optional and I was too lazy to go to the store. I considered some dry herbs from my cupboard, like an “Italian Spice Medley,” but decided to just skip it altogether.

  • Olive oil

I recently learned to cook with oil, instead of water, and it changed my life. (A great breakdown of the different types of kitchen oils.)

  • 
1/2 tablespoon butter

I’ve been convinced in the past year that butter really is that much better than margarine. (If you don’t trust me, at least read what best-selling author Michael Pollan has to say about it.)

Next step, proper kitchen utensils:

EQUIPMENT:

  • 10-inch sauté pan with lid

In this case, the lid is essential. As for the 10-inches, just make sure your chicken fits comfortably in the pan. If you don’t have a sauté pan, these tips might help you find the perfect one. Considering that most of my cookware came from Ikea, I may not be the best source for recommendations, but Amazon, Marshall’s, Costco, or thrift stores, can all be excellent sources for quality pots and pans (and other kitchen items).

Clearly a pan is not the only thing you are going to need. So I’m going to add:

  • Sharp knife capable of cutting chicken

I reiterate the above locations for those in need of a knife set.

  • Spatula

Having burned myself on many a metal spoon, I cannot recommend a good wooden spoon / spatula enough—they don’t transfer heat!

  • Cutting Board

Your choice between wooden or plastic. If you’re really lazy, you can just use a plate. If you can’t stick your board in the dishwasher, make sure you follow these steps to keep it clean.

  • Three Medium-Sized Plates

I really can’t justify putting in a link here, I hope you own plates.

INSTRUCTIONS:

Defrosting frozen chicken: An intelligent, pre-planning person might have remembered to set their frozen chicken breasts out in the morning to ensure that they were properly defrosted by the evening. I, however, was not that person. So, my chicken, having been set out a mere three hours before, was still half frozen by the time I went to cook it. I tried to rectify this by massaging it under hot water from the faucet. (Apparently, according to the USDA, both of these methods are unsafe and one should only defrost their chicken in the refrigerator, cold water, or the microwave. Oops. Still alive.) I moved on to the microwave. I basically just started hitting buttons (like “Defrost” and “Chicken” and “Yes”) until it started working. But, if your microwave doesn’t have a defrost setting, two minute increments on 50% power would probably be an okay choice—then again, remember how many times I’ve cooked chicken in my life and take my advice at your own risk.

Start with your chicken on your cutting board…

  1. Pound the chicken breasts to an even thickness with the handle or flat of a knife.

Okay, I forgot to do this but, to ensure even cooking, this would probably be a good thing to do. If there is any excess fat (the white stuff) on your chicken breasts, feel free to trim it off.

  1. Lightly salt and pepper the chicken breasts.

Don’t be like me and touch your salt and pepper shakers with your raw chicken covered hands—attempting to wash them is not as fun as it sounds.

  1. Mix about a half teaspoon of salt in with the flour along with a little pepper. Chop the herbs finely, if using, and mix in as well.

Mix this flour mixture on one of your three plates. The other two are for your chicken—one for raw, one for cooked. I didn’t measure but be careful not to pour too much flour, anything you don’t use will be thrown out. Having just salted and peppered my chicken, I didn’t bother to mix in any salt and pepper (and my chicken still passed a taste test) but to each their own. As I stated above, I skipped the herbs.

  1. Quickly dredge the chicken breasts in the flour, so that they are just lightly dusted with flour.

I don’t know why this has to be done “quickly.” I took my time. Take your breasts and dunk each side in the flour. I scooped even more flour on top and gave it a good pat to make sure they were really covered.

  1. Heat the sauté pan over medium-high heat. When it is quite hot, add the olive oil and butter. Let them melt, and swirl the pan.

  1. Turn the heat to medium. Add the chicken breasts. Cook for just about 1 minute to help them get a little golden on one side (you are not actually searing or browning them). Then flip each chicken breast over.

“Turn the heat to medium.” Oops. So, being unable to read, I kept my heat on high and was assaulted by crackling oil. But my chicken still turned out fine. (I can’t say the same for my blackened pan.) Being paranoid of salmonella, I didn’t follow the one minute rule. Instead, I waited until each side was golden brown (more golden than brown).

  1. Turn the heat to low. Put the lid on the pan. Set a timer for 10 minutes, and walk away. Do not lift the lid. Do not peek.

My feelings on this: “Whaaaa? No peeking??? Like none—zero? But, what if I want to make sure it’s working? Ugh.”

  1. After 10 minutes have elapsed, turn off the heat. Reset the timer for 10 minutes and leave the chicken breasts in the pan. Again, do not lift the lid. Do not peek.

“STILL!? Sigh, fine.” When it comes to cooking, trust is not something I do well.

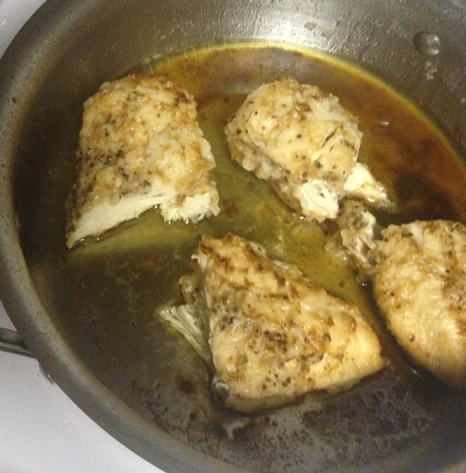
  1. After the 10 minutes are up, take the lid off, and tada! Soft, tender, juicy chicken breasts that aren’t dried out in the least. Doublecheck them to make sure there is no pink in the middle. Slice and eat.

“OMFG IT ACTUALLY WORKED!” Tender, soft, juicy, NOT PINK, tasty chicken breasts. I sliced each breast in half and served.

Pro Cleaning Tip (From someone more Pro than me):

If you’re like me and burned the shit out of your pan, try out the following technique I recently learned from a friend:

  1. Make sure you drain any excess oil and then put the pan back on the burner, on high heat, and wait a minute until it gets hot (or just do this right after you are done cooking).

  2. Put the pot under running water, angling the pot AWAY FROM YOU, and scrub with a long-handed scrubby brush (not a sponge). Don’t be alarmed if the oils in the pan crackle and steam when they hit the water.

  3. Scrub, scrub, scrub.

  4. All clean!

This is part of The UE Review series.

ChickenSquare

Photo by Anastasia Heuer