Category Archives: Food

Let’s Ask: A Nutritionist About Beans, Hangovers, And Misadventures With Whey

Nutritionist and registered dietitian Emily Bostrom and her cousin Alyssa Kurtzman share a healthy obsession with food, a set of grandparents, and many nutrition-related conversations, often late at night via G-Chat or anxious text message exchange. They sat down together to discuss…

Heavy Cream vs. Half & Half

Alyssa: Last weekend, I followed this Jacques Pepin recipe for a butternut squash gratin, except I used half and half because I couldn’t bring myself to use heavy cream. And it came out all weird and curdle-y! Why did the cream not mesh into the gratin like restaurant gratins? And what was that liquid in the bottom of the pan? Was the gratin safe to eat? And by that I mean I still ate all of it. And am I going to die now.

Emily: First things first—I believe that it was very safe to eat (as long as it didn’t sit out on your counter between 40° and 140° F for more than two hours). Also, since you’re not reporting any awful symptoms, I’m guessing it sat pretty well.

So, there are few things to consider when making a dish that relies on heavy cream. First of all, should you really be cutting calories when you’re making a seasonal dish you only make once a year? (I personally don’t believe in “diet” holiday food.) So my first recommendation would be to eat a salad for lunch, and use heavy cream in the recipe. Now, as a dietitian, I too experience the guilt associated with even entering the heavy cream section of the dairy refrigerator. Too often, when I buy ingredients like heavy cream or boxed macaroni and cheese–

Alyssa: Judge.

Emily: It’s ORGANIC, okay; I race out of the store before the food police can find me and take away my credentials. But, it’s okay! Go for it. Just don’t eat the leftovers every day after that for a week.

Anyway, back to the curdling issue. When you add heat (like in the oven) or acid (like that salted squash) to milk, you can cause it to separate into its components: curds (solids) and whey (watery liquid you found in the bottom of your pan). Unless you’re making your gratin for Little Miss Muffet, you probably want to prevent this from happening. When you cook milk in this whey *ahem, nutrition joke*, there are a few things that help to keep it from separating, or curdling. First, fat helps milk maintain its texture, so that heavy cream might actually be in that recipe for a reason (those restaurant gratins are so creamy because of the cream). If you’re really motivated to keep the recipe low-fat for some reason, like you’re making this for your grandma with heart disease or it’s the day before your annual lipid panel, then there are a few more ways to improve your gratin’s texture with a lower-fat milk in the recipe.

Starch is another way to improve the final product, so making a roux (flour and fat mixture) can really help that gratin stay creamy and not clumpy. Just add a teaspoon of all-purpose flour for each cup of milk (or half and half) in the recipe. Also, making sure not to rinse the sliced squash (or potatoes, if you’re doing that version) would help maintain that naturally occurring starch for the recipe. Finally, the fresher the milk, the less likely it is to curdle, so hike out to the farm and collect some fresh half and half for your delicious butternut squash gratin. Also, invite me over.

Alyssa: Sorry. I wasn’t kidding about having eaten all of it.

Quest for the Best Bean

Alyssa: I’m pretty sure all beans are healthy, but are some healthier than others? What is the best bean? Come on, we know you know. Stop hiding this information from us.

Emily: Okay, asking me to pick the healthiest bean is like asking a mother to pick her favorite kid! (As an only child, though, I’ve never felt uncomfortable asking this question… I’m sure you’re Aunt W. and Uncle S.’s favorite daughter…)

Alyssa: I am, but when our dog Misha was still alive, they told me it was a toss-up.

Emily: Well, obviously. You could never compete with those giant ears.

As you said, all kinds of beans really are healthy, and have some things in common. Most all beans are rich in fiber, folate and B-vitamins, and many contain iron, which we like. Also, beans are a pretty good source of protein, especially as a meat-free source for our veg friends. Finally, beans (especially dried ones) are cheap, which is important when the fancy free-range, organic, fair-trade, locally grown truffle salt you’re sprinkling on them is $35.00/oz.

But, since you insist on finding out the best bean, I’ll just summarize the benefits of beans into this little chart so you can pick for yourself.

Rich in… Special Feature! Use in…
Black Beans Fiber, Folate, Iron, Magnesium Anthocyanins, an antioxidant that makes them extra heart healthy Salads, Burgers, Soups or dips!
Soy Beans Calcium, Iron,  Potassium 9 Essential Amino Acids! A fantastic plant protein. Hummus, edamame (steamed) or stir fried
Chick Peas Fiber, Folate, Potassium, Magnesium The Most Common Legume in the World! Creamy hummus, crunchy and roasted or mixed into warm falafel.
Lima Beans Fiber, Potassium Cultivated to support the Aztec and Incan protein-deficient diet With corn as Succotash or stewed on their own.
Black-Eyed Peas Fiber, Magnesium, Zinc A symbol of good luck in the new year! In fritters, stews, salads and with rice.

[Source: Eat Right]

A Holiday Party Hangover Cure

Alyssa: Holiday party hangover cure: go.

Emily: Okay, honestly, what is every company’s deal with holiday parties on weekdays? Is it to ensure that nothing gets done the next day at work? To make people feel less comfortable drinking liberally off the company tab? Whatever the reason, I just don’t like it. Weeknights are for cleaning your bathroom and eating sensibly and watching the last three episodes of the Real Housewives of Beverly Hills.  Everyone knows that.

Alyssa: Apparently one of the new cast members is a witch, btw???

Emily: Where do they find these people?! Anyway, since companies insist on weeknight party time, here are a few evidence-based ways to get your ass to work the next morning:

  1. Much of that miserable morning is due to dehydration and electrolyte imbalance. So the first, most obvious hangover fix is something liquid with electrolytes, plus a little bit of sugar to get those much needed electrolytes into our tissues. What’s rich in electrolytes and fluid? Coconut water, watered-down Gatorade or Powerade (these sports drinks have just more sugar than we need), or a little bit of 100% orange juice should do the trick, and then just transition to water. Hydrate ‘til you just can’t stand getting up from your desk to pee anymore, and then you’ll know that you’ve done a good job.
  2. A cup of a caffeinated beverage can really make you feel more alert, and research shows that it can help improve your recovery after a long night of eggnog. Contrary to popular belief (including supporters like my mom and Dr. Oz), the research shows that 400mg of caffeine or less per day has no effect on your hydration. That means that about 3 cups of coffee are hydrating rather than dehydrating. Good news for those of us who are rolling into work twenty minutes late with last night’s mascara on.
  3. So, here’s a fun one: asparagus. Maybe the party had asparagus wrapped in prosciutto as hors d’oeuvres, and there are some left in the office fridge! That’s a double whammy with the salty ham (electrolytes!) and enzymes found in asparagus that have been shown to speed up the processing of alcohol in our bodies. SO, munch on some of my absolute-favorite-vegetables-of-all-time and feel fantastic!

Alyssa: Up top.

Emily Bostrom, RD, is a Registered Dietitian with degrees from Rutgers University and the University of Medicine and Dentistry of New Jersey, who eats, cooks and thinks about food. You can also find her singing loudly in the car and at http://www.emilybostrom.com/

Alyssa Kurtzman is a Content Manager at @CLIPTAMATIC and works on the UE social media staff. Life mantra: It’s never too hot for soup. @KURTZMANIA
Photo by Meaghan Morrison

Photo by Meaghan Morrison

The Five Day Holiday Cocktail Challenge

The last time UE did a cocktail challenge, we enforced one simple rule: cocktails could use only the ingredients in my fridge at the start of the challenge. Otherwise it wouldn’t be a challenge, now would it?

So, this time around, the same rules apply. However, those who know me are aware that I’m a pretty savvy seasonal grocery shopper (if not an excessive one), so I already had a lot of super useful, whimsical Fall- and Winter-themed goodies in my kitchen. And, when I say I put pumpkin pie spice in everything… I. Mean. Everything.

Obviously, I was made for this challenge.

Five-holiday-cocktails

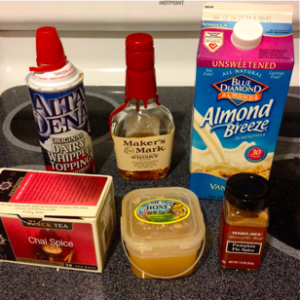
Here are the items I had to work with:

  • Pumpkin Pie Spice – This combines cinnamon, ginger, allspice, and nutmeg, which a lot of these types of recipes call for. Autumnal spice catch-all for the win!
  • Black Chai Tea Bags
  • Trader Joe’s Pear Cinnamon Cider – The most yum: get off the computer and go buy some immediately, it’s seasonal!
  • About a dozen hard peppermint candies
  • Unsweetened Vanilla Almond Milk – You can substitute with regular milk if that’s your jam! It’s just what I had in my fridge.
  • Cran-Raspberry Juice
  • Pumpkin Spice Coffee Creamer
  • Whipped Cream
  • Vanilla Extract
  • Honey
  • Kahlua
  • Vodka
  • Rum
  • Whisky
  • Red wine
  • Oranges


DAY ONE: The Pumpkin Spice Russian

The Dude’s weapon of choice, The White Russian, all gussied up for the holidays. My original intention was to create a Pumpkin Spice Latte Shot, but soon realized that, much like a traditional PSL, it was a drink best consumed in joyful little sips instead of one fat swig. However, you could definitely still make these as shots if you left out the milk! You’d just combine the Kahlua, rum, and pumpkin spice coffee creamer and pour into shot glasses.

Day One: Ingredients

Day One: Ingredients

Day One: Drink

Day One: Drink

INGREDIENTS:

  • 1 Part Kahlua
  • 1 Part Rum *
  • 2 Parts Almond Milk (or regular milk)
  • 1 Part Pumpkin Spice Coffee-mate
  • A dash of Pumpkin Pie Spice to sprinkle on top

* I realize that White Russians are typically made with vodka instead of rum, but I had a non-vodka drinker in my midst that night so I had to accommodate. It tasted great with rum though!

As with most of the drinks on this list, I would recommend garnishing this with a cinnamon stick! I just didn’t have any in the house (gasp). I know. I know.

DAY TWO: Hard Cinnamon Pear Cider

I bow down to you, simplest and tastiest of treats! Seriously, emphasis on simple. As long as you have a quality apple or pear cider on hand and some booze, you can whip up a pot of this sweet, spicy goodness in about five minutes if you suddenly decide to invite a group of SantaCon participants in from the cold.

Day Two: Ingredients

Day Two: Ingredients

Day Two: Drink

Day Two: Drink – Winter is Coming? Pssh, Winter is HERE. Just ask Snoopy.

INGREDIENTS (serves about four people, modify proportionally to please your crowd):

  • 6 Cups Pear Cinnamon Cider (or apple cider, if you prefer)
  • 1 Tablespoon Pumpkin Pie Spice
  • 1 Cup of Rum – I’d love to try this with spiced rum someday too. Hint hint, use that if you have it!
  • ½ of a navel orange, cut into quarters with the peel on

Combine the ingredients in a pot and simmer on the stove until warm (but be careful not to overboil it!). Ladle into mugs and drink heavily. Charlie Brown Christmas soundtrack is optional, but highly recommended.

P.S. This is another one that could be made all-the-more-wonderful with a cinnamon stick garnish!

DAY THREE: The Peppermintini

Okay, so here’s the only one on this list that didn’t turn out quite the way I expected. I think it could have been improved with a scoop of vanilla or peppermint ice cream, thrown into a blender. It was missing this very specific chilly, minty creaminess. I think the primary issue here was that my fancy-pants were on a little bit too tight; I tried too hard to do something complex. But I’d love to see if anybody out in Readerland can adjust some things and make this drink sing!

Day Three: Ingredients

Day Three: Ingredients

Day Three: Drink

Day Three: Drink

INGREDIENTS:

  • 6 Peppermint Candies (or one candy cane), crushed
  • 1 Part Chilled Vanilla Vodka*
  • 2 Parts Vanilla Almond Milk (or regular milk)
  • 1 Part Simple Syrup (combine boiling water and sugar)
  • Whipped cream

* I did not have vanilla vodka, so I combined two teaspoons of vanilla extract with the regular vodka. It tasted pretty normal! I should also mention that I did a lot of research on infusing spirits to prepare for this article. It would have taken too long so I skipped it, but it was fun to learn about. Maybe next time!

Create the simple syrup in a small saucepan by combining the sugar and water. Bring the mixture to a boil then immediately crank down the heat and let it simmer for 5-7 minutes. Add half of the crushed peppermint candies to the simple syrup and let it melt. It will turn a fun pink color. Go with it. Let it cool for about 30 minutes. Stick in the fridge if you want.

If you have a martini shaker, combine the vodka, simple syrup, and almond milk and shake it up. If you don’t have one, that’s okay. You can just use a big, tall juice glass and mix it together vigorously with a whisk or a fork. Then, rim your martini glass with the rest of the crushed peppermints. To do this, wet the rim of the glass with water and then crush the rim in a circular motion against the mints till you have a nice coating.

Then, pour the ingredients into the glass, squirt on a little whipped cream, and top with any remaining crushed peppermints.

DAY FOUR: Chai Hot Toddies

This one won the battle. Took home the gold. Et cetera. This drink is awesome because you can whip it up on any chilly day; it doesn’t even have to be the holiday season! A dear old friend of mine sent me a link to a similar recipe not long ago (please note how adorably this blogger incorporated cinnamon sticks!). I modified it to accommodate the ingredients I already had (which as we know by now, shamefully did not include cinnamon sticks). I definitely downed two of these in one sitting. Too, too good.

Day Four: Ingredients

Day Four: Ingredients

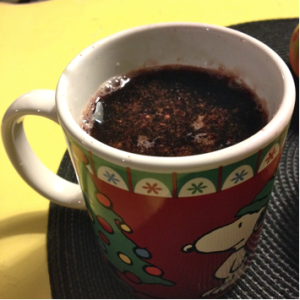
Day Four: Drink

Day Four: Drink

INGREDIENTS:

  • 1 Bag of Black Chai Tea per Mug
  • Boiling water
  • 3-4 Tablespoons Almond Milk (again, or regular milk!)
  • 1 Tablespoon Honey
  • 1-2 Shots of Whisky
  • Whipped Cream
  • A Dash of Pumpkin Pie Spice

Steep your Chai tea in hot water to the level of intensity you prefer for tea (longer = stronger). I tend to like my Chai very spicy and bold, so I let it sit for a solid 3-5 minutes. Then, add the honey, whisky, and milk to taste. Top with a dollop of whipped cream and your new BFF, pumpkin pie spice.

Day Five: Mulled Wine

Hey, so like… what even are mulling spices? Are they just a thing Williams Sonoma sells during the holidays every year as a stocking-stuffer-slash-last-minute-gift for your awesome wine-o big sister? (Nudge nudge, little sib!) I decided I’d find out what mulling spices actually consisted of. And you know what? They’re very similar to pumpkin pie spice. So while my mulling spices weren’t nearly as fancy as the ones Williams Sonoma sells, I saved $25 (or whoever got my letter to Santa this year).

Day Five: Ingredients

Day Five: Ingredients

Day Five: Drink

Day Five: Drink

INGREDIENTS (serves about 4-5 people):

  • 1 Bottle of Red Wine – I used a budget-friendly Pinot Noir for this exercise. Mulled wine is a great way to drink that cheapo red you’ve got sitting on your shelf—aside from, y’know, just drinking it.
  • 2 Tablespoons Honey
  • 3-4 Cups of Cran-Raspberry Juice (to taste)
  • 1-2 Tablespoons Pumpkin Pie Spice (again, to taste) – Add more if you like a spicier drink.
  • Suggestion – Orange peels simmered in the pot and cinnamon sticks for garnish

Combine the red wine and cran-raspberry juice in a large pot, set it on medium heat for about 10-15 minutes and allow it to simmer. It’s not a good idea to let this boil because of all the sugar! If you have oranges, I highly recommend adding peels or small slices to the mixture and letting them sit in the pot. Add the honey and stir in the pumpkin pie spice. Ladle into mugs once it’s at a nice, cozy temperature.

Let us know in the comments if you tried any of these and how they turned out! Our cocktail challenges are always open to interpretation.

Have a Happy Merry!

The 21 Day Sugar Detox

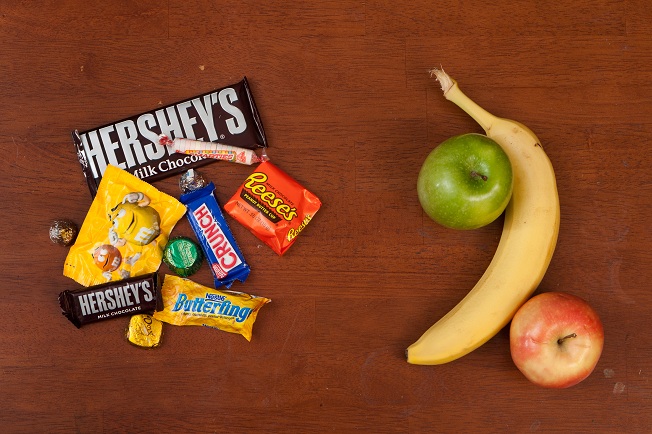
When I try to explain my relationship with sugar, I tend to refer to it as that ex who is  just no good for me. Once I finally saw past the sweet, candy-coated, emptiness of the calories I was consuming, all that was left was how lethargic, heavy, and stuffed I felt. So finally I declared, “That’s it, Sugar, you’re not good for me” and I cut him out of my life. I un-friended him on Facebook and I even bought a vegetable slicer—because, hell, I’m replacing all those noodles with zucchini spaghetti. And for a while, I’m good. I feel more energized, more focused, I sleep better, and I breathe better. It’s awesome.

Photo by Andy Sutterfield

Photo by Andy Sutterfield

But then Sugar comes back around and he’s like, “Hey girl, I heard you were having a party… I brought you those brownies with peanut butter cups inside that you love so much.” And I’m all, “Nope, I don’t do sugar anymore.”

But as the night wanes, I tell myself, “Well, just a taste of this peanut butter cup brownie won’t hurt.” It’s comfortable and familiar and it makes me feel good. Before I know it, the love affair is back on, full throttle, and all I want is pad thai and pizza dough. For who understands me, knows me, and never judges me like a slice of apple spice pound cake?

It’s an unsustainable relationship. And Sugar and I will mend ways and break up, I fear, many more times before I’ve really wrapped my head around how much better I feel without him.

I won’t bore you with the oh-so-bitter details of why sugar is bad for you because you can learn more about them here, here and here. Be warned, there is definitely a good amount of fear mongering out there when it comes to sugar and gluten intake, but it’s important to know the facts about the negative impact that sugar has on our bodies and also be aware that, as with anything, excess consumption is bound to have negative repercussions. Excessive sugar intake has been linked to diabetes, obesity, high cholesterol, heart disease, eczema, and gum disease. Not to mention that it’s highly addictive.

I’ve never exactly been the picture of healthy eating habits and I never gave much thought to just how much sugar I was consuming—either natural or processed. After all, the bottom of the food pyramid, the category we’re told to consume the most of, is a giant spread of rice, bread, and noodles. So for all intents and purposes, I figured I’d nailed it. Turns out—and you may have guessed this by now—the sugar found in said rice, bread, and noodles is not actually good for us. At all. Which is why I decided to do my first sugar detox.

Here are the rules I followed for my 21-day sugar detox. They’re actually pretty simple!

  1. DON’T eat anything with sugar. All bread/pasta/rice products are out. Baked goods, obviously, are a no. Avoid potatoes, corn, quinoa, and legumes.
  1. DO eat lots of meat, protein, vegetables and anything else you can find that’s high in fat or fiber. Nuts are great, and so are eggs. Get creative, or don’t, but stick to the rules.

Depending on what level of the detox you commit to (i.e. how many allowances you intend to make for yourself), sweet potatoes are on the sometimes list. So are green bananas. Both of these guys are definitely sugary in their own natural way, but far less so than regular potatoes and ripe bananas. It’s recommended that you incorporate one serving daily of either of these if you work out regularly.

It’s also important to buy meat and eggs that are organic and grass fed, since so many chickens and cows are corn-fed and grain-fed it means that if they’re consuming it, when you eat them, you are too. You’ll also get to avoid a world of hormones, growth promoters and antibiotics that so often wind up in the meat we eat.

Part of this process is about keeping your blood sugar levels as even as possible. Therefore, if you’re going to partake in dairy products during this detox, you should stick to whole-fat dairy because your body processes non-fat and reduced fat dairy in the same way it processes any kind of sugar: it will lead to crazy blood sugar spiking of the unwanted variety.

With this knowledge and a vague plan, I set off for Whole Paycheck Whole Foods to get my high-protein / high-fat / gluten-free on. Now, the key to success for any detox is utter and total preparation. Boil some eggs, bag some almonds and keep that ish on you all the time. Especially at first. That’s my best and most prominent piece of advice—be ready to feed yourself something high in protein and sugarfree at the drop of a hat.

Another trick that helps a lot is to find ways to replace what you’re cutting out. If you’re like me and live on a steady diet of noodles and sauce, crack open a spaghetti squash, or get a julienne peeler and make noodles out of sweet potatoes or zucchini. If you’re all about those Yukon gold mashed potatoes, make your best cauliflower mash with garlic and butter. Before you know it, you will forget you’re only eating vegetables.

Make some treats for yourself. There are hundreds dozens of gluten, sugar, and dairy-free baked goods online that turn out to have a real natural flavor and a deeply satisfying texture. Take this from someone who spent a whole Saturday during my first detox just looking at bread recipes online. Do yourself a favor and make some imitation bread.

Another tip: drink water. Drink all the water. Put lemon in it, steep tea in it, put it on ice and drink it all day long. It’ll wash the toxins out of your body, stave off cravings, and generally make you feel more awesome.

There will probably be some side effects, not unlike anything you’ve felt if you’ve ever tried to give up coffee. You might feel achy, you might have headaches, and there’s a pretty good chance that your body will revolt a little bit. You may discover midway through your detox that when you need to use the restroom, there’s a sense of—erm—urgency, if you will. That tummy ache you’re feeling is Candida die-off. Candida is a fungus that lives happily and symbiotically in your small intestines so long as we keep feeding it sugar. Stop feeding it and, well, it’s going to die. And that can be kind of unpleasant. (Sorry.)

After about 7 days of the detox, a really magical thing happened for me. My sinuses opened completely. For as long as I can remember, I’ve suffered from what the fancy medical professionals refer to as sinusitis. It’s a chronic inflammation of the nasal cavity, which makes breathing through my nose a non-starter. It can also cause a lot of sinus pressure headaches. As it is, sugar, gluten, legumes, and dairy are all inflammatories, and when I cut them out of my diet my sinuses became less inflamed and I could breathe through my nose. It was amazing.

For me, that was the health benefit that sealed the deal. A lot of people I know now who detox from sugar do it to lose weight, feel less bloated, and because it makes them healthier. It will help you achieve all of those things, and a lot of people experience benefits that far surpass the basics. Some people with minor gluten intolerances discover that rashes and acne clear up, and that they end up needing less sleep.

You will also find that after 21 days, that brownie sundae won’t look so tempting. Your body will have adjusted so wholly that you’ll think it’s too sweet. You’ll have a new appreciation for the natural sweetness of foods like grapes, sweet potatoes and bananas: healthy sugars that you can gradually reintroduce to your diet. There’s a lot of winning to be had.

So then, day 22 rolls around and you’re probably wondering what happens next. You’ve stabilized your blood sugar, reacclimated your taste buds to life’s natural sweetness, and you’ve even killed off that funky bacterium that was living in your intestines. Sure, now you can start to reintroduce natural sugars back to your diet, like fruit, and well… fruit. So it’s totally smooth sailing from here on out right? That depends. If you have also completed the detox you may have discovered that sugar is literally in everything. Ketchup, and buffalo chicken wings, and taco shells.  So it gets pretty tough to avoid. I’m willing to guess that even the most diligent among us (a group that does not include myself) struggle to truly steer clear of sugar long-term.

Yes, that means I fall off the wagon. It means my cheat days turn into cheat months where I fall several paces behind the wagon, sipping pumpkin spice lattes and eating Nutella crepes. It happens often enough, but I can tell you my body has not let me forget the benefits sugar-free eating. I can’t get halfway through a plate of pasta before I can feel my sinuses begin to close. So I try to go easy and be fair on myself when “just this one peanut butter cup” turns into all the french fries at In ‘N’ Out. I try to avoid bread and pasta and potatoes and for the most part I succeed. Everything else I try to keep attainable: I’m not a stickler about sauces or cheeses, and I have reintegrated beans and rice into my diet. The goal is to improve quality of life after all.

There’s little else that the heart of a carboholic like myself wants more than a big pile of noodles, covered in cheese, topped with breadcrumbs, wrapped in a sourdough bowl. Followed by a brownie, covered in cake. (Duh.) So take it to heart when I say that, although the 21 Day Sugar Detox was probably one of the most challenging things I’ve ever done for myself, it’s absolutely been one of the best things and I’d do it again.

Here’s the link to the full program for those of you eager to give this a go yourselves.

Food on the Cheap

Once upon a time, I made a rash, but good, decision. I decided that I really wanted to live near my university instead of commuting four hours every day. But, I also knew that getting a job there would be hard without a local address. So, I did the fairly irrational thing: I moved there without having a job lined up. I had enough savings to pay my rent for a few months—except, oops, I totally forgot to budget for the other costs of living! Like food.

Photo by Sara Slattery

Photo by Sara Slattery

Food is kind of a big deal so I did some research, looked at basic nutrition, and then bought what was the cheapest. This was not at the “nice” grocery store with the nut bar and open bins of nutritional yeast and gluten-free oatmeal. This was at Grocery Outlet or Food Maxx. This was the “ethnic” Mexican, Vietnamese, or Indian market. This was the last half hour of the farmer’s market when the person behind the table wants to get rid of the last bag of oranges.

I took a notebook with me and, over a couple of shopping trips, saw what was cheapest and weighed that against my personal needs. For example, I find large grocery stores very overwhelming, so I get some stuff at Trader Joe’s that is the same price almost everywhere: milk, eggs, butter, bread, frozen vegetables—even organics, if I wanted them. I’m not including prices because they vary widely, and the best thing to do is compare prices at whatever is local to you!

In an attempt to balance my nutrition, I tried to have a carb, protein, and vegetable or fruit with every meal. For breakfast: hot rice pudding and fruit, or toast and an egg with frozen sautéed spinach, or just some oatmeal and brown sugar if I was feeling especially lazy. The oatmeal packets at the store are ridiculously easy to recreate. Lunch or dinner was maybe Spanish rice (rice, spices, canned tomatoes) and bean tacos, lentil and rice soup, black bean burgers, homemade French fries, pudlas, or stir-fry.

The Staples for a Cheap Kitchen

When I was living on the cheap, I filled my pantry with basic staples in bulk because they will spoil the slowest!
  • Dry rice
  • Dry lentils
  • Dry beans
  • Other dried goods (oats, bulgur, etc.)
  • Large bagged spices

I found that the following brought a lot more variety into my meals, so I bought as much as half my freezer and cupboards could hold! Discount and bulk stores, for the win!

  • Flour
  • White/Brown Sugar
  • Pasta
  • Potatoes
  • Frozen, dried or canned fruit and vegetables
  • Olive oil for cooking
  • Bouillon Cubes
  • Tofu
  • Eggs

Since we all have our own preferences and dietary restrictions, don’t feel limited because you can’t follow my examples above.  There are a lot of cheap alternatives for you to consider when stocking your own cheap kitchen:

  • Bulk Tea (instead of soda)
  • Corn Tortillas (instead of flour tortillas)
  • Bread ($2 for 12 servings!)
  • Fresh vegetables (when in season!)
  • Coffee (because everything is cheaper than Starbucks)
  • Mozzarella and Feta (the cheapest cheese I’ve seen)
  • Bacon Ends or Ham Hocks (great for flavoring soups and stews)
  • Meat and Fish on sale (throw it in the freezer if it is about to expire!)

Did you notice what’s not on here? I considered dairy, meat, and pre-processed foods “special items” because, when comparing price-per-ounce, they were way more expensive than other protein and carb sources like beans, rice, flour, and frozen/canned produce. Except for the occasional cheese wedge or free pizza, I didn’t see a lot of meat or dairy. It’s weird, but I was so into making affordable stuff actually taste good that I didn’t even miss meat. The key to cooking deliciously on the cheap is spices, spices, spices. I experimented with what I liked and started to add it to everything!

All this dried food requires a lot of cooking. I learned that it’s best to soak beans overnight to soften them, lessen gastrointestinal issues, and decrease cooking time! I just put some beans in a bowl, cover with water, and let them sit overnight. The next day, simmer until soft. I then discovered that it’s prudent to invest in a rice cooker if you like rice, and a crockpot if you hate standing over a stove. These meals usually come out to be cheaper per serving than frozen or boxed meals, and way more nutritious. It makes sense to try to safeguard your health when you can, because hospital bills in the future are definitely not frugal!

If you do like farmers’ markets, vendors usually lower their prices or are much more willing to haggle during the last half hour. They often don’t have long-term storage for their produce, so it’s better for them to get rid of it before it spoils. If you can pick from multiple markets, try them all, especially the ones in the less swanky parts of town: honestly, I’ve found the prices are much better there. I’ve seen the same vendors at multiple locations, and their lowest prices are usually in cities and more working-class parts of town, not the suburbs or the ladies-who-brunch neighborhoods.

I hope this article gives you some insight into eating cheaply without resorting to McDonald’s and Top Ramen! Some great resources with tips and recipes I’ve found include Budget Bytes, Broke Ass Gourmet, and Poor Girl Eats Well. If you’ve got any of your own suggestion, share them in the comments. Bon appétit!

Adventures of an Aspiring Chef: The Produce Challenge

A couple months ago, I wrote an article about figuring out how to cook chicken. Since then, I’ve been challenging myself to become a better chef. This past month, the challenge was to purchase five produce items that I wouldn’t normally buy and figure out how to cook them:

  • a turnip
  • an eggplant
  • a spaghetti squash
  • a bag of Brussels sprouts
  • two pears

Let the games begin.

THE TURNIP

Okay, so first I’ll admit I didn’t cook the turnip. But I tried to! Do you know how hard it is to find good turnip recipes? I wasn’t in the mood for anything in the soup variety, anything involving mashing, or anything remotely close to fries, so I settled on a nice cheesy turnip gratin—which sounded delicious until I realized a modest-sized block of Gruyere cheese (only enough for this one recipe) was $12. Yes, I know good things cost money, but $12 worth of a cheese I don’t even know if I like? Suffice to say, the neglected white and purple ball of guilt is still sitting in my refrigerator… fine, I’ll get some Gruyere at the store tomorrow.

EGGPLANT PARMESAN

I’m pretty sure the only thing I’ve ever eaten with eggplant in it was eggplant parmesan. I figured that was a good place to start. I found  this seemingly easy, highly rated recipe (two criteria I always look for) and got to work.

Ingredients:

AllRecipes.com

What I Used

My Commentary

3 eggplants, peeled & thinly sliced

1 eggplant, sliced

I probably should have peeled the eggplant, but I forgot I owned a vegetable peeler, and peeling without one… not so easy. I also didn’t “thinly” slice my eggplant, but I’ll be better about that next time. The thicker pieces didn’t cook as well and ended up being a bit tough and chewy.

2 eggs, beaten

2 eggs, beaten

I don’t know how this lady thought 2 eggs would cover 3 eggplants. I needed both just to coat my 1 eggplant. In the future, with even thinner slices—meaning more sides to coat—I will probably need 3.

4 cups Italian seasoned bread crumbs

A container of Italian seasoned bread crumbs.

Have enough to use “as needed.”

6 cups spaghetti sauce, divided

A jar of spaghetti sauce.

This is what “divided” means in cooking. I just poured from the jar, again, “as needed.” I ran out of sauce really quickly, though, so I probably should have used 2 jars.

1 (16 ounce) package mozzarella cheese, shredded and divided

A ball of mozzarella that was on sale at Ralph’s.

I think it was 16 ounces…

1/2 cup grated Parmesan cheese, divided

Poured from my Costco jar of pre-grated Parmesan.

Clearly there is an “as needed” trend going on here.

1/2 teaspoon dried basil

Oops.


Directions:

AllRecipes.com

My Commentary

1. Preheat oven to 350°F.

To reduce potential bitterness, the comments suggested sweating the eggplant by sprinkling them with salt, letting them sit for 30 min, rinsing with cold water, and patting dry with a paper towel. I did none of this and did not notice, but I still might try it next time.

2. Dip eggplant slices in egg, then in bread crumbs. Place in a single layer on a baking sheet. Bake in preheated oven for 5 minutes on each side.

Add foil to your baking sheet for easy clean up. Bake for 10 minutes on each side, as suggested by the comments and my own experience.

3. In a 9×13 inch baking dish, spread spaghetti sauce to cover the bottom. Place a layer of eggplant slices in the sauce. Sprinkle with mozzarella and Parmesan cheeses. Repeat with remaining ingredients, ending with the cheeses. Sprinkle basil on top.

I did this until I ran out of sauce. Then I just kept layering eggplant and cheese, it all worked out in the end. Forgot about the basil, which might have been a nice touch.

4. Bake in preheated oven for 35 minutes, or until golden brown.

I had to bake mine for at least 45 minutes and most of the comments suggested something in the 40-60 minute range. Be your own judge of this. Undercooking might lead to tougher eggplant: I wish I had cooked mine even longer.

All in all, this turned out to be a success. I’d do it again with thinner slices and a longer baking time. I ended up serving it by itself with some salad, but next time I’d serve it over some plain spaghetti (which is what I did with the copious leftovers and it was delicious). The breaded eggplant was definitely the best part so now I’ve got big plans to make these breaded eggplant sticks with my next eggplant.

BROWN SUGARED ROASTED BRUSSELS SPROUTS

Emily Knight did a whole piece for UE on the excellence of Brussels sprouts. She also dazzled me with them in person a couple years ago and wrote up the recipe on her blog. I tried to replicate to her success with my bag of Brussels sprouts.

Ingredients:

Directions:

Brussels sprouts

1. Preheat the oven to 400°.

Olive oil

2. Prep the Brussels sprouts by cutting off the icky end bit, slicing them in half, and then rolling them around in a bowl with some olive oil.

Brown sugar

3. Sauté the Brussels sprouts for about 5 minutes with plenty of brown sugar and more oil so they can get soft and sweet.

4. Spread the Brussels sprouts out on a baking tray and cook for 30 minutes.

This seemed so easy that I’m actually impressed that I screwed it up. See, when Emily said “plenty” of brown sugar, I channeled all my childhood memories of horrible boiled Brussels sprouts—and put in a copious amount of brown sugar. So much brown sugar, there was in fact a caramelized liquid to drizzle over the sprouts before I baked them. Sounds like a recipe for awesome, right? Not so much. Unfortunately, and I can’t believe sweets-loving me is saying this, this made them too sweet and not nearly as good as Emily’s. But this will definitely not be the last time I attempt this side dish.

SPAGHETTI SQUASH SPAGHETTI

I’d been intrigued by spaghetti squash since my neighbor first introduced me to it. As a lover of noodles, I’ll admit, I was a little skeptical. But after hearing several friends repeatedly rave about the dish, I was ready to give it a try.

Before you even get to making the spaghetti sauce, you must first “prep” the spaghetti squash:

Directions:

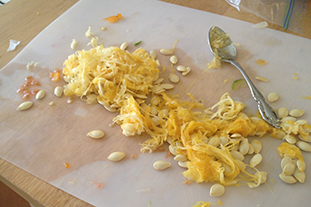
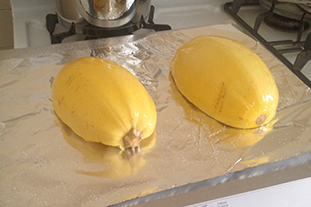
1. Cut the squash in half (AKA hack the shit out of this tough squash until it splits in half).

2. Remove the seeds / pulp. Pumpkin carving flashbacks are optional.

3. Douse with olive oil, salt, and paper and then turn flesh side down on a foil covered baking sheet and cook for 30-40 min at 450°F.

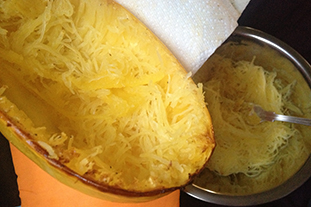
The “spaghetti” comes out like buttah when scraping it with a fork and has the consistency of angel hair noodles. I may have overly enjoyed this step, but noodles are being created from squash, it’s meant to be enjoyed.

Making the Sauce:

Spaghetti is one of the few things I’ve actually been able to cook for years, though it’s really not that hard when you are just cutting up vegetables and stirring in jarred tomato sauce. This time I decided to add ground beef, which I’d only ever cooked once before.

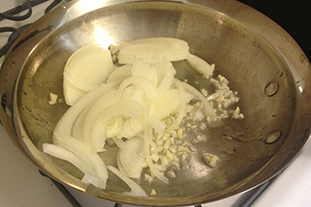
For anyone who, like me, feared ground beef, it’s actually even easier than chicken. I put some olive oil in a frying pan, added the garlic and onion first, gave them a minute or two, and then added the ground beef. Brown the ground beef (until you see no more pink) and add in the zucchini when it’s almost done. Continue cooking until you see no more pink in the meat, then add the jar of sauce. I usually let the whole thing come to a boil and then simmer for a few minutes. But really, you can eat it as soon as it’s hot. I also usually add in the chopped tomatoes last, so they retain some of their original consistency when I serve. Seeing as how I made this entire recipe up, it’s really a use-what-you’ve-got-and-go-with-it situation.

Serve your sauce over your spaghetti squash “noodles.” I added some grated Parmesan cheese and had to salt and pepper my “noodles” a bit more (so I’ll probably add salt and pepper to the squash post–baking-and-forking next time), but otherwise I’d say this was every bit delicious as I had heard. I barely noticed that I was eating squash, in fact, I might have even liked it more than pasta but don’t tell anyone.

FRUIT CRUMBLE

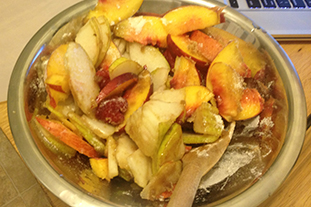
With all the use I’d been giving my oven, I’d yet to bake a dessert in it. This was clearly not okay! I decided to rectify this with my pears and some remnant raspberries I had left in my refrigerator. I Googled pear and raspberry crumble, found this, and went to town.

Ingredients:

CanadianLiving.com

What I Used

My Commentary

FILLING

4 cups sliced peeled pears

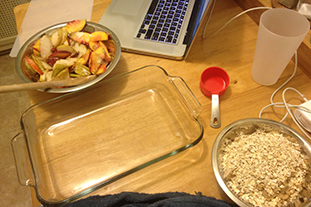
Two sliced, unpeeled, pears

I didn’t even notice the skin, but now that I’ve found my peeler, I might peel next time.

2 cups frozen raspberries

a handful of fresh raspberries

Unfortunately, when I went to get my raspberries, I realized many of them had gone to the other side and I found myself with far fewer than I’d anticipated.

a nectarine

To compensate, I added in a nectarine.

a couple grapes

This is where I went a bit off the rails, but I was bolstered by this grape and pear crisp recipe (and I was still lacking fruit!). You’ve got to work with what you’ve got!

1/3 cup packed brown sugar

1/3 cup packed brown sugar

2 tbsp all-purpose flour

2 tbsp all-purpose flour

1/2 tsp nutmeg

Yeah, I don’t keep nutmeg on hand. Probably should.

TOPPING

3/4 cup all-purpose flour

3/4 cup all-purpose flour

3/4 cup packed brown sugar

3/4 cup packed brown sugar

3/4 cup quick-cooking rolled oats

3/4 cup quick-cooking rolled oats

1/3 cup butter, melted

1/3 cup butter, melted

Melted in the microwave.


Directions:

CanadianLiving.com

My Commentary

1. In large bowl, gently toss together pears, raspberries, brown sugar, flour and nutmeg. Spread in 8-inch square glass baking dish.

I did this with my fruit additions and omitted the nutmeg.

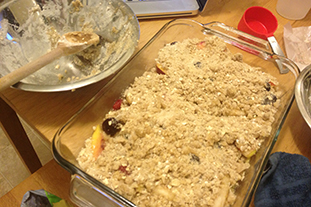
2. In separate bowl, stir together flour, brown sugar and rolled oats. Drizzle with butter; stir until crumbly. Sprinkle over fruit.

3. Bake in 350°F oven until golden and bubbly and fruit is tender, 45 to 60 minutes.

Watch one episode of Breaking Bad, then eat.

I served this warm with some whipped cream and had to hold myself back from going for seconds.


Cooking used to be so daunting to me but when I remind myself of these simple rules/guidelines, it’s just another tasty challenge:

More Meals = More Practice

Make dinner every night. Even when I don’t feel like it, I cook. By doing this I learned (1) cooking is not nearly as hard as I thought it was, (2) it is possible to do it both well and quickly, and (3) it’s a great, fun way to switch gears after a long day even if it feels like a chore when you first start.

Improvise AKA Get Creative

Don’t make cooking harder than it needs to be, follow the instructions, but don’t be afraid to switch ingredients or adapt recipes to your equipment/time/skill level. I usually combine several recipes and look closely at reviewers comments and see what their experience was like.

Don’t Skimp on Essentials

Substituting and improvising can be a wonderful adventure, but skimping on essentials like oil, butter, eggs, milk and cream can severely effect the taste of a meal (and not in a good way). If it says it wants A WHOLE CUP OF ACTUAL BUTTER, put in a damn cup of ACTUAL butter!  Not margarine, not half a cup, not anything else. I could start linking to all the articles and arguments about butter being better for you than all of its substitutes but I’m going to go with this line from Michael Pollan: “Eat food, not food products.” Or this line from me: “It tastes so much better.” Eat in moderation, exercise, be smart, and put down all the junk food before you blame butter.

Leftovers are your friend

Always make enough to take for lunch the next day and, if possible, even more to keep in the freezer. If you don’t eat it for lunch, it can be there for another dinner. There’s nothing better than coming home from a long day and turning some frozen leftovers into a new 15 minute meal.

The Five Day Summer Cocktail Challenge

This whole experiment had but one simple catalyst: for the first time ever, I have a pool. It is summertime and I have a pool!

This has never happened before, and as a result there have been a lot of impromptu instances of, “Hey come over, and let’s sit by the pool and drink!” But there are only so many bottles of “Pinot Greeg” one can chill at a moment’s notice, so I decided that, for five days, I would create a new summer cocktail each evening using only the ingredients I currently had in my fridge and liquor cabinet.

Five summer cocktails

Here is a rough list of the items I had to work with:

  • Lemonade
  • Orange juice
  • Frozen raspberries and strawberries
  • Black Cherries
  • Lime Sparkling Water
  • Cranberry-Raspberry juice
  • Rum
  • Tequila
  • Whisky
  • 1/4 a bottle of margarita mix
  • White Wine
  • Rosé Wine
  • Fresh basil
  • Cucumbers
  • Honey

And here are the results!

Sidenote: I tend to like my drinks on the stronger side. If you are of the lighter persuasion, you may want to cut the alcohol ratios in half or double the juice ratio. Whatever you fancy!

DAY ONE

Named after my dear friends who once made me a very similar cocktail on a sweltering New York day in August, I call this sweet thang The Brosman-Keach.

1

Day One: Ingredients

2

Day One: Drink

INGREDIENTS:

  • lemonade
  • whisky
  • frozen raspberries (keep them frozen, like juicy little ice cubes!)

Add ingredients in no particular order. I don’t typically do exact measurements, but this is pretty much 1 part whisky per every 2 parts lemonade. Mix to taste, however, if you like yours stronger. Serve in a glass on the rocks.

Simple, tangy, and super refreshing. The best part is the syrupy, boozy raspberry juice at the bottom once you finish it!

DAY TWO

My basil plant had basically begun to commit seppuku in this 100+ degree heat, so I thought it best to utilize it in a drink before it passed on to herb heaven. (Confession: even sans global warning, I still kill all my houseplants.)  The result? Frozen Boozy Basil Lemonade.

3

Day Two: Ingredients

4

Day Two: Drink

INGREDIENTS:

  • lemonade
  • tequila
  • 4-5 basil leaves
  • ice
  • 1 slice of cucumber for garnish

Blend 2 parts lemonade for every 1 part tequila with the basil leaves and the ice and serve frozen, garnished with the cucumber.

Much like a mojito, a little kick from a fresh herb goes a long way! The only stumbling block I encountered here was that the drink and the crushed ice did not want to be friends. They just kept separating, as indicated in the photo above. This can be alleviated, however, by just drinking it right away!

DAY THREE

I thought I’d make my poolside go-to work overtime and give me a little sangria action. The result? Triple Berry Threat White Sangria, baby.

5

Day Three: Ingredients

6

Day Three: Drink

INGREDIENTS:

  • frozen raspberries and strawberries (again, keep ‘em frozen so they melt in the drink!)
  • fresh black cherries (pitted and cut in half)
  • 2 parts chilled white wine (I used pinot grigio here)
  • 1 part rum
  • a splash of OJ
  • a splash of lime sparkling water.

Pour liquids over berries.

Addendum: As I was drinking this one, I realized it could do with a little simple syrup, as it’s quite sour! Since I didn’t have any simple syrup (i.e. I was too lazy to make it myself in that moment), I decided to get a little sassy and improvised with a drizzle of honey on top. You may want to do the same if it’s too tangy for you!

DAY FOUR

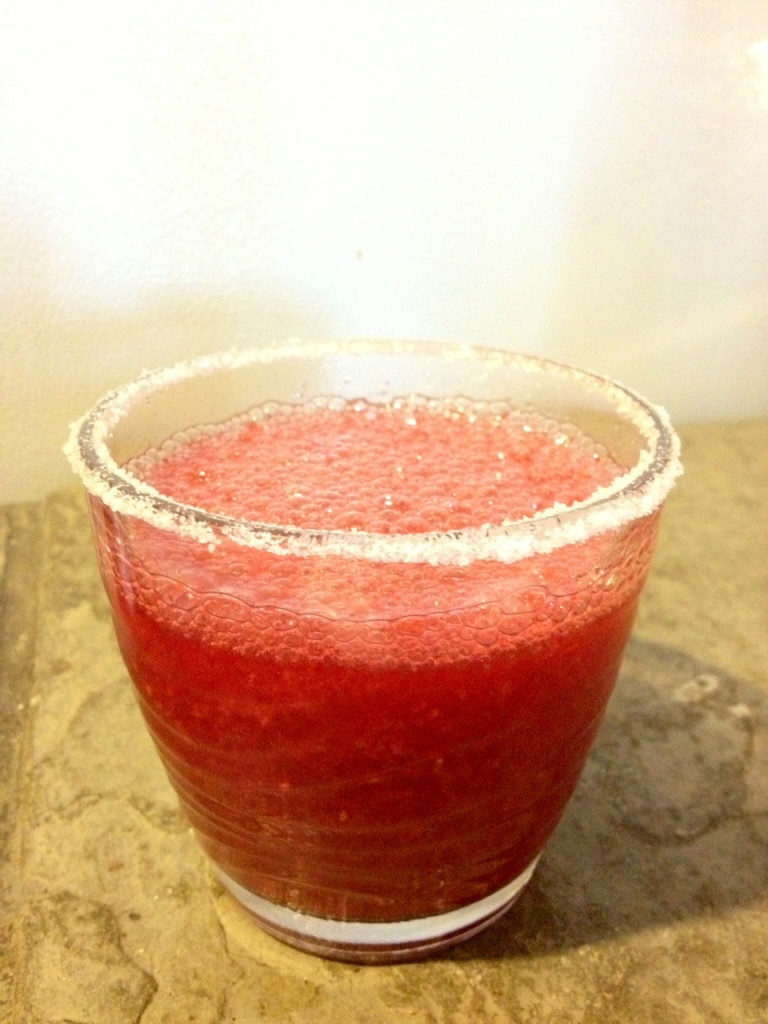
I’m convinced that I got progressively better (and drunker) at this game with each passing day, so I am telling you right now that these last two drinks are definitely my MVPs. This bad boy here was borne of a need for twice as much margarita mix as I currently had in my liquor cabinet. Necessity, the mother of invention, would like to introduce you to… The Cran-Razarita!

7

Day Four: Ingredients

8

Day Four: Drink

INGREDIENTS:

  • 1 part Tequila per every 2 parts cran-raspberry juice
  • a splash of margarita mix
  • frozen raspberries (yes, as before, keep them frozen!)
  • ice

Blend the above, serve frozen, and rim with salt (if that’s your jam). Or, however you usually like your margaritas!

I’ll bet they didn’t think of this on that episode of Mad Men where they’re trying all the different Ocean Spray flavors!

DAY FIVE

I really don’t like rosé wine. Every time I buy it, I think I’m just craving a change in my world that manifests itself in a weird wine choice instead of a healthy life choice.

Point being, I did that. I bought rosé wine recently. But as luck would have it, I finally figured out what to do with it! It was pretty much destiny in the form of … Hard Cherry Lemonade!

9

Day Five: Ingredients

10

Day Five: Drink

INGREDIENTS:

  • 2 parts Rosé or white zinfandel wine
  • 1 part rum
  • 1 part lemonade
  • a handful of black cherries (cut in half and pitted)

Some of you Los Angeles–dwelling vino aficionados might recognize the Malibu Wines shoutout on the glass here: apropos for the girliest drink on the menu. And yes, although this is the girliest drink, it is also probably the strongest! Drink slowly! Or don’t. :)

How to Order Meat & Eggs

Confession—I love meat, but I don’t eat beef. However, my street cred in understanding meat comes from dating ardent beef-eaters (I grew up in the Midwest, y’all), much to the dismay of my Hindu mother.

Photo by Sara Slattery

Recently, I dated a gentleman who was well-versed in beef and beer. Dinner conversations generally involved the words yeast, fermentation, and rare, which in hindsight points to signs that we were probably destined to break up.

So, while the only beefeater I prefer is gin, I will thank my relationships for imparting some worldly knowledge. I’ve eaten dinner with enough weirdoes to learn my restaurant etiquette, so you don’t have to!

Here’s my breakdown on the different ways to order steak and eggs (my specialty!) at a restaurant, without looking like a complete vegetarian.

STEAK:

First of all, steaks are any piece of meat that is considered a “fast cooking” cut: a cut that does not require long time to cook. Flavor and tenderness tend to have a mutually exclusive relationship; generally, the more lean or tender the steak is, the less flavor it has, because the flavor really comes from the fat. In addition, the muscles that do the most work such as the legs and neck tend to be more lean and tough as compared to their “lazier” counterparts.

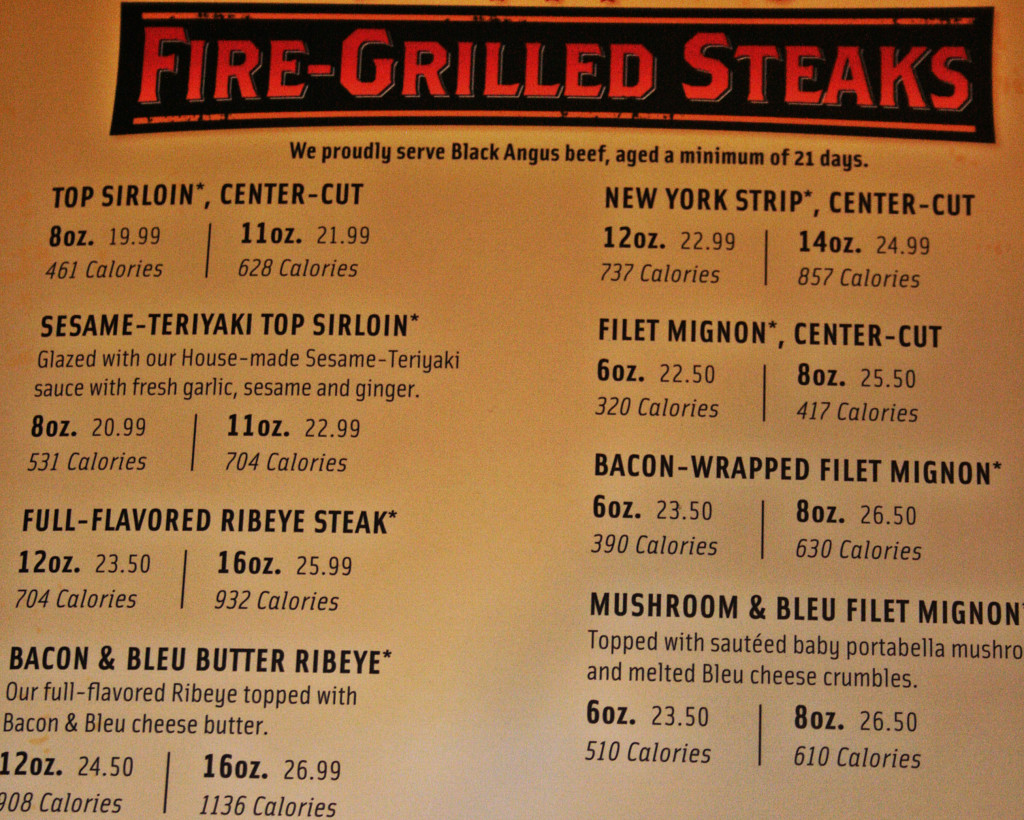
Now, let’s put the grade and type of beef aside. There are two ways to tackle steak: cut and temperature. Let’s start with the different cuts or, to be crude, the areas of the cow which are available for your carnivorous pleasure. Depending on the cut, the tenderness, flavor, and cooking method can vary widely, but I’ve listed the popular ones below.

  • Forequarter cuts: These cuts are near the front of the cow, or “forequarters.”
    • The Rib: Pretty self explanatory: this meat can be short ribs, prime ribs, and rib eye steaks. The cow’s muscles near the ribs generally do not work hard or exercise; therefore, there is a great amount of marbling (intramuscular fat), making the meat relatively tender.
  • The Loins: Now, the hindquarter cuts can be broken down into three type:
    • Sirloin: While less tender than short loin, sirloin is generally more flavorful. It can also be further divided into top sirloin and bottom sirloin.
    • Tenderloin: This can be considered a sub-type of the loin. Staying true to its name, it is the most tender. Filet Mignon is a form of tenderloin. This comes from two relatively small pieces of tenderloin muscle in cattle, making the coveted steak pricier than its counterparts.
  • Miscellaneous: Other steaks like the chuck, round, and flank come from their respective areas and tend to be the tough cuts.
    • Chuck: A cut from the neck to the ribs. Many times, this steak includes shoulder bones and is generally is less expensive than its rib-based steak counterparts.
    • Rump Steak: Take a guess where this meat comes from! The rump meat is tough and is generally roasted.
    • Round Steak: This lean meat is from the thigh of cattle; due to the lack of fat, it does not tenderize quickly, so it is more suited to slow cooking methods such as roasting.
    • Flank Steak: This substantially tough steak is long and flat. The meat requires marinades and other slow cooking methods and are not ideal for steaks.

Now that you’ve figured out what part of the cow you’re eating, how would you like it served? High-end steakhouses may have their own variations, but here is a general guideline to temperature:

  • Rare: Cool, red center
  • Medium Rare: Warm, red center
  • Medium: Hot, red Center
  • Medium Well: Hot, pink Center
  • Well: No pink, brown

Photo by Sara Slattery

EGGS:

Now let me introduce my expertise—eggs. As a meat eater with a pretty strict vegetarian family, eggs are the only dishes that count as a free pass for everyone in my household to foray into the animal kingdom. In fact, most of my family turns a blind eye to eggs as long as the dish meets strict scientific requirements or, you know, doesn’t “smell eggy.”

  • Scrambled: The most common type of egg preparation, scrambled eggs are basically the yolk and the whites (unless you specify whites only!) beaten briskly to incorporate air and constantly stirred in a pan to produce large puffy curds of egg.
  • Over easy/medium/hard: These are all fried eggs that refer to the consistency of the yolk. For example, over easy implies a runny yolk with solidified whites, but over hard means to cook on both sides ‘till the yolk hardens.
  • Sunny-Side Up: A caveat of fried eggs, sunny-side up refers to one side of the eggs being fully cooked, while the yolk remains runny.  Crack an egg over low heat and let one side cook without flipping or pushing it around the pan. The difference between an over easy and a sunny-side up egg is that in preparing sunny-side eggs, you let only one side fry, while any “over” preparation requires you to flip the egg to the other side to cook the egg whites.
  • Poached: A poached egg has a smooth unbroken yolk that is surrounded evenly by a casing of eggs whites.  The preparation involves submerging the yolk in water, as opposed to letting it cook straight on the pan. Crack an egg into a bowl, without breaking the yolk, before sliding the contents into a pan of simmering water for cooking. Wait until the egg white has solidified, but the yolk stays soft. The key to success here is getting the freshest eggs possible and timing it right!
  • Boiled: Boiled eggs remain in their shells until they reach your plate. Despite the name, boiled eggs should not actually be boiled throughout the entire cooking process. Instead, bring eggs (with shell intact) to a boil and then remove them from the heat. For soft- or medium-boiled, let them stand for 2-3 minutes; but for hard boiled, let the eggs sit in the boiling water for 12 minutes. After your remove the eggs, plunge them immediately into a bowl of ice water to facilitate peeling off the shell.

While there is a wide spectrum and range that varies from country to country and restaurant to restaurant, this serves a general guide to understanding the steak and egg lingo.  The real key takeaway is that if you know how to order eggs and meat, you should definitely ask me out.

Harnessing Every Last Bit Of Your Leftover Ingredients

This Internet-wide preponderance of food blogs, food porn, recipe-shares, Pinterest pinwheel cookie pins—it’s no flash in the pan (filled with tilapia). People love food. Case in point: the Food Network has created a second entire network to fit all of its televised cooking and food-related content. Twenty-four hours a day wasn’t enough.

Leftovers Square

Photo by Alyssa Kurtzman

And food is a relatively easy, highly Instagrammable form of creative expression that you get to eat afterward. But I and others like me—who swoon at those unattainable middle shelves of Whole Foods aisles, dreaming of making that $40,000 salary—can’t easily justify buying a three-dollar bunch of rosemary just for the required tablespoon, chopped, in that cornbread-dumpling beef (or tofu!) stew. However! Don’t overlook the recipe or the ingredient, even though it costs almost as much as the beef (or tofu!) shoulder you bought in the first place.

Seriously, don’t leave it out. Rosemary, like most other fresh herbs (you heard me, genetically-programmed cilantro haters), is a delight, especially in an entrée or sauce with other earthy flavors in it. Its piney notes make your dish seem more dimensional and polished. But no one is going to use an entire package of rosemary in a recipe, unless you’re cooking for squirrels, because that dish is going to taste like an evergreen. So what to do with the remains? I’ve found that the longest-lasting and most practical use for it is to make a simple syrup or infusion with the leftovers:

  • Add the leftover herb (washed—don’t be lazy like that) into a small saucepan with equal parts sugar and water. A cup of each should be fine, depending on how much you have to work with.
  • Slowly dissolve the sugar and bring the mixture to a boil, stirring so nothing burns, and then turn the heat off and let that pretty little syrup chill in the saucepan, covered, for up to a couple hours—or more, I guess, if you fall asleep or something.
  • Then strain it through a mesh strainer into some kind of container, cover, refrigerate, et voilà! It should last for a few months or so.
  • Any herbaceous syrup will be delicious in homemade cocktails (yes, even cilantro, which is muy delicioso in a margarita). You’ll look super professional to your friends, like you planned the whole thing, as opposed to it being a byproduct of that pot of stew you ate by yourself while you marathon-ed Fringe. And for your non-imbibing friends (bless them), the syrups make for a lovely refresher when mixed with club soda.

If you’re not a fan of the sweet stuff, you can also let those leftover herbs sit for a couple of days in a bottle of gin or vodka for a more hardcore (and omgg bikini-friendly) rocks drink.

So what about your leftover scraps of everything else? One of the most crucial tools for maximum usage of your scrappies is your freezer. Sounds obvious, but you wouldn’t believe the variety of items that will keep and even improve by being put in the freezer. It’s not just for ice anymore!!!

Exhibit A: baked goods. Brownies, cakes, cookies, and chocolate will all keep remarkably well in the freezer—much better, in fact, than in the refrigerator. The fridge tends to degrade that moleculo-confectionary-mouthfeel (it’s science), while the freezer will fix the pastry in its delicious original consistency. They only take about an hour sitting out or a ten-second zap in the microwave to thaw—or you can just eat them frozen, which is surprisingly tasty.

Okay, baked goods aren’t necessarily an “ingredient,” but bread often is, and that freezes up like a charm. Other things that freeze like a 13-year-old doing the Cha-Cha Slide are meat, which is obvious, as well as butter and other types of animal-based fat, like bacon fat and lard—both of which are way fun and totally not gross to cook with, contrary to your probable opinion. Also cooked pasta, especially in some kind of tomato-y sauce, is often improved by “resting” in the freezer for a period of time. Obviously broth or stock will last until doomsday in there, as will ginger root and even bananas, which turn an unappetizing brown color but then eliminate the need for ice if you throw them in a blender with other smoothie ingredients. Other things worth saving in the freezer are anything with seeds, such as a spice mix containing sesame seeds, or flaxseeds, which you can also grind up in the aforementioned smoothie. That’s a trick a little old man who runs a spice stand in a shuk once explained to me: high oil-content seeds like that will quickly go rancid in a room temperature cupboard. At least I think that’s what he said.

What other ingredients could you possibly have left over after all that? …Milk? I guess you could make yogurt with it (you psycho), or else, you know, drink it. Vegetables? Odds and ends from onions, garlic, shallots? SFTS: stir-fry that shit. I’ve got a freezer full of lard if you need it.

Getting Your Brunch On

Having lived in New York City for almost seven years now, brunch has become a weekly staple in my life. Before moving here for college in 2005, I never really understood the concept of the word “brunch.” In my younger years, it was more of a fun combination word (breakfast + lunch).

BrunchHero

Photo by Anastasia Heuer

But then I discovered some things: I could eat a full plate of delicious breakfast food (and not just a quick bowl of cereal or a bagel before class/work during the week) alongside a lovely cocktail long before Happy Hour and not feel guilty whatsoever. I could do so after sleeping in until one o’clock in the afternoon (I hate when delis and fast food restaurants stop serving breakfast at eleven o’clock in the morning. What is that about anyway? For the record, I am not a morning person). All while catching up with anyone and everyone after decompressing from the work week.

When I talk to my family members in Florida about “brunch,” their reaction is often an intrigued “ohhhh,” with a raised eyebrow or side smile. It’s like they assume I’m trying to be fancy. That’s just not the case. People assume a lot of things about brunch—it’s expensive, pretentious, and difficult to coordinate. Those things can be true, but they don’t have to be! Every brunch is different depending on the restaurant, cuisine, group of diners, and the intentions of the individuals involved.

A couple things to keep in mind when planning a brunch date:

Beware the Food Coma: Sometimes I’m in the mood for a truly hearty and filling brunch. After a long week of eating on-the-go and stuffing my face with takeout, I like to sit and eat something that will fill me up and make me want to pass out in my bed afterwards. A few months ago, I had the Jerk Bacon and Eggs at Red Rooster in Harlem. The bacon and eggs are served in a skillet on top of beans with a side of grits. It was seriously delicious, but I went into a food coma as soon as I got home. This should not be your go to option if you have grand plans for an afternoon activity or an evening at the gym. Okay, maybe eating those grits, too, was overdoing it. Sometimes, though, you just need a day of food and rest. Let me tell you—after that four-hour post-brunch nap—I felt much better.

If you’re in NYC, my picks for “fill-you-up” brunches are great at Balthazar, Alice’s Tea Cup, and Kitchenette.

The Joys of the Boozy Brunch: My friends and I will often get together on a weekend to enjoy an excuse to start drinking well before five o’ clock. But, to really take advantage of this concept, one must find a restaurant with “unlimited” brunch cocktails, like mimosas, Bloody Marys, Arnold Palmers, bellinis, Irish coffees, and more. Generally speaking, your party has a 2-3 hours to drink up as many of those cocktails as you want.

I have grown to love a good Bloody Mary (especially when it’s spicy), and I had my very first one at the Sunburnt Calf on the Upper Westside. We ended up drinking for several hours before we had to leave (brunch ended at four o’ clock). Because the servers keep refilling your glass, be careful that you don’t lose track of just how many drinks you have consumed. I find this usually leads to either passing out by six o’ clock in the evening or getting an early start on that night’s “going out.” Either way, in my experience, it leads to a satisfying day… and night.

If you are in NYC, this and this are both lists of great spots for a boozy brunch. My favs are the Sunburnt Calf, Calle Ocho, and Yerba Beuna. They all offer the wonderful “unlimited brunch cocktails” option. Intermezzo is another “unlimited brunch cocktail” establishment that sometimes has a drag show later in the afternoons for those who like to keep the party going.

The “Prix Fixe” and The More Adventurous: Some restaurants have a “prix fixe” brunch menu that includes one or two brunch cocktails, coffee or juice, and an entrée. It’s the best of all things brunch in one tidy package. Others might try to wow you with their unique menu items or food combinations. These can be fun places to try but warn your guest in advance just in case they have picky pallets. In terms of a more adventurous brunch, in NYC, I recommend Talde. I’m still thinking about their brunch menu many months later. (Key Appetizer: Pretzel Pork and Chive Dumplings. I mean, who can resist?)

Don’t Forget about Price: Some of those upscale, four to five “dollar sign” restaurants can charge a pretty penny for brunch. Going to a bar-type establishment, or a “hole in the wall,” can give you a great meal and end with a modest bill. This varies greatly depending on the establishment. But you can do yourself a favor and plan ahead. Find out if a brunch place is for you by reading reviews on Yelp, or taking a pre-look at the restaurant’s menu online. This will also help you predict which kind of brunch you are in for.

No matter how you do it, brunch can be exactly what you need for whatever mood or occasion it happens to be.

Comment and let us know what your favorite type of brunch is! Do you have any great brunch spots in your area?

The UE Review: Cooking Chicken Breasts

When we started UE, one of our missions was to test our how-tos (or ones we found around the web) and publish follow-ups from the UE perspective. Today we are not going to test one of our own articles but a recipe we found on one of the websites we follow, The Kitchn.

A little background on my experience with chicken: My mother is still so frightened of “pink” (undercooked) chicken that she dices her chicken breasts up into quarter-inch squares that she then cooks to death. (Mom, I love you.) I fondly called this “cubed chicken” and mocked it all the way up until college when I realized—having only learned the one way—that I too would cook my chicken like this. (Mom, I still love you.) This inexperience, and my already lazy cooking habits, led me to eventually quit cooking the bird—or any meat really—altogether. I have since faced my fears of meat but not my cutting habits, only graduating to slightly larger “chunks.”

But today is the end of all that because today I learn how to cook chicken breasts without cutting them at all.

THE RECIPE: ”How to Cook Moist Tender Chicken Breasts Every Time”

INGREDIENTS:

I started by collecting the following:

  • 1 to 4 boneless skinless chicken breasts

I was cooking for four (no pressure) so I used two boneless skinless chicken breasts. These breasts were about an inch and a half thick and frozen.

  • Salt and freshly ground black pepper

If you don’t have “freshly ground” black pepper lying around, pre-ground pepper should be fine. I, for one, used to hand mash peppercorns between two paper towels with the butt of a knife because I was too lazy to buy ground pepper or a pepper grinder (don’t ask me why I had whole peppercorns) …but I don’t think many people will have this problem. (Just in case: tips for finding a the right pepper mill and the different kinds of peppercorns.)

  • 1/4 cup flour

Check.

  • 
1 teaspoon freshly chopped herbs (optional)

Meh. It said optional and I was too lazy to go to the store. I considered some dry herbs from my cupboard, like an “Italian Spice Medley,” but decided to just skip it altogether.

  • Olive oil

I recently learned to cook with oil, instead of water, and it changed my life. (A great breakdown of the different types of kitchen oils.)

  • 
1/2 tablespoon butter

I’ve been convinced in the past year that butter really is that much better than margarine. (If you don’t trust me, at least read what best-selling author Michael Pollan has to say about it.)

Next step, proper kitchen utensils:

EQUIPMENT:

  • 10-inch sauté pan with lid

In this case, the lid is essential. As for the 10-inches, just make sure your chicken fits comfortably in the pan. If you don’t have a sauté pan, these tips might help you find the perfect one. Considering that most of my cookware came from Ikea, I may not be the best source for recommendations, but Amazon, Marshall’s, Costco, or thrift stores, can all be excellent sources for quality pots and pans (and other kitchen items).

Clearly a pan is not the only thing you are going to need. So I’m going to add:

  • Sharp knife capable of cutting chicken

I reiterate the above locations for those in need of a knife set.

  • Spatula

Having burned myself on many a metal spoon, I cannot recommend a good wooden spoon / spatula enough—they don’t transfer heat!

  • Cutting Board

Your choice between wooden or plastic. If you’re really lazy, you can just use a plate. If you can’t stick your board in the dishwasher, make sure you follow these steps to keep it clean.

  • Three Medium-Sized Plates

I really can’t justify putting in a link here, I hope you own plates.

INSTRUCTIONS:

Defrosting frozen chicken: An intelligent, pre-planning person might have remembered to set their frozen chicken breasts out in the morning to ensure that they were properly defrosted by the evening. I, however, was not that person. So, my chicken, having been set out a mere three hours before, was still half frozen by the time I went to cook it. I tried to rectify this by massaging it under hot water from the faucet. (Apparently, according to the USDA, both of these methods are unsafe and one should only defrost their chicken in the refrigerator, cold water, or the microwave. Oops. Still alive.) I moved on to the microwave. I basically just started hitting buttons (like “Defrost” and “Chicken” and “Yes”) until it started working. But, if your microwave doesn’t have a defrost setting, two minute increments on 50% power would probably be an okay choice—then again, remember how many times I’ve cooked chicken in my life and take my advice at your own risk.

Start with your chicken on your cutting board…

  1. Pound the chicken breasts to an even thickness with the handle or flat of a knife.

Okay, I forgot to do this but, to ensure even cooking, this would probably be a good thing to do. If there is any excess fat (the white stuff) on your chicken breasts, feel free to trim it off.

  1. Lightly salt and pepper the chicken breasts.

Don’t be like me and touch your salt and pepper shakers with your raw chicken covered hands—attempting to wash them is not as fun as it sounds.

  1. Mix about a half teaspoon of salt in with the flour along with a little pepper. Chop the herbs finely, if using, and mix in as well.

Mix this flour mixture on one of your three plates. The other two are for your chicken—one for raw, one for cooked. I didn’t measure but be careful not to pour too much flour, anything you don’t use will be thrown out. Having just salted and peppered my chicken, I didn’t bother to mix in any salt and pepper (and my chicken still passed a taste test) but to each their own. As I stated above, I skipped the herbs.

  1. Quickly dredge the chicken breasts in the flour, so that they are just lightly dusted with flour.

I don’t know why this has to be done “quickly.” I took my time. Take your breasts and dunk each side in the flour. I scooped even more flour on top and gave it a good pat to make sure they were really covered.

  1. Heat the sauté pan over medium-high heat. When it is quite hot, add the olive oil and butter. Let them melt, and swirl the pan.

  1. Turn the heat to medium. Add the chicken breasts. Cook for just about 1 minute to help them get a little golden on one side (you are not actually searing or browning them). Then flip each chicken breast over.

“Turn the heat to medium.” Oops. So, being unable to read, I kept my heat on high and was assaulted by crackling oil. But my chicken still turned out fine. (I can’t say the same for my blackened pan.) Being paranoid of salmonella, I didn’t follow the one minute rule. Instead, I waited until each side was golden brown (more golden than brown).

  1. Turn the heat to low. Put the lid on the pan. Set a timer for 10 minutes, and walk away. Do not lift the lid. Do not peek.

My feelings on this: “Whaaaa? No peeking??? Like none—zero? But, what if I want to make sure it’s working? Ugh.”

  1. After 10 minutes have elapsed, turn off the heat. Reset the timer for 10 minutes and leave the chicken breasts in the pan. Again, do not lift the lid. Do not peek.

“STILL!? Sigh, fine.” When it comes to cooking, trust is not something I do well.

  1. After the 10 minutes are up, take the lid off, and tada! Soft, tender, juicy chicken breasts that aren’t dried out in the least. Doublecheck them to make sure there is no pink in the middle. Slice and eat.

“OMFG IT ACTUALLY WORKED!” Tender, soft, juicy, NOT PINK, tasty chicken breasts. I sliced each breast in half and served.

Pro Cleaning Tip (From someone more Pro than me):

If you’re like me and burned the shit out of your pan, try out the following technique I recently learned from a friend:

  1. Make sure you drain any excess oil and then put the pan back on the burner, on high heat, and wait a minute until it gets hot (or just do this right after you are done cooking).

  2. Put the pot under running water, angling the pot AWAY FROM YOU, and scrub with a long-handed scrubby brush (not a sponge). Don’t be alarmed if the oils in the pan crackle and steam when they hit the water.

  3. Scrub, scrub, scrub.

  4. All clean!

This is part of The UE Review series.

ChickenSquare

Photo by Anastasia Heuer