It’s important to wash your car regularly, especially if you ever plan on selling it. Someone who is looking to buy a used car is more likely to buy a car that looks clean, and your paint job is the first thing people will see. A car that isn’t washed regularly will have its paint eaten through by sap, dirt, and other debris, which cause visible flaws in the paint and will make reselling the car much more difficult.

Photo by Sara Slattery
Washing your car by yourself can be a frugal and relaxing way to spend an afternoon. Getting all the necessary supplies to wash your car does have a small initial investment, but after you have all the supplies, you’ll be able to wash your car for about $1 each time (the cost of the soap and water). Much cheaper than a drive-thru car wash, and you have the peace of mind of knowing that everything was cleaned properly!
Washing by hand is the only way to wash a convertible car, and will save the paint job on any car! Drive-thru car washes that contact the paint with brushes strip your paint off each time and will cause your paint to fade prematurely. Washes that use high pressure nozzles have the same effect, albeit lesser.
1. Supplies
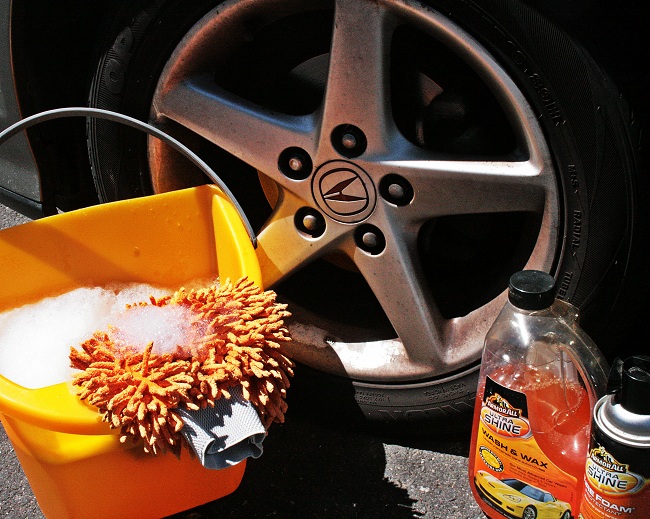
You only need a few supplies to wash your car. You’ll need two buckets, three or four microfiber cloths, a wash mitten or car sponge, and some car soap. Do not use anything except car soap! Dish soap and other soaps can strip away the wax and clear coat on your paint. Additionally, microfiber cloths are ideal for washing and drying because they trap the dirt particles in their fibers, whereas a rag or a paper towel will drag the dirt along, scratching the paint.
You should be able to pick up everything you need at your local auto parts store for around $20.
2. Preparation
Before you start washing the car, it’s best to find some nice shade to park under. If you can’t find any shade, you can go to a do-it-yourself carwash or wait until the right time of the day so that the sun isn’t directly blasting your car. Another option is to rinse your car in the sun, and then quickly park somewhere nice and shady. If shade just isn’t an option, you’ll have to wash and dry the car one section at a time in order to prevent water spots from occurring.
Fill up one of your buckets with soap and water, and fill the other bucket with only water. Next, lift your windshield wipers up until they ‘click’ and stay off the windshield.
You’re almost ready to wash your car, but first double-check that all the windows are rolled up and all the doors are closed.
3. Rinsing
When rinsing the car, don’t use a hose or a nozzle with too much water pressure: too much pressure will end up scratching your paint! A garden hose with a trigger spray attachment is perfect.
Start by rinsing the car from the top down. Start with the roof and work your way down to the sides of the car. This should remove or break loose most of the dirt, preventing scratches when you scrub the car with the sponge.
If you live in an area with snow, you’ll want to pay special attention to the wheel wells, as the salt used on the roads builds up and can cause corrosion if ignored.
4. Washing
After you’ve finished rinsing the car, you’re ready to soap it. Grab your sponge and soak it in the soapy water. You’ll need to go around the entire car with the sponge, starting from the top and working your way down to the bottom of the car. Go section by section, making sure that you’ve removed all dirt and debris from each area of the car before moving on to the next. A good order is to start with the roof, move on to the hood/front bumper of the car, then work your way back along the passenger side until you reach the trunk/rear bumper, and then work around the driver’s side to the front of the car, starting with the top of each section and working your way down.
As you finish each section, it’s best to rinse the sponge off in the clean water bucket and then re-soap it in the other bucket. This prevents dirt from building up on the sponge, making it clean better and preventing scratches to your paint. Some parts of your car will be much dirtier than others, and you may have to rinse the sponge off multiple times in order to get one panel clean.
Once you’ve finished all the body panels, move onto the wheels. Grab a clean microfiber towel, dip it in the soap water, and wipe down the wheels, making sure you get the brake dust off of all the visible surfaces. Make sure that the towel you use for the wheels is kept as a wheel-only towel for all future washes, as leftover brake dust will scratch your paint.
5. Rinsing (again)
This is the same as step 3, but now to rinse all the excess soap off. It’s important to rinse off all the excess soap because soap residue can cause damage to your car’s clear coat.
Instead of using a hose, you can choose to use a second sponge with the clean water bucket. Make sure to rinse the sponge out in the clean water often. Make sure not to use too much pressure on the sponge; all you want to do is break the dirt loose. This method saves a lot of water, but can be a bit more time consuming.
6. Drying
This is the part that becomes a race against time, and it is the reason for that nice shade you found earlier. When drying the car, start with the top and work your way down. This prevents water from the top running down to an area that you’ve already dried. Use one of the microfiber towels to wipe down the car and remove most of the excess water, making sure to wring it out as necessary. Once you’ve wiped the car down once with the first microfiber, grab another dry microfiber and go over the entire car again. This gets the car completely dry and prevents the water from evaporating off and leaving dirty residue or hard water stains.
After you’re satisfied that you’ve gotten everything dry, do a pass around the car to look for any water residue or streaking on the windows. If you find any residue or streaking, rub the second drying towel on that area and it should wipe off and shine clean.
7. Waxing (optional)
Now is the perfect time to wax your car, if you so desire. When waxing, you want to use a minimal amount of wax. If white streak marks are visible after you’ve passed over an area, you’re using too much! Use a wax applicator pad to apply the wax, and wait approximately 5 minutes until the area hazes over before buffing with a clean microfiber towel. It’s best to apply and buff one section at a time. Waxing your car is important because it acts as a shield between your clear coat and the dirt, and your car shine for longer so you don’t need to wash your car as often.
If you’ve waxed your car using a high-quality wax (and followed the instructions properly), it will only be necessary to wash your car once a month. If you opted out of waxing your car, it’s best to wash it every week to prevent debris from eating through your clear coat and ultimately your paint.
Wax essentially acts as an extra layer of paint, keeping your car cleaner for longer while simultaneously protecting your paint and clear coat.
Things to note
Should you happen to have a convertible car, do not wash the soft top with a hose unless you’re absolutely positive you have no leaks. If you only have minor leaks, it’s ok to scrub it off by hand with a clean sponge and dry it off with a microfiber towel. Keep in mind that a fabric-like convertible top is not waterproof, it is just water resistant, while a vinyl top is waterproof. If you’re unsure what kind of material your convertible top is made out of, you can ask your car dealership or a local auto parts store. It’s best not to use car soap on a convertible top, since most car soaps contain some sort of shine-enhancing oil, which the top will absorb and become a dust magnet.
If you have a truck, the steps above are almost the same. The only difference is that you will need to open the bed and rinse it out. If you have a bed liner, there’s no need to dry off the bed; but if your truck bed has no liner, then you need to dry inside the bed to prevent rust, residue, and hard water stains.
