Tag Archives: staining

Let’s Ask: How Do I Stain This?

Working in a hardware store, I come into contact with a lot of do-it-yourself-ers. While I admire their efforts, often they need an expert, or at least someone with a little experience, to help point them in the right direction. One of the most common problems customers bring to my attention involves staining, both interior furniture and deck stains. It’s a lot harder to fix mistakes made while staining than it is if you mess up while you’re painting, and many people jump into a large project without doing their research. Here are some of the FAQs that are often brought to me by customers:

How do I prepare?

The most important part of any home improvement project is the preparation. You need to have the proper tools and know the proper techniques, or you’re going to have a bad time. When it comes to staining, this comes down to knowing what type of surface you’re working with, and whether it is new or old. I frequently have customers tell me they aren’t sure if their piece is even made of real wood, or whether it has been stained in the past. The answer I usually give is to try a little stain on a small, hidden area, and see what happens. If it soaks into the wood, you’re probably fine to stain the whole thing. If it doesn’t, stop trying, it’s not going to work. If the stain is just pooling up on top of the piece, it either is not able to be stained, or there is another coating or stain already on the wood that needs to be removed. In terms of equipment, you should have a brush, a rag to wipe off excess stain, and something to clean your brush (soap and water for water-based stain, and mineral spirits for oil-based). Unless your stain is designed to be wiped on, you should always use a brush. Exterior stains can be applied with a brush, roller, or sprayer, but check your product for recommendations before beginning.

What does a stain do?

Another misconception a lot of customers have is that a stain, like paint, is just an exterior coating. One of the most common problems my customers have is that they’ve tried to apply a stain as if it was a paint and, in many cases, directly over existing paint, or other coatings. Stain only works on bare wood, because it needs to soak into the wood fibers. Imagine your wood as a bundle of drinking straws. The straws can soak in water, and other liquids. However, there is a limit to how much the straws can absorb, and, of course, if they are blocked by something, they won’t soak in anything at all. Stain needs to soak into wood, and when it dries the fibers of the wood grain lock the color inside. A paint or clearcoat goes on top of the wood, and will prevent other liquids from soaking in, and make the piece more durable. You typically go over interior stains with polyurethane when you are done.

How can I stain something that has been painted or sealed?

The basic answer is: you can’t. You have to remove the paint in order to properly stain the wood. This is by far the most frustrating part of staining for customers unfamiliar with the process. Many decide to try anyway, only to return in a few hours even more frustrated. Defiant to the end, I’ve seen customers go through darker and darker stains, thinking a darker color would just cover up their mistakes, rather than taking my previous advice. In the end, their piece was ruined, and as far as I can tell they never attempted to remove anything they applied to it.

What about removing an old stain?

Unless you’re changing your stain color or switching to a water-based stain from an oil-based, you usually don’t have to remove your old stain at all. Just remember, a water-based stain can’t go over an oil-based stain. Removing stain is not particularly hard, but it will take patience. For interior stains, you have the option to sand the wood, or strip it. I usually recommend stripping, because it requires the least amount of grunt work. Sanding is cheaper, but harder, and you are more likely to damage your wood from over sanding. Most strippers just need to be brushed on, and let sit for a while, and then rinsed off. For interior stains this isn’t that hard at all, but for exterior deck stains, it’s a larger and more complicated task. Exterior stain remover usually comes in a concentrated form (so you can make a large quantity of it) and should be applied to the entire surface you want to remove the stain from. Unlike some strippers, these types of removers usually require their own neutralizer product. At this point is when most customers decide to just paint their deck instead–just saying.

With this information, your next staining project should be a breeze! The real key to staining, and any other household project for that matter, is to take the time to understand the process, and what types of stumbling blocks you might encounter. Staining is never a simple project to undertake, so consider whether it’s really worth your time. It can make your furniture and deck look fantastic, but only if done properly. If you’re looking for a quick-fix, try painting instead.
Photo by Rob Adams
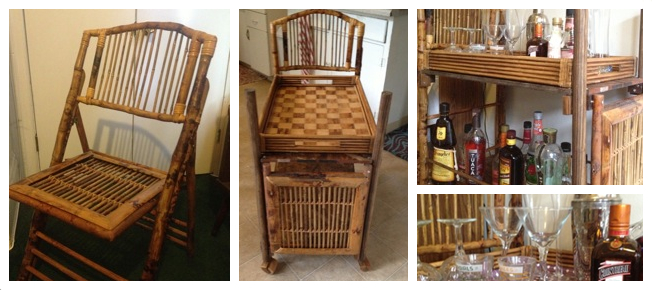
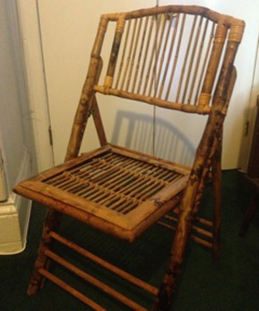
Photo by Rob Adams

Baby’s First Building Project: from Folding Chair to Bar Cart

Dinner party with a dozen or so close friends, all gathered in the dining room of my house. Various friends and roommates bustle around, getting food on the table and pulling up chairs. Someone inevitably reaches for the bamboo folding chair and I tense up, clutching the plate of Brussels sprouts I’m holding. Our guest flips the chair open with a caviler flick of the wrist, drops it in front of the table and plops down heavily. My face contorts in an anguished wince as I hear the mournful creak of the old, vintage bamboo as it bends under the weight of our unsuspecting guest.

Bar Cart

After this scene had replayed itself several times, I began to wonder. Sure, I didn’t like seeing the pretty, antique bamboo chair that I had thrown down 20 bucks for at Urban Ore subjected to the torment of being sat on. However, it had occurred to me that this was, in fact, the primary function of said chair, and perhaps I should either come to terms with that fact or get rid of the thing.

Needless to say, I sat on this knowledge for a good year or so before springing in to action. And when that day came, I did not take either of the equally undesirable actions I had presented to myself. Instead, I thought, I should repurpose it into something. Something awesome. And finally, one day, after spending a good 2¼ hours pining over bar carts on Pinterest, I leapt to my feet, shouting—“I could use my bamboo folding chair for this! I could use it to make my bar cart!” Eureka.

Now, as the title suggests, I did not go into this endeavor with a whole lot of knowledge or experience. I had used a drill, which was great, and I had been to Home Depot before. That was fine, though: I used my networks, consulting with friends, family, and the Internet.

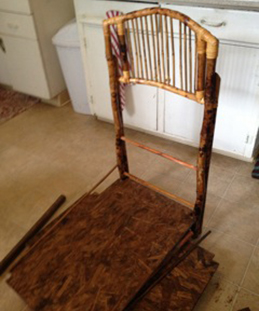
Starting from the brainstorm stage, I took the chair apart and maneuvered it to try to figure out how, exactly, my finished product would look. This also allowed me to take stock of what else I would need to buy to complete my project. Speaking from the wealth of experience I have gained by building exactly one item, I think that having something tangible to manipulate while you brainstorm can really help you visualize what you want and how you can get there.

Original chair! Chair in pieces on my floor as I brainstorm how to put it together. My wood shelves are there too.
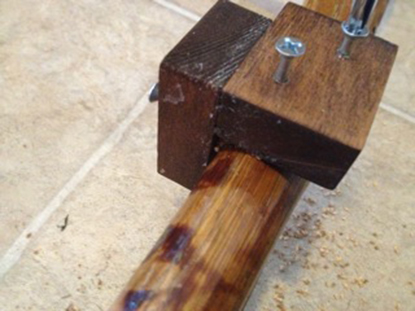
Here are my “L”-shaped supports for the wooden shelves. I just bought a long pice of rectangular wood and cut it into 2 inch pieces.


Per my dad’s suggestion, I also measured the materials I had and drew out a sketch, complete with piece measurements and where screws would go. This piece was invaluable—I referred to my sketch often throughout the process and you will too, should you take the prudent route and make a sketch for your own building project. Furthermore, my father’s experience and advice were extremely helpful: no doubt, I would have made a shoddier product were it not for a few of his suggestions. I definitely recommend going over your plan with an acquaintance who has even a tiny bit of experience building something.

In that same vein, when you go to the hardware store to purchase your materials, I also recommend conscripting an employee to help you. This person knows what they are talking about (most of the time, and if they don’t, find someone new). They can help you find the cheapest and best way to get what you need, which can save you money and time. In my experience, hardware stores are way too big and have far too many options for beginners.

Beginning the work back at home, I found the old adage “Measure twice, cut once” to be the best possible advice one could give—­particularly after I had to return to the hardware store after failing to abide by it. Once I finally had my pieces cut and ready, I laid them out to stain them.

A few words about wood staining: It took awhile to stain my pieces and let them dry before I could put the piece together, so if you will be using wood stain or paint, be sure to allow for the necessary time and plan a nice, outdoor place for them to dry without asphyxiating yourself. Also, if you use stain, know that you cannot just throw away the cloth you use, as wood stain is crazy flammable. You have to soak it in water and then do some hazardous waste disposal. (When someone writes an article on how to do that, I’ll let you know. And then, I’ll also finally be able to throw out the small can of water and used stain rag that is currently sitting on the floor of my pantry.)

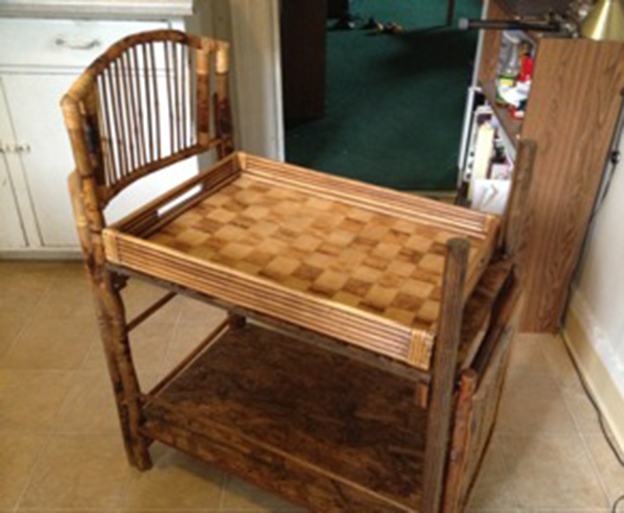
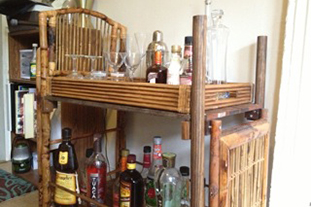
Finished product, with awesome tray!

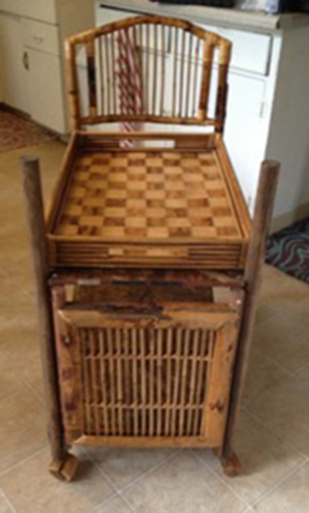
Finished product from a new angle – The back of the chair is farther back in the photo, and the seat of the chair is attached right there in the foreground.

While the stained wood was drying, I began to drill my holes. First, I drilled small holes to make and connect little “L”-shaped supports to set the shelf on. Getting those to be even took several rounds of measuring, recruiting people to hold things to getting, using the level, swearing when it wasn’t level, and measuring again. When I finally had those lined up and screwed on, I had a bigger drill situation to attack. I had, by beautiful, divine providence, come across the perfect bamboo hostess tray to sit at the top tier of my cart at an antique store. Perfect – things would now stay put stylishly. However, I still needed a way to keep the big bottles of rum at the bottom to feel and look somewhat secure. I decided to get two dowel rods, stain them, and make a little railing for the bottom tier.

At this time, I learned quite a bit about the drill that I didn’t know. After attempting to drill a hole big enough to fit my ¾ inch dowel rods only to have the drill whine and sputter at me, I learned that it is necessary start with a small hole and enlarge it gradually by using an increasingly larger bit to grow the hole. Though this may seem super obvious, it took me quite some time to figure it out, so I thought I’d save you the trouble. You will not be able to drill a ½ inch hole directly into solid wood. Start with 1/16 and work your way up. Since I was drilling on my beautiful antique chair, I did some practice drills on spare wood to gear myself up for it. Definitely would do again – I learned the hole enlarging tip that way and saved a bunch of heartache.

After all this crazy work of staining, drilling, and leveling, I could finally assembly my cart! I took the beautiful back of the chair propped it up and the “pushing” end of the cart. I used two mega thick dowel rods, stained to match my chair, and fixed them at the other end. To balance the motif of excessive bamboo rods, I took the seat of the chair and nailed it to the barren, dowel rod end of the cart, giving it more life and visual action. Then, I placed my wooden shelves on their little “L”-shaped supports and fit my dowel rods into their now enormous drill-holes and pushed the whole thing together. I dashed in circles around it, drilling anything that made me nervous, until, with a drop of the tired drill hand and a heavy sigh, I collapsed into a kitchen chair. My bar cart was done!

With drinks! And accouterments!

I know there are a million tips and tricks to have a successful building project, and I am still learning so many of them. Still, don’t forget to sand your edges to avoid splinters. Don’t screw screws in too close or the wood will crack. Don’t screw them into slivers of wood too small, either, or the same thing will happen. Use a level so your finished product doesn’t tilt. If the vintage wheels don’t go on, just keep hammering until they do. If you wander antique stores long enough, you’ll find exactly what you need. Make sure, at the end of your project, that you have someone with you whom you can excitedly scream at to “come look” every 5 minutes or so.

And good luck! May your building project bring you as much joy and inebriation as mine has brought me.

Let Me Fix You: The Pink Chest

When you live with someone who has a trunk obsession, you might one day find an ugly, ugly, ugly hot pink cedar chest sitting in your living room. Now, because you have taste (and they do too thankfully), the only way this atrocity can stay is if you take it back to its original wooden self. Bring. It. On.

Before I get started though, let me warn you that this is not so much a DIY instructional as it is story time: the trials and tribulations of someone who’s just gonna do stuff and hope for the best.

The paint job was straight up shit. Bad paint jobs mean one of two things: either the previous owner was a crap painter or they were trying to cover something up. You never know what you’re going to find, but with the beautiful, untouched cedar wood visible inside, there was a very good chance that treasure lay beneath.

The Stripping

First I wiped the chest down with Murphy’s Oil Orange Multi-Use Wood Cleaner Spray (think Windex for wood). The goal wasn’t to clean it, just to get the crusty chunks of dirt off. I decided to start with the back of the trunk, figuring this is where I’d do the least damage if things went awry. In lieu of the regular, noxious smelling paint stripper I’d used years ago, I decided to try Citristrip because it claimed to be low on fumes yet high on results (since my work space was doubling as my living room).

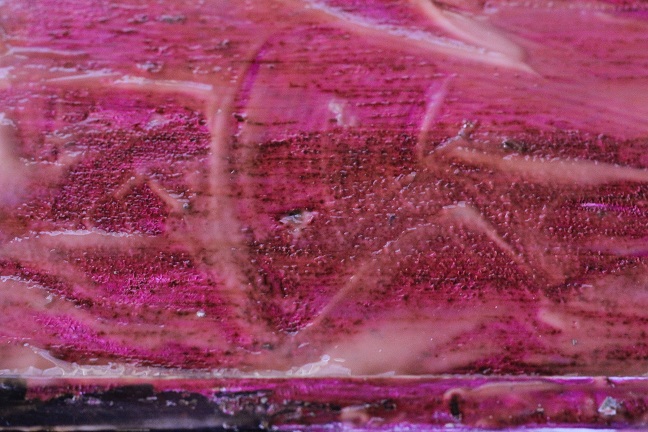
The basic idea behind all paint strippers is that you apply a coat on top of the paint, wait, and then scrape the paint off. I poured out the Citristrip (which has the consistency of melted Gak) smeared it around, poured some more and smeared again. The directions suggested using a paintbrush, but I opted to finger paint with a pair of rubber gloves. And then I waited the requisite 30 minutes for it to do it’s mojo (and another 10 because, well, I forgot to check on it).

With Citristrip, you don’t see the paint bubble up like you do with the oh-so-fun smelling stuff, but the paint will discolor enough to let you know it’s working. You can keep it stripping for up to 24 hours, though I never left it on more than two. But the thicker it is and longer you leave it, the easier the paint scrapes.

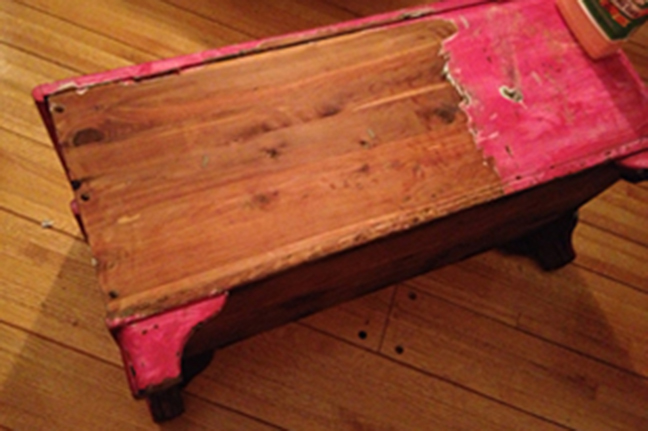
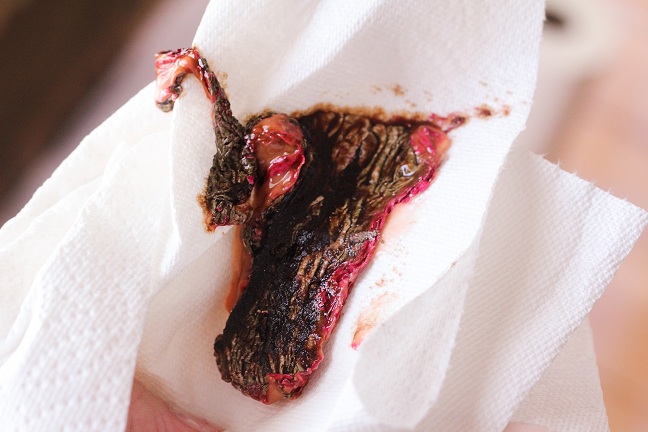
I used a 3” putty knife to scrape. I tried to follow the grain, scraping in one direction for the longest possible pass so that most of the paint ended up on my putty knife. Then I wiped it off on a paper towel, threw it into a plastic bag, and got ready for the next long swipe. Most of the paint scraped off like buttah. For the paint stuck in cracks and gouges, I used Ikea’s curved paring knife. Beware: aggressive scraping leads to wood shavings. If (and when) I saw strips of wood peeling off, I stopped and moved on.

pinkchest_648x431

Because I was only working on a modest sized towel, and I like my furniture and my shiny hardwood floor, I had to be very careful about dripping and spraying. This meant I could only strip one side at a time instead of doing the whole thing at once.

The Scrubbing

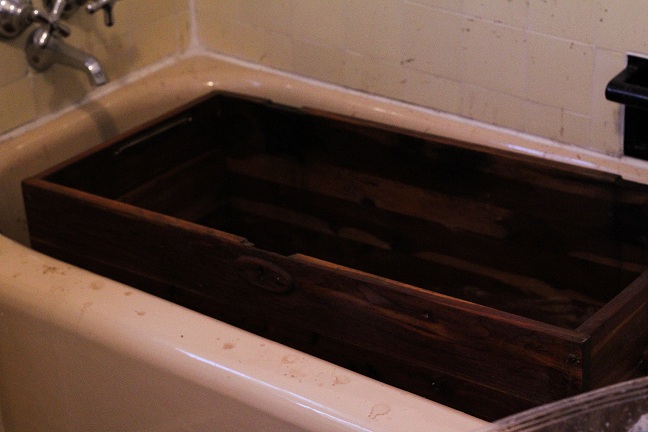
Even after you scrape off most of the paint, there’s still a goopy, residue left on the wood that just smears if you try to wipe it up with a paper towel. In my head this gunk was full of stripping chemicals that were going to hurt the cedar if they stayed caked on. So I washed each side individually after I stripped it and then I threw it in the bathtub (where it fit perfectly) to scrub it some more.

Originally I was using the Orange Cleaner spray with grade #00 steel wool (steel wool comes in several grades). But by the time I’d stripped 3 sides, I only had a 1/4 of the orange spray bottle left, so I moved on to the more economical Murphy’s Original Oil Soap. The steel wool not only picks up the gunk left by the paint stripper, but it also acts as a gentle sander. Unfortunately, the #00 was just a bit too fine which meant it would get matted with all the crud much more quickly. I almost went through the whole 12 pack, hence switching to the coarser grade #1 steel wool which was much better at lifting up stubborn paint.

The advantage of doing this in a bathtub (or if you’re lucky enough to be outside near a hose) is that there’s a constant supply of water and boy oh boy did that liquid blacken. The water that came off was nasty (a putrid diarrhea color) and it sprayed everywhere. Good news was that it smelled nice. It was probably in the bathtub for hour until the water finally ran beige.

The Sanding (or My Big Mistake)

I left the trunk to dry overnight and when I woke up in the morning it looked awful. I have scrubbed this thing to an ashy death, killing all the potential I spent hours scraping and scrubbing into existence… not really, but it felt like it. Having already read things like this, I was aware that this was another step in the process but it wasn’t any less horrifying.

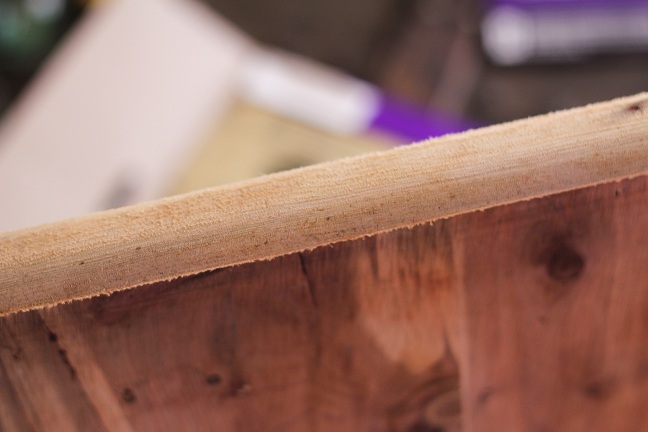
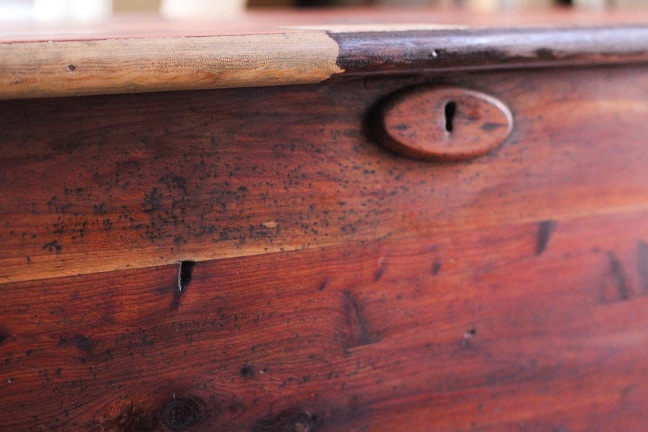
My naivety led to me to think that all the ashy discoloration would simply go away with some oil and that sanding was only for the rough patches. The wear and tear was cool, why sand that away? So I gave it a mild sanding with some 320 grit sandpaper (yes, sandpaper has grades too) and then I moved on to oiling. In retrospect, this was my big mistake, but more on that later. The only thing I actually sanded was the trim because it had this funky peach fuzz going on along with a faint greenish hue left by the original olive colored paint.

The Finish (But Not Really)

Now for what felt like the daunting part: choosing a finish. There were way too many choices, but I surmised the standards were oil, varnish, shellac and laquer. My biggest concern was ease-of-use in a small space, but I also wanted a natural shine, not a plasticy one, so I went with oil.

Typical oil finishes are Danish Oil, Teak Oil, Tung Oil and Linseed Oil. I didn’t want to stain the cedar wood, I just wanted to, ya know, “moisten” it. Linseed was crossed off simply because none of the pretty, DIY blog posts I’d read used it, Danish oils usually have some stain and other chemicals in them, and Teak tends to darken the wood, so the last man standing was: Tung Oil.

Turns out most stores don’t sell the real stuff (the one I found at Home Depot was a Tung “finish” that had more chemicals than oil in it) so I ended up buying Hope’s 100% Tung Oil from Amazon.

I snapped the rubber gloves back on, poured the honey-like oil on a rag (the size of a wash cloth courtesy of an old towel) and rubbed it in. The smell wasn’t amazing (burnt chestnuts?) but tolerable. I did two coats and let it dry.

For the sallow colored trim, I discovered that Minwax made stain pens with which I could essentially Sharpie my furniture. I picked the Red Mahogany color and even though it didn’t stain perfectly even, probably because I’d oiled it first, it gave the illusion of natural wear over the years.

Finally, I waxed the chest with Feed-N-Wax (because other people said to) and hoped that I was done.

The Real Finish

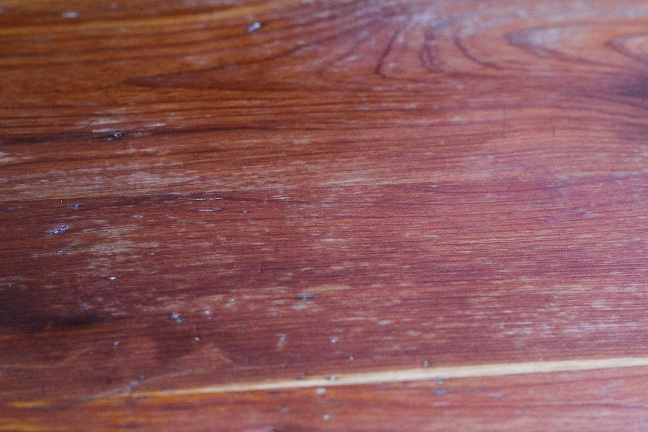
Unfortunately, even after the wax had dried, there were still noticeable parts of the lid that looked ashy/greenish/blah. Annoyed but determined, I found some 60 grit sandpaper in the toolbox and started sanding my little heart out. Not only did the sanding clear up the discolorations, it actually brought out more the wood grain than I expected.

I’m halfway done with sanding and kicking myself that I didn’t do this earlier. What can I say, I’m an idiot perfectionist. The current plan is to try out a power sander and then oil it back up sans annoying imperfections. I might hold off on the waxing though, it dries matte and I’m not sure I like it. I know I’ve sanded away the shine, but I’m making the prettiest goram chest I can, even if I have to backtrack.I started this project having no idea what I was doing, but at the end of the day it’s all trial and error whether you have a manual or not. Just accept that you might screw it all up… or you might not. I’m still figuring it out.

Extra Credit: Apparently, to avoid spontaneous combustion, this is how you dispose of oil soaked rags: