Tag Archives: Spotlight

Get off the Couch! A Couch to 10K Guide

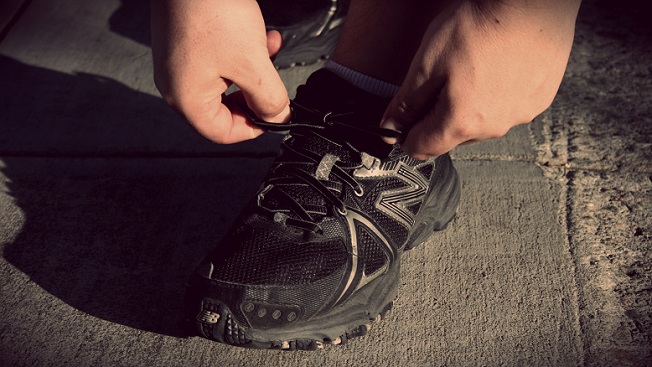
So you want to run? You want the wind in your hair, the asphalt under your feet, and the feeling of accomplishing a physical milestone? Welcome! Let’s get you off the couch and into the world of early mornings, aches and pains, and numbing ice baths.

First, a little something about me: I have never been a runner. Throughout my childhood, I participated in many sports but didn’t love running. But then I grew up, became an adult, and realized that I needed to create an active lifestyle for myself. So I joined up with Team In Training (more about that later) and have since run 2 half-marathons and a handful of 5Ks and 10Ks, along with close to 500 miles in training.

So maybe you’re asking, “Why is this article titled ‘Couch to 10K’ and not ‘5K’”? Because all of the information I’m about to drop is valuable for building up to running longer races. Running 5Ks is a wonderful and admirable goal, but a 10K requires a bit more information; so this article will give you a guidance system for eventually doing those longer races. Because, hey! You’ll be crossing those finish lines in no time.

There is an entire world of running and you can get in pretty deep, but today I’ll cover training and conditioning, clothing, and nutrition.

Training and Conditioning

There are a few methods by which elite runners train. “What, you mean you don’t just go out and run?” Well, yes, of course you can just do that. However, there are some other training methods that have become popular recently in the running world: one of which is called interval training.  

Interval training (also known as the “Run/Walk Method”) can be implemented in many ways while running. My training consisted of running for five minutes and then walking for one minute. A friend of mine would run for the length of three songs and then walk for one. The basic principle is that you give your muscles a chance to cool down while running instead of after. This allows your muscles to recover more quickly, allowing less soreness. For more in-depth information, check out what famed runner Jeff Galloway has to say on the subject. I encourage you to explore his site for everything from running tips to training schedules.

In addition to finding your perfect training method, conditioning is very important. Do you have to be in pristine shape to run a 10K? No, you don’t. But, you do need to work yourself up to the distance via cardio training. I’m a girl who likes to do “Just Dance” on the Wii for 45 minutes. Do what works for you! But make sure you add in some other form of workout (cardio or cross training) in between your midweek runs.

Speaking of midweek runs… you need to do them! Running 3-4 times per week will put you on the perfect track for your 10K. One run per week should be a longer distance, working your way up to 10 kilometers (6.2 miles). But it’s great to go out for shorter midweek runs to build your endurance. Find a friend, make it a before-work social event, and have fun with it. And make sure you stretch! Here’s some information on dynamic stretching (which is better than static stretching) for before and after your runs.

Clothing

Maybe what you wear isn’t the most important thing in your training, but it will be more comfortable if you wear certain items made out of certain materials.

If you go to an active-wear store or Target or wherever, you will see “moisture wicking” on many of their items. Those are what you want! Please, please, please don’t wear cotton (this includes socks and undergarments)! Cotton traps moisture, making your clothes heavier, making you heavier, making running harder. Okay, maybe it’s not that dramatic, but you’ll thank me later for the moisture wicking.

There are tons of options in terms of styles of clothing. Shorts, capris, leggings, short sleeve tops, long sleeve, no shirt—these are all available to you! Some pants have places for your keys; some have pockets to carry nutrition with you. Some bottoms have built in underwear, some don’t. (Trust me, you don’t want to be too sweaty in your nether regions, so perhaps invest in some sports underwear.) But most importantly, wear what you want. It’s not a fashion show. Just make sure to dress for the weather where you live.

Nutrition

“Wait, I need to eat something while running?” Yes, but only during longer runs. After about forty-five minutes of running (sometimes sixty, depending on body weight) your body seriously depletes in calorie levels. So it’s time to load up! This is your time to try out what works for you. As with everything else I’ve talked about, there are many, many options for what you can eat.

My favorite treats include Clif Shot Bloks and shell-less sunflower seeds. The Shot Bloks have a high calorie count and the sunflower seeds offer salt, which you lose while running (yay, sweat!). You’ll notice that right after you eat these mid-run snacks, your energy kicks back in to high gear and you feel ready to run more. Again, try out a few things to see what you like, what doesn’t upset your stomach, or what is easiest to carry. You’ll find your favorites soon enough.

Along with consuming calories, make sure you drink water or an electrolyte-enhanced drink! You really don’t want to get dehydrated during or after your runs. Check out this Runner’s World Article on eating and drinking before, during and after your runs. I love their suggestion of drinking chocolate milk—yum!

Time to Run

So, now that you have all of the information you need, it’s time to get out and run! Just do it. You’ll feel amazing afterwards and as soon as you cross the finish line, you’ll have reached an incredible personal goal.

If you want more help with training, I would suggest looking in to a few different groups that offer coaching while you give back to charitable organizations. Remember that I mentioned Team In Training (TNT)? TNT offers coaching assistance with a large group of people in your neighborhood, all while supporting and benefiting the Leukemia and Lymphoma Society (LLS). I ran both my half marathons with TNT, and I couldn’t be happier with the results. Not only can I pass all of my learned information on to you fine folks, but I also had an extremely gratifying experience raising money for LLS. I have never been prouder to call myself a runner.

Now, it’s your turn. Sign up for your first 5K or 10K and let us know how the training went, what worked, and what didn’t in the comments section below! The first time crossing the finish line is always the best. Here’s to more firsts!
Running Square

Photo by Sara Slattery

Successfully Disputing a Ticket (aka Beating The Man)

This is a story about having a vigorous—some might say pathological—need to fight a broken system. In case you didn’t notice the article’s title, I’ll tell you right off the bat that I ultimately won this months-long dispute with the New York MTA. And you can, too! The easiest thing to do, of course, is to not to get a ticket in the first place—this is not a how-to for criminals. But sometimes, these things are unavoidable.

Photo by Sara Slattery

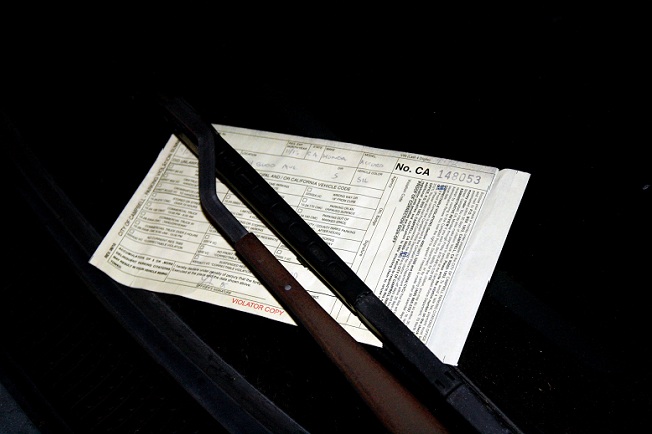
My story begins on a relatively mundane evening in January. I was rushing out of my office—a startup in Chelsea—so I could get home for a scheduled work call. I headed to my regular subway station, where I pulled out the creased monthly MetroCard I’d been trying to iron out (mostly by putting it between two credit cards and sitting on it). The first time I swiped it, the turnstile told me to “Please swipe again.” The second time: “Just used,” with the smirkiest of smirks on its mischievous nonexistent face. It wouldn’t let me in.

This is not an infrequent occurrence, as I’m sure New Yorkers can attest; generally when this happens, one shouts some brief exasperated explanation to the station attendant, who then unlocks the emergency door. At that particular station, though, there is no attendant; and a rush-hour crowd of straphangers (doesn’t that sound like an old-timey sex term? Straphangers. Straphangers.) amassed behind me, their irritation palpable. So, I stepped over the turnstile. Whatever. And I was immediately greeted by a plainclothes cop—which is fine: it’s their job, after all. I explained the scenario, not thinking that it would necessarily end with us laughing over a couple of beerskies, but at least expecting him to let me go with a warning! It must have been quota day, though, because I got no sympathy from the cop, who issued me a $100 ticket.

I asked him, “Sir, I know you saw what you thought was me flouting the laws of this city and you were required to take action, but do you understand why, as a civilian, this feels very unfair? For me to purchase a MetroCard every month, never deceive the system [which is true, by the way], be in a rush to get home to continue my workday, and be punished for that?” To which he repeated some stuff about being a “Police Officer of the City of New York” that clearly indicated he was not about to toe the blue line for me. So, furiously, I got on the next train, commiserating with a bike messenger who noted the yellow slip in my hands with a knowing smile and was immediately subjected to my blustering all the way to Essex/Delancey.

I don’t consider myself an angry person—“excessively vengeful” may be a better term for it. I knew, on principle, there was no way I was going to pay $100; also, I’d told the cop in the heat of my excessive vengeance that I would “absolutely fight!” the ticket, and I felt obligated to follow through.

So I called the wrongdoers’ hotline on the back of my ticket, found out where the Transit Adjudication Bureau is (Brooklyn Heights) and the best time to go (8:30 am, preferably not Mondays or Fridays), and began the long slog of disputing the ticket.

A few mornings later, I found myself in a large room at the TAB waiting to be called for my hearing. I had no idea what to expect—behind that metal door, were there a bunch of little courtrooms? Where would I sit in the little court? Would I be held in contempt if I texted a photo to my boyfriend? What about my parents? What if I just took a photo and didn’t text it until I left the premises?

As it turned out, I was seen by only one hearing officer, a very nice lady, in a small room with a tape recorder on the table. After verifying on the record that I was telling the whole truth and nothing but the truth, so help me Oprah, I explained the scenario (see above). She sent me back to the waiting area while she deliberated. After a few minutes, my name was called again and a man behind a very thick glass window told me the case had been adjourned until I could get a record of that dastardly MetroCard’s activity on January 10.

Now, here’s where it gets really fun: I sent the necessary paperwork to an MTA vortex, including handwritten requested dates. The adjournment was through April 30, which seemed like plenty of time, except that an entire month passed before I got a report back from the MTA. The report indicated that my request was processed on February 14, and attached was a list of the MetroCard’s full activity… on January 14. Which was completely useless except perhaps as a nice walk down Recent Memory Lane, because, as I mentioned, the incident occurred on January 10. Excessively vengeful words were uttered. I thought about just giving up and mailing in a $100 check, but at this point, I was too invested in probing the bureaucratic inner-workings.

A few mornings later, I found myself in a long line at some MTA building in the Financial District—incidentally, also where you can go if you lose your MetroCard, as I found out from the 60 people in front of me who had all suffered that plight. I was eventually seen by a clerk who seemed very angry, presumably because he was going for the company record in MetroCards-replaced-per-hour and my unrelated request was slowing him down. After scanning the first activity report and the ticket, he finally agreed to re-process. Off I went to wait some more… another month, in fact.

Version 2.0 of the MetroCard activity report finally came and I opened it with my heart pounding, like someone receiving their STI test results. Success! No MetroCard swipe was registered on the evening of January 10, but the swipe number jumped from #13 on the morning of January 10 to #15 on January 11. Glitch! Don’t get too excited, I told myself. Just because you had a nice hearing officer the first time doesn’t mean some jerk won’t throw this report aside and say that you should still pay a fine for setting a bad example. Good point, self.

Again, a few mornings later, I was back at TAB. I greeted the security guards on my way in, now old friends. After a brief wait, my name was called by a different hearing officer (thankfully, another nice lady) and the process was much the same as the first, except this time with Exhibit B. The officer reviewed the report, raising an eyebrow at the missing swipe number just as I’d dreamed she would, and twenty minutes later the clerk behind the thick glass told me with a smile that my case was dismissed! “You’re a free woman,” he said, in my imagination. I left the building with my head held high, and spent $10 of my hard-kept money on an extravagant breakfast. Take that, somebody!

Remotivation: Jumping Back on the Health Bandwagon

It’s 11 pm. You stand in front of the open refrigerator, rub your distended belly and wonder what just happened to the fifteen Darth Maul cookies left over from your boyfriend’s “May the Fourth Be With You” Star Wars party. Oh yeah, you just ate them all, despite your determined declaration just last Monday that “It’s time to start fresh!” They somehow found their way into your mouth, and on the fourth day in a row of not working out, too. What bad luck! Evil cookies!

If you have ever tried to begin living a healthy lifestyle, you are probably familiar with one of the two following scenarios. One is to say “Screw it, I’ll start next month” and throw out your entire health plan (so you might as well cram in that last cupcake, too). The other is to spiral into a fit of self-loathing and overcompensation, involving weird cleanses with exotic spices and citrus and two hours every day on the elliptical.

Stop! There is a healthier way! Stop binging or purging (or a combination of both) and follow this easy, healthy method to remotivate yourself in the days immediately following a slip-up. And if you’ve never tried to live a healthy lifestyle for the first time, you can apply these same principles to begin in an appropriate, non-Nicole-Richie way!

That Night

Don’t beat yourself up. You are human, and humans make mistakes. Don’t make yourself throw up (or even try) and don’t continue to binge—you know you’re uncomfortable anyway. Take that food baby to bed and get a good night’s sleep.

And stop doing jumping jacks; it’s just going to give you cramps. You’ll know it’s futile when you have to stop after three of them.

The Next Morning

First of all, I’d like to reiterate last night’s message: don’t beat yourself up. Realize that one day of overeating (or even a couple of days) isn’t going to morph you into Jabba the Hut. That being said, it doesn’t give you a pass to keep screwing up. Those calories count, and so do calories for the rest of that week, and all those extras add up quickly. This is a new day, a day to forgive yourself and start out with fresh determination.

With all of that in mind, start with a healthy breakfast. I know you might still feel kind of bloated and gross from the night before, and eating might be the last thing you want to do, but starting your day with a light but nourishing meal will give you energy, keep your metabolism going, avoid the 3 pm hunger attack, and remind you that food is not of the devil. If you don’t usually eat breakfast, now is a good time to start. Most people think that they will lose weight by cutting calories earlier in the day; however, most people who skip breakfast end up making up those calories later in the day, and often even more than usual because starvation leads to very poor choices later on. Intense hunger pangs tend to make you go for the fastest food option. Keep driving past that McDonald’s, and don’t you dare stop!

Make sure your breakfast includes a lean protein, which will help keep you full, and a complex carbohydrate (any whole grain or fibrous fruit or vegetable), which will slow your digestion, keep you full, and create a slow-release energy that will hold you over ‘til lunchtime. Some great examples are:

  • Nonfat Greek yogurt, with a handful of berries (I use frozen for convenience), a sprinkling of granola, and a drizzle of honey.
  • Two whole grain toaster waffles spread with a tablespoon of peanut butter and sliced banana.
  • Scrambled egg whites with mixed vegetables and a slice of whole wheat toast.

Also, get a workout in! It’ll boost your endorphins, and even a light morning walk will remind you that food is fuel and that calories don’t have to stick if you don’t want them to! Plus, you’ll feel much better and get a self-esteem boost if you tend to be hard on yourself.

The Rest of That Day

There are two things you need to do before the day is over. One is to make a plan for the rest of the week, including your dinners and workouts. The best way to combat a future slip-up is to have a plan and treat it as a non-negotiable appointment. At the same time, keep your expectations realistic. Know thyself, and give yourself goals that you know you can accomplish. For instance, if you work an 80-hour workweek starting at 9 am and you come home exhausted every day, don’t expect to work out after your workday—you’ll never get it done. Instead, plan to suck it up and set your alarm for an hour earlier. Get your workout in before work when you still have a ton of energy, or plan a lunchtime workout. Having your plan in front of you, on paper (or smartphone), will assure you that it’s doable. Look, you have time for it! You scheduled it in: it’s in your schedule right there!

The other task is to get rid of whatever triggered your slip-up in the first place. I know it sucks to throw out food, especially if that food happens to be leftover nachos (they crisp up great in the oven!), but just close your eyes and get it done. In fact, this might be a great time to go through your cupboard and throw out problem foods in general. Giant jar of mayonnaise? Get rid of it. Double-stuff Oreos lurking in your pantry? Bid it farewell. Cooking lard? What are you, crazy? Banish it from thy sight!

This is one I have trouble with. My pantry is pretty well-behaved in general, but if there is leftover brownie cheesecake from a party, my logic says, “Well, I don’t want it to go to waste, but I don’t want it tempting me all week. I’ll just… eat it all now! That way, it won’t be a problem later and I’ll only have been really bad for one day, instead of slightly bad for seven days! Genius!”

What? Don’t raise your eyebrows at me. No one is perfect. Let’s move on.

The Rest of That Week

Stick to your plan. Recognize that treat days are perfectly acceptable within the structure of a healthy lifestyle, but the best way to distribute them is to wait for a treat day (or, preferably, just one treat meal) on a special occasion when you really won’t care, such as a family dinner, birthday party, or holiday. A good way to look at it is the 90/10 rule: eat well 90% of the time, and don’t worry about the other 10%.

Do your research. Find healthy alternatives for cooking methods, ingredients, or your favorite treats. For example, sauté vegetables in chicken broth instead of butter, or replace an after-dinner serving of ice cream or cake with a bowl of sliced apples, sprinkled with cinnamon, oats, and honey heated in the microwave. Voilà, healthy apple crumble. Once you’ve done your research, do your grocery shopping and begin incorporating these substitutes into your diet!

Have a rule for your workouts: never, ever, go more than two days in a row without exercise. Any kind of exercise. If you’re on a trip, find the hotel gym or go jogging. Visiting friends? Go out for a walk or hike, and let them show you the town. If you’re in space, I don’t know… bounce off the walls in zero gravity or something! Just make it a priority to keep active and keep it in the forefront of your mind. With this rule, you will never wake up one morning and realize it’s been two months since you’ve worked out, and you will get a decent number of workouts in per week.

The Rest of your Life

Remember, a healthy lifestyle is just that… a lifestyle. Whatever you plan to do, you have to see yourself doing it for the rest of your life. There is no magic diet that will help you reach your ideal Hugh Jackman/Gwyneth Paltrow proportions, and then let you go back to eating whatever garbage you want without gaining it all back.

This also may mean letting go of some unrealistic expectations. If the only way you’ll ever look like Gwyneth Paltrow (who, honestly, I don’t think is that hot anyway) is by starving yourself, then you aren’t meant to look like Gwyneth Paltrow (who, again… is not that hot). Learn to love your body for what it is! The human body is an extraordinary thing, and can do extraordinary things if you treat it well and let it try. Often, exercise is a doorway to this frame of mind; once you see what your body can do given the chance, you’ll stop punishing it and start taking good care of it.

And finally, I’d like to leave you with this final note on the nature of food. Food can be the best medicine in the world or a slow, agonizing poison, but food is not evil. It isn’t trying to trip you up, and that burger honestly does not have it out for you. There is great joy to be found in our food. Treats can be enjoyed in moderation, but you need to find the balance for yourself. Good, healthy, and nutritious food can have beautiful tastes, textures, and color, and above all, it will nourish and enrich your life and fuel your amazing body. Make the right choices, find the love and richness that can be found through good health, and make that your healthy lifestyle.

It won’t be easy, but it will be worth it, and I promise you will thank yourself.

remotivation

Things You’d be a Sucker to Buy New or Full Price

As a millennial managing my personal finances in the wake of The Great Recession, I have had to find creative ways to cut back that I otherwise might not have. This includes buying used things when, in more prosperous times, I may have bought the item brand new. On this pauper’s pilgrimage, I’ve discovered that if you can find what you’re looking for secondhand, you’d be an idiot to buy it for the full price.

Thrifting Square

Photo by Sara Slattery

Tools, books, cheap sunglasses, furniture, stylish clothing… These are all on my list of things you should never buy new, because you can find them used on Amazon, eBay, at thrift stores/flea markets, or used bookstores, from half price to pennies on the dollar. More importantly, you can feel rich for a couple of hours while directly supporting your local economy! Got twenty dollars in your pocket? Well, well, well—look at Mr./Ms. Fancypants-Highroller!

There’s a reason why the word cheap has such a bad connotation: being cheap means that only the bottom-line dollar amount matters. If that’s the case for you, you might as well stop reading. However, being frugal means extracting a high amount of value relative to the amount of money invested. Who doesn’t want good quality stuff without breaking the bank?

Enriching the Local Economy

With relatively few exceptions, new goods are sourced globally from giant corporations. Putting aside the typical ranting against them, this means that rather than enriching your friends and neighbors, your money supports factory labor thousands of miles away and mostly enriches several hundred institutional shareholders.

Buying used and in secondary markets usually entails going to a local thrift store, which often is family owned (like one of my favorites: Lost and Found in Sunnyvale, CA), or buying from individuals at flea markets. The further your money travels, the less stimulating it’s going to be to your community. Generally speaking, it’s more responsible to spend locally.

Only Got 20 Dallaz in My Pocket

Thrifting is also a fun, inexpensive activity! Half the fun is going with friends to look at all the awful stuff that’s there—like I do (shameless plug). Also, sometimes you will see things at the flea market that were obviously shoplifted and are now being fenced for sale. Some might view this as participating in a legal wrong—cool, keep walking to the next stall. Personally, I play too much Skyrim, so I like think that I’m acting like a member of the Thieves’ Guild or the Ragged Flagon, reveling in the cloak-and-dagger nature of a ‘black market’ (when really its mostly just razor heads and Similac). It’s nerdily exhilarating, and I get a kick from it. Plus, I don’t really know for sure if it’s been stolen, and I can’t exactly go around lobbing accusations. Since the presumption of innocence is the bedrock of American justice, shop away, moral relativists! Besides, what’s more immoral: benefitting from shoplifting, or charging $40 for a hammer made at forty cents per unit by a nine year old Chinese kid?

Things to Never Buy New

  • BOOKS:

Especially the following:

-       Any book by Tom Clancy
–       Any book by James Patterson
–       Any book by Danielle Steel
–       Any book by John Grisham
–       Any copy of The DaVinci Code (Ew.)
–       Any copy of Wild Animus (You’re a sucker if you pay any money for this, they give it away on all college campuses)
–       Any objectivist propaganda by Ayn Rand
–       Any copy of Shōgun

  • TOOLS:

People are always trying to get rid of their tools—they bought new ones or they don’t use them anymore: whatever the reason, they want to get rid of theirs. You can buy tools at anywhere between 10-20% of what they’d cost at a Home Depot. And if paying a fraction of the cost for tools and enriching your local economy wasn’t enough incentive, you should be aware of the political campaigns Home Depot supports and determine whether or not they align with your own beliefs.

If you’re moving into your first place and you’re looking to build your kit of indispensable tools, look out for these items at your local flea market. You could save a nice bundle of money. The tools commonly spotted:

-       Hammer
–       Scissors
–       Basic screwdrivers
–       Razor heads
–       Razor blades
–       Duct Tape
–       Tweezers
–       Nail clippers
–       Saw blades
–       Drill bits

  • OTHER:

-       Sunglasses

Seriously, unless you’re buying Ray-Bans or Oakleys, all sunglasses are basically plastic shit made in China. Twenty dollars for cheap plastic crap is a crime, and retailers that sell them at that price ought to have bamboo shoots shoved underneath their toenails. At a flea market, you can buy them for about $5 a piece, or cheaper.

-       Leather jacket

This is important, because a brand new one rarely (if ever) costs less than $150 and they can cost as much as $200-400 or more, depending on the brand. But if you hold out for exactly the jacket you want, you can usually find it between $10 and $40 at a thrift store. These are the real gems of thrifting. If you have a nice leather jacket like I do, you wear it all the time. You will have saved hundreds of dollars and look like you stepped out of a Macklemore music video (can I refer to that song a little bit more? I definitely haven’t done it enough).

Getting Started

Yelp. Google. Seriously.

First, finding the thrift stores presents a logistical problem. You rarely ever want to hit just one. The most fruitful method I’ve found is to Yelp it, and then transpose the positive Yelp hits into a Google Map. From there, I group the stores into sectors, or ‘circuits,’ that I can hit as part of a planned trip or if I just happen to be nearby. This type of informational awareness allows me to attack all the thrift stores with optimal logistical efficiency. No wasted gas, no yo-yo-ing back and forth across town—you will be a precise, methodical, lethal thrifter.

If you choose to hunt at a flea market, make sure you have cash. Since there is no ‘check out’ save the person who is manning the stall, take the opportunity to hone your haggling skills. Some people will be receptive to it; others will not. The method of haggling I have found to be most effective is to hover and look indecisive. An experienced fleamarketeer will sense the opportunity, and swoop in and make you an offer. Make your best “Aaaggghh, I dunno…” face, and watch the price fall. Finally, take out some cash, make sure they see it, and undercut the second offer by about 10% or try to get a bulk deal if applicable. Do not do this at a brick-and-mortar establishment—it is a major protocol breach. Likewise, at a brick-and-mortar store, cash isn’t as important as it is at a flea market or garage sale, since most thrift stores take credit cards.

So support your local economy, save some money yourself, and have some social fun in the process. Thrift, you magnificent millennial bastard children of capitalism, thrift!

All My Shit’s Online

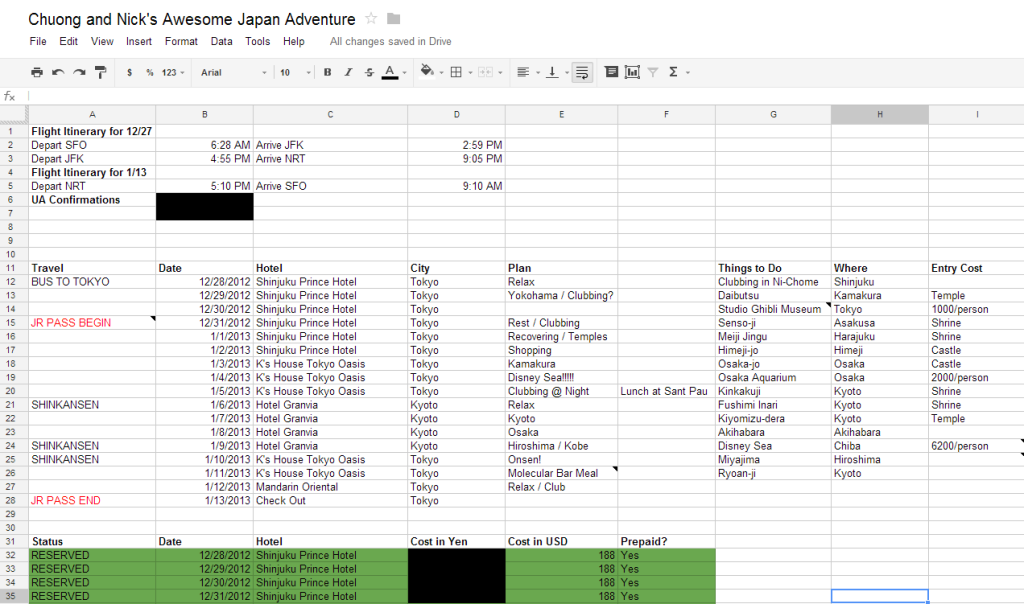
My boyfriend and I have schedules that don’t match up. We have social calendars that sometimes deviate from one another’s. Sometimes I forget that we really need to get eggs from the grocery store. Again. And so did he on his way home from work. Life together is complicated, but we use a variety of Google web apps to make managing the chaos easier. When we started planning a trip to Japan, there were questions like “What the hell do I need to pack? How cold is it? Are we going anywhere warm?” (Everything, very, and no). Now, when we need to organize anything, we just share a document in the cloud: no fuss, no forgotten eggs, and just a clean spreadsheet synced across our devices.

Cloud 4

Photos by Chuong Nguyen

As a fairly avid iOS user, I have no issues using main competitor’s web products. Google’s products are built better from a user’s point of view, and they’re easier to access from any device with an Internet connection. If you’ve got an Android product, these services sync up nicely with your devices to make sure you stay on track with whatever you’re doing.

For weary travelers with organizational issues, read on:

Google Calendar (or How My Boyfriend and I Book Each Other Up)

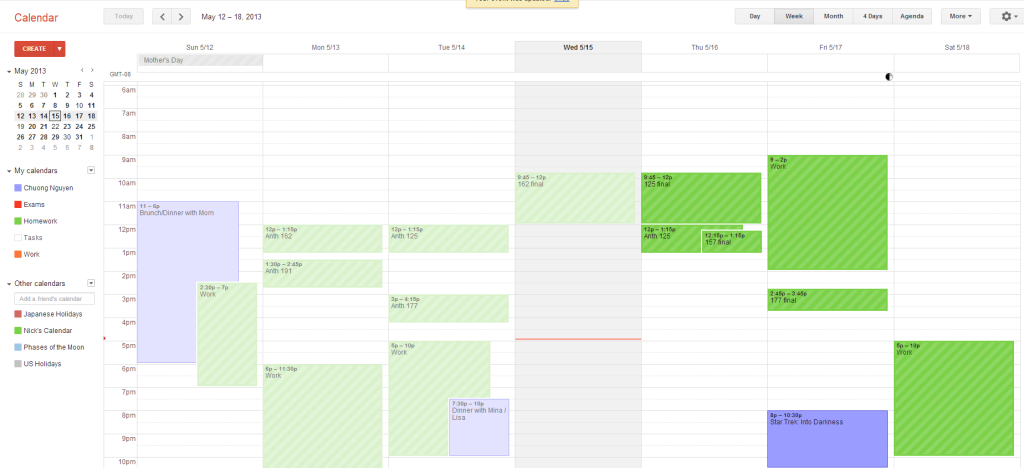
When I was at university, I made appointments on my Google Calendar for myself when I had work and classes. I’d set the appointment to recur until the end of the semester, and gave it a separate colored label so it could fade into the background. This provided the basic template for when I had free time, how late I could sleep in, and approximately what time I’d come crashing home. From here, a differently colored calendar was my appointment book for assignments and papers. Small reminders of “12pg paper on Environmental Waste” or “Problems 1-35, odd, page 76” helped declutter my mess of syllabi from my school bag. It became easier to just check my calendar for when things were due for what class, than to rifle through a binder full of papers.

Cloud 1

When my boyfriend and I started seeing each other more seriously, we realized that we had fairly opposite schedules. I had work in the mornings and classes in the evening with some nights off, and he had classes midday and work in the evening with some mornings off. We had to compromise and find times for when we could see each other, and sharing our Google Calendars gave us the visual organization we needed to know that we could indeed see Iron Man on Thursday night, probably around 8 PM. His Calendar shows up as a different color than mine, so it helps me see when I’m free compared to when he is available. From here, it’s not that hard to text and ask if he’d like to have brunch on Saturday, because I can see that he’s working a closing shift. A few minutes of organization from you and your partner can make seeing each other so much easier.

Google Drive (or How to Always Have Everything You Need for School and Work)

Cloud 2

Google Drive

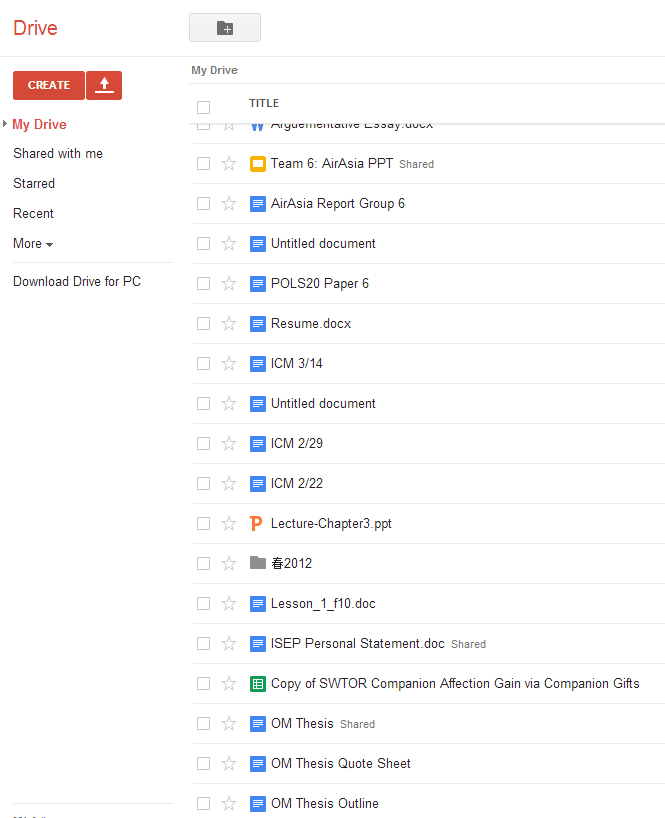
Google Drive started as Google Docs, but it’s become Google’s version of Dropbox. Sure it’s not exactly the same thing, but for major documentation and cloud editing, it’s the best that I’ve used. You can upload and store files from other applications, or choose to create and edit within your browser using Google’s alternatives: Docs, Sheets, and Slides.

Google Docs can be used to take notes for class or work, stored on the cloud for you to access from your smartphone, tablet, or laptop. It’s easier to study (and you can’t make excuses), because your notes are everywhere! For writers too, it’s a good idea to just start docs with your poetry or quick writing. You can come back to it later when you come home from the cafe or school, and revisit it if you want to.

cloud 3

Google Doc

I use Google Sheets (similar to Microsoft Excel) to calculate budgets, including how much I’m paying for rent, if we can eat at Chili’s on Thursday (yes, but no margaritas), and how much I can afford to put into savings. Planning for trips and events (such as my friend’s lovely wedding, including all of her ideas) is a breeze. I set up a tab for locations, another for timetables and itineraries, and another for my packing list. The reward for planning on Google Sheets is that I can check it or update it from the parking lot at the grocery store or from my work computer without forgetting it by the time I get home.

But here’s my favorite part: Google Slides is a cloud-accessible version of Microsoft PowerPoint, with all of the perks of shared collaboration. You can upload your template to the Drive, and everyone can add in their parts. From there, you can peer edit easily, with commenting and built-in tracking of all the revisions from each person. I also particularly like using Slides to present as well, to avoid issues with exporting and importing into PowerPoint. It makes working in groups in university or high school (and arguably in the professional world as well) very easy. There’s no angst about how Jenny doesn’t have PowerPoint 2012 or how Marcus wants to use this font that his dad designed but no one else has installed. (That said, standard disclaimer about putting private industry information in the cloud. Google has pretty solid security, but you don’t want to be the person that leaked big news to the public. Be careful, but be proactive about using it.)

Cloud 5

Google Presentation

For the folks who like having documents on the go, Drive is a godsend. I’ve studied from my smartphone in the hallway before an exam. I’ve used Sheets to see when I’m probably going to be debt free (or more realistically, if that new toaster is within my reasonable budget). I’ve watched my group sigh with relief when I pull up the presentation that someone forgot to bring on a USB drive.

Why You Should Declutter Your Life and Let Google Do It For You

It’s easy. You can have your social calendar on the go. You can study for classes, jot down notes, and plan your wedding from your smartphone or tablet. You can throw up that presentation about Grandma and Grandpa’s 50th Wedding Anniversary just because they wanted to see it again in without any hassle. Getting your stuff into the cloud takes a little time investment, but the payoff is huge. You can sync up with friends and coworkers, maintain and protect your access to your documents, and avoid duplication or loss of effort.  If you have a Gmail or Google Apps address, you already have access to Google Drive; if you don’t, it’s free to sign up!

How to Mediate a Conflict

Aren’t conflicts just the most fun? Every group of friends, coworkers, or any gathering of people will probably have some sort of drama every now and then.

Be it roommates who aren’t talking because of dishes left in the sink or people who are frustrated about scratch paper being left in the communal copier, it’s good to have a conflict mediation system up your sleeve to help folks work things out. Here are some basic steps:

Assess your Involvement. Are you the best person to be helping these people? Make sure you are actually a neutral party. If you’re not, get the eff out of there: you’ll really only make things worse and get yourself stuck in the middle. Is this a work issue? Make sure you feel comfortable enough with office politics to play this role. As a mediator, your job is not to figure out who is right, but instead to help the aggravated parties create an equitable solution together. Make sure you are coming from the right place.

Set your discussion up. Choose a comfortable, quiet, private place to chat. Start by setting some ground rules for the discussion. These are here to make sure the discussion stays on track and that people are less likely to be hurt by others’ words (because we all know that “sticks and stones” is a huge lie). Good ground rules include:

  • ‘I statements’: Participants only talk about their experience of the situation. This doesn’t include what they think others might feel, or why they think others have done something.

Pro tip: “I think you’re a bitch” is not an ‘I statement.’

  • Be kind: no yelling, no insults, no storming out.
  • If anyone in the group has to leave at a certain time, talk about that now so everyone is aware.

Tell everyone the structure of the discussion, so people know what to expect. Here is a typical structure:

  • Each person explains their side of the story and gets heard by everyone else.
  • Together, you all explore solutions.
  • After exploring, you’ll agree on a solution to start with.

Now it’s time to jump in!

Figure out what actually happened. Start by having each person explain where they are coming from. Flip a coin or draw numbers to see who starts first. In instances with large groups of people, it’s important to repeat this process with each individual, and not set up camps. Each person will have a unique experience of the conflict, and people ganging up on another person will defeat the purpose.

Here is an example, using our imaginary friends Oscar and Martha:

  • Martha won the coin toss, so she starts by telling her side of the story and why she is upset.
  • Oscar repeats what he heard Martha say without interpretation or explanation.

This is super critical. The goal of this piece of the process is to make sure that each person’s feelings are put out in the open, and each person can confirm that the other person understands. The summary should be something like “Martha says that it she feels frustrated when she comes home to a sink full of dirty dishes.” An example of a bad summary would be “I leave my dishes in the sink, and it doesn’t matter to me, because I have more important things to do than dishes.” As a mediator, it’s really important to keep people from digging in their heels and not trying the process out.

If you are mediating a conflict between a large group of people, have each person say something. They don’t have to tell the whole story back, but it’s critical that person who shared feels like every person understood.

  • Martha confirms whether or not Oscar understood her story correctly. I usually ask people “Is that how you feel?” or “Is that what happened?”
  • Repeat, but with Oscar’s side of the story.
  • If you are in a group, repeat until each individual has had an opportunity to tell their experience.

Take a deep breath. Well done! At this point in the mediation, things should already be looking up. Feeling heard is really powerful, and getting everything out on the table is usually more than half the battle. But, we still have to press on…

As mediator, identify key words and issues. Is someone looking for respect? Cleanliness? Remuneration? What were some needs that were identified as not being fulfilled? Choose the issues that need to be resolved, and get ready to start looking for solutions. Make sure to check first with the people who are upset—it would make things way worse to assume you know exactly what the biggest issues are.

  • A great way to ask this is, “It sounds like it really bothers you, Martha, when you come home and find dishes in the sink, is this true? Can I list this as one of the main issues to focus on?”
  • There is no right number of issues to focus on—it totally depends on the conflict and how much time you have. If you are pressed for time, make sure to ask the people you are helping what the most important things to focus on are.

Start Looking for Solutions. With the person who lost the coin toss starting first (Oscar in our case) or the last person to speak if in a large group, start asking your conflicted parties to suggest solutions to each issue. Each person should suggest a solution, and then there should be time to think before swapping to the other person. Go issue-by-issue and write the suggestions down until you have a good brainstorm of solutions.

Photo by Anastasia Heuer

Photo by Anastasia Heuer

Check In. Take a beat. Check in with those involved. Are they feeling good? Hopeful? Frustrated? If they are not feeling so great, go back and explore more about what is really going wrong. You may be focusing on something totally incorrect!

Make a Plan. Once you have a list of solutions and everyone’s feeling good, make an action plan, and make it SMART. That is, Specific, Measurable, Attainable, Relevant and Time-bound. A bad solution would be “Oscar will wash the dishes,” but a SMART solution is “Oscar will wash dirty dishes within 24 hours of using them.” The latter solution can be checked in a way that the former can’t, and that makes it really easy to identify when Oscar hasn’t followed up.

Check Back. Make a time to check in with the involved parties to see how they are doing. Make plans for coffee a week or two later to see how they are feeling and reassess then.

Want to read more about conflict resolution? My favorite resource is The Center for Nonviolent Communication

How Not to Sound like an Idiot: Watching Sports

Sports and sports fandoms have existed since ancient times. We, as a society, love to gather with like-minded people and talk about what we love and, for a lot of us that includes “The Game.”

So what do you do if you know someone who loves to watch and talk about sports, but you have no clue what they are talking about? Well, fear not: here are the basics of three popular sports to help you navigate your way through the top major U.S. sporting events of the year: the Super Bowl, the World Series, and March Madness.

Football: the Super Bowl

American football spawned from the game rugby (if you ever watch the two, they look pretty similar). The basic idea of football is to get the ball down the field to the end zone to score a touchdown. Play is divided into four quarters, each 15 minutes long. There is an offensive side (the one who has the ball) and a defensive side (the one who is trying to get the ball).

The offensive side has four attempts (called downs) to move the ball ten yards down the field (the field is 120 yards), or else they have to give the ball to the defensive side. The offensive side can do this a number of ways by running or throwing the ball to another player further down the field. The plays are counted by calling them the 1st down, 2nd down, 3rd down, and 4th down. Often, if the offensive team has not been able to reach a new “1st down” (by moving the ball ten yards in their four attempts) they will punt the ball (by kicking it down field) to the other team on their 4th down. This avoids a turnover (where the other team gets the ball). Turnovers can also happen if an offensive player fumbles (drops the ball and it is retrieved by a defensive player) or if a defensive player intercepts (catches the ball during a pass intended for an offensive player).

A touchdown (when the ball crosses into the end zone during a down) is worth six points. The scoring team then has an opportunity to score an extra point via a field goal (a kick in between the U-shaped posts) or a two-point conversion (another touchdown, but starting really close to the end zone). The offensive team can also choose to kick a field goal during the 4th down, instead of punting back to the defense or running a touchdown. If successful, this play will earn them three points.

Professional teams usually score around 15 to 20 points per game, but it can range anywhere from zero to 50 points each.

Basketball: March Madness

The basic idea of basketball is to get the ball down the court to score a basket in the net. Basketball is a fairly fast-moving game and the rules are different between an NBA (National Basketball Association) game or an NCAA (National Collegiate Athletic Association) game. Since March Madness is, in my opinion, a bigger deal than the NBA Finals, let’s focus on NCAA regulation rules.

An NCAA game is divided into two halves, each 20 minutes long. Much like football, the offense has the ball and the defense is trying to get the ball. The offense is given 35 seconds to shoot a basket or 10 seconds to move the ball past the half-court line—or else the ball is returned to the defense. This countdown begins at the beginning of each half and is restarted automatically after each basket is scored, (you can see this countdown timer on the scoreboard, usually above the score count). Each basket is worth two points unless the shooter gets a basket at or behind the three-point line, which earns them three points.

Professional teams usually score between 80 to 100 points a game.

Baseball: the World Series

Baseball is a slower-paced sport, and can sometimes seem boring if there isn’t a lot of action. The field is called a baseball diamond and has four bases: home plate, first base, second base, and third base. (Hello, middle school make out rules!) The point of baseball is to score as many runs as possible. A run is when the batter runs around all four bases and back to home plate without getting tagged by an opposing player who has the ball. One batter reaching home plate counts as one run or one point.

A game of baseball is divided into nine innings. An inning is when both the home team and the visiting team have played offense and defense (meaning, both have gotten a chance to bat). When an inning starts, the team on defense sends nine players out to the field: three in the outfield, four in the infield, a pitcher, and a catcher. The pitcher throws the ball to the batter, who tries to hit it out into the field using a baseball bat. Then, it’s basically a race: the batter runs to get to the base before the defense can throw the ball to the base. As long as the batter gets to the bases before the ball, he is safe; but, if he doesn’t, then he is out. Also, if the batter hits the ball in the air and a defensive player catches it before it hits the ground, that player is out—this is called a fly ball.

Usually, professional teams score around 2 to 5 runs per game; it is possible, though rare, for the score to get into double-digits.

I hope this helps you to understand the basics of these sports! If all else fails, just sit back, relax with a cold beverage of your choosing, and yell when everyone else yells. But don’t be afraid to ask questions! These games sometimes have rules so obscure that even pros can get confused, so as long as you’ve got the basics, you’ll be fine. Clear eyes, full hearts, can’t lose!

SportsIdiot1Hero

Photo by Meaghan Morrison

Harnessing Every Last Bit Of Your Leftover Ingredients

This Internet-wide preponderance of food blogs, food porn, recipe-shares, Pinterest pinwheel cookie pins—it’s no flash in the pan (filled with tilapia). People love food. Case in point: the Food Network has created a second entire network to fit all of its televised cooking and food-related content. Twenty-four hours a day wasn’t enough.

Leftovers Square

Photo by Alyssa Kurtzman

And food is a relatively easy, highly Instagrammable form of creative expression that you get to eat afterward. But I and others like me—who swoon at those unattainable middle shelves of Whole Foods aisles, dreaming of making that $40,000 salary—can’t easily justify buying a three-dollar bunch of rosemary just for the required tablespoon, chopped, in that cornbread-dumpling beef (or tofu!) stew. However! Don’t overlook the recipe or the ingredient, even though it costs almost as much as the beef (or tofu!) shoulder you bought in the first place.

Seriously, don’t leave it out. Rosemary, like most other fresh herbs (you heard me, genetically-programmed cilantro haters), is a delight, especially in an entrée or sauce with other earthy flavors in it. Its piney notes make your dish seem more dimensional and polished. But no one is going to use an entire package of rosemary in a recipe, unless you’re cooking for squirrels, because that dish is going to taste like an evergreen. So what to do with the remains? I’ve found that the longest-lasting and most practical use for it is to make a simple syrup or infusion with the leftovers:

  • Add the leftover herb (washed—don’t be lazy like that) into a small saucepan with equal parts sugar and water. A cup of each should be fine, depending on how much you have to work with.
  • Slowly dissolve the sugar and bring the mixture to a boil, stirring so nothing burns, and then turn the heat off and let that pretty little syrup chill in the saucepan, covered, for up to a couple hours—or more, I guess, if you fall asleep or something.
  • Then strain it through a mesh strainer into some kind of container, cover, refrigerate, et voilà! It should last for a few months or so.
  • Any herbaceous syrup will be delicious in homemade cocktails (yes, even cilantro, which is muy delicioso in a margarita). You’ll look super professional to your friends, like you planned the whole thing, as opposed to it being a byproduct of that pot of stew you ate by yourself while you marathon-ed Fringe. And for your non-imbibing friends (bless them), the syrups make for a lovely refresher when mixed with club soda.

If you’re not a fan of the sweet stuff, you can also let those leftover herbs sit for a couple of days in a bottle of gin or vodka for a more hardcore (and omgg bikini-friendly) rocks drink.

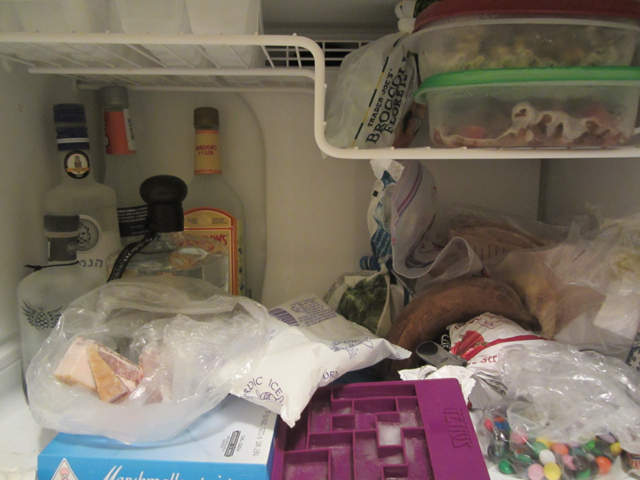
So what about your leftover scraps of everything else? One of the most crucial tools for maximum usage of your scrappies is your freezer. Sounds obvious, but you wouldn’t believe the variety of items that will keep and even improve by being put in the freezer. It’s not just for ice anymore!!!

Exhibit A: baked goods. Brownies, cakes, cookies, and chocolate will all keep remarkably well in the freezer—much better, in fact, than in the refrigerator. The fridge tends to degrade that moleculo-confectionary-mouthfeel (it’s science), while the freezer will fix the pastry in its delicious original consistency. They only take about an hour sitting out or a ten-second zap in the microwave to thaw—or you can just eat them frozen, which is surprisingly tasty.

Okay, baked goods aren’t necessarily an “ingredient,” but bread often is, and that freezes up like a charm. Other things that freeze like a 13-year-old doing the Cha-Cha Slide are meat, which is obvious, as well as butter and other types of animal-based fat, like bacon fat and lard—both of which are way fun and totally not gross to cook with, contrary to your probable opinion. Also cooked pasta, especially in some kind of tomato-y sauce, is often improved by “resting” in the freezer for a period of time. Obviously broth or stock will last until doomsday in there, as will ginger root and even bananas, which turn an unappetizing brown color but then eliminate the need for ice if you throw them in a blender with other smoothie ingredients. Other things worth saving in the freezer are anything with seeds, such as a spice mix containing sesame seeds, or flaxseeds, which you can also grind up in the aforementioned smoothie. That’s a trick a little old man who runs a spice stand in a shuk once explained to me: high oil-content seeds like that will quickly go rancid in a room temperature cupboard. At least I think that’s what he said.

What other ingredients could you possibly have left over after all that? …Milk? I guess you could make yogurt with it (you psycho), or else, you know, drink it. Vegetables? Odds and ends from onions, garlic, shallots? SFTS: stir-fry that shit. I’ve got a freezer full of lard if you need it.

That Time of the Month: Dealing with Your Period

It’s a plague brought unto us at the most awkward of times and lasts throughout most of our adult lives (or at least the arguably attractive portion). For many women, they just started bleeding one day and have continued to do so every month since. So, let’s clear up some confusion about what is happening, why, and how to best deal with it.

Most of us learned about our baby-making machines in adolescent schooling, but here’s just a quick refresher: Every 28 days or so (every woman is different) your uterus will shed the lining (called “endometrium“) that was meant to create a hospitable environment for a fertilized egg. Since the guest of honor didn’t show, it doesn’t need all those party decorations. Your body will go back to homeostasis, and in doing so your hormones will get all out of whack, leading to the oh-so-pleasant changes in water retention (bloating) and mood (PMS). The cramping that you might feel is your uterus contracting in order to expel the endometrium. This whole process can last anywhere from 2 to 7 days, although for most women it’s about 3 to 5.

To prepare yourself beforehand, the most important thing you can to increase your comfort is hydrate, hydrate, hydrate! Before and during. A healthy amount of water in your blood works to promote viscous blood flow and hydrates your muscles helping to cut down on breakouts, painful cramps, fatigue, headaches, bloating, and loose bowel movements. Easier and cheaper than any over-the-counter medicine, right?

And, if you’re the type to get mood swings, exercise and a change of scenery will do wonders for your mood. Sadly, milk chocolate won’t help, but dark chocolate might! It contains small amounts of anandamides, which will give you a natural mood enhancement.

In actually dealing with the bloody mess, we have some options:

Pads

The easiest option. They’re easy to insert: just peel and attach. By simply having it down there, you know it’s doing its job. You don’t need to question when it’s time to change, your eyes will tell you all you need to know. There’s also that peace of mind that comes with knowing that there’s nothing foreign in your lady-crevices.

But they definitely come with their share of problems. While you can feel pretty secure with one on, it may lead to itchiness or, if left on too long, a certain smell that might alert others to the state of your vagina. Their comfort factor is reliant on bathroom accessibility, which kind of sucks. And, unless you’re catatonic, these pillows of cotton tend to shift, which can lead to a bit of a mess if you’re not careful. In addition to all that, they’re may not be the best at secrecy: not only does it feel like you’re wearing a diaper, you may look like it too.

If throwing away three pads a day is economically alarming, there’s an eco-friendly option to pads as well! You can either purchase or make your own re-usable cloth pads. I haven’t personally tried this, but I think it sounds like a fantastic option. It’s basically the same idea as reusable diapers, but with menstrual blood instead of feces. That’s about a hundred times less gross! Or about two times less gross—my gross tolerance may be a bit higher than most.

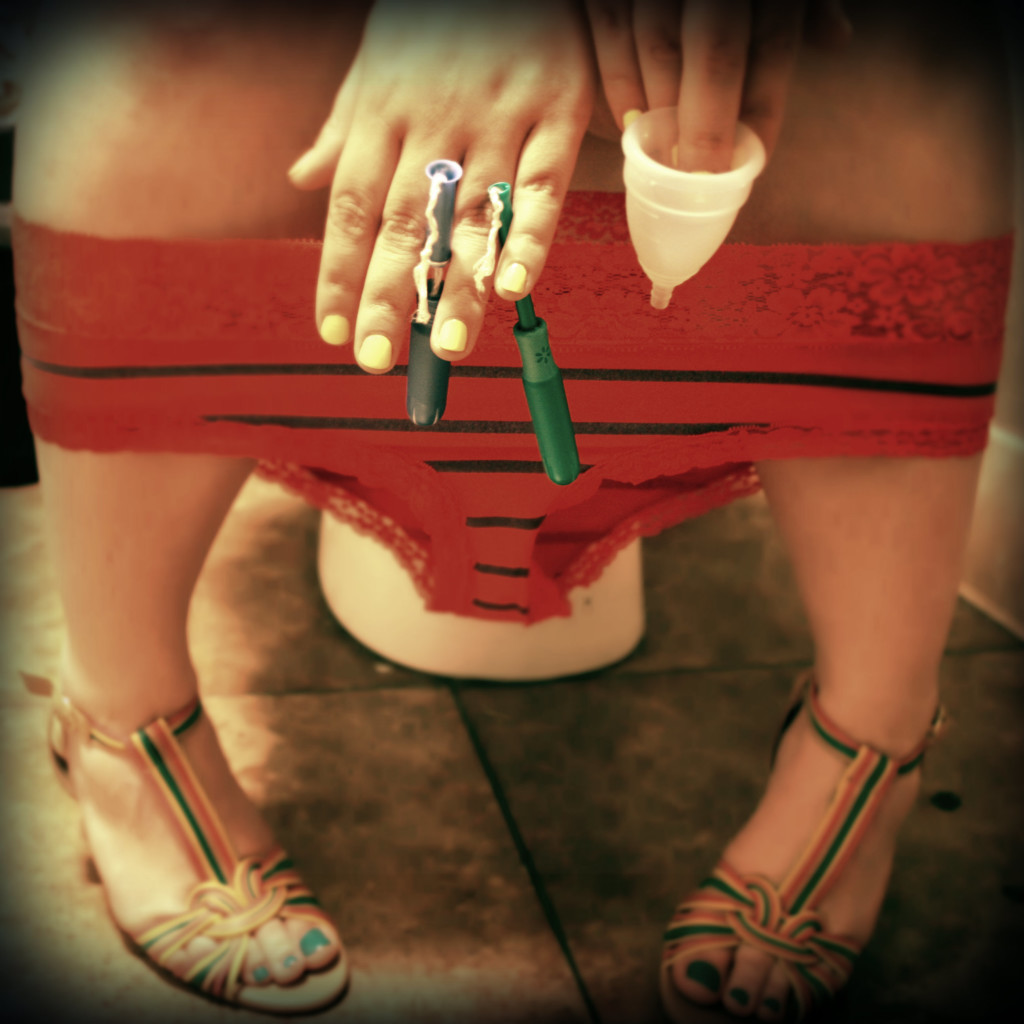
Tampons

My old go-to. They have many benefits over pads: they’re discreet, don’t show through your pants, and when inserted correctly, you can’t feel them. Plus, you can go swimming without fear of leaving a red trail and you can enjoy an active lifestyle without getting a rash! When dealing with your period, they’re the first road to freedom.

We have two options for tampon usage, those with applicators and those without. They’re both very simple, and easy to get the hang of. Insert the fatter end of the applicator into your vagina, grip the neck with your thumb and middle finger, and then press down on the skinny end with your index finger to push the tampon in and then remove the applicator.  Without a pre-packaged applicator, your fingers will act as the applicator. Same idea, except you grip the body of the tampon, and push directly on the string side of it. A little messier, but it has the benefit of more control over how it sits in your body. If you are able to feel the tampon inside of you, then it needs to be pushed deeper. Once you feel comfortable with the position, lightly tug on the string to ensure that it stays in place. If it doesn’t move, congratsyou’re good to go!

However, there are a few downsides: Tampons definitely have a time limit. Depending on your body, or the day of your cycle, this can range from one to eight hours. If you leave it in for too long, you can run the risk of overflow, unpleasant odor, and the most serious of all risks—Toxic Shock Syndrome (cue ominous music). Toxic Shock Syndrome (TSS) can result in death if it’s not caught early enough, and I think we’d all choose shedding uterine lining over death any day, amiright?

I once read a story about a women who forgot that she had a tampon in, then later had sex. The tampon didn’t come out for a few days. That might be something to keep in mind. Sorry for the nightmares.

Menstrual cups

I am in love with menstrual cups. These silicone vesicles of perfection have changed my life. Not only are the health benefits enormous, but they’re good for the environment too! They cost about $40 and one will last you up to ten years, so you’re no longer spending 10 dollars every month to protect your underthings and your dignity. They have the benefits of freedom that tampons provide, but with a menstrual cup you don’t have the risk of TSS. That’s because you’re not inserting cotton, which can harbor bacteria. The best thing about cups is that you’ll never leak with them and you can safely sleep all night in them! You probably shouldn’t keep them in longer than 16 hours on heavy days before you empty them, though, because that’s a pretty heavy load of blood to be keeping inside your vagina.

However, there’s a learning curve to them. First, make sure it’s right side up. The whole point is that it’s a cup to “catch” your blood. There are two ways to insert it depending on which is more comfortable for you. You can either pinch one side in so that the opening now forms a “C,” or you can punch down one side into the cup itself. Once inside your vagina, let go of the bowl of the cup to let it unfold, and then twist the base of the cup in a full rotation to form a seal of suction. If you hear a kind of popping noise as you twist, you know you’ve done it right. I usually like to pull down on it slightly and check if there’s any resistance. After this, wash your hands and you’re good to go! If you’re like me though, the first few times you use it, you might check yourself every ten minutes out of paranoia.

As for removing it, place your fingers around the bottom of the cup, and gently squeeze while twisting to loosen the suction. If you don’t loosen the suction, it’ll feel weird and you’ll know to stop, I promise. Hold it upright and then dump the contents into the toilet (or if you’re taking a shower, you can dump it down the drain). Rinse the menstrual cup (or wipe it down with toilet paper) before reinserting it to ensure a clean suction. It’s not actually that messy unless you purposefully fling it around or if you’re a complete klutz.

When you’re done with your week of menstruation, wash the cup and then soak it in boiling water for a few minutes. That will sterilize it, and you can then store it until your next period. Warning—you probably should not use if you have an IUD. Upon removal, the suction might pull your IUD strings out and—yikes—that would hurt.

So if you’ve been curious, or your period has been making your life hell, I hope I’ve helped shed some light on some solutions. Happy flowing!

Photo by Sara Slattery

Disputing a Medical Bill

Usually, when navigating the confusing world of health insurance, after every procedure, check-up, etc., you get a lovely little statement from your insurance company. I liked these—mostly because they said “Amount You Owe: $0.” Until last year, when a tiny billing discrepancy with my dentist crumbled into a massive back-office mess. My dentist was really good, and I truly used to like her, but in 2012—almost 3 years after I started seeing her—I got a big bill.  As in a several thousand dollar bill. There had to be a mix up! I just assumed they must have billed me for the wrong procedure and all would be straightened out soon enough.

So, I called in. Turns out, the dental office had only received checks for one or two of my seven appointments. Then, I called my insurance company, who told me that the practice had to call them to figure it out. I called the dentist back, and her office told me to hang tight. Three months later, we had the same conversation. And again at the six month mark.

Finally, when we rolled into 2013, I got another bill, and I was fed up. No one from my insurance company or my dentist’s office was listening to me.

And then I discovered how to dispute a claim. And now, I can tell you.

To clarify, this dispute didn’t involve lawyers—if you want to read about that, you can hit up Google. I contested this myself.

First, find out how to file a grievance with your health insurance provider. A grievance is a basically a formal complaint. You can actually call in a grievance, but I chose to file one online because it was quick and I had a written record afterwards.

Grievance forms ask standard questions such as when the incident occurred, who the persons involved were, and what exactly happened. Awesomely, grievance forms also ask you if you tried to handle the issue on your own, what the outcome of your discussion with the providers was, and (perhaps most importantly) what you want the outcome to be.

My dispute ended there. Problem solved: I ended up only owing a mere $9.

But, let’s say your insurance company doesn’t do a great job at responding in a timely manner. You have rights. These are usually spelled out by your insurance company at the bottom of the grievance form. In my case, the insurance company had 30 days to give me a written decision. If I was in that process longer than 30 days, I could file a grievance with my state. This is often done through a branch of the health department, usually called the Department of Managed Health Care or something similar.

No insurance company wants to get the state involved, so hopefully you won’t ever get this far. If things still haven’t cleared up, you have other options before even hiring a lawyer, such as contacting your State Insurance Commissioner. This government line of defense can help you in more areas than just insurance issues. When a friend of mine was going back and forth with AT&T for months on replacing a faulty landline, she called the Public Utilities Commission and someone high ranking from AT&T called her back within hours.

And then, when it’s all over, be sure to tell your state’s Better Business Bureau. Other consumers can use your experience to make informed decisions about their insurance companies. At this point, you have had a rough experience and you should let other potential customers know.

Pro Tip: When filing a customer service complaint in any area—from health insurance to fast food service—the words Better Business Bureau can often help turn things your way.

In some serious cases, you will need a lawyer’s help; but, know that if you look around there are already many avenues carved out for you to get your problems solved.

MedicalBillsHero