Tag Archives: Spotlight

Protect Your Shit: Renter’s Insurance

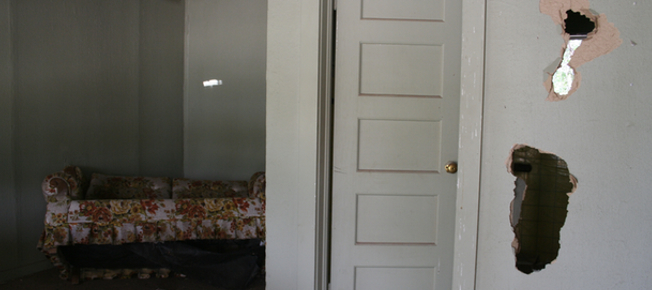
Congratulations, you signed your lease on your new apartment! You moved in all your furniture, your PlayStation 3, your MacBook Pro, and your collection of Christian Louboutins. Three weeks later, you arrive home to find that your downstairs neighbor didn’t realize blocking the built-in wall heater with a wooden cabinet was a bad idea. Your apartment is scorched, and your belongings have been reduced to ash. But don’t worry—your landlord has insurance, so you’ll be ok… Right?

Actually, no. Your landlord has insured the building but not your personal property within the apartment. Stories like this are why you should consider getting renter’s insurance.

What is renter’s insurance?

Renter’s insurance covers your personal property within your apartment. In the event that it is damaged or stolen, the insurance company will give you the money to replace the lost belongings. (Just like your parents’ house insurance.) Renter’s insurance also provides liability coverage, which can help you if someone gets injured in your apartment.

How much is it?

Most renter’s insurance plans run $10-$35 per month and the price is determined by the size of your apartment, the value of your belongings, and your deductible. Personally, I’d rather pay a little more per month for a lower deductible—to avoid shelling out $500 before the insurance kicks in—but it’s your choice.

But do I really need it?

That really depends on you. One way to determine if you need renter’s insurance is to add up the costs of all your belongings and decide if that cost merits purchasing insurance. (Try using a rate calculator like this one offered by State Farm.) If not, consider less expensive options, such as getting a safety deposit box at a bank for any priceless treasures.

Another thing to consider is the location of your apartment. What’s the crime rate in your area? Have there been a lot of break-ins? Do you live on the ground floor?  Do you live in a town where frozen pipes are common? Are you (or your roommate or your upstairs neighbor) likely to flood your apartment?

Finally, if you are a pet owner, and your pet was to bite another person, your renter’s insurance may be able to protect you from a liability lawsuit. (There is such a thing as pet insurance but it’s pet health insurance, similar to your medical insurance.)

How do I get it?

Progressive, AAA, Geico—any major insurance company—will offer renter’s insurance. I recommend trying to get a plan with the same carrier as your car insurance because they might offer a sweet multi-plan discount.

Am I missing anything?

Be sure to read the fine print for each plan and know exactly what your plan covers. For example some plans only cover damage on particularly valuable objects—such as musical instruments, electronics and fine jewelry—to a certain value. Others may have additional costs for liability coverage. Some policies will still cover stolen or damaged items even when they’re not at home (for example: in your car or hotel room).

But wait: you’re not done yet. Do you live in an area prone to natural disasters such as earthquakes, hurricanes, tornadoes, and/or floods?

You might have to purchase additional insurance to protect yourself. These plans have varying costs and restrictions. For example, residential insurance policies in California no longer cover damage sustained during an earthquake due to the losses sustained during the 1994 Northridge earthquake. You have to purchase additional insurance for this and other natural disasters, outside of your standard renter’s insurance plan. How this insurance is administered is regulated on a state-by-state basis.

In some cases, you may need multiple policies to cover one disaster. There was a lot of controversy after Hurricane Katrina as certain hurricane insurance policies only covered damage due to wind—despite the fact that hurricanes often bring rain and, therefore, floods. Many people were not covered since they had not purchased additional flood insurance.

I’m still not sure, where else can I get information?

Sites like this one from Allstate or this one from Insure.com have explanations of renter’s insurance that can help.

In the end, whether or not you purchase renter’s insurance is a personal decision. Just remember to make sure you know exactly what you’re getting. Nothing is worse than buying into a policy and, when it’s time to cash in, discovering you aren’t covered the way you thought you were.
rentersinsurancecropped

Photo by Michelle White

My Cauliflower Nightmare

This summer, I was shopping at the farmer’s market and on a whim, decided to buy a head of cauliflower. This may seem pretty lame to some of you—especially those of you who put nettle chips (that you hand-picked from a field and dried yourself) on your salads—but it was pretty gutsy of me!

I don’t eat cauliflower with any regularity. I’m fairly certain my mom had some traumatic experience with cauliflower in her childhood, because we never ate it when I was little, and I have always considered it to be devoid of flavor and nutrients. I mean, what kind of vegetable is white? That can’t be normal.

I brought home my bold purchase, put it in my fridge, closed the door. What had I done? Clearly I needed to find out what exactly this thing was and how I could make it tasty.

So I did what any aspiring cook would do: I Wikipedia-ed cauliflower. I learned that it’s in the brassica oleracea family and related to broccoli and Brussel sprouts (which I love). Cauliflower has lots of vitamin C and fiber while also being low in fat and carbohydrates. Unfortunately, it does not have quite as many vitamins and nutrients as broccoli, but it’s pretty close.

Excited to try this alien vegetable, I consulted the regular resources in my kitchen (because I find the number of recipes online terrifyingly daunting): The Betty Crocker Cookbook New Edition and The Good Housekeeping Illustrated Cookbook (the exact 1980 edition my Mom has). Both had recipes involving boiling or steaming the cauliflower, followed by drenching it in fatty sauces, which sounded pretty foul. But then I remembered that my aunt had given us a cookbook for Christmas, Barefoot Contessa How Easy is That?. Inside I found a recipe for “garlic-roasted cauliflower”—and anything with garlic in the title instantly had me drooling.

I consulted the recipe. I needed:

  • 1 head of garlic, cloves separated but not peeled
  • 1 large head of cauliflower (or two small ones), trimmed, cut into large florets
  • 4 1/2 tablespoons good olive oil
  • Kosher salt and freshly ground black pepper
  • 1/4 cup minced fresh parsley
  • 3 tablespoons pine nuts, toasted
  • 2 tablespoons freshly squeezed lemon juice

I didn’t have lemon juice, pine nuts, or fresh parsley, but I did have a garlic clove!

  1. Preheat your oven to 450 degrees.
  1. Bring a small pot of water to a boil and add the garlic cloves. Boil for 15 seconds. Drain, peel and cut off any brown parts. Cut the largest cloves in half lengthwise.

I preheated the oven and started the water boiling for the garlic cloves. Wait what? Boiling the garlic cloves? Unexpected invaluable lesson: boiling them for 15 seconds makes peeling them a heck of a lot easier!

I took my knife and cut off a floret (think snacking on raw broccoli size), I was getting excited about the prospect of my delectable, garlicky cauli—HOLY CRAP, THERE’S A SPIDER IN MY CAULIFLOWER!

I screamed. Actually, to be more specific, I screamed like I was five. (Side note: I have arachnophobia.) I found myself in the living room, clutching my phone, feeling very itchy, and frantically texting my fiancé to come home from work NOW and save me!

Now, I love farmer’s markets, and I understand that there is an inherent risk that my organic, pesticide free produce might have been walked over by buggies. But, there was a spider…a LIVE spider…in my cauliflower.

To help you better understand my state of mind when confronted with a surprise spider attack, these are the first things I thought:

Where are all his spider friends that must also be lurking in my produce?
How did it live in my fridge for 3 days?!
Is it a radioactive super-spider?!

[Editor’s Note: I saved you from the nightmare-inducing photo link that used to be here.]

While I was deciding if it was safe to reenter my kitchen, I started to ponder the pros and cons of continuing this cauliflower adventure. Before I could do anything though, I needed to deal with the spider.

And by deal with it, I mean I waited until my fiancé came home, thoroughly rinsed (by spraying it down with the hose outside—just kidding) and cut up the cauliflower for me. All while I stood a safe distance away…with our sharpest knife…just in case. Thankfully, he found and killed the spider. (Thanks, babe!)

He wasn’t sure that we should proceed but I decided we were going to be adults and see this through.

After satisfying ourselves that there were no more radioactive spiders, that the cauliflower was clean and edible, and that we had enough of the ingredients to make a go of it, we finally continued with the recipe:

  1. On a sheet pan, toss the cauliflower with garlic, 3 tablespoons olive oil, 2 teaspoons salt and 1 teaspoon pepper. Spread mixture out in a single layer and roast for 20 to 25 minutes, tossing twice, until the cauliflower is tender and garlic is lightly browned.

Roasting is super hot and I convinced myself that this would vaporize any potential spider buddies.

  1. Scrape the cauliflower into a large bowl with garlic and pan juices. Add remaining 1 1/2 tablespoons olive oil, parsley, pine nuts and lemon juice. Sprinkle with another 1/2 teaspoon salt, toss and serve hot or warm.

Unfortunately, because we lacked some of the ingredients, it didn’t taste all that great. But if I had, I am convinced it would have been splendiforous! I have yet to try cauliflower again but (now that I no longer consider it the mutant of the vegetable world) I intend to soon.

And since I’m still alive and writing this article, I would call it a major step forward in overcoming my arachnophobia!

Well, I still need saving…but I scream less, and not as loud.

IMG_0468

Photo by Elise Lundstrom

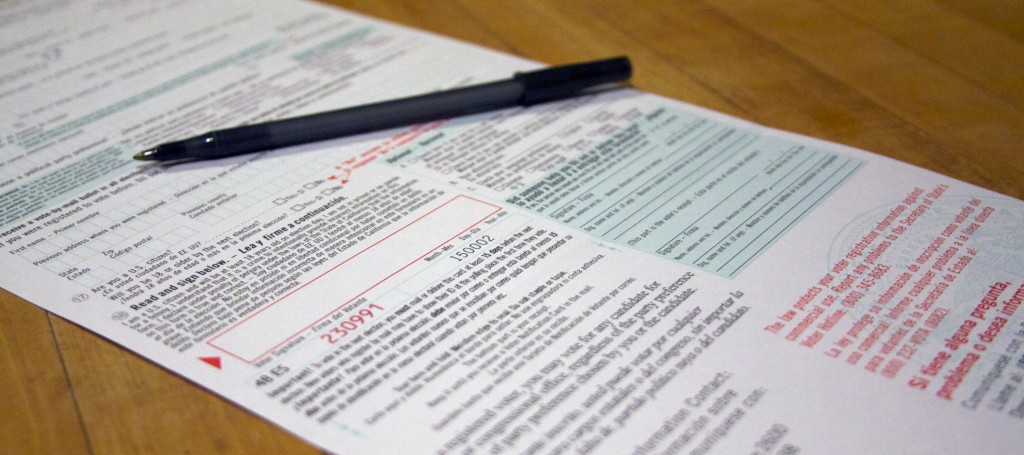
Your Guide to Voting in All 50 States

It is common knowledge that, statistically, young people don’t vote. Whether it’s because we’re not registered, we don’t care, we don’t know how, or we need a refresher in civics (because we were too busy watching a bumblebee out of the window during Government class), people under the age of thirty-five, given the right to vote, often don’t exercise it.

So for those of you who are just now eligible, haven’t registered since the last election, have recently moved, or are lost in an existential crisis about the meaning of a vote, I give you our quick and dirty instructions on how to register to vote:

1) Figure out the state where you are registering

This is the state where you have your driver’s license/pay your taxes. Even if you do not live there, it is where you vote. If you’re travelling, away at school, etc., you can vote absentee (more on that later).

2) Look up your state’s process

Unfortunately, every state is a bit different, but it’s usually a very simple process. You need to do a quick search on your particular state’s rules, how long before the elections you need to register, and what registering requires. In nearly all states, there’s a registration deadline (and no, it’s almost never Election Day). You can check your state’s deadline on this handy list. (Note: A few lucky places do allow same-day registration or election-day registration, but it’s pretty uncommon.)

If you’re not sure if you’re registered, where you’re registered, or how you are registered (absentee, party preference, etc.), try one of the following:

    • Can I Vote.org can help you find out if you’re registered and where your polling place is.
    • County Registrar: Google “county registrar” with the name of your city. You should be provided with the name of your county’s “Registrar of Voters” and the website, address, and phone number of his or her’s office. Their website can help you check your registration status and/or re-register (this includes changing your address, changing your name, changing your party, or changing your vote-by-mail status). But if that gets confusing, give them a call, or take a quick drive over (they are in your county).

If you just need to register:

    • See above for your County Registrar.
    • State Election Board: You can also get a voter registration form from your State Election Board. You can find a complete list of all of the State Election Boards here.
    • State Registrar: If your state doesn’t provide an easily accessible form, you can use this national registration form and send it to your state Registrar’s office (follow the Googling procedures above with “state registrar” and your state).
    • If all this online stuff is super confusing and you just want to fill out a paper form, visit your nearest local library or post office.

On all of these websites, look for any “Register to Vote” buttons or FAQ that can help you navigate the process.

You CAN register online, but remember you still have to print out the form, sign it, and mail it to your state Registrar.  Make sure you leave time to mail the form before the registration deadline!

3) Register!

Don’t worry, I’ll wait…

4) Find out if your state has early voting / Apply for an absentee ballot

Many states/counties allow you to vote up to a few weeks early to avoid the sometimes-crazy lines that amass on Election Day. Early voting is often significantly more convenient, so go ahead and see if it’s an option for you through your State Election Board.

If you are going to be out-of-state for the election, apply for an absentee ballot. Again, you can check your State Election Board’s website to find out the specifics. Just remember, this will take more time, as it requires mailing and such, so don’t wait too long. Double check if your state will allow you to drop off your ballot at a polling place on Election Day (allowing you to both procrastinate and get a super awesome “I Voted” sticker).

5) Find your polling place

Usually the address of your polling place will come in the mail with your voter registration card (if your state doesn’t send cards, check the back of your sample ballot, or see step #2) a few weeks after you register or a few weeks before the election.

6) Do your research

Once you are registered, you might receive a Voter Information Guide from your Registrar with information about the candidates as well as propositions, initiatives and referendums.

If you tend to not keep up with local news and politics, you may want to do some research on your local elections as well. Often a good place to start is your local news, as they tend to profile local candidates and run stories on them close to the election.

If you don’t get the newspaper  (or it doesn’t show up in an easy Google search) and local TV news isn’t your thing, smartvoter.org is also a very useful, nonpartisan site for information on local, state, and federal elections.

7) Vote!

We’ve reached the most important step. Don’t forget! The next election is November 6th—mark your calendar now.

Now you are all set to influence the laws of our land. Even if it doesn’t feel like it, everyone’s vote matters in the end. You can help to change the statistics. After all, you likely pay taxes and possibly student loans, you may own a home or have kids, and eventually you could decide to retire. Today’s lawmakers influence all of this and more. Do something to influence them.

Go. Vote.

voting

Photo by Meaghan Morrison

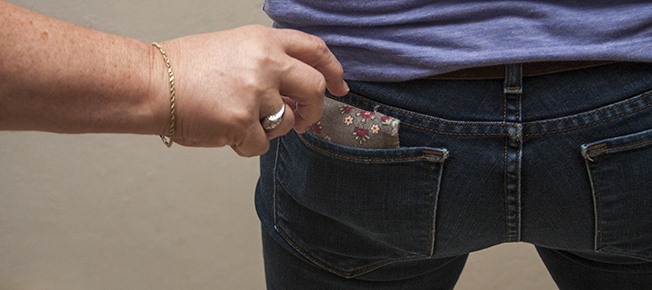
FML: My Stolen Wallet

It was like any other SaturdayI got off work, ate a snack, then flopped into bed. This particular evening, I was dozing off when my phone buzzed with a text from Chase Fraud, “Did you purchase $300 at a shoe store?” Uh, no.

Getting your wallet stolen is a bitch.

The damage: a hundred dollars cash, my driver’s license, a debit card, my birth certificate (with my social security number written on the back), a sticky note with both my checking and savings account numbers scribbled on it, and various other cards (including my car insurance/registration, my voter registration card, my AAA card, several gift cards, and an old student ID).

The Bank

My first step was to report the fraudulent charges to Chase. The cool thing about their fraud service (which might be true for other national banks) is when they text you about a possible fraudulent charge, if you say, “Yes it’s fraudulent,” they automatically call you. If your bank is not this fancy, you can find customer service numbers online or on your bank statements.

At first, I got the standard pre-recorded voice (wanting either my card number or my account number for verification) but after about a minute I was directed to a real human being. The woman asked me for my address (more verification) and then to confirm which charges were fraudulent. She listed off the last five or so, but I had to log into my online account to see exactly what she was talking about. There were three fraudulent charges: $50 at a gas station, $300 at FootLocker, and $30 at a nail salon. She flagged the charges, canceled my card, and informed me that a new one was on its way.

As for reversing the charges, she told me it would only take about 12 hours for a refund to be posted to my account, but this was not entirely true. The two smaller charges were credited to my account the next morning, but the $300 charge from FootLocker was not. Now this delay isn’t necessarily the banks fault, they have to work with the stores (who may or may not be open and/or challenge the charges). So, if you’re making a claim on the weekend, don’t be surprised if the credits/debits don’t clear until Monday or Tuesday. Overall, the call took about 15 minutes and was pretty painless.

Now if you’re smarter than I am, you won’t put your actual account numbers in your wallet. If the thief had just gotten my debit card, I could have reported it stolen and just waited for a replacement in the mail. But, since we’ve established I’m kind of an idiot, I had to go to my local branch and switch over all my accounts instead.

The guy who helped me told me that my situation was not uncommon and was very helpful. He created new checking and savings accounts for me and transferred over all my money. He kept the old accounts open, but frozen, so only deposits could be made. (This is so that you can be reimbursed for the fraudulent charges.) It shouldn’t cost any money to do this and, if you have one, bring your passport (or some form of identification, i.e. your social security card or birth certificate etc.) Or better yet, call ahead and find out what identification they need.

The Police

After I got off the phone with Chase, I called the police to file an incident report. This meant, about an hour later, an officer showed up at my house to take my statement and give me an identity theft packet with lots of helpful (and scary) information. I gave him a copy of my bank statement (printed off the Internet) because I had noticed that all the purchases were made at local stores. The officer told me this would help tremendously. Now a detective had specific stores to check, along with the exact purchase amounts. But, because my work place (which is where we’d determined the theft had occurred) doesn’t have cameras, getting the thief on camera, at one of these stores, was the only way to identify him or her.

The Credit Bureaus

Next up, I checked my credit report with each of the three major credit bureausEquifax, Experion, and TransUnion. (Did I know there were three credit bureaus before this fiasco? I did not.) Luckily, I discovered that www.annualcreditreport.com allows you to check all three bureaus at once, which eased the pain a little. I put in my name and social security number. Then I was prompted to answer really random yet oddly specific questions that only I should know. Things like “Where did I live before 2000?” and “How much money did I make in 2010?” Don’t worry, it’s multiple choice.

You should not have to pay to get your credit report. (There could be a fee if you’ve already checked your report in the past year, but if it’s been more than 12 months, you should be fine.) Credit scores typically cost, but reports should not. Reports are mostly for record keeping purposes and so that you can see if anyone’s stolen your identity in the future. I gave the reports a once over, everything checked out so I saved a digital copy and printed another one out for good measure.

Technically you should call each credit bureau and let them know your information has been stolen. I didn’t do this because the credit bureaus can’t stop identity theft and I was 99% sure that this was a punk kid who just wanted my money, not my identity.

The DMV

Getting a new license is like getting your old one, you wait in line, fill out a piece of paper, and get your picture takenwhich I still had to shell out $9 for. Replacing my voter registration card was free. Fortunately, I did not need another copy of my car registration, but if you do, just have your license plate number with you.

The Rest

Cash and gift cards are just gone, they’re never coming back.

I don’t have credit cards, but if you do, approach it like you’re dealing with the bank. Also, I can’t speak for getting new insurance documents (because I had duplicates), but I would suggest calling your provider and going from there.

The document that continues to keep me up at night is my short form birth certificate. It’s the size of a credit card, and contains my name, birthday, and the city I was born in, embossed with a government seal. This document alone could do some serious damage, but I also wrote my social security number on the back of it because I’m a genius. If someone really wanted to be malicious, they’d have everything they needed (driver’s license, birth certificate, SSN) to steal my identity. I know it seems convenient and portable to have your life in one place, but for your own sanity, don’t be like me. Bad things happen, minimize the damage.

The police still haven’t caught the thief.

StolenWalletHero

Photo by Meaghan Morrison

Wax on Wax off: The Bikini Wax

Many women hear the words “bikini wax” and cringe, blush, and/or clutch at their nether regions. A visceral reaction to hot wax and hair removal “down there” is expected, but a bikini wax isn’t something to be feared—it can be life changing. If you’ve ever been curious as to how to go about getting a bikini wax, let’s break it down:

I’ve been to many waxing places in my days and have had a multitude of experiences, and it takes some trial and error to find a place you like. Don’t underestimate the power of Yelp. Type in “bikini wax” to find reviews of good places in your location. I go to a special waxing-only salon in Beverly Hills, but I’ve found most hair salons and nail salons also have waxing beauticians. Spas also have waxing options, but I’ve found they’re usually overpriced and under-trained. Once, you’ve found a salon, call and book your appointment just like you would schedule a haircut.

What kind of bikini wax do you want?

Yes, there are KINDS. The different choices refer to the amount of hair being waxed off: Do you want it all gone? Mostly gone? Or just cleaned up a little? If this is your first bikini wax, I’d recommend starting off slow. Remember, if you’ve been shaving (or au natural) the hair has a very old root, so—I’m not going to lie to you—it’ll hurt. I recommend going for a standard bikini wax, just a bit off the sides and top. (You can always go back and remove more.) Or if you’re feeling more advanced, try a full bikini wax with a landing strip (which is exactly what it sounds like), or go bald and get a Brazilian (my personal preference). Remember, if you get too ambitious, and belatedly decide a Brazilian’s not for you, the greatest (or worst) thing about hair is that it grows back. Cost wise, the more hair you wax off, the more you’ll have to pay. Ranging from about $20-$50.

Do you have to do anything to prep?

If you already do your own personal maintenance, let your hair grow out to at least a half an inch, so there is enough to wax. If you’ve never groomed in your life, that’s totally fine, just make sure to tell your aesthetician (aka waxer). Remember: the more frequently you wax, the less and finer your hair will grow back, making it easier on both you and your waxer.

Regardless of your prior maintenance, when you meet your waxer, make sure you tell them that this is your first bikini wax. They’ll help minimize the pain for you by waxing faster in smaller sections. It’s their job; they don’t want you to suffer through it!

Take some steps to ease the pain:

  • Strategically schedule your appointment. Try not to get waxed the week before or after your period, as you’re more sensitive to pain during that time. Also, keep in mind that your pain threshold goes up as the day goes on, so be sure to schedule your appointment is in the late afternoon when your tolerance is at its highest.
  • Take an Advil or two about 45 minutes before waxing to help reduce your pain.

What does one wear to get a bikini wax?

My bikini wax shy friends always think the most embarrassing part is stripping down and having someone prod around their business. The most important thing to remember is: your waxer has been seen it all before—they are professionals, this is is their job. But, if you are still nervous, there are ways to get around total exposure. If you decide to go for a standard bikini wax, you can leave your undies on, which is why I recommend it for first timers, who are most likely to be intimidated by getting naked. But for those of you willing to go all the way, I’d suggest wearing a dress, or something similar, that won’t require you to feel so exposed. It’s good to let yourself “breathe” post-wax and a dress is great for that, too!

How long will it take?

Bikini waxes are quick (fifteen to twenty minutes) so you won’t be naked for long. But if you think you will feel super self-conscious, bring a distraction. Phones are the easiest, in my opinion. When I first started off, I would read on my phone and be done before I’d even read through a single chapter.

What do you do afterwards?

No sex, working out, or wearing leggings for the first day after your wax. All three can hurt and cause ingrown hairs because of the amount of friction against your baby-soft new skin.

But the best part? Don’t worry about booking another appointment for another 4-6 weeks, depending on how fast your hair grows. That means that two bikini waxes will suffice for an entire summer! (Compare that to shaving twice a week.) Efficient, right?

bikiniwaxhero

Photo by Meaghan Morrison

Welcome to the UNDERenlightened

A few months ago, a friend of mine invited me over for dinner. I can easily say that this particular friend is one of the smartest people I know, so when she told me that she had gotten her license suspended for forgetting to pay a cell phone ticket, I was—well, shocked. She’d assumed someone would mail her the ticket, and when they didn’t… Sure enough six months later, she was pulled over for something arbitrary and informed that not only was her license suspended, she also had a giant unpaid fine. Oops.

The thing is, I had absolutely no room to talk. Just the year before, I had found myself in a similar situation. Who knew you needed to call the gas company after you moved into a new apartment? (A fact I’d managed to miss in all my previous apartments.) Turns out saying, “What do you mean? You don’t just send me a bill?” doesn’t magically turn your hot water, heater, or stove back on… for a week! I definitely learned that lesson.

I shared this story with my friend and we both felt profoundly less dumb. Then I asked her, “Wouldn’t it be awesome if there was a place where people could share all these stories, so that other people could learn from them before they made the same mistakes?”

And the UNDERenlightened was born.

Our mission is to create a community that is universal and personal, where knowledge and experiences can be shared without assumption—a place for all the things life forgot to teach you.

We are a community of writers, dreamers, and thinkers committed to the belief that, through sharing our individual experiences and knowledge, we are creating a place where no one has to feel embarrassed, scared, or overwhelmed about anything they do not yet know.

Together, we will share our stories, life lessons, and how-tos so that we can help to enlighten one another.

Here’s how we are going to do this:

Enlightenment should be accessible to everyone no matter their age or experience level.

It’s time to stop pretending like we have a handle on this whole adulthood thing. No one has it all figured out! There are hundreds, thousands, millions of things we don’t know about life and, personally, I wouldn’t mind a little help.

We aim to throw out the assumption that, at any age, you should already know how to do something. We want to be a resource that makes no presumptions about our community’s prior knowledge. Our articles are designed to make allowances for even the most UNDERenlightened readers. We make no judgments. We are your allies. And if we are giving you instructions on how to hang a large picture frame, we’re not going to assume you have a tool kit. Instead, we’ll very nicely point you towards this $7.99 set at Ikea.

The power of shared knowledge and experience can make life just a little bit easier.

Let’s say you get locked out of your apartment tonight. Oh sure, you think you know what to do: “I’ll just Google a locksmith. — But, wait, crap: my phone is inside my locked apartment. Ok, that doesn’t matter, I’ll call someone on a pay phone. We still have those right? How do I find one? And when I do, whom do I call?”

We believe the best way to learn is from each other, through our follies and our triumphs. One shared horror story that answered all—or even just some—of those questions could save the rest of us a world of potential misery. (Good thing one of our contributing writers already has had three different lockout experiences she can draw from! You can read her advice here.)

Learning should be fun, mistakes should be funny, and lessons should be valuable.

There are plenty of other how-to resources out there, and if you want to read a formulaic article about how to use bleach, go to About.com. But we know stumbling through this whole adulthood thing can get pretty ridiculous, so if you want to read about the sardonic experiences of a self-admitted first-time bleach user trying to follow those About.com instructions, you’ve come to the right place.

Our enlightenment should be tested and questioned.

If enlightenment was straightforward, we wouldn’t be here. To ensure that we are providing our community with the best enlightenment possible, we will periodically ask an UNDERenlightened writer to try out one of our how-tos and publish a follow-up. We also encourage you to test our how-tos and tell us about it!

The UNDERenlightened is first and foremost a community and we are here to help each other.

Want to suggest something for us to talk about? Use our NEEDenlightenment? form and let us know! From the silly to the serious, if you don’t know how to do it, we’re here to help.

Have something that you want to share? Join the UNDERenlightened team!

The other day, while I was trying to answer one of the eight million questions I was facing, I thought, “I SO wish I had an UNDERenlightened article for running the UNDERenlightened.“ Daily, we come across ideas for articles—how to tie a tie, how to get a bikini wax, and what to say to a friend who has been diagnosed with cancer—are just a few of the things you are going to see over the coming weeks. Last month, one of our writers had her wallet stolen. As terrible as this is, my first thought (and text) was, “OMG, you can write an UNDERenlightened article about that!” (Keep an eye out for that early next week.)

Thank you for taking the time to check us out. I am so proud of the articles you are going to be seeing over the coming months and of the team that is behind them. I hope you learn as much as we have from their experiences. We know we can’t prepare you for all of life’s hurdles, but we can try to make some of them a little bit easier to jump.