Tag Archives: projects

Let’s Ask: How Do I Stain This?

Working in a hardware store, I come into contact with a lot of do-it-yourself-ers. While I admire their efforts, often they need an expert, or at least someone with a little experience, to help point them in the right direction. One of the most common problems customers bring to my attention involves staining, both interior furniture and deck stains. It’s a lot harder to fix mistakes made while staining than it is if you mess up while you’re painting, and many people jump into a large project without doing their research. Here are some of the FAQs that are often brought to me by customers:

How do I prepare?

The most important part of any home improvement project is the preparation. You need to have the proper tools and know the proper techniques, or you’re going to have a bad time. When it comes to staining, this comes down to knowing what type of surface you’re working with, and whether it is new or old. I frequently have customers tell me they aren’t sure if their piece is even made of real wood, or whether it has been stained in the past. The answer I usually give is to try a little stain on a small, hidden area, and see what happens. If it soaks into the wood, you’re probably fine to stain the whole thing. If it doesn’t, stop trying, it’s not going to work. If the stain is just pooling up on top of the piece, it either is not able to be stained, or there is another coating or stain already on the wood that needs to be removed. In terms of equipment, you should have a brush, a rag to wipe off excess stain, and something to clean your brush (soap and water for water-based stain, and mineral spirits for oil-based). Unless your stain is designed to be wiped on, you should always use a brush. Exterior stains can be applied with a brush, roller, or sprayer, but check your product for recommendations before beginning.

What does a stain do?

Another misconception a lot of customers have is that a stain, like paint, is just an exterior coating. One of the most common problems my customers have is that they’ve tried to apply a stain as if it was a paint and, in many cases, directly over existing paint, or other coatings. Stain only works on bare wood, because it needs to soak into the wood fibers. Imagine your wood as a bundle of drinking straws. The straws can soak in water, and other liquids. However, there is a limit to how much the straws can absorb, and, of course, if they are blocked by something, they won’t soak in anything at all. Stain needs to soak into wood, and when it dries the fibers of the wood grain lock the color inside. A paint or clearcoat goes on top of the wood, and will prevent other liquids from soaking in, and make the piece more durable. You typically go over interior stains with polyurethane when you are done.

How can I stain something that has been painted or sealed?

The basic answer is: you can’t. You have to remove the paint in order to properly stain the wood. This is by far the most frustrating part of staining for customers unfamiliar with the process. Many decide to try anyway, only to return in a few hours even more frustrated. Defiant to the end, I’ve seen customers go through darker and darker stains, thinking a darker color would just cover up their mistakes, rather than taking my previous advice. In the end, their piece was ruined, and as far as I can tell they never attempted to remove anything they applied to it.

What about removing an old stain?

Unless you’re changing your stain color or switching to a water-based stain from an oil-based, you usually don’t have to remove your old stain at all. Just remember, a water-based stain can’t go over an oil-based stain. Removing stain is not particularly hard, but it will take patience. For interior stains, you have the option to sand the wood, or strip it. I usually recommend stripping, because it requires the least amount of grunt work. Sanding is cheaper, but harder, and you are more likely to damage your wood from over sanding. Most strippers just need to be brushed on, and let sit for a while, and then rinsed off. For interior stains this isn’t that hard at all, but for exterior deck stains, it’s a larger and more complicated task. Exterior stain remover usually comes in a concentrated form (so you can make a large quantity of it) and should be applied to the entire surface you want to remove the stain from. Unlike some strippers, these types of removers usually require their own neutralizer product. At this point is when most customers decide to just paint their deck instead–just saying.

With this information, your next staining project should be a breeze! The real key to staining, and any other household project for that matter, is to take the time to understand the process, and what types of stumbling blocks you might encounter. Staining is never a simple project to undertake, so consider whether it’s really worth your time. It can make your furniture and deck look fantastic, but only if done properly. If you’re looking for a quick-fix, try painting instead.
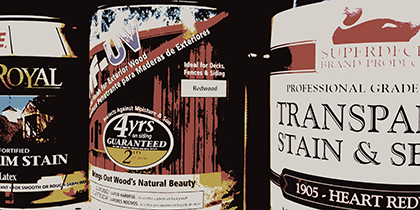
Photo by Rob Adams
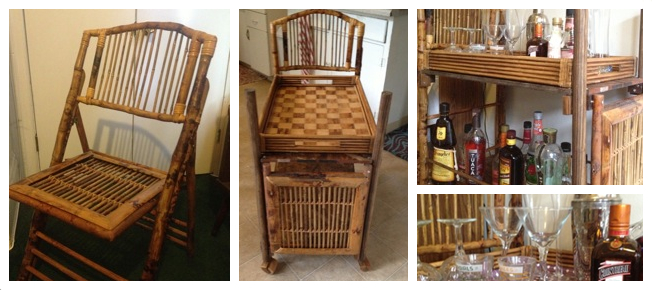
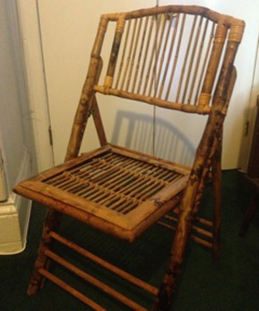
Photo by Rob Adams

Baby’s First Building Project: from Folding Chair to Bar Cart

Dinner party with a dozen or so close friends, all gathered in the dining room of my house. Various friends and roommates bustle around, getting food on the table and pulling up chairs. Someone inevitably reaches for the bamboo folding chair and I tense up, clutching the plate of Brussels sprouts I’m holding. Our guest flips the chair open with a caviler flick of the wrist, drops it in front of the table and plops down heavily. My face contorts in an anguished wince as I hear the mournful creak of the old, vintage bamboo as it bends under the weight of our unsuspecting guest.

Bar Cart

After this scene had replayed itself several times, I began to wonder. Sure, I didn’t like seeing the pretty, antique bamboo chair that I had thrown down 20 bucks for at Urban Ore subjected to the torment of being sat on. However, it had occurred to me that this was, in fact, the primary function of said chair, and perhaps I should either come to terms with that fact or get rid of the thing.

Needless to say, I sat on this knowledge for a good year or so before springing in to action. And when that day came, I did not take either of the equally undesirable actions I had presented to myself. Instead, I thought, I should repurpose it into something. Something awesome. And finally, one day, after spending a good 2¼ hours pining over bar carts on Pinterest, I leapt to my feet, shouting—“I could use my bamboo folding chair for this! I could use it to make my bar cart!” Eureka.

Now, as the title suggests, I did not go into this endeavor with a whole lot of knowledge or experience. I had used a drill, which was great, and I had been to Home Depot before. That was fine, though: I used my networks, consulting with friends, family, and the Internet.

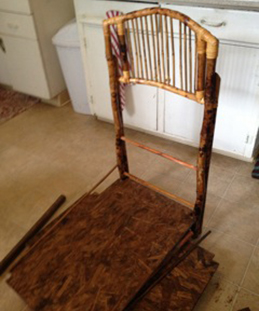
Starting from the brainstorm stage, I took the chair apart and maneuvered it to try to figure out how, exactly, my finished product would look. This also allowed me to take stock of what else I would need to buy to complete my project. Speaking from the wealth of experience I have gained by building exactly one item, I think that having something tangible to manipulate while you brainstorm can really help you visualize what you want and how you can get there.

Original chair! Chair in pieces on my floor as I brainstorm how to put it together. My wood shelves are there too.
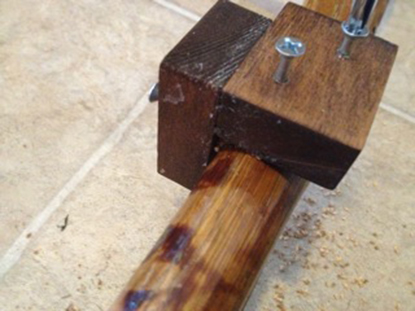
Here are my “L”-shaped supports for the wooden shelves. I just bought a long pice of rectangular wood and cut it into 2 inch pieces.


Per my dad’s suggestion, I also measured the materials I had and drew out a sketch, complete with piece measurements and where screws would go. This piece was invaluable—I referred to my sketch often throughout the process and you will too, should you take the prudent route and make a sketch for your own building project. Furthermore, my father’s experience and advice were extremely helpful: no doubt, I would have made a shoddier product were it not for a few of his suggestions. I definitely recommend going over your plan with an acquaintance who has even a tiny bit of experience building something.

In that same vein, when you go to the hardware store to purchase your materials, I also recommend conscripting an employee to help you. This person knows what they are talking about (most of the time, and if they don’t, find someone new). They can help you find the cheapest and best way to get what you need, which can save you money and time. In my experience, hardware stores are way too big and have far too many options for beginners.

Beginning the work back at home, I found the old adage “Measure twice, cut once” to be the best possible advice one could give—­particularly after I had to return to the hardware store after failing to abide by it. Once I finally had my pieces cut and ready, I laid them out to stain them.

A few words about wood staining: It took awhile to stain my pieces and let them dry before I could put the piece together, so if you will be using wood stain or paint, be sure to allow for the necessary time and plan a nice, outdoor place for them to dry without asphyxiating yourself. Also, if you use stain, know that you cannot just throw away the cloth you use, as wood stain is crazy flammable. You have to soak it in water and then do some hazardous waste disposal. (When someone writes an article on how to do that, I’ll let you know. And then, I’ll also finally be able to throw out the small can of water and used stain rag that is currently sitting on the floor of my pantry.)

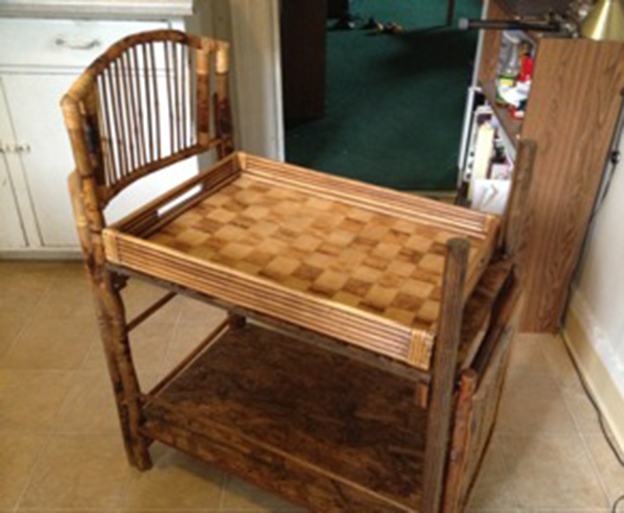
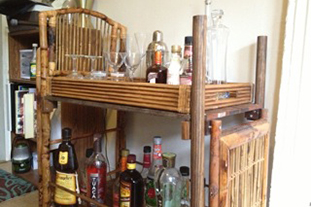
Finished product, with awesome tray!

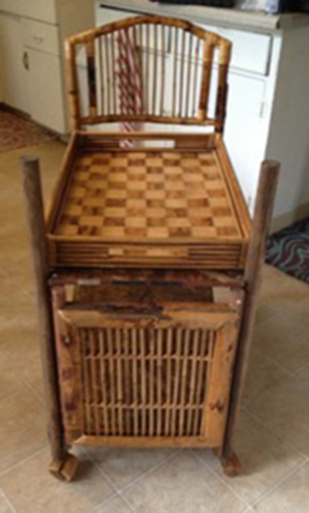
Finished product from a new angle – The back of the chair is farther back in the photo, and the seat of the chair is attached right there in the foreground.

While the stained wood was drying, I began to drill my holes. First, I drilled small holes to make and connect little “L”-shaped supports to set the shelf on. Getting those to be even took several rounds of measuring, recruiting people to hold things to getting, using the level, swearing when it wasn’t level, and measuring again. When I finally had those lined up and screwed on, I had a bigger drill situation to attack. I had, by beautiful, divine providence, come across the perfect bamboo hostess tray to sit at the top tier of my cart at an antique store. Perfect – things would now stay put stylishly. However, I still needed a way to keep the big bottles of rum at the bottom to feel and look somewhat secure. I decided to get two dowel rods, stain them, and make a little railing for the bottom tier.

At this time, I learned quite a bit about the drill that I didn’t know. After attempting to drill a hole big enough to fit my ¾ inch dowel rods only to have the drill whine and sputter at me, I learned that it is necessary start with a small hole and enlarge it gradually by using an increasingly larger bit to grow the hole. Though this may seem super obvious, it took me quite some time to figure it out, so I thought I’d save you the trouble. You will not be able to drill a ½ inch hole directly into solid wood. Start with 1/16 and work your way up. Since I was drilling on my beautiful antique chair, I did some practice drills on spare wood to gear myself up for it. Definitely would do again – I learned the hole enlarging tip that way and saved a bunch of heartache.

After all this crazy work of staining, drilling, and leveling, I could finally assembly my cart! I took the beautiful back of the chair propped it up and the “pushing” end of the cart. I used two mega thick dowel rods, stained to match my chair, and fixed them at the other end. To balance the motif of excessive bamboo rods, I took the seat of the chair and nailed it to the barren, dowel rod end of the cart, giving it more life and visual action. Then, I placed my wooden shelves on their little “L”-shaped supports and fit my dowel rods into their now enormous drill-holes and pushed the whole thing together. I dashed in circles around it, drilling anything that made me nervous, until, with a drop of the tired drill hand and a heavy sigh, I collapsed into a kitchen chair. My bar cart was done!

With drinks! And accouterments!

I know there are a million tips and tricks to have a successful building project, and I am still learning so many of them. Still, don’t forget to sand your edges to avoid splinters. Don’t screw screws in too close or the wood will crack. Don’t screw them into slivers of wood too small, either, or the same thing will happen. Use a level so your finished product doesn’t tilt. If the vintage wheels don’t go on, just keep hammering until they do. If you wander antique stores long enough, you’ll find exactly what you need. Make sure, at the end of your project, that you have someone with you whom you can excitedly scream at to “come look” every 5 minutes or so.

And good luck! May your building project bring you as much joy and inebriation as mine has brought me.

How to Paint a Room

Whether you are painting your dream house or just touching up your bedroom walls, painting can be a very enjoyable, yet daunting, activity for those unfamiliar with the process. This is something that you’re going to have to look at every day, so it is important to do a good job! If you have never painted before, here are the basic steps to help you get started.

Materials You Might Need

This is a basic list of the materials you will need. Every job dictates slightly different tools, but this will get you in the right direction. Talk to the color specialist at your local hardware store for better information about what tools are best for your specific job.

  • Paint/Primer
  • Brushes/Rollers
  • Trays
  • Plastic/Drop Cloths
  • TSP/Cleaning Supplies
  • Spackle/Putty Knife/Sandpaper
  • Ladders
  • Mineral Spirits/Solvents
  • Sand Paper
  • Imagination! (Not Optional.)

Prepping

Before you start painting, you’re going to need to prep your work area.

First, you will want to cover or clear the room of any furniture or other things you don’t want to get paint on. You can use plastic sheeting or drop cloths in order to protect your floor from splattering paint. To make it easier to navigate and prevent trip hazards, you may want to secure the sheeting to the floor with blue masking tape, also known as painter’s tape (or any other tape that won’t leave residue).

If you have a different color trim or need to achieve a nice, crisp line at the edge of where you are painting, you will have to use tape. Often, people use regular blue masking tape because it is relatively cheap; however, if paint is left on the tape for too long, it is very likely to seep beneath the tape and leave hairy looking lines along your edge. What you should use is a tape with some type of foam chemical laced on the edge that will form a seal that prevents any paint from leaking. I recommend using FrogTape, which is the original paint block tape. Any contact with water will activate the chemical, so painting over it with water-based paint will automatically activate it. To use it with oil-based paints, you have to manually activate the product with a damp cloth before painting. Tapes like these can be left up much longer, and your paint will not bleed. If you insist on using regular masking tape, be sure to remove the tape as soon as possible.

The next step is to prepare the surface on which you will be painting. Depending on what type of paint project you are working on, there are several things you may have to do.

For older walls, perhaps already painted once before, you may need to fill in any cracks or nail holes with spackle or nail hole filler. These can be easily applied with a putty knife and are usually around five or six dollars for a small tub. A popular type of spackle for painters is lightweight spackle. If your brand new tub of spackle feels practically empty, it is probably a lightweight spackle. The benefits are that it will dry much faster than regular spackle and, in many cases, they contain primer, making small patch jobs a breeze. Lightweight spackle is not very durable though, so I would only recommend it for small holes and cracks. If you’re working in a bathroom or place with a lot of moisture, use vinyl spackle or one that will dry flexible. These types of putties are less likely to crack when exposed to moisture. Once the putty is applied and dried, just sand it down to the level of the wall with some sandpaper.

Cleaning

The next step is to thoroughly clean the surface you will be painting. At the very least, give the wall a good cleaning with warm soap water, and then rinse it off. However, many people prefer to use Trisodium Phosphate (TSP for short), an all-purpose cleaner that also helps prepare the surface to be painted.

Priming

The last thing to do before painting is optional depending on several factors. Many people argue over whether you actually have to use a primer to paint your wall, but it all comes down to what is currently on your wall and what kind of paint you are using. A good rule to remember is that if it is a surface that has never been painted before, you need to prime it. Even with extra coats of paint, it just won’t stick as well without the high levels of titanium dioxide found in primer. (This is essentially what makes the primer adhere to the wall and your paint.) Today, most paints are labeled as “Paint and Primer in One,” which many people assume means they won’t have to prime. Typically, a Paint-and-Primer-in-One paint simply has added titanium dioxide, but it’s not nearly at the same levels as a true primer. What the Paint and Primer in One does is save you from re-priming the previously painted surfaces. However, if you are painting over a deep color and trying to achieve a light color, you will most likely need to prime anyway, otherwise your color will appear much darker because of the previous color underneath.

Painting

Once your work space is ready and your primer is completely dry (your can of primer will have instructions specifying how long to wait), you are ready to paint!

Now that you are all prepped, the actual painting process is actually pretty straightforward. Many people have different preferences regarding the order of things to paint, but traditionally you start with a brush on the edges of the wall and then use a roller to finish the main portion. Many paint manufacturers have different suggestions depending on what type of paint you use, as well. Be sure to read all of the information on your particular can of paint.

To begin, open your can of paint with a screwdriver or a paint can key (you can buy these at most hardware stores for a dollar, and they help preserve the integrity of your can’s lid). Use a stir stick or other stirring device to mix your paint up a bit to ensure none of the pigment has settled on the bottom. If your paint has been sitting for a while, it might even be necessary to have your can of paint shaken again. As long as the can is still in good condition and the can is more than half full, most hardware paint departments will be happy to shake your old can of paint, even if you didn’t buy it from them. Worst case scenario, you can shake the paint by hand in circular motions.

Next, pour some of your paint into a small cup or other paint carrying device. Use your angled brush and dip it about half way into the paint. Wipe off any excess paint, and then cover the edges of the wall. The benefit of the angled brush is you can get a closer, more even application of paint with less risk of getting the paint where you don’t want it. Reapply the paint on your brush occasionally, never letting it get too thin or too thick. If it is too thin, your wall will turn out splotchy. Too much, and it will not dry properly, potentially leading to many other problems later on. There are also smaller rollers designed to be used for this purpose; however, I personally find that a brush gives you a lot more control.

Now that you have finished your edges, you can move onto the main portion of the wall. Pour some paint into your tray (the deeper end). Place your roller into the tray and pull back, bringing some paint with you. You then roll the roller back and forth on the textured portion, ensuring you get a nice, even coverage of paint. If you get too much paint on your roller, it will not roll properly, and is liable to splatter paint back at you when you roll. Too little and you will have to reapply the paint to your roller more frequently. If you are right handed, start from the right end of the wall and work your way left. If you are left handed, do the opposite.

Many people assume the best application with a roller is vertical lines, but in order to get the best coverage and smoothest final product, you should actually apply the paint in a slight angled fashion resembling a narrow W or N shape, and finish with a straight line all the way to the top when your roller starts to run dry. This is so you don’t leave huge gobs of paint at the edge of the ceiling. Every time you finish one strip, your next should overlap by about half the size of the paint roller. To finish up you do a rollover, which is just rolling over the area you just painted with your roller, without applying more paint. This is only to help even out your paint and make sure you didn’t leave any areas particularly thick.

Drying

The last step is to sit back and watch paint dry. I’ll wait for you…

Okay, I guess you should clean up while you wait. It is actually very important for the integrity of your brushes that you clean them immediately after you finish using them. If you are using a water-based paint, this is as simple as using warm soapy water. If you are using an oil-based paint, you will need to use mineral spirits instead.

Last, make sure your brush is left to dry with the bristles hanging down so the water or mineral spirits drains out properly. (This is why paint brushes have holes on the end: so you can hang them up to dry!) The roller can also be cleaned with soap and water. If you have to use it again right after cleaning it, you can buy a roller spinner that will help dry it much faster. It’s important not to use a damp brush or roller, because that will potentially water down your paint.

Assess whether or not your paint job requires a second (or third) coat. If so, repeat. Happy painting and share your stories with us in the comments!

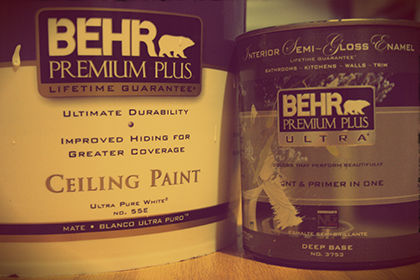
Photo by Sara Slattery

Photo by Sara Slattery