“Maybe she’s born with it, maybe its Maybelline.” I don’t know about you, but I have grown up hearing these words spoken in commercials, seeing them written on advertisements, and watching them parodied in many improv shows. Maybelline wants us to believe their products are so natural, no one can tell you are wearing any makeup at all.

Photo by Sara Slattery
Though the sentiment is okay, I never really liked wearing that much makeup and don’t particularly like companies telling me I have to wear it in order to look the way I want to. So, I established my own face care routine early on to try and find what makes my skin feel the best—that way, on days when I am the laziest person in the world, I can still venture out into the real world as confident as if I had been airbrushed by professionals that morning.
Here are a few tips for establishing the right face care routine for you. Whether you be male, female, or an alien from outer space, taking care of your skin is important!
First things first: Wash your face!
First and foremost, to ensure your skin is looking radiant, find a cleanser that works best for your skin. There are a lot of different products out there, so do your research and (if possible) talk to a dermatologist about your skin and what would work best.
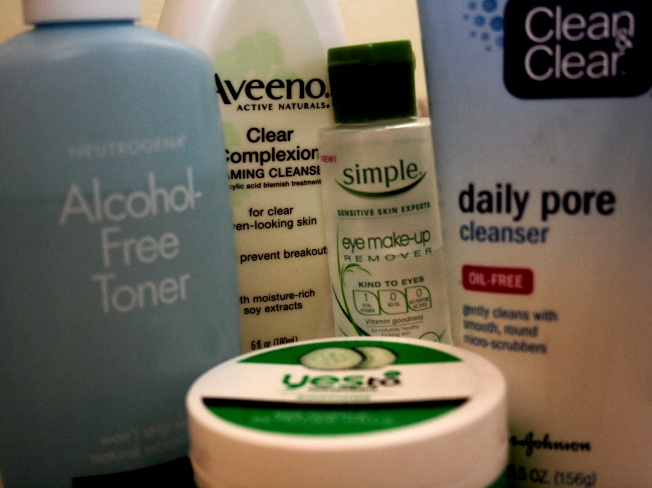
Feel really oily all the time? Try products that help balance your pores, such as Cetaphil Cleansers. Or if your skin is really dry and needs extra moisturizer, try products that have lotion in their cleansers such as CeraVe. Or if you are like me and get stress acne, Neutrogena Stress Control acne cleanser works very well for exfoliating my skin. Regular soap and water works… but not that well, and it can dry out your skin. What’s great about cleansers is they are specifically made for the skin on your face.
The right cleanser for you all depends on what your skin reacts to the best. But be realistic! A lot of cleansers contain chemicals or ingredients that help some people’s skin but create problems for others’, so you will need to try a few before settling down. Commercials and beauty ads will always try to sell you on The Next Big Thing but these cleansers are usually just trends that come and go like any other product. Take a long look in the mirror before you browse the cleanser aisle and think about what works best for you. Your skin reacts to the world around you, be it stress, weather, or hormones, so finding a cleanser that works great in all areas will be one that lasts.
How often should I wash my face?
This is also something that will depend on your skin and how it reacts to products. Overall, the best skin routines include washing your face once or twice a day. I know a lot of people who keep their products in the shower and wash their face when they wash their hair. However, depending on what your day, week, or month has been like—whether it’s been super stressful or you are spending all your time outside in the dirt—you might need to change up this routine.
If you wear a lot of makeup, washing your face is paramount because of the extra products on your skin. Wash your face before you apply and after you take it off to make sure all the extra products are gone. You also shouldn’t scrub your face too much. The skin on your face doesn’t go through the same wear and tear that your hands or your feet do, so extra scrubbing or cleaning will eventually strip your skin of its natural nutrients and could dry it out, creating more problems in the long run.
After you wash your face, apply a gentle non-scented moisturizer such as Vaseline or Neutrogena face creams to ensure your skin won’t dry out. If you have oily skin, there are moisturizers that help to prevent extra oil while still moisturizing your skin, such as Cetaphil Oil Control Moisturizer.
What about facials or face-wipes?
I won’t advertise for super expensive and fashionable beauty products, but some of them are really fun to use and make your skin feel great afterwards! You’ll find the fun facial products such as charcoal masks, salt scrubs, and sparkly soaps in a number of stores like Lush or Sephora. Though a daily skin routine doesn’t need these to be successful, they are fun to have and to use. If you are interested in buying some mask products or facial creams, do some research and ask question of the sales representatives about what would work best for your skin and won’t undo all the hard work you’ve put in your daily routine! Use these products at most once a week to give your face a shiny new start.
For those who are on-the-go or just lazy like me, there are some face-wipe products that allow you to clean your face of dirt, sweat, and makeup in a flash, keeping your pores clean and clear. Neutrogena Face Wipes and Oxy Daily Cleansing pads are a good shortcut for those who don’t want to go through the whole process every day. These face wipes can be used as a substitution for most of your facial cleaning, but their powers only go so far. Nothing can replace a cleanser and hot water when it comes to getting dirt out of your pores.
Can I still wear makeup?
For those who wear make-up, the best way to help your skin is to use as little pore-covering makeup as possible. Heavy foundations, if applied too often and not cleaned off properly, can cause some major issues for you
r skin. The best way to help your face stay as clean and clear as possible is to find foundations that are light and let your skin breathe throughout the day—such as a mousse or a light cream. If you can, only apply foundation to problem areas, such as old acne scars or under your eyes. That way, the rest of your skin can enjoy its natural state.
Powder foundations are also a good substitute. After you apply your moisturizer, use a fluffy brush to apply the foundation power on your face, creating a light and even tone. At the end of the day, make sure to wipe all of your makeup off and wash your face so it can breathe overnight!
Popular beauty and skin care brands will offer a wide range of products that cover every problem that your skin could have. Morning puffiness, blackheads, whiteheads, oily, dry, spotted—you name it, there is a cream or a scrub that claims to take care of it. Even though a lot of these products sound really great, a lot of them are just like any other scrubs and cost twice as much. So, when it comes to super cool facial creams that promise to fix everything under your skin, think twice before you purchase and first find out if it’s something you really need or want.
It also takes a while for your skin to react to this new cleaning routine, so don’t be surprised if there are no results within the first couple days of your new regimen. Sometimes cleansers react badly to skin, so if you see angry red blotches on your skin or it gets exponentially oily or dry, find some new products. But, if by the end of one to two weeks you are starting to see a cleaner brighter self in the mirror, then go forth with confidence!
