Scouring thrift stores can be a great, cheap solution for outfitting your space with vintage furniture, but it can also be the source for a growing to-do list of DIY projects. Such was the case with the beautiful wooden bed frame I found at my local Salvation Army. I scooped it up for $120 and brought it home to my new apartment only to discover that my box spring now posed two major problems: (1) the box spring, combined with my modern day super thick pillow-top mattress, made the bed too high to get into (like step-stool necessary), and (2) at some point during the move, my box spring developed this squeaking sound that creaked every time I rolled over.
So, I could get a new box spring (but it would set me back another $100 and it still wouldn’t solve the height problem) or I could replace my box spring with an alternative. I went online and discovered many mattresses today, particularly those of the pillow-top variety, don’t need to be flipped and thus don’t require a boxspring anymore. My first thought, of course, was: IKEA! They don’t believe in box springs either! Which would have been an excellent solution, if only my new bed frame had had a center rail—an integral structural support to the thin slats sold at IKEA. Not eager to test out their buckling potential, I looked into: a single sheet of plywood, which was nixed for its apparent susceptibility to mold growth, or a bunky board, except that they are designed to only be used in addition to slats (which made me question why people buy them at all?). This left me with only one option: it was time to make my own bed slats.
Step 0: Googling
I started researching making my own bed slats and found this excellent slat tutorial.
Step 1: Acquiring Tools
You know what’s awesome about doing all your previous DIY projects in your Stepdad’s back shed? Power tools. Do you know what my apartment doesn’t have? Power tools. It does, however, contain a wimpy (albeit visually appealing) toolbox! But, given the scope of this project, and even though I had some woodworking knowledge under my belt, doing this on my own was going to require purchasing a few things.
With the number of DIY projects starting to build up in my apartment, I decided it was time to invest in a power drill of my own. Turns out, a power drill/portable saw combo at Home Depot only costs $10 more than just a power drill. Considering I was already set to spend the money, naturally, I bought the combo. It was the cheapest brand, Ryobi, but at $99 I wasn’t being picky. I double-checked reviews online, compared the features to the other drills around it, made sure the set came with a lithium-ion battery (not nickel-cadmium, which was the former battery standard but is now being phased out), and that the battery pack would work with any future Ryobi power tools I chose to purchase (next buy: power sander!).
But once you’re the proud owner of a fancy new power drill, you still need two things before you can actually use it: drill bits and screws. I opted for a slightly larger drill bit kit because I wanted to make sure I had a set that included all the basic screwdriver heads. Because I had no idea what kind of screws I’d need for all my drill powered future projects, I settled on this assorted wood screw pack to get me started. I also purchased a variety pack of nails just in case this whole plan blew up in my face and I had to resort to my good ol’ hammer. (For more tips on what you should have in your toolbox, check out Michelle’s suggestions here.)
Note: I have yet to use my portable saw but my vastly more experienced Stepfather strongly suggested I buy myself a Work Mate before using it. It’s a foldable and portable work table with clamps that you can use to saw things more easily (read: without hurting myself).
Step 2: Acquiring Materials
Chances are, wherever you go for wood, they are going to have an overwhelming number of options. There are several key decisions that you will have to make:
Note: Before you go to a lumber supplier (in my case: Home Depot), it is important to measure–actually measure with a tape measure and everything. Don’t be rushed, and don’t skip this, or you’ll end up making the same mistake I did.
First thing you have to decide is what type of wood you want. For a project like this, where no one will be seeing the wood, you can go with a cheaper soft wood like pine or Douglas fir.
Next, you need to decide on what thickness and width you want your wood to be. When I think about lumber, “2-by-4” is more of a name than an actual description. Turns out it’s actually both. The first number is the thickness of the wood and the second is the width. So a 2×4 is 2” thick and 4” wide. Unfortunately, to be extra confusing, lumber is actually identified by what they call nominal lumber sizes, meaning that it is labeled as the size it was before the wood was planed and cut. Therefore a 2×4 was 2” thick and 4” wide. However, now as it lies in front of you, the wood is only 1.5” x 3.5”. Not confusing at all, right? I totally didn’t know that until I was researching for this article, so of course I took the length of my bed (72”) and decided I’d need eight 6″ wide boards. With each of the eight boards spaced 3″ apart this would give me: 48″ of wood + 24″ of space = 72″. When I got home and realized the real measurements of the wood, my 3” between each board turned into 3.5” but it still worked. I wanted the slats to be as thin as possible for the mattress to sit on while still being strong enough to hold it up without bowing, so I went with 1” thick wood. Don’t be afraid to ask for help! The blog post I was following had me looking at 2×12 boards, but the employee helping me saved me a ton of money by suggestion I use 1×6 boards instead.
The next thing you need to figure out is length. My 1×6 boards were each 72” long. (Again, the blog had suggested 16’ (192”) boards, but these were way more manageable and cheaper.) 72” is a lot longer than my full bed, so I needed to trim them down to size. I may now be the proud owner of a portable saw, but I still had the friendly folks at The Home Depot cut my wood for me. The first time I tried this, however, I had been lazy and rushed in my measuring, so the super quick measurements I scribbled down were actually wrong. When I got my perfectly trimmed 52.5” boards home, I discovered that they were too short by 1.5”. One thing the blog had right, which I ignored, was the common bed sizes: if I’d listened to them regarding the width, I would have cut my wood correctly (to 54”) the first time and not wasted $30.
When buying wood, it’s also important to check for defects (like these common wood defects) in each board. When I got home with my second round of correctly cut 54” wood, I realized I had one “weak” board, meaning that the board was easier to bend in the middle than the rest. I already had my boards spaced 3.5” apart and I didn’t want to lose a whole board and risk putting too much weight on the remaining ones. Instead, I put the weak board on top of the metal frame on the end, where it would be more supported and have the least amount of pressure on it.
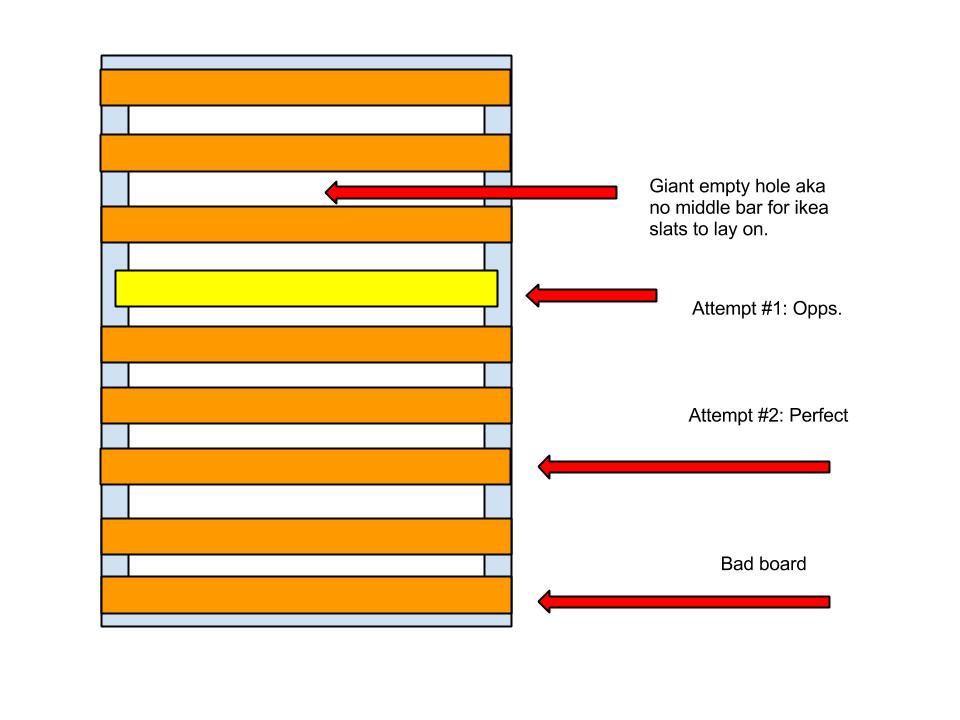 Step 3 (which should have been Step 1): Designing using your vast structural engineering knowledge… or what you learned from Google
So, at first, the plan (devised from the blog I’d found) was just to get a bunch of boards and lay them across my frame. This would have been great except that, unlike their example, my bed frame didn’t have anything on the sides to keep the slats from moving or, worse, slipping off. Not wishing to experience this in the middle of the night, I had to do a little extra planning:

Thanks to my earlier wood measuring error, I had a few extra boards to work with, so I decided to add two support boards to keep the slats from moving and/or slipping off the frame. Once flipped over, the supports would hit against the metal on the frame, thus keeping the slats in place, and look like this:
 If only I had made these drawings BEFORE I started and not just for this article. Add that to the lessons-learned list.
This was the final product:
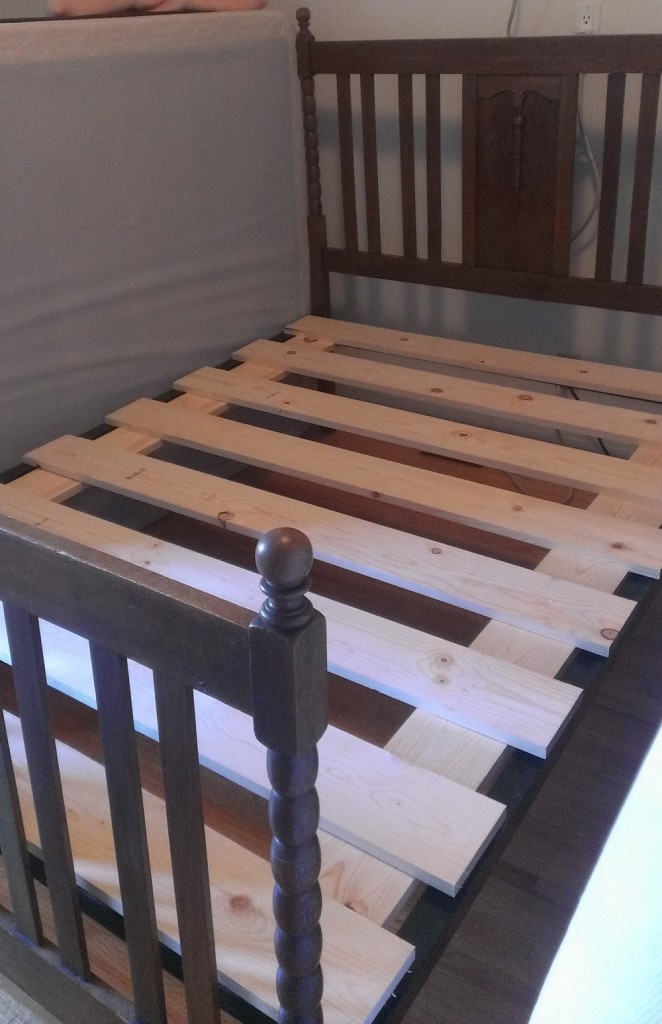
After a month of excellent sleep, without injury or sagging, I think it’s safe to call it a success!


 If only I had made these drawings BEFORE I started and not just for this article. Add that to the lessons-learned list.