Tag Archives: grooming

Self-Waxing In A Walk-In Closet*

* I’m not saying you HAVE to do this in a walk-in closet—that’s just the approximate size of my bedroom. (No. Really.) Obviously, it doesn’t matter where you wax, but it may be encouraging to know that you can do it even in the tightest of spaces; to be clear, I’m talking about rooms here.

So you’ve decided to self-wax. Good for you! Waxing is a quick, long-lasting way to rid yourself of any body hair that you would personally like to obliterate. And self-waxing (or as I call it, productive masochism) can save you time and a lot of money.
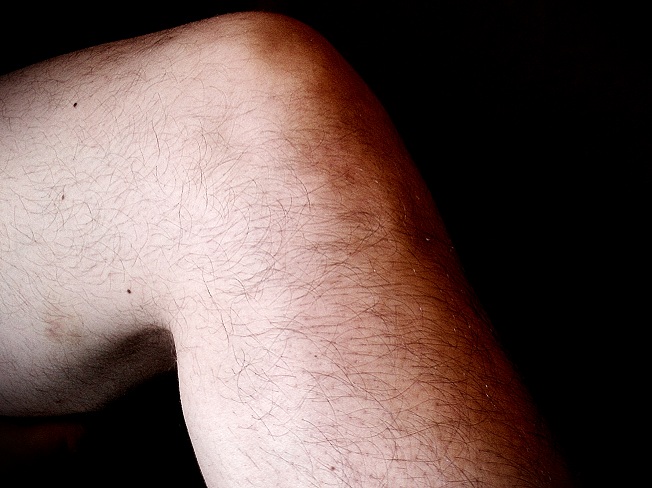
waxing square

Photo by Sara Slattery

And before you ask: I’m not going to get into the feminist/anti-feminist/aesthetic/societal reasons for wanting to remove some or all of your body hair. If you prefer to let yourself grow wild, more power to you. You can spend this article kicking back and thinking about how long you’d outlast most women in the Siberian tundra.

First, a list for getting started. You’ll need:

  • Hair. Hair that is at least ¼” in length, and no longer than ½”.
  • Wax. I prefer the kind of wax that requires strips (see below for why). Microwaveable wax is the easiest to find in stores, but you’ll be making trips to the microwave every 15 minutes or so to reheat it, so if like me, you have male roommates who come home at inopportune times and that’s not a realistic option, then I would recommend cold wax. Cold wax, which is harder to find (I got mine at Whole Body at Whole Foods Market), only requires one or two zaps in the microwave over the whole process, and it’s also usually made from sugar, so you can rinse the wax off the strips and reuse them afterwards (holla).
  • Strips! Muslin strips come with most jars of wax, but you’ll probably eventually find that you have more wax than you do strips. So if you spot a roll of muslin at some beauty supply store, do yourself a favor and buy it before the day comes when your underarms are covered in wax and you’re scrambling to determine your most expendable t-shirt. Because it’s sad, and yes, you are going to miss that Guster tee.
  • Baby oil. This is the best way to remove wax from any surface, especially skin. (The first time I waxed my legs, it took about 40 minutes for me to look this up with only the side of my left pinkie to type with. The more you know.)
  • Old newspaper or magazines. Use these to cover any surface, including the floor, within a 4’ radius of you, so as not to drip any wax that may go undiscovered until you step on it and tread it all over your apartment.

About 30 minutes before you start, take an ibuprofen—this is optional, but it helps, especially if the idea of (minimal!) pain has you nervous. Make sure your skin is clean and, if you’re planning on doing your underarms, deodorant-free. Next, put on some crappy reality TV show or an episode of a sitcom you’ve already seen (I recommend 30 Rock reruns) to put your mind at ease. I’ll also note that I’m currently eating jerky from the Malaysian jerky stand while I wax, which is of course optional. Last, if you have long hair and no intentions to wax it off, you should put it up.

Put on a robe (or not) and scurry over to the microwave with your jar of wax, following heating instructions from the package. You’ll find that you almost always have to nuke it for longer than they suggest. Does the wax look like honey when you stir it with its accompanying Popsicle stick? Then it’s ready!

Return to your quarters, then set the wax down somewhere very close to you, so as to minimize dripping. You can use a chair both to hold the wax jar and to prop up your foot if you’re doing your bikini area or leg. Try and position yourself in front of a mirror in order to better see what you’re doing. If you’re looking for a “starter” body part to wax, I recommend the legs, which are easy to see (except maybe behind your knees) and least sensitive.

Coat the Popsicle stick—not too thickly— with the warm wax (touch it first with your finger to make sure you’re not about to sear your skin); then, with a strip handy, administer a thin layer onto your skin in the direction of hair growth. Take a look if you’re not sure about this: leg hair grows in a downward direction, for example; underarm hair, the opposite. The administered wax can be as wide as 2” and as long as 6-8”. No turning back now!

Pull the skin taut, preferably in the same direction as you schmeared the wax, and quickly cover the area with a strip, smoothing it down. It’s fine—preferable, even—if the strip covers a wider area than the wax you put down. Now here’s the best part: before you have time to even process the phrase “Worth it?”, yank that strip in the opposite direction of hair growth, and take a look! It should be coated with wax, as well as (hopefully) most of the hair that was once attached to your skin. Gross/Awesome!

A quick stripless wax tangent: Stripless wax (Surgi-Wax being the most popular example) doesn’t require muslin strips, because the wax dries on its own, after which point you can flick up the end of the strip and yank it all off. As I said before, I prefer wax with separate strips; let me lay out from experience the process of using stripless wax for you:

You’ve got one leg up on the chair. You glide the wax smoothly down your leg before pulling the skin taut. Then, tightening your jaw, you brace yourself for the pain… and keep bracing… and keep bracing… for thirty seconds. Which may seem like a short amount of time, but it translates to basically an eternity when you know that that half-minute countdown ends with you tearing a dried piece of hair-plastered wax from your leg (or else it’ll just stay there forever). Trust me, nothing good will be accomplished in that thirty seconds—it’s like trying to read a Jane Austen novel, up a tree, with an enraged bear underneath you. Now, repeat a million times.

Carefully make your way around your chosen appendage, overlapping by a couple centimeters over the previous patch of waxed skin to avoid missing any spots. Because some follicles are just tougher than others, you may have some stray hairs remaining when you’re done. You can just leave those, or you can remove them individually with a tweezers like me, because control issues.

Practice makes perfect with this ancient art—you may find that you’re not picking up most of the hair your first time waxing, which may be a heat issue or a thickness issue with the wax. But the more you do it, the more precise it’ll be, not to mention the hair will grow back less thickly each time. When you’re done, dab your freshly waxed parts with some baby oil, reminding them that you’re doing this because you love them. Then shut off 30 Rock, put on some clothes, and go enjoy your new, balder self!


The Perfect Lipstick

Lipstick can be difficult. You’re going for a sultry pout or flirty hot pink, but according to the mirror at the end of the night, you look like a 6-year-old caught playing with mom’s make-up. Not cool!

Photo by Sara Slattery

Here are some step-by-step instructions to get long-lasting, even lip color. I’ve also included some product recommendations (focusing on affordable options, because $30 for one tube of lipstick usually isn’t exactly budget-friendly)!

This article is specifically for lipsticks. Lip glosses, stains, balms, and translucent lip colors will probably not get the best results. But, if you want to try it, go ahead! We’d love to hear your results in the comment section.

Warning: Please spot-test before trying new products, because you never know how your skin will react to them! Put a dab of a new product on your inner forearm and wait a few minutes to see how you react. For people with sensitive skin, it may be wiser to wait a full 24 hours. If you’re allergic to anything, always read the labels!

1. Exfoliate

Exfoliating clears your lips of dead skin that can catch on to lipsticks, making them bleed or flake. This can be easily done with stuff you have at home: mix equal parts oil and brown sugar until you get a paste, then scrub your lips! You can use coconut oil, olive oil, jojoba oil, or any kind of oil you might use on your skin. Wait a minute to let the oil sink in to your lips before moving on to step two. Rinse off with water, and voila! If you don’t have brown sugar, you can also scrub your lips with a bit of oil on a clean toothbrush or washcloth.

You can also buy lip scrubs, but they can be costly. Try not to use a body scrub, as they are harsher and can tear the skin on your lips! This could lead to flaking or infections.

Check out some popular lip scrubs from Sephora, Fresh Sugar, and Lush.

1a. Prime (Optional):

If you’re feeling extra fancy, you can use a lip primer or a foundation to even out your skin tone. Primer can be used under or instead of lip liner.

Some great primers can be found at Eyes Lips Face and Urban Decay.

2. Line

Using a lip liner, fill in your entire lip. Yes, your entire lip: not just the edges! This gives your lipstick more staying power. If you wanted to make your lips appear fuller, now would be the time to line slightly outside the line of your lips.

The liner will even out your lips. If you have visible veins or dark lips, use a beige or lighter colored liner, especially under bright lipsticks. This will help your lipstick look more opaque. You can also match the liner to the color of your lips or to your lipstick itself for slightly different looks.

Popular lip liners are sold by Wet ‘n Wild, Maybelline, Rimmel and MAC.

3.  Moisturize

Because it sticks to your skin so well, lip liner can be drying. If you have particularly dry skin or your lips start to flake, try a simple balm over your liner. Anything you get at the drugstore works, but make sure it’s clear and not tinted!

Much-loved moisturizers are available from Burt’s Bees, NIVEA, and Chapstick.

4. Color

Time for lipstick! Carefully apply the lipstick. Do a few layers, and then rub your lips together.

Picking out lipsticks can be fun! L’Oréal is a classic drugstore brand, while MAC is very popular but more expensive. Wet ‘n Wild is a great way to try different colors on the cheap. Revlon has popular matte lipstick and moisturizing, buildable lip butter.

5. Blot

Take a clean washcloth or tissue and carefully press it to your lips, as if you’re giving a kiss. Just once! This creates a deeper stain.

5a. Powder (Optional)

If you want really long-lasting color, you can apply translucent powder to your lips at this point. I don’t particularly like what this does to the texture of my lips, but it does work! With a finger, press a small amount of powder all the way around your lip. Let it set for a minute. Remember, only use translucent powder—a skin-toned powder will take away from the lipstick’s color!

New York Color and Sally Beauty offer translucent powders.

6. Brush

This is where lip brushes come in! Transfer color from the lipstick palette or tube to your lips with a lip brush, making small, even strokes parallel to your lips. For some reason, the staying power using a brush is much longer than swiping it on, so this is definitely worth your time!

Eyes Lips Face has a lip defining brush and retractable lip brush, and Ecotools offers a detailed lip brush and multipurpose brushes. Both are affordable, quality options.

6a. Matte, Glossy, or Full? (Optional)

If your lipstick isn’t matte already and you are going for a matte look, blot your lipstick again.

If you want glossy lips, you can apply gloss over your finished lipstick. This looks especially nice with creme finishes, because pearl and frost finishes already have some shine to them.

To make lips look fuller, apply a gloss or a lipstick one shade brighter to the center of your lips. Blend outwards with your finger or by rubbing your lips together.

7. Clean-Up

You’re probably in front of a mirror, so check your teeth to make sure you didn’t get any lipstick on them! If you are re-applying your lipstick on the go, you can stick your index finger in your mouth past your teeth, and then pull it out against your lips, like eating a Popsicle. This takes color off your teeth and the inside of your lips, guaranteeing a smudge-free smile.

Wax on Wax off: The Bikini Wax

Many women hear the words “bikini wax” and cringe, blush, and/or clutch at their nether regions. A visceral reaction to hot wax and hair removal “down there” is expected, but a bikini wax isn’t something to be feared—it can be life changing. If you’ve ever been curious as to how to go about getting a bikini wax, let’s break it down:

I’ve been to many waxing places in my days and have had a multitude of experiences, and it takes some trial and error to find a place you like. Don’t underestimate the power of Yelp. Type in “bikini wax” to find reviews of good places in your location. I go to a special waxing-only salon in Beverly Hills, but I’ve found most hair salons and nail salons also have waxing beauticians. Spas also have waxing options, but I’ve found they’re usually overpriced and under-trained. Once, you’ve found a salon, call and book your appointment just like you would schedule a haircut.

What kind of bikini wax do you want?

Yes, there are KINDS. The different choices refer to the amount of hair being waxed off: Do you want it all gone? Mostly gone? Or just cleaned up a little? If this is your first bikini wax, I’d recommend starting off slow. Remember, if you’ve been shaving (or au natural) the hair has a very old root, so—I’m not going to lie to you—it’ll hurt. I recommend going for a standard bikini wax, just a bit off the sides and top. (You can always go back and remove more.) Or if you’re feeling more advanced, try a full bikini wax with a landing strip (which is exactly what it sounds like), or go bald and get a Brazilian (my personal preference). Remember, if you get too ambitious, and belatedly decide a Brazilian’s not for you, the greatest (or worst) thing about hair is that it grows back. Cost wise, the more hair you wax off, the more you’ll have to pay. Ranging from about $20-$50.

Do you have to do anything to prep?

If you already do your own personal maintenance, let your hair grow out to at least a half an inch, so there is enough to wax. If you’ve never groomed in your life, that’s totally fine, just make sure to tell your aesthetician (aka waxer). Remember: the more frequently you wax, the less and finer your hair will grow back, making it easier on both you and your waxer.

Regardless of your prior maintenance, when you meet your waxer, make sure you tell them that this is your first bikini wax. They’ll help minimize the pain for you by waxing faster in smaller sections. It’s their job; they don’t want you to suffer through it!

Take some steps to ease the pain:

  • Strategically schedule your appointment. Try not to get waxed the week before or after your period, as you’re more sensitive to pain during that time. Also, keep in mind that your pain threshold goes up as the day goes on, so be sure to schedule your appointment is in the late afternoon when your tolerance is at its highest.
  • Take an Advil or two about 45 minutes before waxing to help reduce your pain.

What does one wear to get a bikini wax?

My bikini wax shy friends always think the most embarrassing part is stripping down and having someone prod around their business. The most important thing to remember is: your waxer has been seen it all before—they are professionals, this is is their job. But, if you are still nervous, there are ways to get around total exposure. If you decide to go for a standard bikini wax, you can leave your undies on, which is why I recommend it for first timers, who are most likely to be intimidated by getting naked. But for those of you willing to go all the way, I’d suggest wearing a dress, or something similar, that won’t require you to feel so exposed. It’s good to let yourself “breathe” post-wax and a dress is great for that, too!

How long will it take?

Bikini waxes are quick (fifteen to twenty minutes) so you won’t be naked for long. But if you think you will feel super self-conscious, bring a distraction. Phones are the easiest, in my opinion. When I first started off, I would read on my phone and be done before I’d even read through a single chapter.

What do you do afterwards?

No sex, working out, or wearing leggings for the first day after your wax. All three can hurt and cause ingrown hairs because of the amount of friction against your baby-soft new skin.

But the best part? Don’t worry about booking another appointment for another 4-6 weeks, depending on how fast your hair grows. That means that two bikini waxes will suffice for an entire summer! (Compare that to shaving twice a week.) Efficient, right?

bikiniwaxhero

Photo by Meaghan Morrison