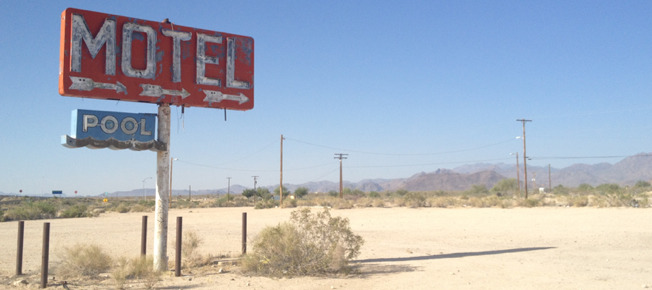
For those of us in the United States, it’s often easy to forget that we live in a gigantic country. One pretty spectacular way to remind yourself of the vastness and diversity of our nation (cue the anthem and waving flag) is to camp across the States. When my husband and I moved from California to Maryland for grad school and then, two years later, moved back to California once we’d finished, we opted to camp our way across. Both times, it was beyond spectacular.
Here are some tips to help you both avoid our mistakes and see some amazing things:
1) Choose how you want to get where you’re going.
Highways in the United States are numbered in a super convenient way. There are two-digit interstates (major routes) and there are three-digit interstates (that spur off the two-digit routes). In general, two-digit interstates that run north-south are given odd numbers, and east-west interstates are given even numbers. The numbers get higher as you move west to east, and south to north.
With those major routes at your disposal, see if they run near where you want to go. I like to sit down with a paper map and a protractor, but you could just Google Map it. Google Maps has a ton of great features. You can build a map and keep working on it over time. You can avoid highways or tolls, or measure each leg of your journey individually. Use the Radius Around a Point map to see how far you can go outside of your route in a certain amount of time.
2) Figure out how long you want to spend on the road each day.
If you drive cross-country in four days, you’ll spend 10–12 hours behind the wheel each day. This is brutal. Consider how many hours you can tolerate in your car. A good rule of thumb is to aim to get to the campsite before 5 pm so you can check in and, depending on the season, set up your tent or sleeping area in the daylight.
This will make your life a lot better because you won’t wake up those camping around you (making for awkward greetings and no chance at free coffee from strangers in the morning), and it’s much harder to accidentally hit your travel buddy in the head with tent poles when the sun is still up. If you get up at 7am (which you probably will because you’re sleeping outside and hello, dawn) and get on the road by 8am, you can still get eight hours of good driving with a lunch break and a little sightseeing in each day.
3) Make a budget.
Even though it feels like this would be less expensive than flying, the costs can add up fast. Use your budget to determine how many days you can really afford to stay on the road. Your gas and toll costs will stay constant, but the longer you are out and about, the more you will spend on lodging, food, and campsites. Here are some things to take into account:
- Gas Money. This is easy to calculate: (number of miles ÷ your car’s MPG) × average price of a gallon of gas. Going straight across from California to Maryland was about 3,000 miles, the average price of gas today is about $3.75, and my car gets about 28 MPG. Here’s how that calculated to get us straight there:

And I bet you told your math teacher you would never use anything you learned in the real world.
- Tolls. These can add up super quickly and vary by state. If you are on a tight budget, it’s definitely worth figuring this out. Crossing a state on the same highway will likely cause the maximum toll. Here is a link to all toll roads in the U.S., with most of the prices.
- Cost of Campsites. These can range from $10–80 per night. You can always look this up ahead of time.
- Cost of Food. Resist the urge to hop between Wendy’s and Mickey D’s the entire way. Why risk missing a pretty unique opportunity to sample regional cuisine? Don’t discount grocery stores as a good place to grab basic meal makings. With this in mind, you can easily get by for $10–20 per day per person.
- Miscellaneous Costs. Cool pit stops, unforgettable meals, souvenirs, maintenance—you never know. It’s always good to have a nice bit of flex cash to cover what you can’t predict.
4) Think about what to bring.
Buying camping gear can be overwhelming, so unless you want to end up with astronaut ice cream and four different types of headlamps, start by thinking about what you’ll be dealing with, then build your kit from there.
- Weather. You don’t need intense sleeping bags if you’re camping in D.C. in August, but you will want a tent because of bugs. And if it’s super rainy, a car-camping setup is sometimes best.
- Bears. Food in cars + bears means this can happen. Figure out if your campsite has a bear locker, or if you can get by with a bear canister.
- Food. If you do not need to worry about bears, then consider whether you need a cooler. Will you be making a grocery stop every day? Will you be going through a particularly hot part of the country? Planning ahead and grocery shopping can go a long ways toward reducing your food budget.
- Light. Flashlights and lanterns are beyond useful. Headlamps are also excellent because if you do arrive past sunset, you’ll have both hands to set up your tent.
- Bathing. Will your campsites have showers? Do you need to bathe in a natural water source? Consider what your toiletries are made of, and whether they are safe to go into rivers and lakes.
- Navigation. Smartphones and the Internet mean you could reasonably leave on your trip without planning anything, but don’t forget a paper map. I use this huge book map of the U.S. because sometimes it’s nice to get the bigger picture, and you never know when your battery will die or you won’t have service.
- Space. If you are in a small car, don’t get even more cramped with unnecessary gear. If you can’t extend your legs fully when you set out, you’ll be throwing things out the window onto the highway by day two, and I’m pretty sure you can get a ticket for that.
Bottom line: You need a place to sleep and mechanics to make food. This could be as simple as a tarp and a cooler, or as complex as this.
5) Make reservations ahead of time for popular campsites.
Places like Yosemite, Lake Tahoe, or Yellowstone tend to fill up right at the beginning of the season. Check out the state parks’ websites, KOA Campgrounds, or a campsite aggregate website, like this one, where you can search by map and reserve online.
6) Do something to make sure you don’t go stir crazy.
Make a really long playlist. Only listen to local radio stations. Make a photography challenge: I took pictures of all the state signs every time we crossed a border. Are you driving through a friend’s hometown? Ask what their favorite places are, and stop there. We stopped at a great bar in Iowa City, Iowa, because a good friend went to college there.
7) Know when you need a break.
Maybe it’s a torrential downpour. Maybe it got dark more quickly than you expected. Maybe you are exhausted or sick or need a hot shower. Maybe you got lost four times that day and do not, under any circumstances, want to share a tent with your travel buddy. This happens. If you can afford it, taking a night in a hotel is not the end of the world and won’t make the experience any less authentic.
I think more than anything, be relaxed! Enjoy sleeping outside and seeing some places off the beaten path. There are few opportunities to take this kind of trip, so take the time to make it fun.

Photo by Anastasia Heuer
