Tag Archives: furniture

Home (Theater) Improvement

“This is the end of life as we have come to know and love it.” I thought as I watched thirty five square feet and 1080 progressively scanned lines of glorious television walk out of my life forever. My roommate, along with his beloved projector, was headed for greener pastures, leaving the rest of us to languish away into sad, lonesome, standard-def obscurity.

The Projector

There’s a lot of good literature out there on the Googles that will help guide you to the perfect projector. Since we had become accustomed to a certain standard of television, we were looking for a 1080p projector, 60Hz would do, with a minimum contrast ratio of 1:2000. But In terms of what kinds of projectors are available on the market (from the $200 VewSanic knock-off to the $20,000 3DMax Sound-O-Vision Extreme), the price range we were expecting was between $500 and $1000. But for us our wallets, we were just looking for something to “scrape by.” So, when we found an $800 projector that hit our minimum requirements, but was available for $580 through a special refurbished program, we jumped at it. BOOM. And we had a projector again.

Everything was hooked up to the cable and DVR—we turned it on and… there’s no sound. Maybe we should have thought this out better. With a trip to RadioShack for a ⅛” stereo to ¼” mono adapter, we were able to jury rig my fiancée Meggyn’s bass amp in as a temporary sound system. Well, at least it was loud and thumpy!

The Mount

Bliss settled in, until we realized we were merely maintaining the status quo. Like cavemen watching the firelight flicker across the wall. With the projector haphazardly settled on an end-table with a book underneath to prop it up, the risk of inebriated guests leaving open-topped drinks on the same table and toppling them into the delicate internals—the horror, the horror!—was just too high. Of course, I’d just dropped an inordinate sum of money on a brand new projector, so I wasn’t keen on the idea of dropping even more moolah on a television mount that wouldn’t directly affect the viewing experience.

One of the nice things about living in a leased house is that you never know what surprises you might find! After hunting around for extra shelving, I came across an old television mount up in the back corner of the garage (the kind for those tube TVs that could smash toddlers to atoms). And so began the next obstacle: the mount was bolted into a high wooden rafter in the garage, but we only had drywall in the living room… To Google! It turns out that as long as there’s a stud behind wherever you’re screwing in the mount, it should hold weight. After a trip to the local Ace hardware to buy some screws that could be used to drill to China and a quick download of the Bubble Level app—to make sure we weren’t setting ourselves up for a neck kink—we got to work. (Contrary to Meggyn’s expectations, the level app did a good job!)

And then failure struck—we broke two of the screws because we thought we could get away without drilling pilot holes. It’s TOOL TIME! We borrowed a drill (thanks, mom!), and we raised the projector up like the Mennonites raising a barn. Then we cracked open a few beers to celebrate exactly like the Mennonites would not have.

The Connections

Now we were getting somewhere! We could no longer inadvertently destroy all of our wonderful video goodness without some extra effort of lobbing liquids towards the ceiling. The next failure, of course, being that we couldn’t actually connect the cable or the power to our ascended projector. Who wanted to get lost in the details of connecting this, right? What are we, rocket surgeons?

To solve our connection problems, I repurposed some unused bookshelves I had bought for my room. With a few more marks and holes in the wall next to the projector mount, I added a shelf in the living room that we loaded up with every bit of television-related electronics. To paint the picture for you, we now had the projector on the old TV mount (in the dead-center of the wall), an overburdened shelf stacked with enough boxes with blinking lights that it may have been flagged by the NSA, a bass amp on the floor, and so many power cables and audio/video cables strewn about that they might as well have been vines in a nightmarish Lovecraftian dystopian future of cybertronic Amazonian forest… Let’s leave it at “messier than a dorm room during finals” and be done. But now that everything worked, I was at: “Please, for the love of God and all that is holy (and not blinking lights at me), let me be done.”

The Organization

Now we had a beautiful 1080p picture taking up the front wall and plenty of loud thumpy sounds to accompany it. Except if you changed the input from the cable to the Wii. Or to the Chromecast. Or to the Xbox. Was I the only one around here who understood which colors get connected to which inputs on the back of this thing?! Rather than attempting to teach every person who came to the house which cables to disconnect/reconnect to switch the audio whenever you switched the video feed (I just wasn’t up for writing the Connectionist Manifesto), I decided that another trip to RadioShack was in order. There I found an A/V switch for under $20 along with a few new A/V cables and a shiny new sound bar with subwoofer for definitely not under $20 (Meggyn was complaining about wanting her bass amp back and, hey, it was payday!). I returned to our humble, if electrically dangerous, abode armed with my new equipment, a sharpie, some wire ties, some labels, and as much determination as I could muster. I tackled the monumental task of improving our sound system, organizing our A/V shelf, wire managing all of the dangly bits (can’t leave any extra 1s or 0s), and setting our theater system up in such a way that at the press of a (CLEARLY LABELLED) button, my roomies, or any of our guests, could switch between video and audio streams at will.

The Finishing Touches

Life almost seemed perfect. It was simple enough to use the newly organized system, the new sound system was much more balanced than a 15 Watt bass amp, and whatever we watched was beautiful (except the Wii… stupid standard-definition output). But if you can’t find a problem to fix, then you aren’t looking hard enough. Some of the darker colors were being washed together by the projector, and it was sometimes hard to tell what was going on during scenes that took place in the dark. Blackout curtains became the next addition to the room. We got these thanks to a generous donation of leftover fabric from Meggyn’s mom. They just barely cover the full width of our window, but it works. Now, we can watch the projector during the day as if it were the middle of the night (without that pesky bedtime thing). Our last improvement was to go to OSH and buy some cinder blocks, push the couch forward so that it was closer to the wall (or rather, the screen), drop the cinder blocks behind the old couch and ADD ANOTHER  COUCH. Because couch. Now, we’ve got theater-style seating to go with our home-theater!

I still don’t think we’re done making improvements, but for the moment we’re pretty happy with how everything turned out. And the only really spendy parts were the projector itself and the sound bar—things which will be following us to our next house! Thanks to some successful craigslist foraging, the new couch was free, and the cinder blocks we used to prop it up were a few dollars apiece. We used five blocks for the couch and another three to make a recycled-plywood footrest.

All-in-all, we could have done a much worse (much more expensive) job of converting our living room into one radical home theater.

Photo by Michael Cox

Photo by Michael Cox

Let’s Ask: How Do I Stain This?

Working in a hardware store, I come into contact with a lot of do-it-yourself-ers. While I admire their efforts, often they need an expert, or at least someone with a little experience, to help point them in the right direction. One of the most common problems customers bring to my attention involves staining, both interior furniture and deck stains. It’s a lot harder to fix mistakes made while staining than it is if you mess up while you’re painting, and many people jump into a large project without doing their research. Here are some of the FAQs that are often brought to me by customers:

How do I prepare?

The most important part of any home improvement project is the preparation. You need to have the proper tools and know the proper techniques, or you’re going to have a bad time. When it comes to staining, this comes down to knowing what type of surface you’re working with, and whether it is new or old. I frequently have customers tell me they aren’t sure if their piece is even made of real wood, or whether it has been stained in the past. The answer I usually give is to try a little stain on a small, hidden area, and see what happens. If it soaks into the wood, you’re probably fine to stain the whole thing. If it doesn’t, stop trying, it’s not going to work. If the stain is just pooling up on top of the piece, it either is not able to be stained, or there is another coating or stain already on the wood that needs to be removed. In terms of equipment, you should have a brush, a rag to wipe off excess stain, and something to clean your brush (soap and water for water-based stain, and mineral spirits for oil-based). Unless your stain is designed to be wiped on, you should always use a brush. Exterior stains can be applied with a brush, roller, or sprayer, but check your product for recommendations before beginning.

What does a stain do?

Another misconception a lot of customers have is that a stain, like paint, is just an exterior coating. One of the most common problems my customers have is that they’ve tried to apply a stain as if it was a paint and, in many cases, directly over existing paint, or other coatings. Stain only works on bare wood, because it needs to soak into the wood fibers. Imagine your wood as a bundle of drinking straws. The straws can soak in water, and other liquids. However, there is a limit to how much the straws can absorb, and, of course, if they are blocked by something, they won’t soak in anything at all. Stain needs to soak into wood, and when it dries the fibers of the wood grain lock the color inside. A paint or clearcoat goes on top of the wood, and will prevent other liquids from soaking in, and make the piece more durable. You typically go over interior stains with polyurethane when you are done.

How can I stain something that has been painted or sealed?

The basic answer is: you can’t. You have to remove the paint in order to properly stain the wood. This is by far the most frustrating part of staining for customers unfamiliar with the process. Many decide to try anyway, only to return in a few hours even more frustrated. Defiant to the end, I’ve seen customers go through darker and darker stains, thinking a darker color would just cover up their mistakes, rather than taking my previous advice. In the end, their piece was ruined, and as far as I can tell they never attempted to remove anything they applied to it.

What about removing an old stain?

Unless you’re changing your stain color or switching to a water-based stain from an oil-based, you usually don’t have to remove your old stain at all. Just remember, a water-based stain can’t go over an oil-based stain. Removing stain is not particularly hard, but it will take patience. For interior stains, you have the option to sand the wood, or strip it. I usually recommend stripping, because it requires the least amount of grunt work. Sanding is cheaper, but harder, and you are more likely to damage your wood from over sanding. Most strippers just need to be brushed on, and let sit for a while, and then rinsed off. For interior stains this isn’t that hard at all, but for exterior deck stains, it’s a larger and more complicated task. Exterior stain remover usually comes in a concentrated form (so you can make a large quantity of it) and should be applied to the entire surface you want to remove the stain from. Unlike some strippers, these types of removers usually require their own neutralizer product. At this point is when most customers decide to just paint their deck instead–just saying.

With this information, your next staining project should be a breeze! The real key to staining, and any other household project for that matter, is to take the time to understand the process, and what types of stumbling blocks you might encounter. Staining is never a simple project to undertake, so consider whether it’s really worth your time. It can make your furniture and deck look fantastic, but only if done properly. If you’re looking for a quick-fix, try painting instead.

Photo by Rob Adams

Photo by Rob Adams

Let Me Fix You: Box Spring to Bed Slats

Scouring thrift stores can be a great, cheap solution for outfitting your space with vintage furniture, but it can also be the source for a growing to-do list of DIY projects. Such was the case with the beautiful wooden bed frame I found at my local Salvation Army. I scooped it up for $120 and brought it home to my new apartment only to discover that my box spring now posed two major problems: (1) the box spring, combined with my modern day super thick pillow-top mattress, made the bed too high to get into (like step-stool necessary), and (2) at some point during the move, my box spring developed this squeaking sound that creaked every time I rolled over.

So, I could get a new box spring (but it would set me back another $100 and it still wouldn’t solve the height problem) or I could replace my box spring with an alternative. I went online and discovered many mattresses today, particularly those of the pillow-top variety, don’t need to be flipped and thus don’t require a boxspring anymore. My first thought, of course, was: IKEA! They don’t believe in box springs either! Which would have been an excellent solution, if only my new bed frame had had a center rail—an integral structural support to the thin slats sold at IKEA. Not eager to test out their buckling potential, I looked into: a single sheet of plywood, which was nixed for its apparent susceptibility to mold growth, or a bunky board, except that they are designed to only be used in addition to slats (which made me question why people buy them at all?). This left me with only one option: it was time to make my own bed slats.

Step 0: Googling

I started researching making my own bed slats and found this excellent slat tutorial.

Step 1: Acquiring Tools

You know what’s awesome about doing all your previous DIY projects in your Stepdad’s back shed? Power tools. Do you know what my apartment doesn’t have? Power tools. It does, however, contain a wimpy (albeit visually appealing) toolbox! But, given the scope of this project, and even though I had some woodworking knowledge under my belt, doing this on my own was going to require purchasing a few things.

With the number of DIY projects starting to build up in my apartment, I decided it was time to invest in a power drill of my own. Turns out, a power drill/portable saw combo at Home Depot only costs $10 more than just a power drill. Considering I was already set to spend the money, naturally, I bought the combo. It was the cheapest brand, Ryobi, but at $99 I wasn’t being picky. I double-checked reviews online, compared the features to the other drills around it, made sure the set came with a lithium-ion battery (not nickel-cadmium, which was the former battery standard but is now being phased out), and that the battery pack would work with any future Ryobi power tools I chose to purchase (next buy: power sander!).

But once you’re the proud owner of a fancy new power drill, you still need two things before you can actually use it: drill bits and screws. I opted for a slightly larger drill bit kit because I wanted to make sure I had a set that included all the basic screwdriver heads. Because I had no idea what kind of screws I’d need for all my drill powered future projects, I settled on this assorted wood screw pack to get me started. I also purchased a variety pack of nails just in case this whole plan blew up in my face and I had to resort to my good ol’ hammer. (For more tips on what you should have in your toolbox, check out Michelle’s suggestions here.)

Note: I have yet to use my portable saw but my vastly more experienced Stepfather strongly suggested I buy myself a Work Mate before using it. It’s a foldable and portable work table with clamps that you can use to saw things more easily (read: without hurting myself).

Step 2: Acquiring Materials

Chances are, wherever you go for wood, they are going to have an overwhelming number of options. There are several key decisions that you will have to make:

Note: Before you go to a lumber supplier (in my case: Home Depot), it is important to measure–actually measure with a tape measure and everything. Don’t be rushed, and don’t skip this, or you’ll end up making the same mistake I did.

First thing you have to decide is what type of wood you want. For a project like this, where no one will be seeing the wood, you can go with a cheaper soft wood like pine or Douglas fir.

Next, you need to decide on what thickness and width you want your wood to be. When I think about lumber, “2-by-4” is more of a name than an actual description. Turns out it’s actually both. The first number is the thickness of the wood and the second is the width. So a 2×4 is 2” thick and 4” wide. Unfortunately, to be extra confusing, lumber is actually identified by what they call nominal lumber sizes, meaning that it is labeled as the size it was before the wood was planed and cut. Therefore a 2×4 was 2” thick and 4” wide. However, now as it lies in front of you, the wood is only 1.5” x 3.5”. Not confusing at all, right? I totally didn’t know that until I was researching for this article, so of course I took the length of my bed (72”) and decided I’d need eight 6″ wide boards. With each of the eight boards spaced 3″ apart this would give me: 48″ of wood + 24″ of space = 72″. When I got home and realized the real measurements of the wood, my 3” between each board turned into 3.5” but it still worked. I wanted the slats to be as thin as possible for the mattress to sit on while still being strong enough to hold it up without bowing, so I went with 1” thick wood. Don’t be afraid to ask for help! The blog post I was following had me looking at 2×12 boards, but the employee helping me saved me a ton of money by suggestion I use 1×6 boards instead.

The next thing you need to figure out is length. My 1×6 boards were each 72” long. (Again, the blog had suggested 16’ (192”) boards, but these were way more manageable and cheaper.)  72” is a lot longer than my full bed, so I needed to trim them down to size. I may now be the proud owner of a portable saw, but I still had the friendly folks at The Home Depot cut my wood for me. The first time I tried this, however, I had been lazy and rushed in my measuring, so the super quick measurements I scribbled down were actually wrong. When I got my perfectly trimmed 52.5” boards home, I discovered that they were too short by 1.5”. One thing the blog had right, which I ignored, was the common bed sizes: if I’d listened to them regarding the width, I would have cut my wood correctly (to 54”) the first time and not wasted $30.

When buying wood, it’s also important to check for defects (like these common wood defects) in each board. When I got home with my second round of correctly cut 54” wood, I realized I had one “weak” board, meaning that the board was easier to bend in the middle than the rest. I already had my boards spaced 3.5” apart and I didn’t want to lose a whole board and risk putting too much weight on the remaining ones. Instead, I put the weak board on top of the metal frame on the end, where it would be more supported and have the least amount of pressure on it.

bed 2Step 3 (which should have been Step 1): Designing using your vast structural engineering knowledge… or what you learned from Google

So, at first, the plan (devised from the blog I’d found) was just to get a bunch of boards and lay them across my frame. This would have been great except that, unlike their example, my bed frame didn’t have anything on the sides to keep the slats from moving or, worse, slipping off. Not wishing to experience this in the middle of the night, I had to do a little extra planning:

Let Me Fix You- Box Spring to Bed Slats

Thanks to my earlier wood measuring error, I had a few extra boards to work with, so I decided to add two support boards to keep the slats from moving and/or slipping off the frame. Once flipped over, the supports would hit against the metal on the frame, thus keeping the slats in place, and look like this:

Let Me Fix You- Box Spring to Bed Slats (1) If only I had made these drawings BEFORE I started and not just for this article. Add that to the lessons-learned list.
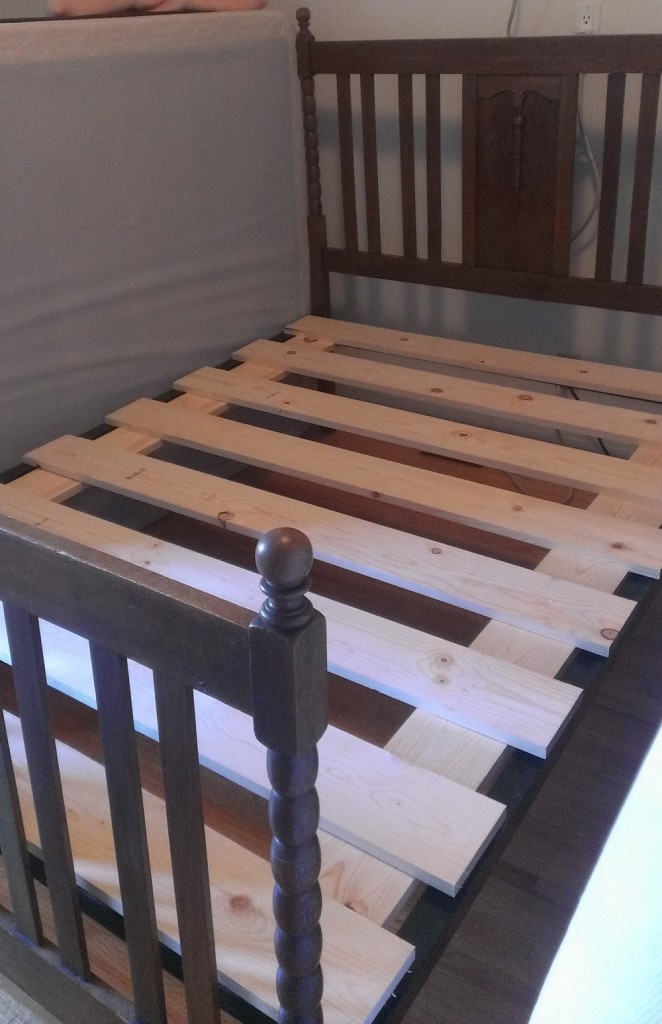
This was the final product:

Bed Slats square

After a month of excellent sleep, without injury or sagging, I think it’s safe to call it a success!

Let Me Fix You: The Pink Chest

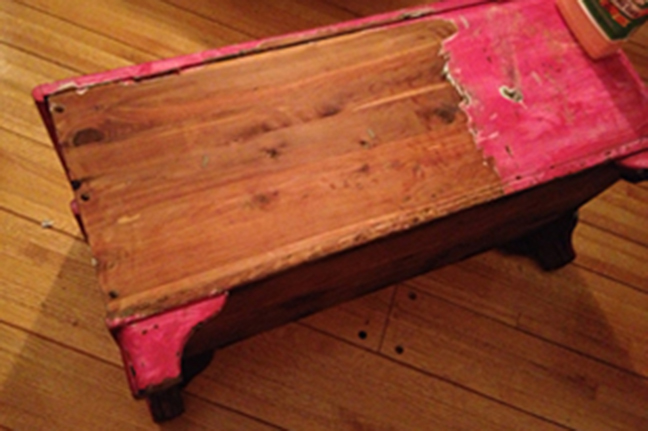
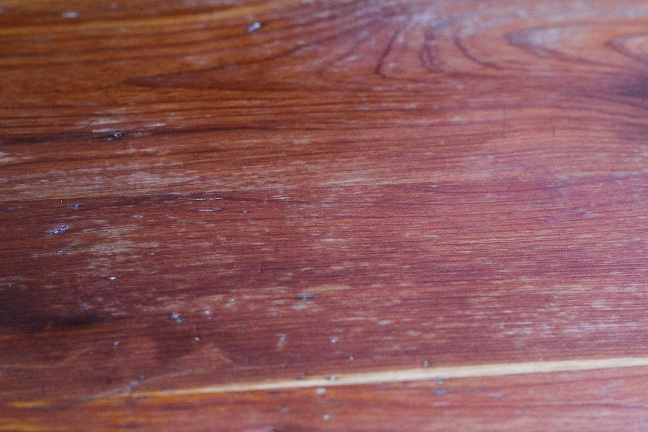
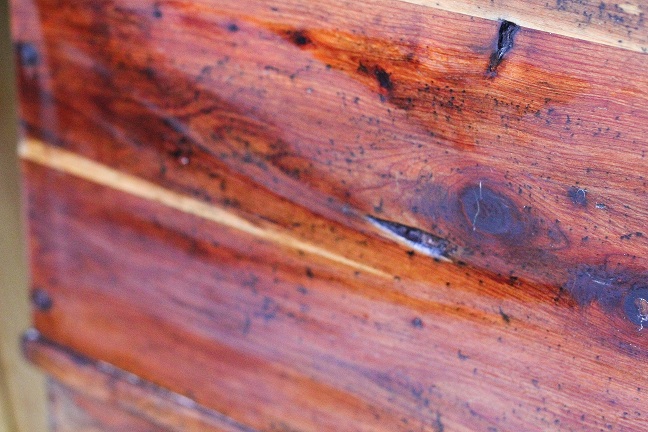
When you live with someone who has a trunk obsession, you might one day find an ugly, ugly, ugly hot pink cedar chest sitting in your living room. Now, because you have taste (and they do too thankfully), the only way this atrocity can stay is if you take it back to its original wooden self. Bring. It. On.

Before I get started though, let me warn you that this is not so much a DIY instructional as it is story time: the trials and tribulations of someone who’s just gonna do stuff and hope for the best.

The paint job was straight up shit. Bad paint jobs mean one of two things: either the previous owner was a crap painter or they were trying to cover something up. You never know what you’re going to find, but with the beautiful, untouched cedar wood visible inside, there was a very good chance that treasure lay beneath.

The Stripping

First I wiped the chest down with Murphy’s Oil Orange Multi-Use Wood Cleaner Spray (think Windex for wood). The goal wasn’t to clean it, just to get the crusty chunks of dirt off. I decided to start with the back of the trunk, figuring this is where I’d do the least damage if things went awry. In lieu of the regular, noxious smelling paint stripper I’d used years ago, I decided to try Citristrip because it claimed to be low on fumes yet high on results (since my work space was doubling as my living room).

The basic idea behind all paint strippers is that you apply a coat on top of the paint, wait, and then scrape the paint off. I poured out the Citristrip (which has the consistency of melted Gak) smeared it around, poured some more and smeared again. The directions suggested using a paintbrush, but I opted to finger paint with a pair of rubber gloves. And then I waited the requisite 30 minutes for it to do it’s mojo (and another 10 because, well, I forgot to check on it).

With Citristrip, you don’t see the paint bubble up like you do with the oh-so-fun smelling stuff, but the paint will discolor enough to let you know it’s working. You can keep it stripping for up to 24 hours, though I never left it on more than two. But the thicker it is and longer you leave it, the easier the paint scrapes.

I used a 3” putty knife to scrape. I tried to follow the grain, scraping in one direction for the longest possible pass so that most of the paint ended up on my putty knife. Then I wiped it off on a paper towel, threw it into a plastic bag, and got ready for the next long swipe. Most of the paint scraped off like buttah. For the paint stuck in cracks and gouges, I used Ikea’s curved paring knife. Beware: aggressive scraping leads to wood shavings. If (and when) I saw strips of wood peeling off, I stopped and moved on.

pinkchest_648x431

Because I was only working on a modest sized towel, and I like my furniture and my shiny hardwood floor, I had to be very careful about dripping and spraying. This meant I could only strip one side at a time instead of doing the whole thing at once.

The Scrubbing

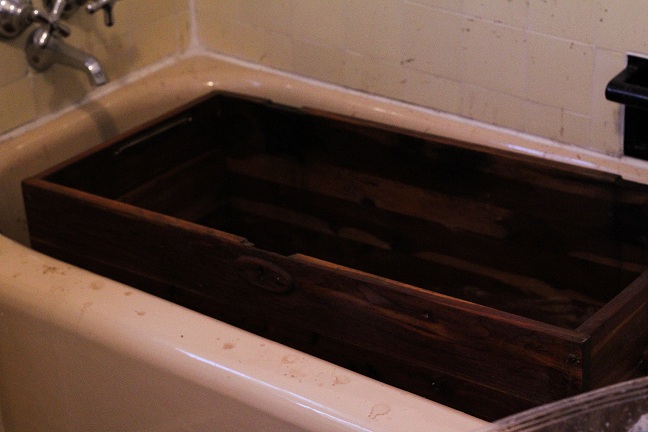
Even after you scrape off most of the paint, there’s still a goopy, residue left on the wood that just smears if you try to wipe it up with a paper towel. In my head this gunk was full of stripping chemicals that were going to hurt the cedar if they stayed caked on. So I washed each side individually after I stripped it and then I threw it in the bathtub (where it fit perfectly) to scrub it some more.

Originally I was using the Orange Cleaner spray with grade #00 steel wool (steel wool comes in several grades). But by the time I’d stripped 3 sides, I only had a 1/4 of the orange spray bottle left, so I moved on to the more economical Murphy’s Original Oil Soap. The steel wool not only picks up the gunk left by the paint stripper, but it also acts as a gentle sander. Unfortunately, the #00 was just a bit too fine which meant it would get matted with all the crud much more quickly. I almost went through the whole 12 pack, hence switching to the coarser grade #1 steel wool which was much better at lifting up stubborn paint.

The advantage of doing this in a bathtub (or if you’re lucky enough to be outside near a hose) is that there’s a constant supply of water and boy oh boy did that liquid blacken. The water that came off was nasty (a putrid diarrhea color) and it sprayed everywhere. Good news was that it smelled nice. It was probably in the bathtub for hour until the water finally ran beige.

The Sanding (or My Big Mistake)

I left the trunk to dry overnight and when I woke up in the morning it looked awful. I have scrubbed this thing to an ashy death, killing all the potential I spent hours scraping and scrubbing into existence… not really, but it felt like it. Having already read things like this, I was aware that this was another step in the process but it wasn’t any less horrifying.

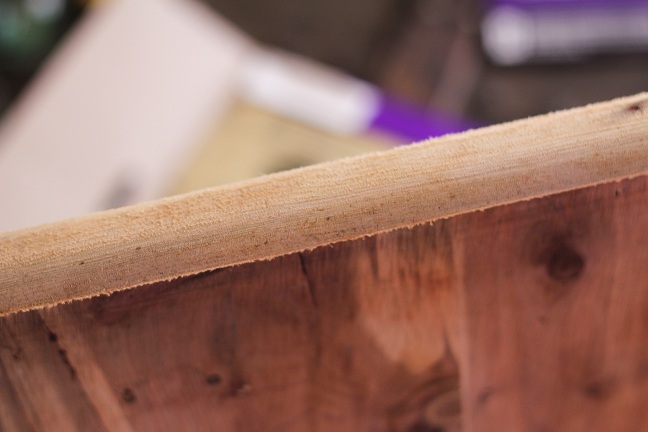
My naivety led to me to think that all the ashy discoloration would simply go away with some oil and that sanding was only for the rough patches. The wear and tear was cool, why sand that away? So I gave it a mild sanding with some 320 grit sandpaper (yes, sandpaper has grades too) and then I moved on to oiling. In retrospect, this was my big mistake, but more on that later. The only thing I actually sanded was the trim because it had this funky peach fuzz going on along with a faint greenish hue left by the original olive colored paint.

The Finish (But Not Really)

Now for what felt like the daunting part: choosing a finish. There were way too many choices, but I surmised the standards were oil, varnish, shellac and laquer. My biggest concern was ease-of-use in a small space, but I also wanted a natural shine, not a plasticy one, so I went with oil.

Typical oil finishes are Danish Oil, Teak Oil, Tung Oil and Linseed Oil. I didn’t want to stain the cedar wood, I just wanted to, ya know, “moisten” it. Linseed was crossed off simply because none of the pretty, DIY blog posts I’d read used it, Danish oils usually have some stain and other chemicals in them, and Teak tends to darken the wood, so the last man standing was: Tung Oil.

Turns out most stores don’t sell the real stuff (the one I found at Home Depot was a Tung “finish” that had more chemicals than oil in it) so I ended up buying Hope’s 100% Tung Oil from Amazon.

I snapped the rubber gloves back on, poured the honey-like oil on a rag (the size of a wash cloth courtesy of an old towel) and rubbed it in. The smell wasn’t amazing (burnt chestnuts?) but tolerable. I did two coats and let it dry.

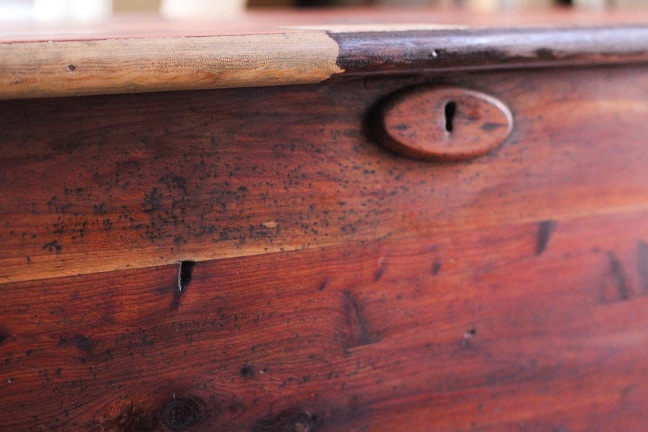
For the sallow colored trim, I discovered that Minwax made stain pens with which I could essentially Sharpie my furniture. I picked the Red Mahogany color and even though it didn’t stain perfectly even, probably because I’d oiled it first, it gave the illusion of natural wear over the years.

Finally, I waxed the chest with Feed-N-Wax (because other people said to) and hoped that I was done.

The Real Finish

Unfortunately, even after the wax had dried, there were still noticeable parts of the lid that looked ashy/greenish/blah. Annoyed but determined, I found some 60 grit sandpaper in the toolbox and started sanding my little heart out. Not only did the sanding clear up the discolorations, it actually brought out more the wood grain than I expected.

I’m halfway done with sanding and kicking myself that I didn’t do this earlier. What can I say, I’m an idiot perfectionist. The current plan is to try out a power sander and then oil it back up sans annoying imperfections. I might hold off on the waxing though, it dries matte and I’m not sure I like it. I know I’ve sanded away the shine, but I’m making the prettiest goram chest I can, even if I have to backtrack.I started this project having no idea what I was doing, but at the end of the day it’s all trial and error whether you have a manual or not. Just accept that you might screw it all up… or you might not. I’m still figuring it out.

Extra Credit: Apparently, to avoid spontaneous combustion, this is how you dispose of oil soaked rags:

Expectations vs. Reality: Living in Sin

“Ooooh, I guess things are gettin’ pretty serious, huh?”

If you are preparing to move in with your sig-o, get ready to hear that every day of your life for the foreseeable future.

But what the heck does that even mean… “Things are gettin’ pretty serious”? In the year 2013, what qualifies as a “serious enough relaysh” that you’d consider moving in together? Only you and your guy/gal can accurately answer that question. It’s different for everybody, so this won’t be a discussion about how to know if it’s the right move. But whether you’re gearing yourself up to put a ring on it or cruising along at a gentler pace, one thing remains constant: living together changes (almost) everything. You might not expect it to, especially if you’ve practically been living together the entire time you’ve been dating. But, as one half of a couple that just took a jaunty stroll down this road, here are a few realities of the situation that might differ a smidge from your expectations.

The actual physical moving of apartments was rather eye-opening for me. I think I’ll start with that. Moving day is about as relaxing as that moment when your best friend just became a zombie, and you must decide whether or not to blow his head off because in about five seconds he’s going to eat your face. Moving is a dangerous dance! It’s likely you’ve never seen your sig-o handle stress of this kind before. Our move went a little something like this: we decided to do it ourselves, with friends and a U-Haul. Except, in the end, only one super-dedicated friend actually stuck with us the whole day, the U-Haul rental place was far away and threw off our whole schedule, and we were not as well-packed as we thought we were. A mattress was thrown off a balcony. Things of a somewhat vile variety were uttered. So… my advice for the big day? Fork over the cash, and hire a moving company. Really. U-Haul often tacks on all kinds of extra fees anyway, so in the end it’s not that much cheaper. If you hire movers, you can focus on the excitement of your first awesome apartment together instead of: “Hey, Liz, please don’t hold that chair like you have 6-inch T-Rex arms, the legs are going to—!”“Uhh, do we have a hot glue gun? The legs of this chair all fell off.”

But if you do decide to DIY, take comfort in this: if your relationship comes out of moving day intact, it can probably survive anything!

Something else I wasn’t quite expecting was the fact that just because we liked each other, it would not necessarily mean we liked each other’s stuff. Once we got through the move and started putting things in their proper places, there were several instances of, “Oh… wait, we’re hanging that? On an actual wall in our actual home?” When we lived in our respective apartments with roommates, we always had our own rooms—spaces that were completely our own. But now, for the first time ever, the entire space was shared space. The solution in this case is simple, but it requires patience. Over time, invest in nice, new things that you both like. If you’re not lucky enough to have your tastes perfectly align, I recommend having a joint “cool new shit” fund. It doesn’t have to cost an arm and a leg, either. Go to the flea market together and get an antique desk or a funky painting (then do as I do, and go home and watch Flea Market Flip for 3 hours and proclaim, with bloated self-confidence, “We could totally make that table, why aren’t we on this show?!”).

Which obviously leads me to this addendum: Definitely try to make some of this stuff if you’re crafty types! In the end, you might have to make a few concessions. But focus on getting new stuff together, instead of stewing over how much you know he/she loathes your antelope-shaped candelabra (yeah, that’s mine).

Also, speaking of joint purchasing ventures: maybe you were expecting the money questions to kind of answer themselves, or that you’d both be impeccable about splitting all household expenses evenly. But you need to chat about it. My philosophy is 50/50, all the way—on everything from the cable bill to groceries, no matter which person the food “belongs” to (so this means, yes, I spend just as much on his ground beef as he does on my veggie burgers and tofu). But definitely have an honest conversation about your finances before you move. If one of you is a little more solvent than the other, that’s okay. Maybe you agree on 70/30 or 60/40. But whatever you decide, have a mathematical layout and stick to it. It’s easy to get sloppy with that kind of thing, but it’s also the thing most couples wind up fighting about!

Another notable change is the sharing of people. Two-Buck-Chuck-Ladies-Night-In will take on a different form. As will five-hour Xbox/Chipotle-scarfing marathons. Your single-social behavior is going to change, which is weird, right? It’s not like either of you were “single” before this. But now, when you have friends over, even if you have the space for each person to operate independently, you may feel it’s necessary to try to include one another. And that’s great! I love when the important people in my life get to know one another better. My heart is easily warmed by everybody getting on like peanut butter and jelly. But I definitely wasn’t expecting this change in the social atmosphere. Now every friend visitation is pre-examined, case-by-case. If my best girlfriend needs to drink half a bottle of wine and give me a very graphic play-by-play of her latest sexcapade, I will suggest a trip to the bar instead of inviting her over, as was our usual M.O. when I was living alone.

This accomplishes two things: firstly, it stops you from inadvertently making your sig-o feel like they’re intruding just because they’re there. Sloppy secondly, it gets you the hell out of the apartment, which leads me to another unexpected possible side effect of co-habitation. “Co-Hermitation,” I like to call it. It happens to pretty much everybody. It’s totally normal. You’re together, so you’re being social even if you’re staying in. It’s a scientific fact. But if you can break the cycle now and then, have at it!

Now, here’s the thing that I think is the biggest expectation-buster of them all. And, a lot of the time, it could be an expectation that other people have imposed upon you because you made this decision. But here’s the thing: moving in together is an enormous sign of commitment. Yes. But there’s a reason you signed a lease instead of a marriage certificate. Living together might be a step in that direction, but if you ask me (which you sort of did because you continued to read up until this point!), moving in with someone you love should be treated as the ultimate personal experiment. You did it because you wanted to be 30000% sure that this is the right person for you, and there are certain things you’ll only understand about your relationship and the “rightness” of it if you’ve lived with this person. That’s what you needed, so that’s what you decided to do. Not everybody needs this “experiment.” Your parents may not have needed it (as they might endlessly point out to you). But this is the 21st century and, more often than not, this is how we roll as adult people who love each other.

However, let it be known that if this experiment does not meet your expectations, if something changes and this relationship no longer makes you happy, living together does not have to mean that you’re in-it-to-win-it for life. Try to make it work. Try and try again, dammit. Not every day is going to be a rollicking honeymoon. But in the end, if it’s just not meant to be, don’t let anyone guilt you into treating it like a divorce. You moved in with this person so you’d know what they’re really all about. And that’s exactly what you came out of it understanding. I SALUTE YOU if this is you presently or if it ever has been you.

Now, I don’t want to leave anyone feeling sad, because who would I be if I did that? Sheesh. So before I sign off, here are a few more hints, practical or otherwise, that you may or may not find useful in your newfound co-habitative bliss:

  • If you have pets, then guess what: your girlfriend/boyfriend also inherited said pets. You may have said things like, “I promise, the dog is mine, you don’t have to clean up after him or feed him or anything, he’s just gonna exist in the house.” But if you all exist in this household together, man and beast, it’s highly likely that that animal will become a greater shared entity than you expected, for better or worse. So, like… definitely make sure the dog isn’t keen on pooping in his/her shoes.
  • If the fact that she throws wet towels on the bed after a shower makes you rage, for the love of God, just tell her! She probably doesn’t even know she’s doing it, okay? Old habits die hard. It’s a hard knock life, living alone. Nobody tells you not to do this kind of stuff!
  • Same goes for cleaning in general. If you have a different definition of the word “clean,” you should probably come to grips with it and find a harmonious happy medium. People like slobs just about as much as they like that OCD 6 am vacuumer.
  • Two TVs or no TV. I’m so serious. One in the bedroom and one in the living room or none at all! I think everybody appreciates what I mean by this!
  • And one more thing, coming at you from the bed where I currently sit, battling a sore throat that I’m convinced is morphing into flu symptoms minute-by-minute: get familiar with each other’s sick day behavior. People usually treat sick people how they want to be treated when they’re ill, whether that’s with 24/7 doting or with a suck-it-up-hands-off approach. As I sit here contemplating whether or not I want to get up and make some honey-lemon tea, I wonder whether or not he knows that I might want somebody to make it for me. Hmmmm.

Stay tuned for next month’s article on how to maximize your sickness sympathy potential (a beginner’s guide).

Moving in w_your sig other square

Photo by Sara Slattery

Things You’d be a Sucker to Buy New or Full Price

As a millennial managing my personal finances in the wake of The Great Recession, I have had to find creative ways to cut back that I otherwise might not have. This includes buying used things when, in more prosperous times, I may have bought the item brand new. On this pauper’s pilgrimage, I’ve discovered that if you can find what you’re looking for secondhand, you’d be an idiot to buy it for the full price.

Thrifting Square

Photo by Sara Slattery

Tools, books, cheap sunglasses, furniture, stylish clothing… These are all on my list of things you should never buy new, because you can find them used on Amazon, eBay, at thrift stores/flea markets, or used bookstores, from half price to pennies on the dollar. More importantly, you can feel rich for a couple of hours while directly supporting your local economy! Got twenty dollars in your pocket? Well, well, well—look at Mr./Ms. Fancypants-Highroller!

There’s a reason why the word cheap has such a bad connotation: being cheap means that only the bottom-line dollar amount matters. If that’s the case for you, you might as well stop reading. However, being frugal means extracting a high amount of value relative to the amount of money invested. Who doesn’t want good quality stuff without breaking the bank?

Enriching the Local Economy

With relatively few exceptions, new goods are sourced globally from giant corporations. Putting aside the typical ranting against them, this means that rather than enriching your friends and neighbors, your money supports factory labor thousands of miles away and mostly enriches several hundred institutional shareholders.

Buying used and in secondary markets usually entails going to a local thrift store, which often is family owned (like one of my favorites: Lost and Found in Sunnyvale, CA), or buying from individuals at flea markets. The further your money travels, the less stimulating it’s going to be to your community. Generally speaking, it’s more responsible to spend locally.

Only Got 20 Dallaz in My Pocket

Thrifting is also a fun, inexpensive activity! Half the fun is going with friends to look at all the awful stuff that’s there—like I do (shameless plug). Also, sometimes you will see things at the flea market that were obviously shoplifted and are now being fenced for sale. Some might view this as participating in a legal wrong—cool, keep walking to the next stall. Personally, I play too much Skyrim, so I like think that I’m acting like a member of the Thieves’ Guild or the Ragged Flagon, reveling in the cloak-and-dagger nature of a ‘black market’ (when really its mostly just razor heads and Similac). It’s nerdily exhilarating, and I get a kick from it. Plus, I don’t really know for sure if it’s been stolen, and I can’t exactly go around lobbing accusations. Since the presumption of innocence is the bedrock of American justice, shop away, moral relativists! Besides, what’s more immoral: benefitting from shoplifting, or charging $40 for a hammer made at forty cents per unit by a nine year old Chinese kid?

Things to Never Buy New

  • BOOKS:

Especially the following:

-       Any book by Tom Clancy
–       Any book by James Patterson
–       Any book by Danielle Steel
–       Any book by John Grisham
–       Any copy of The DaVinci Code (Ew.)
–       Any copy of Wild Animus (You’re a sucker if you pay any money for this, they give it away on all college campuses)
–       Any objectivist propaganda by Ayn Rand
–       Any copy of Shōgun

  • TOOLS:

People are always trying to get rid of their tools—they bought new ones or they don’t use them anymore: whatever the reason, they want to get rid of theirs. You can buy tools at anywhere between 10-20% of what they’d cost at a Home Depot. And if paying a fraction of the cost for tools and enriching your local economy wasn’t enough incentive, you should be aware of the political campaigns Home Depot supports and determine whether or not they align with your own beliefs.

If you’re moving into your first place and you’re looking to build your kit of indispensable tools, look out for these items at your local flea market. You could save a nice bundle of money. The tools commonly spotted:

-       Hammer
–       Scissors
–       Basic screwdrivers
–       Razor heads
–       Razor blades
–       Duct Tape
–       Tweezers
–       Nail clippers
–       Saw blades
–       Drill bits

  • OTHER:

-       Sunglasses

Seriously, unless you’re buying Ray-Bans or Oakleys, all sunglasses are basically plastic shit made in China. Twenty dollars for cheap plastic crap is a crime, and retailers that sell them at that price ought to have bamboo shoots shoved underneath their toenails. At a flea market, you can buy them for about $5 a piece, or cheaper.

-       Leather jacket

This is important, because a brand new one rarely (if ever) costs less than $150 and they can cost as much as $200-400 or more, depending on the brand. But if you hold out for exactly the jacket you want, you can usually find it between $10 and $40 at a thrift store. These are the real gems of thrifting. If you have a nice leather jacket like I do, you wear it all the time. You will have saved hundreds of dollars and look like you stepped out of a Macklemore music video (can I refer to that song a little bit more? I definitely haven’t done it enough).

Getting Started

Yelp. Google. Seriously.

First, finding the thrift stores presents a logistical problem. You rarely ever want to hit just one. The most fruitful method I’ve found is to Yelp it, and then transpose the positive Yelp hits into a Google Map. From there, I group the stores into sectors, or ‘circuits,’ that I can hit as part of a planned trip or if I just happen to be nearby. This type of informational awareness allows me to attack all the thrift stores with optimal logistical efficiency. No wasted gas, no yo-yo-ing back and forth across town—you will be a precise, methodical, lethal thrifter.

If you choose to hunt at a flea market, make sure you have cash. Since there is no ‘check out’ save the person who is manning the stall, take the opportunity to hone your haggling skills. Some people will be receptive to it; others will not. The method of haggling I have found to be most effective is to hover and look indecisive. An experienced fleamarketeer will sense the opportunity, and swoop in and make you an offer. Make your best “Aaaggghh, I dunno…” face, and watch the price fall. Finally, take out some cash, make sure they see it, and undercut the second offer by about 10% or try to get a bulk deal if applicable. Do not do this at a brick-and-mortar establishment—it is a major protocol breach. Likewise, at a brick-and-mortar store, cash isn’t as important as it is at a flea market or garage sale, since most thrift stores take credit cards.

So support your local economy, save some money yourself, and have some social fun in the process. Thrift, you magnificent millennial bastard children of capitalism, thrift!