Tag Archives: food

My Thanksgiving

When I think of Thanksgiving and the holidays, many wonderful things pop into my head. Even though Christmas music is not allowed in my presence until exactly one day after Thanksgiving, once it’s on I definitely crank up the radio. December 1st is also the start of the “25 days till Christmas” on ABC Family (which usually includes a Harry Potter weekend). But, in my life, the holidays mean more than just these commercialized pastimes, they mean time with my family, delicious food, and (hopefully!) a reprieve from homework. It’s also a time when our family breaks out certain traditions to get us into the spirit of the holiday, and Thanksgiving is where it all starts.

For some, this holiday time could be all about the food or the people or some odd tradition that involves paintball and a bagpipe player. But, for me, Thanksgiving had always been about the specificity: a certain way that the holiday was destined to go. There always had to be this kind of stuffing, and that kind of turkey and this kind of pie (for my family it’s a brined and roasted turkey with a wild mushroom and rice stuffing with apple pie…I am getting hungry just writing this). We had to play this music and drink that wine, or else, how would we know it’s Thanksgiving?! In part, this was because the one thing that always did change was where we would spend the holiday. This changed almost every year: when I was five, we spent Thanksgiving with our grandparents, when I was twelve, we went to the Outer Banks with some family friends, and for the past couple of years, our family has gathered with some cousins who live close to us. All of our ever-changing lives always turned the question of where we would go into a last-minute juggle.  Eventually, because we never had a set plan, our Thanksgiving became rooted in traditions surrounding food and family. It became a time for sharing, for catching up with people we hadn’t heard from in a while, and for spending time with people we love. The host would cook the turkey and the rest of us would bring dishes. We laughed and drank and everyone helped each other when it came to cooking and eating. It was great, if a little exhausting.

However, when my sister and I were both studying abroad, we didn’t get that big fancy dinner or the time with our friends and family. Instead, that holiday became more about who was around us at that time. My sister and I spent one Thanksgiving while she was in Scotland at a pizza restaurant, having a wonderful chat about college and traveling. When I was living in England, I spent my holiday in the library before cooking with some friends in our dorms. It was the first time I realized that the holidays and Thanksgiving could be something different than what I had always experienced.

This year, most of our other family members have branched out, so we decided that this Thanksgiving would just be about us as a nuclear family. Instead of gathering with extended family and friends, we have decided to focus on us as a family. Though this will be very different from the hectic holidays of the past, it will be a nice break from having hoards of people all gathered in a tiny space.

Not only was it a good idea to try something different this year for practical reasons, but it’s also my last year at university and I have no idea where my life is going to take me in the next year and whether I will be able to spend this time with my family again. The same goes for my sister, who just moved to Boston. Before her life becomes too settled, she wanted to come home and spend one last year at home with the four of us. Neither of us really knows how to feel about this or how to approach future holidays. But if this year has taught us anything, it’s that one should do whatever they want for the holidays, regardless of what they feel that they “should” do.

Now that I’m in my last year of college, I’ve begun thinking about my life outside of my hometown and outside of my family. I always knew at some point I would have to but I’ve never really thought about defining myself outside of my parents and our traditions before. And though I am very happy to be spending the time with my parents and sister this year, it is not because I feel like I need to for tradition’s sake. It’s simply because I want to. And I realized, for me, that’s what the holidays need to be about: spending time with the people I love because I want to. So, whether that means time spent with your own family, the family of your significant other, your newfound friends, or all by yourself with six hours of Netflix, spend the time that you have on this earth with those you care about (or those you will grow to care about!) and make the most of the time you have together. Traditions only make up the surface of a holiday. What matters is the core: the love you share with those around you.

Photo by Rob Adams

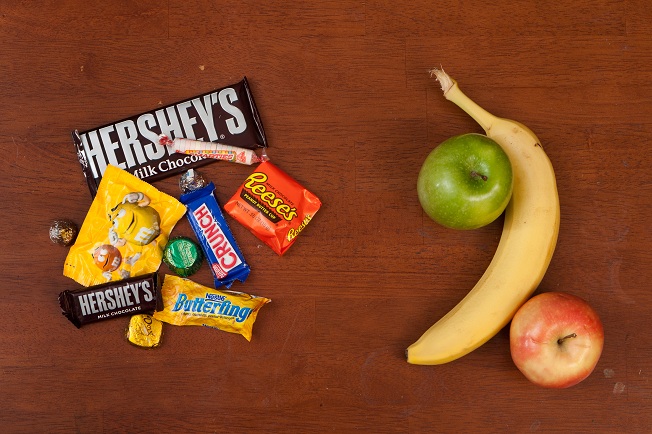
Photo by Rob Adams

Food Poisoning as a Broke Foreigner

Before I left on my two-week dream excursion to Western Europe, my boss had one piece of advice for my first trip to Europe: “Watch out for that French food. They love their rich sauces and butter.”  She was right—the French coat everything imaginable with creamy, delicious sauces.  My boyfriend teases me that I am overly sensitive to food, and he is right, too: my stomach can’t quite handle the greasy, fried foods that most young people in their twenties enjoy.  I have made a point of eating healthier since graduating college; however, this new healthy lifestyle was going to be left back at home. In Europe, I was determined to eat what I wanted, when I wanted, sensitive stomach be damned!

After consuming everything from the four basic Western-European food groups—cheese, meat, bread, and beer—David and I halted our binge in the Louvre. There, we hoped to find a quick, simple lunch.  I ordered what I assumed to be a cheap alternative to the rich and extravagant French dishes: a chicken sandwich.  Baguette, cold white meat chicken, hint of mayo, and lettuce.  By “cheap,” I mean 8 euros, which trust me, is cheap for Paris.  Especially compared to the fondue-and-champagne birthday dinner to which my boyfriend treated me the evening prior.

After filling up on our easy lunch, we commenced our 9-hour Louvre visit.  But, among the Egyptian ruins, mummified cats, and pages from the Book of the Dead, I was already starting to feel tired. It had only been a few hours so I dismissed it as travel fatigue (this was the last day of our whirlwind trip) and carried on. I was not about to miss any of the artifacts from one of my favorite historical eras! So, despite the occasional audible complaint from my stomach, we saw the mysterious Mona Lisa, the gorgeous Venus de Milo, and more paintings of Jesus than could fill the Notre Dame.

As our full-day Louvre excursion continued, David remained enthusiastic but I was drained and found it impossible to find the energy that had kept me going through Versailles, sightseeing in Berlin, an 8-hour drive through the German countryside, and Oktoberfest in Munich.  I kept having to sit down to take breaks on every bench we passed and build my energy to move through a museum that is rumored to take weeks to explore.

After a solid nine hours in the museum, David and I set off to find the Metro station, and stopped by a corner brasserie for dinner.  We were scheduled to fly back to the States the next day, so I wanted my last fill of traditional French food.  I ordered a rare steak, pommes frites, crème brûlée, and a glass of Bordeaux.  I was going to eat what I damn-well pleased and work off the inevitable weight gain later.

We were back in our hotel room by 8 pm and, within an hour, I was complaining of nausea and had a pretty nasty stomach ache.  After taking some Pepto Bismol (a necessity if you plan to eat and drink your way through Germany and France), I was not getting better.  Another hour later, I was vomiting.

David was our pillar of strength—and I say “our” because dealing with your significant other’s food poisoning is no cake walk for either of you—through the next 24 hours, which would prove to be my worst case of food poisoning to date.  (Which is really saying something: when one is born with a delicate stomach like mine, one is prone to overdramatic food poisoning episodes, like the time I got food poisoning from eating a veggie burger in middle school. Yes, that’s right—a burger patty comprised of vegetable matter gave me food poisoning.)  Anyway, once we realized I could not keep one sip of water down, I started worrying about the effects of dehydration. My mom, a registered nurse who has been to the emergency room with a bad bout of food poisoning, was our first call.  We spent 46 euros (about $62) to call her back in California on our hotel room telephone at 2:30 am (no, we didn’t have a calling card, and no, we weren’t about to go hunt one down at 2:30 am).  She confirmed that my symptoms were, in fact, the result of food poisoning and warned David not to let me get any more dehydrated.  Dehydration is the primary concern for anyone with this kind of food poisoning (the vomiting kind), because the effects of dehydration usually warrant a visit to the emergency room.  From then on, our chief concern was to keep me hydrated enough to avoid going to the E.R., where they would give me an I.V. for the fluids that were refusing to stay in my system.  At one point during the course of that night, I simultaneously begged David to make sure I didn’t get dehydrated and not to force me to take another sip of water.  Yes, I was a mess, but at least not a hot one—thankfully, I wasn’t running a fever. Dehydration plus fever equals a certain and expensive trip to the hospital.

When the vomiting wasn’t easing up at all, we realized I still needed medical attention and since we were trying to avoid the E.R., David and the hotel clerk contacted an on-call doctor who was available to make the last-minute house call to our hotel room at 3 am, for the low, low price of 110 euros (about $147).  This angelic, Parisian woman with lovely dark features came into our hotel room with a real-life version of the doctor kit that I played with as a kid: stethoscope, thermometer, blood pressure cuff, and briefcase adorned with vials of prescription drugs.  After asking for my age, known allergies, and what I had eaten the day before and when, she opened her briefcase, pulled out a needle, and prepped an injection.  Now, I’m usually perfectly okay with needles; I am devoted to my yearly flu shot. But, given my incapacitated state, I became uncharacteristically worried about the chance of a rouge air bubble left in the vial and of my doctor’s ability to practice medicine at 3 am.  In my haze, I remember asking what the mystery vial contained, and she responded with the prescription name of an antiemetic, to help with my vomiting and nausea.  I have no idea whether her response was in English or French: I don’t speak a word of French, and her English was coupled with a heavy French accent—so, to this day, I have no idea what she injected into my body. I felt another wave of nausea come over me, so I shrugged my shoulders, looked at my adoring boyfriend for support, ignored the fact that she never snapped on a pair of latex gloves, and willingly handed her my arm.

That doctor’s visit cost 110 euros, cash only, payment on the spot—a fact that I somehow managed to ignore until she was done treating my symptoms.  The “cash only” caveat being an issue since, between the two of us, David and I had roughly 65 euros on hand that was supposed to get us through our final day in Paris.  But the wonderful doctor with the miracle injection that promised to make me stop vomiting needed to be fairly compensated for her time!  David walked down to the hotel front desk, for the third time that night, and asked to borrow the remaining 45 euros with a promise to pay him back once the banks opened and David could withdraw the cash. Thankfully, the grumpy front desk attendant begrudgingly agreed.

I vomited a few more times but, finally, whatever the doctor administered kicked in and I had stopped by the time the sun came up.  I was in no shape to eat solid foods, but I needed to ingest something that would increase my blood sugar and energy.  David left the hotel room on a mission to find Coca-Cola, pick up medicine prescribed by the doctor, and—most importantly—get cash.  What David didn’t prepare for was the fact that, during our dream vacation out of the country, his debit card had expired. This meant he was unable to retrieve cash from any source.  My poor boyfriend walked back to the hotel room to get my debit card and face a not-so-forgiving version of his helpless girlfriend. By the time he returned with the soda, pills, and cash, I was worn down to the point of tears, and David was exhausted.

While the original plan was to hop on the Metro to Paris Orly Airport, there was no way that we could coordinate that effort with my sick ass and our four bags of luggage.  With the remaining cash from David’s morning ATM trip, we spent 80 euros (about $106) for a cab ride that far exceeded our original plan of a 3 euro each Metro ride.  But, we made it to the airport: broke, weak, and grateful for each other.

And when I got back to work a few days later, after arriving safely in the States, I was able to tell my boss all about our unforgettable trip.

Photo by Rob Admans

Photo by Rob Adams

The 21 Day Sugar Detox

When I try to explain my relationship with sugar, I tend to refer to it as that ex who is  just no good for me. Once I finally saw past the sweet, candy-coated, emptiness of the calories I was consuming, all that was left was how lethargic, heavy, and stuffed I felt. So finally I declared, “That’s it, Sugar, you’re not good for me” and I cut him out of my life. I un-friended him on Facebook and I even bought a vegetable slicer—because, hell, I’m replacing all those noodles with zucchini spaghetti. And for a while, I’m good. I feel more energized, more focused, I sleep better, and I breathe better. It’s awesome.

Photo by Andy Sutterfield

Photo by Andy Sutterfield

But then Sugar comes back around and he’s like, “Hey girl, I heard you were having a party… I brought you those brownies with peanut butter cups inside that you love so much.” And I’m all, “Nope, I don’t do sugar anymore.”

But as the night wanes, I tell myself, “Well, just a taste of this peanut butter cup brownie won’t hurt.” It’s comfortable and familiar and it makes me feel good. Before I know it, the love affair is back on, full throttle, and all I want is pad thai and pizza dough. For who understands me, knows me, and never judges me like a slice of apple spice pound cake?

It’s an unsustainable relationship. And Sugar and I will mend ways and break up, I fear, many more times before I’ve really wrapped my head around how much better I feel without him.

I won’t bore you with the oh-so-bitter details of why sugar is bad for you because you can learn more about them here, here and here. Be warned, there is definitely a good amount of fear mongering out there when it comes to sugar and gluten intake, but it’s important to know the facts about the negative impact that sugar has on our bodies and also be aware that, as with anything, excess consumption is bound to have negative repercussions. Excessive sugar intake has been linked to diabetes, obesity, high cholesterol, heart disease, eczema, and gum disease. Not to mention that it’s highly addictive.

I’ve never exactly been the picture of healthy eating habits and I never gave much thought to just how much sugar I was consuming—either natural or processed. After all, the bottom of the food pyramid, the category we’re told to consume the most of, is a giant spread of rice, bread, and noodles. So for all intents and purposes, I figured I’d nailed it. Turns out—and you may have guessed this by now—the sugar found in said rice, bread, and noodles is not actually good for us. At all. Which is why I decided to do my first sugar detox.

Here are the rules I followed for my 21-day sugar detox. They’re actually pretty simple!

  1. DON’T eat anything with sugar. All bread/pasta/rice products are out. Baked goods, obviously, are a no. Avoid potatoes, corn, quinoa, and legumes.
  1. DO eat lots of meat, protein, vegetables and anything else you can find that’s high in fat or fiber. Nuts are great, and so are eggs. Get creative, or don’t, but stick to the rules.

Depending on what level of the detox you commit to (i.e. how many allowances you intend to make for yourself), sweet potatoes are on the sometimes list. So are green bananas. Both of these guys are definitely sugary in their own natural way, but far less so than regular potatoes and ripe bananas. It’s recommended that you incorporate one serving daily of either of these if you work out regularly.

It’s also important to buy meat and eggs that are organic and grass fed, since so many chickens and cows are corn-fed and grain-fed it means that if they’re consuming it, when you eat them, you are too. You’ll also get to avoid a world of hormones, growth promoters and antibiotics that so often wind up in the meat we eat.

Part of this process is about keeping your blood sugar levels as even as possible. Therefore, if you’re going to partake in dairy products during this detox, you should stick to whole-fat dairy because your body processes non-fat and reduced fat dairy in the same way it processes any kind of sugar: it will lead to crazy blood sugar spiking of the unwanted variety.

With this knowledge and a vague plan, I set off for Whole Paycheck Whole Foods to get my high-protein / high-fat / gluten-free on. Now, the key to success for any detox is utter and total preparation. Boil some eggs, bag some almonds and keep that ish on you all the time. Especially at first. That’s my best and most prominent piece of advice—be ready to feed yourself something high in protein and sugarfree at the drop of a hat.

Another trick that helps a lot is to find ways to replace what you’re cutting out. If you’re like me and live on a steady diet of noodles and sauce, crack open a spaghetti squash, or get a julienne peeler and make noodles out of sweet potatoes or zucchini. If you’re all about those Yukon gold mashed potatoes, make your best cauliflower mash with garlic and butter. Before you know it, you will forget you’re only eating vegetables.

Make some treats for yourself. There are hundreds dozens of gluten, sugar, and dairy-free baked goods online that turn out to have a real natural flavor and a deeply satisfying texture. Take this from someone who spent a whole Saturday during my first detox just looking at bread recipes online. Do yourself a favor and make some imitation bread.

Another tip: drink water. Drink all the water. Put lemon in it, steep tea in it, put it on ice and drink it all day long. It’ll wash the toxins out of your body, stave off cravings, and generally make you feel more awesome.

There will probably be some side effects, not unlike anything you’ve felt if you’ve ever tried to give up coffee. You might feel achy, you might have headaches, and there’s a pretty good chance that your body will revolt a little bit. You may discover midway through your detox that when you need to use the restroom, there’s a sense of—erm—urgency, if you will. That tummy ache you’re feeling is Candida die-off. Candida is a fungus that lives happily and symbiotically in your small intestines so long as we keep feeding it sugar. Stop feeding it and, well, it’s going to die. And that can be kind of unpleasant. (Sorry.)

After about 7 days of the detox, a really magical thing happened for me. My sinuses opened completely. For as long as I can remember, I’ve suffered from what the fancy medical professionals refer to as sinusitis. It’s a chronic inflammation of the nasal cavity, which makes breathing through my nose a non-starter. It can also cause a lot of sinus pressure headaches. As it is, sugar, gluten, legumes, and dairy are all inflammatories, and when I cut them out of my diet my sinuses became less inflamed and I could breathe through my nose. It was amazing.

For me, that was the health benefit that sealed the deal. A lot of people I know now who detox from sugar do it to lose weight, feel less bloated, and because it makes them healthier. It will help you achieve all of those things, and a lot of people experience benefits that far surpass the basics. Some people with minor gluten intolerances discover that rashes and acne clear up, and that they end up needing less sleep.

You will also find that after 21 days, that brownie sundae won’t look so tempting. Your body will have adjusted so wholly that you’ll think it’s too sweet. You’ll have a new appreciation for the natural sweetness of foods like grapes, sweet potatoes and bananas: healthy sugars that you can gradually reintroduce to your diet. There’s a lot of winning to be had.

So then, day 22 rolls around and you’re probably wondering what happens next. You’ve stabilized your blood sugar, reacclimated your taste buds to life’s natural sweetness, and you’ve even killed off that funky bacterium that was living in your intestines. Sure, now you can start to reintroduce natural sugars back to your diet, like fruit, and well… fruit. So it’s totally smooth sailing from here on out right? That depends. If you have also completed the detox you may have discovered that sugar is literally in everything. Ketchup, and buffalo chicken wings, and taco shells.  So it gets pretty tough to avoid. I’m willing to guess that even the most diligent among us (a group that does not include myself) struggle to truly steer clear of sugar long-term.

Yes, that means I fall off the wagon. It means my cheat days turn into cheat months where I fall several paces behind the wagon, sipping pumpkin spice lattes and eating Nutella crepes. It happens often enough, but I can tell you my body has not let me forget the benefits sugar-free eating. I can’t get halfway through a plate of pasta before I can feel my sinuses begin to close. So I try to go easy and be fair on myself when “just this one peanut butter cup” turns into all the french fries at In ‘N’ Out. I try to avoid bread and pasta and potatoes and for the most part I succeed. Everything else I try to keep attainable: I’m not a stickler about sauces or cheeses, and I have reintegrated beans and rice into my diet. The goal is to improve quality of life after all.

There’s little else that the heart of a carboholic like myself wants more than a big pile of noodles, covered in cheese, topped with breadcrumbs, wrapped in a sourdough bowl. Followed by a brownie, covered in cake. (Duh.) So take it to heart when I say that, although the 21 Day Sugar Detox was probably one of the most challenging things I’ve ever done for myself, it’s absolutely been one of the best things and I’d do it again.

Here’s the link to the full program for those of you eager to give this a go yourselves.

Food on the Cheap

Once upon a time, I made a rash, but good, decision. I decided that I really wanted to live near my university instead of commuting four hours every day. But, I also knew that getting a job there would be hard without a local address. So, I did the fairly irrational thing: I moved there without having a job lined up. I had enough savings to pay my rent for a few months—except, oops, I totally forgot to budget for the other costs of living! Like food.

Photo by Sara Slattery

Photo by Sara Slattery

Food is kind of a big deal so I did some research, looked at basic nutrition, and then bought what was the cheapest. This was not at the “nice” grocery store with the nut bar and open bins of nutritional yeast and gluten-free oatmeal. This was at Grocery Outlet or Food Maxx. This was the “ethnic” Mexican, Vietnamese, or Indian market. This was the last half hour of the farmer’s market when the person behind the table wants to get rid of the last bag of oranges.

I took a notebook with me and, over a couple of shopping trips, saw what was cheapest and weighed that against my personal needs. For example, I find large grocery stores very overwhelming, so I get some stuff at Trader Joe’s that is the same price almost everywhere: milk, eggs, butter, bread, frozen vegetables—even organics, if I wanted them. I’m not including prices because they vary widely, and the best thing to do is compare prices at whatever is local to you!

In an attempt to balance my nutrition, I tried to have a carb, protein, and vegetable or fruit with every meal. For breakfast: hot rice pudding and fruit, or toast and an egg with frozen sautéed spinach, or just some oatmeal and brown sugar if I was feeling especially lazy. The oatmeal packets at the store are ridiculously easy to recreate. Lunch or dinner was maybe Spanish rice (rice, spices, canned tomatoes) and bean tacos, lentil and rice soup, black bean burgers, homemade French fries, pudlas, or stir-fry.

The Staples for a Cheap Kitchen

When I was living on the cheap, I filled my pantry with basic staples in bulk because they will spoil the slowest!

  • Dry rice
  • Dry lentils
  • Dry beans
  • Other dried goods (oats, bulgur, etc.)
  • Large bagged spices

I found that the following brought a lot more variety into my meals, so I bought as much as half my freezer and cupboards could hold! Discount and bulk stores, for the win!

  • Flour
  • White/Brown Sugar
  • Pasta
  • Potatoes
  • Frozen, dried or canned fruit and vegetables
  • Olive oil for cooking
  • Bouillon Cubes
  • Tofu
  • Eggs

Since we all have our own preferences and dietary restrictions, don’t feel limited because you can’t follow my examples above.  There are a lot of cheap alternatives for you to consider when stocking your own cheap kitchen:

  • Bulk Tea (instead of soda)
  • Corn Tortillas (instead of flour tortillas)
  • Bread ($2 for 12 servings!)
  • Fresh vegetables (when in season!)
  • Coffee (because everything is cheaper than Starbucks)
  • Mozzarella and Feta (the cheapest cheese I’ve seen)
  • Bacon Ends or Ham Hocks (great for flavoring soups and stews)
  • Meat and Fish on sale (throw it in the freezer if it is about to expire!)

Did you notice what’s not on here? I considered dairy, meat, and pre-processed foods “special items” because, when comparing price-per-ounce, they were way more expensive than other protein and carb sources like beans, rice, flour, and frozen/canned produce. Except for the occasional cheese wedge or free pizza, I didn’t see a lot of meat or dairy. It’s weird, but I was so into making affordable stuff actually taste good that I didn’t even miss meat. The key to cooking deliciously on the cheap is spices, spices, spices. I experimented with what I liked and started to add it to everything!

All this dried food requires a lot of cooking. I learned that it’s best to soak beans overnight to soften them, lessen gastrointestinal issues, and decrease cooking time! I just put some beans in a bowl, cover with water, and let them sit overnight. The next day, simmer until soft. I then discovered that it’s prudent to invest in a rice cooker if you like rice, and a crockpot if you hate standing over a stove. These meals usually come out to be cheaper per serving than frozen or boxed meals, and way more nutritious. It makes sense to try to safeguard your health when you can, because hospital bills in the future are definitely not frugal!

If you do like farmers’ markets, vendors usually lower their prices or are much more willing to haggle during the last half hour. They often don’t have long-term storage for their produce, so it’s better for them to get rid of it before it spoils. If you can pick from multiple markets, try them all, especially the ones in the less swanky parts of town: honestly, I’ve found the prices are much better there. I’ve seen the same vendors at multiple locations, and their lowest prices are usually in cities and more working-class parts of town, not the suburbs or the ladies-who-brunch neighborhoods.

I hope this article gives you some insight into eating cheaply without resorting to McDonald’s and Top Ramen! Some great resources with tips and recipes I’ve found include Budget Bytes, Broke Ass Gourmet, and Poor Girl Eats Well. If you’ve got any of your own suggestion, share them in the comments. Bon appétit!

Adventures of an Aspiring Chef: The Produce Challenge

A couple months ago, I wrote an article about figuring out how to cook chicken. Since then, I’ve been challenging myself to become a better chef. This past month, the challenge was to purchase five produce items that I wouldn’t normally buy and figure out how to cook them:

  • a turnip
  • an eggplant
  • a spaghetti squash
  • a bag of Brussels sprouts
  • two pears

Let the games begin.

THE TURNIP

Okay, so first I’ll admit I didn’t cook the turnip. But I tried to! Do you know how hard it is to find good turnip recipes? I wasn’t in the mood for anything in the soup variety, anything involving mashing, or anything remotely close to fries, so I settled on a nice cheesy turnip gratin—which sounded delicious until I realized a modest-sized block of Gruyere cheese (only enough for this one recipe) was $12. Yes, I know good things cost money, but $12 worth of a cheese I don’t even know if I like? Suffice to say, the neglected white and purple ball of guilt is still sitting in my refrigerator… fine, I’ll get some Gruyere at the store tomorrow.

EGGPLANT PARMESAN

I’m pretty sure the only thing I’ve ever eaten with eggplant in it was eggplant parmesan. I figured that was a good place to start. I found  this seemingly easy, highly rated recipe (two criteria I always look for) and got to work.

Ingredients:

AllRecipes.com

What I Used

My Commentary

3 eggplants, peeled & thinly sliced

1 eggplant, sliced

I probably should have peeled the eggplant, but I forgot I owned a vegetable peeler, and peeling without one… not so easy. I also didn’t “thinly” slice my eggplant, but I’ll be better about that next time. The thicker pieces didn’t cook as well and ended up being a bit tough and chewy.

2 eggs, beaten

2 eggs, beaten

I don’t know how this lady thought 2 eggs would cover 3 eggplants. I needed both just to coat my 1 eggplant. In the future, with even thinner slices—meaning more sides to coat—I will probably need 3.

4 cups Italian seasoned bread crumbs

A container of Italian seasoned bread crumbs.

Have enough to use “as needed.”

6 cups spaghetti sauce, divided

A jar of spaghetti sauce.

This is what “divided” means in cooking. I just poured from the jar, again, “as needed.” I ran out of sauce really quickly, though, so I probably should have used 2 jars.

1 (16 ounce) package mozzarella cheese, shredded and divided

A ball of mozzarella that was on sale at Ralph’s.

I think it was 16 ounces…

1/2 cup grated Parmesan cheese, divided

Poured from my Costco jar of pre-grated Parmesan.

Clearly there is an “as needed” trend going on here.

1/2 teaspoon dried basil

Oops.


Directions:

AllRecipes.com

My Commentary

1. Preheat oven to 350°F.

To reduce potential bitterness, the comments suggested sweating the eggplant by sprinkling them with salt, letting them sit for 30 min, rinsing with cold water, and patting dry with a paper towel. I did none of this and did not notice, but I still might try it next time.

2. Dip eggplant slices in egg, then in bread crumbs. Place in a single layer on a baking sheet. Bake in preheated oven for 5 minutes on each side.

Add foil to your baking sheet for easy clean up. Bake for 10 minutes on each side, as suggested by the comments and my own experience.

3. In a 9×13 inch baking dish, spread spaghetti sauce to cover the bottom. Place a layer of eggplant slices in the sauce. Sprinkle with mozzarella and Parmesan cheeses. Repeat with remaining ingredients, ending with the cheeses. Sprinkle basil on top.

I did this until I ran out of sauce. Then I just kept layering eggplant and cheese, it all worked out in the end. Forgot about the basil, which might have been a nice touch.

4. Bake in preheated oven for 35 minutes, or until golden brown.

I had to bake mine for at least 45 minutes and most of the comments suggested something in the 40-60 minute range. Be your own judge of this. Undercooking might lead to tougher eggplant: I wish I had cooked mine even longer.

All in all, this turned out to be a success. I’d do it again with thinner slices and a longer baking time. I ended up serving it by itself with some salad, but next time I’d serve it over some plain spaghetti (which is what I did with the copious leftovers and it was delicious). The breaded eggplant was definitely the best part so now I’ve got big plans to make these breaded eggplant sticks with my next eggplant.

BROWN SUGARED ROASTED BRUSSELS SPROUTS

Emily Knight did a whole piece for UE on the excellence of Brussels sprouts. She also dazzled me with them in person a couple years ago and wrote up the recipe on her blog. I tried to replicate to her success with my bag of Brussels sprouts.

Ingredients:

Directions:

Brussels sprouts

1. Preheat the oven to 400°.

Olive oil

2. Prep the Brussels sprouts by cutting off the icky end bit, slicing them in half, and then rolling them around in a bowl with some olive oil.

Brown sugar

3. Sauté the Brussels sprouts for about 5 minutes with plenty of brown sugar and more oil so they can get soft and sweet.

4. Spread the Brussels sprouts out on a baking tray and cook for 30 minutes.

This seemed so easy that I’m actually impressed that I screwed it up. See, when Emily said “plenty” of brown sugar, I channeled all my childhood memories of horrible boiled Brussels sprouts—and put in a copious amount of brown sugar. So much brown sugar, there was in fact a caramelized liquid to drizzle over the sprouts before I baked them. Sounds like a recipe for awesome, right? Not so much. Unfortunately, and I can’t believe sweets-loving me is saying this, this made them too sweet and not nearly as good as Emily’s. But this will definitely not be the last time I attempt this side dish.

SPAGHETTI SQUASH SPAGHETTI

I’d been intrigued by spaghetti squash since my neighbor first introduced me to it. As a lover of noodles, I’ll admit, I was a little skeptical. But after hearing several friends repeatedly rave about the dish, I was ready to give it a try.

Before you even get to making the spaghetti sauce, you must first “prep” the spaghetti squash:

Directions:

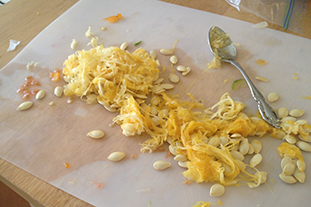
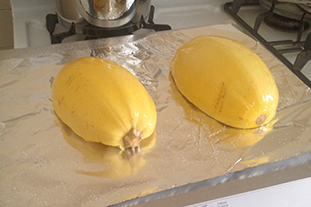
1. Cut the squash in half (AKA hack the shit out of this tough squash until it splits in half).

2. Remove the seeds / pulp. Pumpkin carving flashbacks are optional.

3. Douse with olive oil, salt, and paper and then turn flesh side down on a foil covered baking sheet and cook for 30-40 min at 450°F.

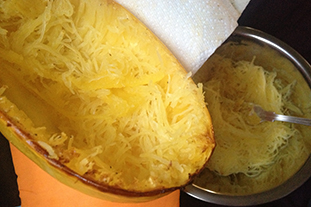
The “spaghetti” comes out like buttah when scraping it with a fork and has the consistency of angel hair noodles. I may have overly enjoyed this step, but noodles are being created from squash, it’s meant to be enjoyed.

Making the Sauce:

Spaghetti is one of the few things I’ve actually been able to cook for years, though it’s really not that hard when you are just cutting up vegetables and stirring in jarred tomato sauce. This time I decided to add ground beef, which I’d only ever cooked once before.

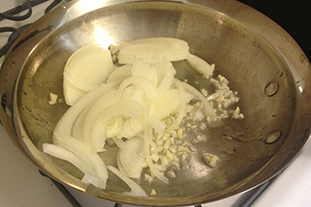
For anyone who, like me, feared ground beef, it’s actually even easier than chicken. I put some olive oil in a frying pan, added the garlic and onion first, gave them a minute or two, and then added the ground beef. Brown the ground beef (until you see no more pink) and add in the zucchini when it’s almost done. Continue cooking until you see no more pink in the meat, then add the jar of sauce. I usually let the whole thing come to a boil and then simmer for a few minutes. But really, you can eat it as soon as it’s hot. I also usually add in the chopped tomatoes last, so they retain some of their original consistency when I serve. Seeing as how I made this entire recipe up, it’s really a use-what-you’ve-got-and-go-with-it situation.

Serve your sauce over your spaghetti squash “noodles.” I added some grated Parmesan cheese and had to salt and pepper my “noodles” a bit more (so I’ll probably add salt and pepper to the squash post–baking-and-forking next time), but otherwise I’d say this was every bit delicious as I had heard. I barely noticed that I was eating squash, in fact, I might have even liked it more than pasta but don’t tell anyone.

FRUIT CRUMBLE

With all the use I’d been giving my oven, I’d yet to bake a dessert in it. This was clearly not okay! I decided to rectify this with my pears and some remnant raspberries I had left in my refrigerator. I Googled pear and raspberry crumble, found this, and went to town.

Ingredients:

CanadianLiving.com

What I Used

My Commentary

FILLING

4 cups sliced peeled pears

Two sliced, unpeeled, pears

I didn’t even notice the skin, but now that I’ve found my peeler, I might peel next time.

2 cups frozen raspberries

a handful of fresh raspberries

Unfortunately, when I went to get my raspberries, I realized many of them had gone to the other side and I found myself with far fewer than I’d anticipated.

a nectarine

To compensate, I added in a nectarine.

a couple grapes

This is where I went a bit off the rails, but I was bolstered by this grape and pear crisp recipe (and I was still lacking fruit!). You’ve got to work with what you’ve got!

1/3 cup packed brown sugar

1/3 cup packed brown sugar

2 tbsp all-purpose flour

2 tbsp all-purpose flour

1/2 tsp nutmeg

Yeah, I don’t keep nutmeg on hand. Probably should.

TOPPING

3/4 cup all-purpose flour

3/4 cup all-purpose flour

3/4 cup packed brown sugar

3/4 cup packed brown sugar

3/4 cup quick-cooking rolled oats

3/4 cup quick-cooking rolled oats

1/3 cup butter, melted

1/3 cup butter, melted

Melted in the microwave.


Directions:

CanadianLiving.com

My Commentary

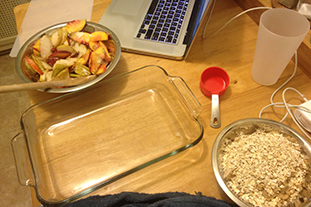
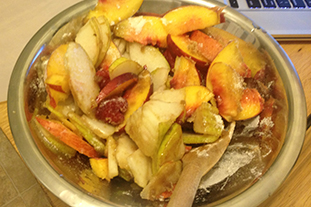
1. In large bowl, gently toss together pears, raspberries, brown sugar, flour and nutmeg. Spread in 8-inch square glass baking dish.

I did this with my fruit additions and omitted the nutmeg.

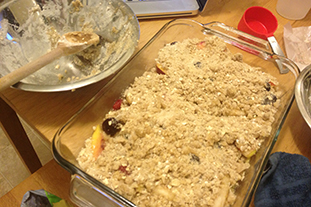
2. In separate bowl, stir together flour, brown sugar and rolled oats. Drizzle with butter; stir until crumbly. Sprinkle over fruit.

3. Bake in 350°F oven until golden and bubbly and fruit is tender, 45 to 60 minutes.

Watch one episode of Breaking Bad, then eat.

I served this warm with some whipped cream and had to hold myself back from going for seconds.


Cooking used to be so daunting to me but when I remind myself of these simple rules/guidelines, it’s just another tasty challenge:

More Meals = More Practice

Make dinner every night. Even when I don’t feel like it, I cook. By doing this I learned (1) cooking is not nearly as hard as I thought it was, (2) it is possible to do it both well and quickly, and (3) it’s a great, fun way to switch gears after a long day even if it feels like a chore when you first start.

Improvise AKA Get Creative

Don’t make cooking harder than it needs to be, follow the instructions, but don’t be afraid to switch ingredients or adapt recipes to your equipment/time/skill level. I usually combine several recipes and look closely at reviewers comments and see what their experience was like.

Don’t Skimp on Essentials

Substituting and improvising can be a wonderful adventure, but skimping on essentials like oil, butter, eggs, milk and cream can severely effect the taste of a meal (and not in a good way). If it says it wants A WHOLE CUP OF ACTUAL BUTTER, put in a damn cup of ACTUAL butter!  Not margarine, not half a cup, not anything else. I could start linking to all the articles and arguments about butter being better for you than all of its substitutes but I’m going to go with this line from Michael Pollan: “Eat food, not food products.” Or this line from me: “It tastes so much better.” Eat in moderation, exercise, be smart, and put down all the junk food before you blame butter.

Leftovers are your friend

Always make enough to take for lunch the next day and, if possible, even more to keep in the freezer. If you don’t eat it for lunch, it can be there for another dinner. There’s nothing better than coming home from a long day and turning some frozen leftovers into a new 15 minute meal.

Traveling Abroad

There is no single road map to studying and traveling abroad. It is an experience that you make all your own, that you can shape into anything you want. Some people leave their home with just a backpack and three months to see the world. And some plan everything perfectly, scheduling every minute. No one way is right.

But whether you like to plan everything or you love to just let the wind take you, everything changes once you step off that plane, train, or automobile and you’re in an entirely new place! And to make sure you aren’t stuck spending exorbitant amounts of money to save yourself, here are a few tips from a seasoned frugal traveler.

Cheap Travel

Buy in advance: By planning your country and city hops in advance, you will save money and gain convenience. Tickets for most transportation companies (especially in America and Europe) are much cheaper if you buy them in advance, and can sometimes save you hundreds of dollars. Spontaneity is awesome, if you can afford it, but if you are on a tight money-made leash, a solid travel plan will be your best friend. If you are a student, you qualify for Student Universe, which is a website that helps students find the best plane ticket prices and has some awesome deals for accommodation, too. As for places to sleep, hostels are almost always going to be cheaper than hotels, and you can find some great and safe places to stay on websites like hostelworld.com. A lot of hostels offer deals, such as extra nights for half price, but you have to check with the hostel before you book.

Travel light: If you are traveling by car or bus, this is less relevant, but if you are traveling by train or plane, using just a carry-on bag will save you boat-loads. A lot of cheap airlines like EasyJet or Ryanair (European budget airlines) will charge you an extra 50 to 75 dollars to check a bag. Investing in a small backpack was the best thing I ever did while traveling in Europe, because I could take it on any airline. And if you are worried about your clothes fitting into a small pack, rolling them up makes them infinitely smaller and you can fit a lot more things. But this also gave me a lesson in importance. Did I really need to bring three pairs of shoes for a four-day trip? Do I need six different tank tops? It takes some practice, but eventually you’ll figure out what you can and cannot live without while traveling.

Getting Around

The Benefits of Walking: Public transportation may seem cheap on the surface, but it’s one of those charges that eventually stacks up. Before you know it, you’ve spent 50 bucks on bus tickets that you didn’t need! This is where the benefits of walking come in. Not only do you save money, but you get a great workout too. You also get to see and explore a lot more of the city if you walk, because your legs can take you places that buses or trams cannot fit. Make sure you bring super comfy walking shoes! If you are traveling to a country that doesn’t speak English, you might also want to either invest in a phrase book or learn a few choice phrases. In many major cities, a lot of people speak English, but it’s polite to at least say please and thank you in the native tongue. You could also find yourself in situation where you need to ask for help, so learning how to ask for an English speaker is a good idea, too. The further away from urban cities you go, the harder it will be to find an English speaker, so be prepared!

Maps, Maps, Maps: For those who are directionally challenged like myself, walking seems much more frightening when your smart phone only works in WiFi zones. But you know what never runs out of battery or range? Paper maps! Almost all hostels and hotels carry city maps. Just ask the front desk to circle where your hostel location is on the map so you always remember where to go if you do get lost. The hostel staff knows the city best, so if you want help in finding cool things to do or see that might be off the beaten path, just ask! They’ll know where the cooler parts of the city are and what places to stay away from. Once you’re out and about, find big landmarks and orient yourself from their locations and then just keep track of street signs. It’s easier than you realize and after a couple of cities, you’ll have a great new skill!

Food, Souvenirs, and General Merriment

Champagne on a Beer Budget: For me, one of the most important factors of a new city or country is the food. Every country is famous for a national dish or cuisine, so do some research and take advantage of it! But food can also be one of the more expensive parts of the trip, especially if all you can find are tourist traps. To get the best experience, try to get away from the center of the city. Some of the best (and cheapest) restaurants are going to be away from the crowded touristy areas. If you are not sure what these tourist traps are, you can follow this golden rule: any place that has pictures of food outside their establishment is not going to be that great and is usually overpriced. If you are traveling on the cheap, consider using your hostel kitchen to cook at least one meal a day, such as pasta or salad (almost all hostels have a kitchen, but not many hotels so choose according to your needs). That way you can try some of the pricier eateries without emptying your wallet.

Keepsakes and Memories: I am not a particularly sentimental person, but I know a lot of people who are, and buying keepsakes or knickknacks from a new city can help to preserve the memories of a truly excellent trip. If you want something that reflects the city or country you are in, try to find a flea market or a town shop that sells items that have historical or cultural value. These things will usually be more expensive, but will have much more sentimental value. If knickknacks aren’t really your thing, just bring a camera or buy a bunch of postcards. They are easy to travel with and can make for some excellent scrapbooking materials (along with those beat up city maps you’ve been using!).

General Merriment: Walking around and seeing a city is great, but there are also a lot of historical or cultural places to see as well! However, these can sometimes cost quite a bit of money to enter. Some of the most magnificent things to see are old churches or government buildings or museums. To get the best deals, do some research and see when places open and their prices. A lot of churches and museums, in Europe especially, are free on Sundays at certain times. If you have a student card, use it to get great discounts. If there is a church you would really like to see but it’s super expensive, try to go to an Evensong, which is a short evening worship service with no Eucharist. This way you get in for free! Your hostel might also offer some great options for tours, such as free walking tours or bike tours, which will help you get used to the city before venturing out on your own.

Studying and traveling abroad was a much harder and much more rewarding experience than I ever thought it would be. You keep expecting everything to settle down and to be normal, but it never does. You are always moving and you are always on your toes, which can get exhausting fast. So if you can, create rituals for yourself. Find a coffee shop to sit in everyday to create a routine. Bring a book with you wherever you go, or people watch while you sit on the side of the street. Traveling and being abroad is an experience that happens to you, and you can make it whatever you want it to be. So read as much as you can and prepare as much as you can, but don’t be afraid to change your mind and to try something completely different—sometimes those can be the greatest experiences of them all!

Photo by Michelle White

Photo by Michelle White

Remotivation: Jumping Back on the Health Bandwagon

It’s 11 pm. You stand in front of the open refrigerator, rub your distended belly and wonder what just happened to the fifteen Darth Maul cookies left over from your boyfriend’s “May the Fourth Be With You” Star Wars party. Oh yeah, you just ate them all, despite your determined declaration just last Monday that “It’s time to start fresh!” They somehow found their way into your mouth, and on the fourth day in a row of not working out, too. What bad luck! Evil cookies!

If you have ever tried to begin living a healthy lifestyle, you are probably familiar with one of the two following scenarios. One is to say “Screw it, I’ll start next month” and throw out your entire health plan (so you might as well cram in that last cupcake, too). The other is to spiral into a fit of self-loathing and overcompensation, involving weird cleanses with exotic spices and citrus and two hours every day on the elliptical.

Stop! There is a healthier way! Stop binging or purging (or a combination of both) and follow this easy, healthy method to remotivate yourself in the days immediately following a slip-up. And if you’ve never tried to live a healthy lifestyle for the first time, you can apply these same principles to begin in an appropriate, non-Nicole-Richie way!

That Night

Don’t beat yourself up. You are human, and humans make mistakes. Don’t make yourself throw up (or even try) and don’t continue to binge—you know you’re uncomfortable anyway. Take that food baby to bed and get a good night’s sleep.

And stop doing jumping jacks; it’s just going to give you cramps. You’ll know it’s futile when you have to stop after three of them.

The Next Morning

First of all, I’d like to reiterate last night’s message: don’t beat yourself up. Realize that one day of overeating (or even a couple of days) isn’t going to morph you into Jabba the Hut. That being said, it doesn’t give you a pass to keep screwing up. Those calories count, and so do calories for the rest of that week, and all those extras add up quickly. This is a new day, a day to forgive yourself and start out with fresh determination.

With all of that in mind, start with a healthy breakfast. I know you might still feel kind of bloated and gross from the night before, and eating might be the last thing you want to do, but starting your day with a light but nourishing meal will give you energy, keep your metabolism going, avoid the 3 pm hunger attack, and remind you that food is not of the devil. If you don’t usually eat breakfast, now is a good time to start. Most people think that they will lose weight by cutting calories earlier in the day; however, most people who skip breakfast end up making up those calories later in the day, and often even more than usual because starvation leads to very poor choices later on. Intense hunger pangs tend to make you go for the fastest food option. Keep driving past that McDonald’s, and don’t you dare stop!

Make sure your breakfast includes a lean protein, which will help keep you full, and a complex carbohydrate (any whole grain or fibrous fruit or vegetable), which will slow your digestion, keep you full, and create a slow-release energy that will hold you over ‘til lunchtime. Some great examples are:

  • Nonfat Greek yogurt, with a handful of berries (I use frozen for convenience), a sprinkling of granola, and a drizzle of honey.
  • Two whole grain toaster waffles spread with a tablespoon of peanut butter and sliced banana.
  • Scrambled egg whites with mixed vegetables and a slice of whole wheat toast.

Also, get a workout in! It’ll boost your endorphins, and even a light morning walk will remind you that food is fuel and that calories don’t have to stick if you don’t want them to! Plus, you’ll feel much better and get a self-esteem boost if you tend to be hard on yourself.

The Rest of That Day

There are two things you need to do before the day is over. One is to make a plan for the rest of the week, including your dinners and workouts. The best way to combat a future slip-up is to have a plan and treat it as a non-negotiable appointment. At the same time, keep your expectations realistic. Know thyself, and give yourself goals that you know you can accomplish. For instance, if you work an 80-hour workweek starting at 9 am and you come home exhausted every day, don’t expect to work out after your workday—you’ll never get it done. Instead, plan to suck it up and set your alarm for an hour earlier. Get your workout in before work when you still have a ton of energy, or plan a lunchtime workout. Having your plan in front of you, on paper (or smartphone), will assure you that it’s doable. Look, you have time for it! You scheduled it in: it’s in your schedule right there!

The other task is to get rid of whatever triggered your slip-up in the first place. I know it sucks to throw out food, especially if that food happens to be leftover nachos (they crisp up great in the oven!), but just close your eyes and get it done. In fact, this might be a great time to go through your cupboard and throw out problem foods in general. Giant jar of mayonnaise? Get rid of it. Double-stuff Oreos lurking in your pantry? Bid it farewell. Cooking lard? What are you, crazy? Banish it from thy sight!

This is one I have trouble with. My pantry is pretty well-behaved in general, but if there is leftover brownie cheesecake from a party, my logic says, “Well, I don’t want it to go to waste, but I don’t want it tempting me all week. I’ll just… eat it all now! That way, it won’t be a problem later and I’ll only have been really bad for one day, instead of slightly bad for seven days! Genius!”

What? Don’t raise your eyebrows at me. No one is perfect. Let’s move on.

The Rest of That Week

Stick to your plan. Recognize that treat days are perfectly acceptable within the structure of a healthy lifestyle, but the best way to distribute them is to wait for a treat day (or, preferably, just one treat meal) on a special occasion when you really won’t care, such as a family dinner, birthday party, or holiday. A good way to look at it is the 90/10 rule: eat well 90% of the time, and don’t worry about the other 10%.

Do your research. Find healthy alternatives for cooking methods, ingredients, or your favorite treats. For example, sauté vegetables in chicken broth instead of butter, or replace an after-dinner serving of ice cream or cake with a bowl of sliced apples, sprinkled with cinnamon, oats, and honey heated in the microwave. Voilà, healthy apple crumble. Once you’ve done your research, do your grocery shopping and begin incorporating these substitutes into your diet!

Have a rule for your workouts: never, ever, go more than two days in a row without exercise. Any kind of exercise. If you’re on a trip, find the hotel gym or go jogging. Visiting friends? Go out for a walk or hike, and let them show you the town. If you’re in space, I don’t know… bounce off the walls in zero gravity or something! Just make it a priority to keep active and keep it in the forefront of your mind. With this rule, you will never wake up one morning and realize it’s been two months since you’ve worked out, and you will get a decent number of workouts in per week.

The Rest of your Life

Remember, a healthy lifestyle is just that… a lifestyle. Whatever you plan to do, you have to see yourself doing it for the rest of your life. There is no magic diet that will help you reach your ideal Hugh Jackman/Gwyneth Paltrow proportions, and then let you go back to eating whatever garbage you want without gaining it all back.

This also may mean letting go of some unrealistic expectations. If the only way you’ll ever look like Gwyneth Paltrow (who, honestly, I don’t think is that hot anyway) is by starving yourself, then you aren’t meant to look like Gwyneth Paltrow (who, again… is not that hot). Learn to love your body for what it is! The human body is an extraordinary thing, and can do extraordinary things if you treat it well and let it try. Often, exercise is a doorway to this frame of mind; once you see what your body can do given the chance, you’ll stop punishing it and start taking good care of it.

And finally, I’d like to leave you with this final note on the nature of food. Food can be the best medicine in the world or a slow, agonizing poison, but food is not evil. It isn’t trying to trip you up, and that burger honestly does not have it out for you. There is great joy to be found in our food. Treats can be enjoyed in moderation, but you need to find the balance for yourself. Good, healthy, and nutritious food can have beautiful tastes, textures, and color, and above all, it will nourish and enrich your life and fuel your amazing body. Make the right choices, find the love and richness that can be found through good health, and make that your healthy lifestyle.

It won’t be easy, but it will be worth it, and I promise you will thank yourself.

remotivation

Harnessing Every Last Bit Of Your Leftover Ingredients

This Internet-wide preponderance of food blogs, food porn, recipe-shares, Pinterest pinwheel cookie pins—it’s no flash in the pan (filled with tilapia). People love food. Case in point: the Food Network has created a second entire network to fit all of its televised cooking and food-related content. Twenty-four hours a day wasn’t enough.

Leftovers Square

Photo by Alyssa Kurtzman

And food is a relatively easy, highly Instagrammable form of creative expression that you get to eat afterward. But I and others like me—who swoon at those unattainable middle shelves of Whole Foods aisles, dreaming of making that $40,000 salary—can’t easily justify buying a three-dollar bunch of rosemary just for the required tablespoon, chopped, in that cornbread-dumpling beef (or tofu!) stew. However! Don’t overlook the recipe or the ingredient, even though it costs almost as much as the beef (or tofu!) shoulder you bought in the first place.

Seriously, don’t leave it out. Rosemary, like most other fresh herbs (you heard me, genetically-programmed cilantro haters), is a delight, especially in an entrée or sauce with other earthy flavors in it. Its piney notes make your dish seem more dimensional and polished. But no one is going to use an entire package of rosemary in a recipe, unless you’re cooking for squirrels, because that dish is going to taste like an evergreen. So what to do with the remains? I’ve found that the longest-lasting and most practical use for it is to make a simple syrup or infusion with the leftovers:

  • Add the leftover herb (washed—don’t be lazy like that) into a small saucepan with equal parts sugar and water. A cup of each should be fine, depending on how much you have to work with.
  • Slowly dissolve the sugar and bring the mixture to a boil, stirring so nothing burns, and then turn the heat off and let that pretty little syrup chill in the saucepan, covered, for up to a couple hours—or more, I guess, if you fall asleep or something.
  • Then strain it through a mesh strainer into some kind of container, cover, refrigerate, et voilà! It should last for a few months or so.
  • Any herbaceous syrup will be delicious in homemade cocktails (yes, even cilantro, which is muy delicioso in a margarita). You’ll look super professional to your friends, like you planned the whole thing, as opposed to it being a byproduct of that pot of stew you ate by yourself while you marathon-ed Fringe. And for your non-imbibing friends (bless them), the syrups make for a lovely refresher when mixed with club soda.

If you’re not a fan of the sweet stuff, you can also let those leftover herbs sit for a couple of days in a bottle of gin or vodka for a more hardcore (and omgg bikini-friendly) rocks drink.

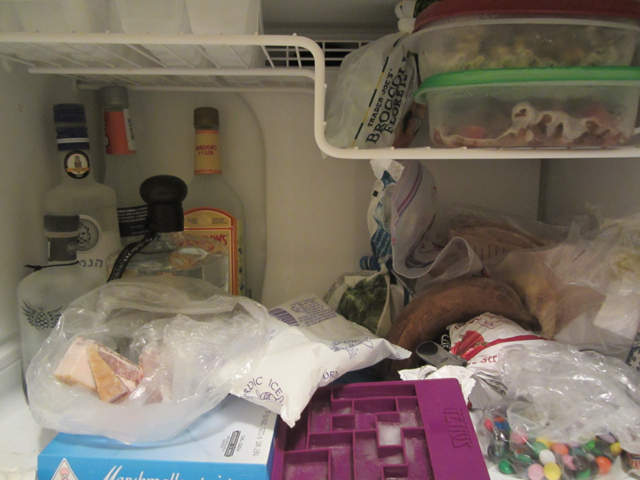
So what about your leftover scraps of everything else? One of the most crucial tools for maximum usage of your scrappies is your freezer. Sounds obvious, but you wouldn’t believe the variety of items that will keep and even improve by being put in the freezer. It’s not just for ice anymore!!!

Exhibit A: baked goods. Brownies, cakes, cookies, and chocolate will all keep remarkably well in the freezer—much better, in fact, than in the refrigerator. The fridge tends to degrade that moleculo-confectionary-mouthfeel (it’s science), while the freezer will fix the pastry in its delicious original consistency. They only take about an hour sitting out or a ten-second zap in the microwave to thaw—or you can just eat them frozen, which is surprisingly tasty.

Okay, baked goods aren’t necessarily an “ingredient,” but bread often is, and that freezes up like a charm. Other things that freeze like a 13-year-old doing the Cha-Cha Slide are meat, which is obvious, as well as butter and other types of animal-based fat, like bacon fat and lard—both of which are way fun and totally not gross to cook with, contrary to your probable opinion. Also cooked pasta, especially in some kind of tomato-y sauce, is often improved by “resting” in the freezer for a period of time. Obviously broth or stock will last until doomsday in there, as will ginger root and even bananas, which turn an unappetizing brown color but then eliminate the need for ice if you throw them in a blender with other smoothie ingredients. Other things worth saving in the freezer are anything with seeds, such as a spice mix containing sesame seeds, or flaxseeds, which you can also grind up in the aforementioned smoothie. That’s a trick a little old man who runs a spice stand in a shuk once explained to me: high oil-content seeds like that will quickly go rancid in a room temperature cupboard. At least I think that’s what he said.

What other ingredients could you possibly have left over after all that? …Milk? I guess you could make yogurt with it (you psycho), or else, you know, drink it. Vegetables? Odds and ends from onions, garlic, shallots? SFTS: stir-fry that shit. I’ve got a freezer full of lard if you need it.

Reusing that Jar: Making Whipped Cream

Okay, let me get this out of the way right now: I’m kind of a hippie. Ok, I am a hippie. I live without a microwave, a working dishwasher, or a hand mixer. I also love to cook. Being a poor grad student, and a little low-tech, but still wanting to try out the latest recipe for mint-lemon crème brûlée (or whatever Martha Stewart is up to these days) means I have to get a little creative in the kitchen.

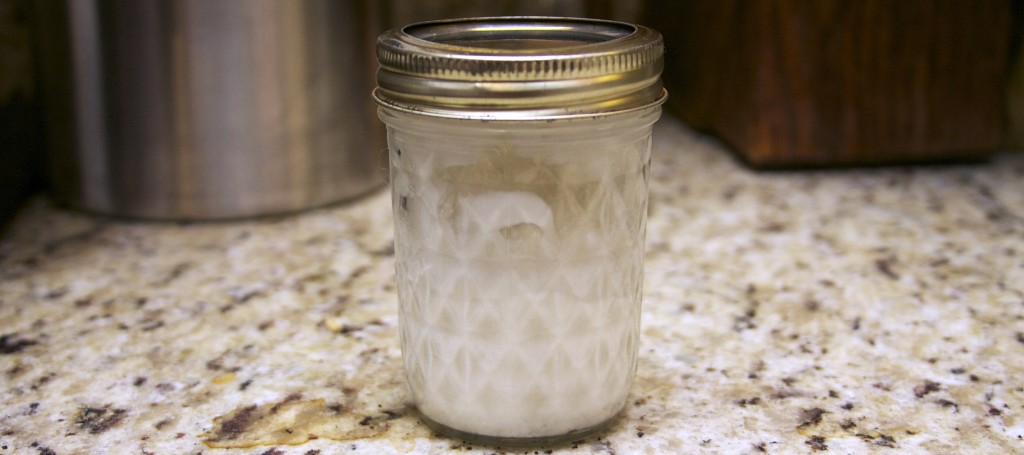
Whipped cream is one of those delicious accents of sweetness that makes nearly any dessert go from good to mind-blowing. If you’ve ever had homemade whipped cream, then you know it tastes way better than whatever you can squirt out of a can. So, how on earth did Mom, or Aunt Josie, or Grandpa Steve, ever get cream to fluff like the clouds baby angels live on? They probably used an electric mixer. But I’ll tell you a secret: You can use a mason jar instead. (Extra bonus: buffed arms!)

Yes. That’s right. A mason jar. You know, like a jam jar, one of those things that all the hipster kids (including me) are using as drinking glasses and vases right now? They totally make great travel mugs, flower vases, containers for leftovers, and pencil holders… but that’s another article. Or five.

Back to whipped cream—let’s talk about how this works:

What you need:

  • One (clean!) mason jar (or an old tomato sauce jar, applesauce jar, or really any glass jar with a tightly sealing lid)
  • A freezer
  • Heavy whipping cream (often sold in pints, like the mini milk cartons you used to get in elementary school)
  • Powdered sugar (totally optional, often labeled “confectioner’s sugar”)
  • Vanilla extract (also totally optional)

What to do:

1. Put your clean glass jar in the freezer—with the lid off—for 15 to 20 minutes before you need to make the whipped cream. (This step isn’t entirely necessary, but it’ll help your cream get fluffier faster.)

2. Take the jar out of the freezer and fill it no more than halfway full with cream. If you fill it more than halfway, the cream won’t have enough room to expand and won’t reach its optimum fluffiness.

3. Here’s where you can add the powdered sugar and vanilla if you’d like. A tablespoon of powdered sugar should be plenty, but it depends on how sweet you want it to be. (No measuring spoons? A tablespoon comes out to be about as much as a rounded average spoonful.) A teaspoon of vanilla extract is enough (about 1/4 of an average spoonful).

4. Now the exercise comes in! (Who said dessert can’t be healthy?) Screw the lid tightly onto the jar, and shake shake shake, shake shake shake, shake that… jar. Vigorously. (Make sure the lid is securely screwed on, otherwise you could end up in the whipped cream version of the Marine World splash zone.) You can even take turns with friends—passing around a jar of cream and making Shake Weight jokes is an excellent way to wait for those brownies to finish baking.

5. The time it takes for your cream to become fluffy goodness depends on how hard you shake that thang and the size of your jar. You’ll know it’s getting close when the cream coats the sides of the jar and makes it hard to tell how full it is.

6. Check after 5 minutes or so of quality shaking, and every few minutes after that. A larger jar—like a quart jar or an applesauce jar—can take a little longer. It’s whipped cream when it’s so fluffy that it doesn’t pour or drip out of a spoon easily. (Sometimes I’m impatient, and I only wait till it’s fluffy but still pourable—a great option if you’re serving it over fruit, ice cream, or pudding, etc.)

Editor’s Note: In an effort to fulfill our goal of road testing some of our articles (and because whipped cream in a jar is ridiculously delicious), Elise and I attempted to follow Heather’s instructions. We discovered that over shaking can lead to undesirable (and inedible) curdling. (Not to be confused with curling—a winter sport popular in Canada.) This can happen quite suddenly. Be careful to check your cream every 15 seconds or so after it starts to coat the sides of your jar. (Seriously, don’t over shake. When you think it’s done—STOP! We can tell you, bickering over the appropriate fluffiness level does not end well.)

7. If you need more whipped cream, spoon and scrape what you’ve got out of the jar into a bowl, wash the jar, and repeat until you have enough for everyone.

8. Enjoy!

What-ifs:

  • If you have leftover whipped cream: store it in the jar or another airtight Tupperware-style container in the fridge. It’ll keep for a few days, but will be iffy after more than a week. Besides, who can let whipped cream sit for that long without devouring it?
  • If you don’t use your heavy whipping cream before the “use by” date: you’re outta luck. I tried freezing my heavy whipping cream once… it was in a glass bottle, and I opened the freezer to find the bottle cracked and frozen to the cream. Then I tried defrosting the cream, even straining out the shards of glass, in an effort to salvage the situation. (I would not recommend this.) It ended up being something in between butter and milk and not all whippable.
  • If you want to get fancy with your whipped cream: go ahead! Experiment with adding a dash of cinnamon or nutmeg when you add the sugar and/or vanilla. (A dash is one shake of the spice jar, if it has a lid with little holes, OR a mound—a little smaller than the size of a dime—in your palm.)
whippedcream

Photo by Meaghan Morrison

Give Brussels Sprouts a Chance

Brussels sprouts (aptly named for their prevalence in Belgium in the 16th century) are often considered the epitome of gross food. Every time a cartoon character has to eat something icky, every time someone wants to complain about a childhood dinner requirement, every time a parent wants to issue a threat to inspire fear into a child’s heart, it always falls on poor, misunderstood Brussels sprouts to be the bad guy.

This is especially unfortunate because it has implanted a dislike of Brussels sprouts in tons of people who have never even eaten them—or at least have never eaten them prepared well! My father was a victim of this stereotype. Unfortunately, my grandma did not know any better than the boiling method. As a result, my brother and I were spared the vegetable growing up and we assumed that if Dad (a foodie and not the least bit picky) didn’t like them, then they must be pretty bad. It wasn’t until I went to college and really started seeking out new recipes and tastes to take advantage of my kitchen when I discovered how tasty these little guys can be! Now I want to eradicate this damaging prejudice from everyone’s hearts, so all can embrace these delicious and healthy little cabbages.

Luckily, we can be the change we want to see in the world here. First, I will tell you the best ways to prepare the sprouts for maximum deliciousness (including some tasty recipes at the bottom). Then, having (hopefully) seen the light, you can prepare and enjoy some delicious Brussels sprouts to share with disbelieving friends.

The trick to enjoying Brussels sprouts is simple: Do not boil or steam them.

Think of the little guys like tofu—would you enjoy tofu, just boiled or steamed in water? No. (Unless, of course, you like bland things, in which case you probably already like Brussels sprouts: rock on!) The deliciousness of tofu comes from sponging up tasty sauces and spices, and the same holds true for Brussels sprouts. You can add whatever you want to them: brown sugar, balsamic vinegar, salt and pepper, cinnamon and cloves, Worcestershire sauce, whatever, and they’ll taste delicious.

So here is how to prepare them:

1.  Buy a bag at whatever grocery store/farmer’s market you frequent and give them a good wash in the sink.

2.  Place them on a cutting board and use a nice, sharp kitchen knife to cut off the ends—that’s the whitish, dirty-looking end, not the round leafy one—and chuck that in the trash or compost. If your Brussels sprouts look bigger than you would comfortably eat in one bite, you might want to cut them in half lengthwise as well. This also gives them a nice flat side to sit on the pan and get that lovely, brown, roasted color.

3.  Once they are clean and cut, put them in a bowl and pour in a dollop or two of oil (vegetable, olive, or other). You want just enough to coat the sprouts and keep them from sticking to your pan. Then, add in your flavoring of choice: classic salt and pepper, brown sugar and cinnamon, honey and balsamic vinegar—the possibilities are endless. Mix it all up with a spoon (or your fingers). You want the whole surface of the sprouts covered so they can soak up all of the flavors.Many people favor sautéed Brussels sprouts with garlic and onion, shallots, or a tasty meat like pancetta and bacon (see recipes below).

4.  At this point, I like to sauté the Brussels sprouts for about 5 minutes. Sauté is just a fancy French word for cooking in a pan with a tablespoon or two of vegetable oil on a medium heat, and moving them around a bit with a wooden spoon to keep them from sticking.

5.  After sautéing the Brussels sprouts, I like to put them into a 400º oven for approximately 30 minutes to roast them. When you try this method, keep an eye on them after minute 20 and assess how brown they are: you must take them out when they are chewable, but not burnt. Some folks turn them after 15 or 20 minutes to get an even browning, but I like mine with just the cut side browned.

Alternate Option: Some recipes call for you to sauté the Brussels sprouts until they’re browned to your liking. Then add a few tablespoons of water and continue cooking them for another 8 minutes or so. If you choose this method, be aware of how adding water may affect your flavoring.

6.  Pull them out when they’re to your liking and serve!

Some favorite Brussels Sprout recipes:

Remember there are lots of ways to make Brussels sprouts delicious; so don’t be afraid to try different things until you find something you like!