Tag Archives: Featured

Unmentionables Unearthed: Buying Bras

The humor and irony of writing this article on the purchasing practices of bras is not lost on me: this June marks exactly fifteen years since that fateful summer day when my doting, dutiful grandma bought me three training bras of differing colors and sizes and placed them on my bed… which I, in turn, threw on the kitchen floor in a hateful rage. I slammed my bedroom door and sent myself to bed without dinner. I was fighting a losing battle against Father Time and puberty. I was not going to wear those nasty body girdles. I was going to play outside on the trampoline in my overalls in all my asexual glory. Every day. Forever.

Photo by Sara Slattery

Well, that didn’t work out so well. That nasty body girdle did indeed become a part of my future. During my freshman year of college, I held down a job at Gap Body (you know, that area of the Gap where the music suddenly changes over to the spa-day playlist and there are never any boys ever). Every day, I measured at least three or four different ladies for their bra size. Would it shock you to know that most women are walking around wearing the wrong bra size? These weren’t 13-year-old girls, clueless about what the eff was going on under their overalls (do 13-year-olds still wear overalls? Was that just me? Whatever, irrelevant). These were grown ladies who ought to have known that they were wearing the wrong size! One day, I did a measurement on myself, only to find that I, too, was in the totally-wrong-size club! I remedied that right away with my sweet employee discount.

You can find these tutorials all over the interwebs, but here are a few basic tips that I learned that year for figuring out which bra is perfect for you (all DIY!) from sizing to style and everything in between:

  • First of all, find out what your size really is! Get a flexible measuring tape and wrap it around the area that’s just above your ribcage and just below your girls. If, for example, you measure in at 31”, your band size is typically 2-3 digits up from that number (so, a 34). Traditionally, you’re supposed to round up. Everyone should get measured! Wearing the right size feels great. Your clothes suddenly fit better, and you might discover a more defined waistline that wasn’t there before!
  • If you’ve got some mad spillage occurring over the edges or if the center isn’t lying flat against your sternum, your cup size is too small. If you notice the fabric / padding is lumpy and folding in on itself, it’s too big. If it feels nice and smooth when you put it on and you can’t really see the lines under your shirt, then well done! That’s the right cup size.
  • However, my next point is about to debunk everything I just said! Not all bras are created equal! I know, right? But, just like pants in a size 2 at one store fit like another store’s size 4, sometimes bras don’t all fit the same. Every bra fits each body a little bit differently, depending upon how much padding the thing has, how broad your shoulders are, how tall you are… everything! My advice is to try everything on, no matter what. Whenever ladies would come into the store and ask for something in their size, I’d always recommend that they try it on before walking out the door with it. Treat your bra size like a really solid ballpark figure. If the bra isn’t comfortable when you put it on, then try a slightly different size (see the next bullet point about “sister sizes”). I know this isn’t what Victoria’s Secret and the like would want me to say about this, but I think every lady can attest to this: sometimes, an article of clothing is just…well… made differently.  TRY. IT. ON.
  • So, like, another bonkers thing: bras are designed so that a 34C, for example, should fit you the same as a 36B. People call these “sister sizes”. The cup size is actually relative to the ribcage measurement. Technically, you ought to stick to your correct band size, but you can get away with it if you absolutely have to have that particular bra and they don’t have it in your size. It should probably fit fine, but as I said before, try that puppy on!
  • Now, something I had to recommend to the ladies over at good ol’ Gap Body was to put their shirts back on over the bras once they tried them on. For whatever reason, not everybody does this in the fitting room! But unless you’re making this purchase for one specific, frisky evening and you don’t ever plan to wear it under your clothing, you should seriously make sure you know what it looks like under your shirt. A lot of people don’t put their shirt back on! Why, I do not know! It’s worth noting that I was recently at a Victoria’s Secret location that had a t-shirt in each fitting room to encourage this practice! It was such a nice idea that I just had to give them a shoutout here.
  • Now, some practical advice as it relates to style: I don’t know about y’all, but not every day is lacy push-up sexytime day. I need a wide variety of comfort levels in my unmentionables drawer. American Apparel makes my absolute favorite everyday comfort bra (which is awesome for both casual wear and for working out). These come in a wide variety of styles and colors. I adore them, but I’ll admit they don’t provide a ton of support if you’re more endowed than I am! But the point is this: pick your favorite comfort poison, and buy a bunch in that same style. You’ll want an arsenal for everyday wear. Then, crank it up just a hair and buy a few that are flirty and fun, but aren’t necessarily bras you’d go jogging in. These should still be comfy and look great under your typical work clothes. There’s nothing weirder than wearing a super sexy bra under a top you’ve had on all day (perhaps in preparation for a big date or you just haven’t done laundry in a while) and it’s obvious that it’s just too much. So, continue to keep it simple in shape and scope. Lastly, get yourself one or two really high octane get-ups. (These, my friend, do not necessarily have to look appropriate under the shirt!)

So, what’d we learn? Measure thyself. Be wary of slight differences between designers. Don’t be afraid to be down with sister sizes. Put the shirt back on. And buy what makes you look and feel not only sexy, but comfy too! After all, we can’t wear overalls forever. Not that we should aspire to.

Traveling Abroad

There is no single road map to studying and traveling abroad. It is an experience that you make all your own, that you can shape into anything you want. Some people leave their home with just a backpack and three months to see the world. And some plan everything perfectly, scheduling every minute. No one way is right.

But whether you like to plan everything or you love to just let the wind take you, everything changes once you step off that plane, train, or automobile and you’re in an entirely new place! And to make sure you aren’t stuck spending exorbitant amounts of money to save yourself, here are a few tips from a seasoned frugal traveler.

Cheap Travel

Buy in advance: By planning your country and city hops in advance, you will save money and gain convenience. Tickets for most transportation companies (especially in America and Europe) are much cheaper if you buy them in advance, and can sometimes save you hundreds of dollars. Spontaneity is awesome, if you can afford it, but if you are on a tight money-made leash, a solid travel plan will be your best friend. If you are a student, you qualify for Student Universe, which is a website that helps students find the best plane ticket prices and has some awesome deals for accommodation, too. As for places to sleep, hostels are almost always going to be cheaper than hotels, and you can find some great and safe places to stay on websites like hostelworld.com. A lot of hostels offer deals, such as extra nights for half price, but you have to check with the hostel before you book.

Travel light: If you are traveling by car or bus, this is less relevant, but if you are traveling by train or plane, using just a carry-on bag will save you boat-loads. A lot of cheap airlines like EasyJet or Ryanair (European budget airlines) will charge you an extra 50 to 75 dollars to check a bag. Investing in a small backpack was the best thing I ever did while traveling in Europe, because I could take it on any airline. And if you are worried about your clothes fitting into a small pack, rolling them up makes them infinitely smaller and you can fit a lot more things. But this also gave me a lesson in importance. Did I really need to bring three pairs of shoes for a four-day trip? Do I need six different tank tops? It takes some practice, but eventually you’ll figure out what you can and cannot live without while traveling.

Getting Around

The Benefits of Walking: Public transportation may seem cheap on the surface, but it’s one of those charges that eventually stacks up. Before you know it, you’ve spent 50 bucks on bus tickets that you didn’t need! This is where the benefits of walking come in. Not only do you save money, but you get a great workout too. You also get to see and explore a lot more of the city if you walk, because your legs can take you places that buses or trams cannot fit. Make sure you bring super comfy walking shoes! If you are traveling to a country that doesn’t speak English, you might also want to either invest in a phrase book or learn a few choice phrases. In many major cities, a lot of people speak English, but it’s polite to at least say please and thank you in the native tongue. You could also find yourself in situation where you need to ask for help, so learning how to ask for an English speaker is a good idea, too. The further away from urban cities you go, the harder it will be to find an English speaker, so be prepared!

Maps, Maps, Maps: For those who are directionally challenged like myself, walking seems much more frightening when your smart phone only works in WiFi zones. But you know what never runs out of battery or range? Paper maps! Almost all hostels and hotels carry city maps. Just ask the front desk to circle where your hostel location is on the map so you always remember where to go if you do get lost. The hostel staff knows the city best, so if you want help in finding cool things to do or see that might be off the beaten path, just ask! They’ll know where the cooler parts of the city are and what places to stay away from. Once you’re out and about, find big landmarks and orient yourself from their locations and then just keep track of street signs. It’s easier than you realize and after a couple of cities, you’ll have a great new skill!

Food, Souvenirs, and General Merriment

Champagne on a Beer Budget: For me, one of the most important factors of a new city or country is the food. Every country is famous for a national dish or cuisine, so do some research and take advantage of it! But food can also be one of the more expensive parts of the trip, especially if all you can find are tourist traps. To get the best experience, try to get away from the center of the city. Some of the best (and cheapest) restaurants are going to be away from the crowded touristy areas. If you are not sure what these tourist traps are, you can follow this golden rule: any place that has pictures of food outside their establishment is not going to be that great and is usually overpriced. If you are traveling on the cheap, consider using your hostel kitchen to cook at least one meal a day, such as pasta or salad (almost all hostels have a kitchen, but not many hotels so choose according to your needs). That way you can try some of the pricier eateries without emptying your wallet.

Keepsakes and Memories: I am not a particularly sentimental person, but I know a lot of people who are, and buying keepsakes or knickknacks from a new city can help to preserve the memories of a truly excellent trip. If you want something that reflects the city or country you are in, try to find a flea market or a town shop that sells items that have historical or cultural value. These things will usually be more expensive, but will have much more sentimental value. If knickknacks aren’t really your thing, just bring a camera or buy a bunch of postcards. They are easy to travel with and can make for some excellent scrapbooking materials (along with those beat up city maps you’ve been using!).

General Merriment: Walking around and seeing a city is great, but there are also a lot of historical or cultural places to see as well! However, these can sometimes cost quite a bit of money to enter. Some of the most magnificent things to see are old churches or government buildings or museums. To get the best deals, do some research and see when places open and their prices. A lot of churches and museums, in Europe especially, are free on Sundays at certain times. If you have a student card, use it to get great discounts. If there is a church you would really like to see but it’s super expensive, try to go to an Evensong, which is a short evening worship service with no Eucharist. This way you get in for free! Your hostel might also offer some great options for tours, such as free walking tours or bike tours, which will help you get used to the city before venturing out on your own.

Studying and traveling abroad was a much harder and much more rewarding experience than I ever thought it would be. You keep expecting everything to settle down and to be normal, but it never does. You are always moving and you are always on your toes, which can get exhausting fast. So if you can, create rituals for yourself. Find a coffee shop to sit in everyday to create a routine. Bring a book with you wherever you go, or people watch while you sit on the side of the street. Traveling and being abroad is an experience that happens to you, and you can make it whatever you want it to be. So read as much as you can and prepare as much as you can, but don’t be afraid to change your mind and to try something completely different—sometimes those can be the greatest experiences of them all!

Photo by Michelle White

Photo by Michelle White

Self-Waxing In A Walk-In Closet*

* I’m not saying you HAVE to do this in a walk-in closet—that’s just the approximate size of my bedroom. (No. Really.) Obviously, it doesn’t matter where you wax, but it may be encouraging to know that you can do it even in the tightest of spaces; to be clear, I’m talking about rooms here.

So you’ve decided to self-wax. Good for you! Waxing is a quick, long-lasting way to rid yourself of any body hair that you would personally like to obliterate. And self-waxing (or as I call it, productive masochism) can save you time and a lot of money.

waxing square

Photo by Sara Slattery

And before you ask: I’m not going to get into the feminist/anti-feminist/aesthetic/societal reasons for wanting to remove some or all of your body hair. If you prefer to let yourself grow wild, more power to you. You can spend this article kicking back and thinking about how long you’d outlast most women in the Siberian tundra.

First, a list for getting started. You’ll need:

  • Hair. Hair that is at least ¼” in length, and no longer than ½”.
  • Wax. I prefer the kind of wax that requires strips (see below for why). Microwaveable wax is the easiest to find in stores, but you’ll be making trips to the microwave every 15 minutes or so to reheat it, so if like me, you have male roommates who come home at inopportune times and that’s not a realistic option, then I would recommend cold wax. Cold wax, which is harder to find (I got mine at Whole Body at Whole Foods Market), only requires one or two zaps in the microwave over the whole process, and it’s also usually made from sugar, so you can rinse the wax off the strips and reuse them afterwards (holla).
  • Strips! Muslin strips come with most jars of wax, but you’ll probably eventually find that you have more wax than you do strips. So if you spot a roll of muslin at some beauty supply store, do yourself a favor and buy it before the day comes when your underarms are covered in wax and you’re scrambling to determine your most expendable t-shirt. Because it’s sad, and yes, you are going to miss that Guster tee.
  • Baby oil. This is the best way to remove wax from any surface, especially skin. (The first time I waxed my legs, it took about 40 minutes for me to look this up with only the side of my left pinkie to type with. The more you know.)
  • Old newspaper or magazines. Use these to cover any surface, including the floor, within a 4’ radius of you, so as not to drip any wax that may go undiscovered until you step on it and tread it all over your apartment.

About 30 minutes before you start, take an ibuprofen—this is optional, but it helps, especially if the idea of (minimal!) pain has you nervous. Make sure your skin is clean and, if you’re planning on doing your underarms, deodorant-free. Next, put on some crappy reality TV show or an episode of a sitcom you’ve already seen (I recommend 30 Rock reruns) to put your mind at ease. I’ll also note that I’m currently eating jerky from the Malaysian jerky stand while I wax, which is of course optional. Last, if you have long hair and no intentions to wax it off, you should put it up.

Put on a robe (or not) and scurry over to the microwave with your jar of wax, following heating instructions from the package. You’ll find that you almost always have to nuke it for longer than they suggest. Does the wax look like honey when you stir it with its accompanying Popsicle stick? Then it’s ready!

Return to your quarters, then set the wax down somewhere very close to you, so as to minimize dripping. You can use a chair both to hold the wax jar and to prop up your foot if you’re doing your bikini area or leg. Try and position yourself in front of a mirror in order to better see what you’re doing. If you’re looking for a “starter” body part to wax, I recommend the legs, which are easy to see (except maybe behind your knees) and least sensitive.

Coat the Popsicle stick—not too thickly— with the warm wax (touch it first with your finger to make sure you’re not about to sear your skin); then, with a strip handy, administer a thin layer onto your skin in the direction of hair growth. Take a look if you’re not sure about this: leg hair grows in a downward direction, for example; underarm hair, the opposite. The administered wax can be as wide as 2” and as long as 6-8”. No turning back now!

Pull the skin taut, preferably in the same direction as you schmeared the wax, and quickly cover the area with a strip, smoothing it down. It’s fine—preferable, even—if the strip covers a wider area than the wax you put down. Now here’s the best part: before you have time to even process the phrase “Worth it?”, yank that strip in the opposite direction of hair growth, and take a look! It should be coated with wax, as well as (hopefully) most of the hair that was once attached to your skin. Gross/Awesome!

A quick stripless wax tangent: Stripless wax (Surgi-Wax being the most popular example) doesn’t require muslin strips, because the wax dries on its own, after which point you can flick up the end of the strip and yank it all off. As I said before, I prefer wax with separate strips; let me lay out from experience the process of using stripless wax for you:

You’ve got one leg up on the chair. You glide the wax smoothly down your leg before pulling the skin taut. Then, tightening your jaw, you brace yourself for the pain… and keep bracing… and keep bracing… for thirty seconds. Which may seem like a short amount of time, but it translates to basically an eternity when you know that that half-minute countdown ends with you tearing a dried piece of hair-plastered wax from your leg (or else it’ll just stay there forever). Trust me, nothing good will be accomplished in that thirty seconds—it’s like trying to read a Jane Austen novel, up a tree, with an enraged bear underneath you. Now, repeat a million times.

Carefully make your way around your chosen appendage, overlapping by a couple centimeters over the previous patch of waxed skin to avoid missing any spots. Because some follicles are just tougher than others, you may have some stray hairs remaining when you’re done. You can just leave those, or you can remove them individually with a tweezers like me, because control issues.

Practice makes perfect with this ancient art—you may find that you’re not picking up most of the hair your first time waxing, which may be a heat issue or a thickness issue with the wax. But the more you do it, the more precise it’ll be, not to mention the hair will grow back less thickly each time. When you’re done, dab your freshly waxed parts with some baby oil, reminding them that you’re doing this because you love them. Then shut off 30 Rock, put on some clothes, and go enjoy your new, balder self!

Tackling a Phone Interview

In a world where 50% of college graduates are jobless, working below their educational level, or outside their field, it’s not unreasonable to think that you may have to interview over the telephone for a faraway job at some point or another. Telephone interviews are strange beasts, because you can’t rely on many of the things that help a lot, like non-verbal communication and environmental clues.

PhoneIntSquare

Photo by Meaghan Morrison

Daunting as this may seem, there are lots of things you can do to make this not so painful. You could even make it work to your advantage! Below are some tried-and-true tips that help me when I’m getting ready for a phone interview, and when I’m in the thick of the interview itself.

Prep Yourself:

  • Clearly write out all your answers ahead of time, and highlight important parts. It’s like an open-book interview!

An easy way to do this is to make a grid with three columns. In the first column, write out each qualification or responsibility listed in the job description. Then, in the second column, write crib notes about something you did that met each responsibility or qualification. In the third column, write what you learned from that experience or if there is anything you would have done differently.

Voila! Interview cheat sheet done and done! Keep this in front of you during the phone conversation to reference.

Prep Your Space:

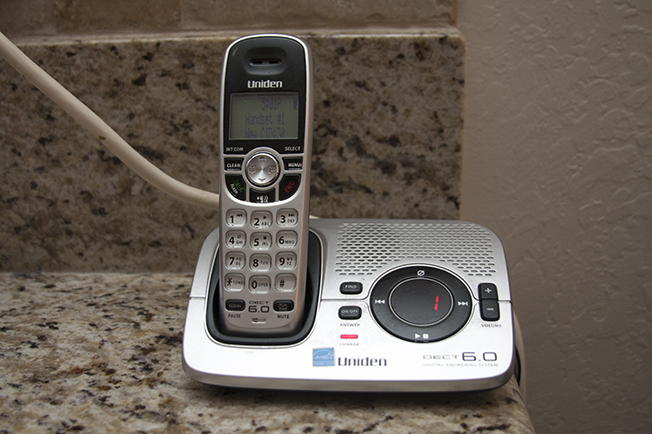
  • Find a place that is quiet where you won’t be disturbed. Then, make sure you get great reception there. If you live in a house that still has a landline (I hear they still exist), use that instead of your cell phone.
  • Put a mirror across from you. As long as you don’t get distracted by how strange your mouth looks or something, you’ll feel more like you are in a conversation.
  • Use speakerphone or a headset. If you talk with your hands like me, there is no chance of you flinging the phone across the room and needing to scramble to pick it up.
  • Be prepared to start your interview at least ten minutes early. Be in place. Sit at a clean table with no distractions. Have your notes and other supplies ready and set to go.
  • Have water handy, but not close enough for to you to knock over with a sweeping gesture.
  • Make sure to have some scratch paper handy so you don’t have to jump up and run to another room. The people on the other end of the line will hear, and you’ll feel uncomfortable for the rest of the conversation!

During the Interview:

  • If you feel comfortable doing so, ask how many questions there will be, and figure out how much time you have per question so you can keep track, or ask about how much time you have for each question. This will help you pace yourself well, and avoid taking up too much of your interviewer’s time.
  • Write down the questions the interviewer asks you, especially if you are a visual learner or if each question has multiple parts. (Want to know more about your learning style? Here is a great quiz.) Jot down initial notes about what you’d like to say, if you can do so quickly.
    This will also come in handy in follow-up interviews, as you’ll know which stories you’ve already told and what you can elaborate on.
  • Be sure to end your questions well, so that your interviewers know what’s going on. It’s easy to ramble on about the time you started a new initiative at work. It’s better to be concise and clear than give every detail in an organized way.

Biggest tip:

  • Be yourself! People can tell when you are trying to play the part. More importantly, most interviews are about fit rather than qualifications: resumes are already there to make sure you meet the basic requirements. There is never an objectively best candidate, and you will never know what the interviewer is actually looking for.

Really, there is no advantage to trying to be someone you’re not. Worst-case scenario is that if you are acting like someone else, you may find yourself in a situation where neither you nor your employer is happy because you weren’t honest during the interview process. Plus, you’re a wonderful, hardworking person! Who wouldn’t love to hire you?

There is no doubt that this is a nerve-wracking process, especially with student loan debt possibly hanging over your head, the fear of losing or not getting health care, and the simple necessity of being able to feed yourself! Use the tips above to give yourself an edge, or at least some peace of mind, through the process of finding a job.

Don’t lose sight of your goal, and don’t give up!

Playing Sports as an Adult

We all have friends who gather on their couches to watch the Super Bowl, Stanley Cup and World Series. I just finished watching a 15-inning game of college softball on ESPN. But how many people do you know who get off that couch and shoot some hoops on their own? There’s probably a handful, but for many of us, finding an adult community sports league can be intimidating.

Here are a few good reasons to join an adult sports league, even if you don’t consider yourself an athlete:

#1: Social Exercising

I don’t know what’s worse: the Freshman 15 or the College Degree’d 30. Whatever workout habit you may have had built into your class schedule, that luxury is gone. Now, you are on-the-go all the time. Eating from the drive-thru, or at your desk, or on your couch after 8 pm. Who wants to force themselves to dedicate time to exercising when you barely have time to breathe?

Recreational sports are an easy answer. Depending on the sport, the exercise can be vigorous or moderate, but you still get to meet new people no matter what level of play. Depending on the league you are in, you might even have practices with bonus exercise.

Additionally, you might find your company has a work league or work team. I can tell you right now, playing softball basically got me hired out of my internship and into my first big-person job. My soon-to-be boss and I warmed up and started chatting and, a year later, I graduated and had my first job (because they really needed my help in Center Field… I mean… in the office).

#2: Try something new!

Remember when we were little and your parents signed you up for things like soccer, tennis, basketball, theater camp, and piano? By the time you reached 14, you probably had to start specializing—pick one after-school activity or pick one sport.

But life isn’t over yet! Want to learn play golf? Sign up for a beginner’s course and bring some friends to the driving range. Did you always want to learn to play lacrosse but never could find a league as a kid? Ask your local league if they accommodate beginners. There are so many people who try new sports after they leave school, and it ends up being a center of their social life. I know people who have learned Ultimate Frisbee and Curling. Heck, go read Melissa’s article about Quidditch and tell me you don’t want to try it, too!

Don’t worry if you aren’t that good right away. If you like the league and team, you’ll get better with time

#3: Rekindle a love of sports. 

While my primary form of exercise is running, my first love will always be softball. I played in work leagues and slowpitch leagues, but it just wasn’t the same as the fastpitch I grew up playing.

But now, I play and manage two fastpitch teams and it’s my favorite hobby. It keeps me sane. Both my teams are in an 18+ women’s league with players at every level. I even got to go to a tournament in Las Vegas—seeing 12 teams from 4 different states compete against each other reminded me why I love this game.

Now a few tips to find a sporting league for you!

The two best places to find a league are through your work and through your city’s parks and recreation department. Many major corporations have company leagues or company teams sponsored through their employee activities program. Additionally, your city has adult sports leagues (mine varies from $40-90 per player per season), just like the ones for kids.

If you can’t find leagues through either of those, there are two private companies that run leagues across the United States: Zogsports and Planet Social Sports. Both these leagues generally offer multiple sports a year and usually make deals with local bars to host the athletes for post-game drinks. ZogSports also raises money for charity and offers volunteer opportunities to players in the league (it was founded in NYC in the wake of 9/11).

Lastly, if you are looking for an obscure sport, I highly recommend using Sportsvite or Meetup. Sportsville a Facebook-type community for sports lovers to find teams or find players for their teams.

Level of Competition

Make sure you join a team in the correct level of competition and find a patient manager. You don’t want to play on a team that plays to win if you are just there to have a good time! I can’t stress enough how important a good manager with the right vision can be to your experience. You don’t deserve to be screamed at for a simple mistake, especially when you are paying to play in this league. I know it sounds silly, but sometimes people don’t have the same priorities.

SportsSquare

Photo by Meaghan Morrison

Not Going Broke, A How-To

After vacationing in Japan, visiting New York, and moving in with my boyfriend, all within three months, I had a lot of debt and needed to have a plan to get rid of it. I have a decent job that sort of allows me to live comfortably, but the reality is that I needed to budget my spending and hold myself to it. Budgeting my way out of debt and into better savings sucks. It really does, but it’s part of being a responsible adult who maybe wants to buy a house, or get married, or take another big vacation abroad.

Photo by Meaghan Morrison

Photo by Meaghan Morrison

Let’s take a look at how I try to set up my budget, which is generally applicable for a young working professional living in the major Bay Area. Please note that the cost of living can be scaled down (or up) depending on where you live.

How Much Money You Make

For salaried workers, this is pretty simple. How much do you get paid? How often do you get paid? Multiply accordingly to figure out about how much you make each month. For example, let’s say my annual income is $40,000–after taxes. It comes out to about $1,200 per paycheck twice a month. We’ll work with a baseline of $2,400 dollars each month, subtracting as we count our expenses.

Cash Flow: $2,400

How Much You Have to Spend

Car payments, rent, and insurance are some typical costs. These are required for not losing your car, your home, and your health (or maintaining any of the above), and as such, these are your priority payments each month. In addition, since you have to buy gas for your car, you should estimate the average cost of a tank and the number of times you fill up in a month. I generally go to a gas station about three times a month, give or take a week. There’s not really an opportunity for cost savings here, barring trading down your current car and moving back and forth.

Cash Flow: $2,400

Rent: -$700

Car Payment: -$306

Gasoline: -$120

Car / Renter’s Insurance: -$110

Cash Flow after Necessities: $1,164

How Much You Have for Food

Barring rent, food is where I spend the majority of my money each month. Cutting back from having sushi two to three times a week sucked, but I had to devise a plan for saving money where I usually spend the most.

First, I accounted for breakfast and work lunches. I normally don’t eat breakfast, but sometimes I do get coffee. Paying $4 three times a week for a coffee and snack comes to $12 per week for breakfast. For lunch, the cafeteria at my work tends to charge about $6 per meal, but I want a little breathing room to eat out with my co-workers once a week at about $15. A $6 cafeteria lunch four times a week, plus $15 for eating out once a week, comes to $39 per week for lunch. Next, we should account for dinners, desserts, and other snacks you would normally eat at home. I try to eat something of moderate size and of moderate price from the grocery store most nights of the week. This usually comes out to about $10 a day, sometimes serving for two or more.

To account for eating out, I let the cost savings roll over, and try to not binge on alcohol or appetizers. In order to calculate how much you’d spend each month, multiply your weekly costs for breakfast, lunch, and dinner by about 4.3 (the average number of weeks in a month). It isn’t an exact number, but it generally works out to be fairly accurate (and then I round up to the nearest whole dollar).

This part of the budget varies greatly from person to person, as some people care more about what they’re eating, how often they’re eating it, and if they can stand leftovers. I for one don’t mind leftovers, but hate monotony in the variety of my overall meals, so I spend a little more on some meals for bigger tastier foods.

Cash Flow after Necessities: $1,164

Breakfast: -$51

Lunch: -$168

Dinner: -$300

Cash Flow after Food: $645

How Much You Have for Fun

Shit gets tricky here. You have a finite amount of money left this month. You could spend it on drinking, a new pair of shoes, or a coffee table. I like all of these things, but my savings are more important to me. If you don’t have any, what happens when you run into trouble? I’m a bit proud and don’t really want to ask my mom and dad for help, so I put a small, but decent chunk directly into savings.

After that, it’s sort of like juggling. You can revise how much you spend each month on entertainment, such as movies or small trips. Or maybe, you want to spend more money on material things, and go shopping more often. These budgets are flexible because you still have money left over. I recommend that you put anything remaining from your cash flow into savings.

Cash Flow after Food: $645

Savings: -$200

Entertainment: -$120

Shopping: -$200

Cash Flow after Fun: $125

Getting Out of Debt

Above, there’s the basic outline of a budget, but you can see that at the end, there’s not a lot to pay back toward existing bills. Here’s where you look at all the things you’re spending money on and figure out where you can afford to cut back. For example, you don’t really need to spend $200 a month on shopping for new things. This could be cut down to $50 for new games or some new makeup, bringing your debt repayment funds up to $275. Furthermore, not everyone is like me and spends a lot of money on food. Some folks I know spend less than $200 a month on food, and that could be you too! Saving money to pay debt sucks, but it needs to be done if you want to be a financially responsible adult. Just learn to cut where it doesn’t hurt as bad.

Note that if you have long-standing credit card debt, you should try to pay it off first before putting a lot into savings. Your savings doesn’t accrue interest, while owing money to credit card companies costs you more in the long run. You should also aim to pay off your credit cards every month, making the bills in the long term much more manageable.

Making Everything Easier

Finally, work out your budget in Microsoft Excel or Google Spreadsheets: it’s an excellent way to have a copy that you can manipulate and track your progress. Alternatively, you can use a site such as Mint to have them track your spending. Such websites can pull records from your credit cards, bank statements, and other bills to better show much you’ve been spending, and usually they have great ways to analyze your spending or track your goals. You can use these to see where you’ve been putting all your hard-earned cash, so you can decide where you need to cut back.

Good luck with the budgets and the savings!

Handling Public Transit

Four years ago, I was in Singapore—arguably one of the safest countries in the world—when I found myself in the back of a stranger’s gray minivan heading back to what would (hopefully) be my hotel. After my friend and I left a bar and couldn’t find taxis, she had used her Mandarin to flag down the vehicle of a family driving back from an IT convention and convinced them to give us a ride home. We ended up getting dropped off at a chicken and rice restaurant because, well, priorities.

Photo by Sara Slattery

I vowed never to hitchhike again, until two years later, when I found myself in Buenos Aires on the back of a strange Argentine’s motorcycle, post New Year’s, heading to breakfast at 7 am because, again, priorities.

As I’ve gotten older and have traveled more, I understand that strangers’ vehicles do not really qualify as public transportation. Therefore, to safely explore a city, I have since opted to take the local tube, metro, or subway. Though it can be overwhelming, taking public transportation can give you the best insights into the nature and vibe of a town. Plus, it teaches you how weird people everywhere really are. While the train lines and the bus numbers change, there are some universal rules that I always follow when hopping aboard anything that moves faster than 2 miles per hour.

1. Always plan a second route.

When I was visiting London for a few days, I became a short-lived master of the specific routes of the Tube. However, one evening when I was rushing to get back to my hotel, the dreaded announcement of a technical difficulty came over the loudspeakers (I swear British English is its own language). The train was going to be parked at this random station indefinitely. Since I was in a rush, I jumped out at the station and came above ground. Realizing I only had a vague idea of where I was, I started walking down the street to find another Tube line and even attempted to navigate the bus system, both ending in utter failures. Annoyed, I tried to hail a cab but they were all taken. Just to add icing on my pathetic cake, it began to downpour because London sits under an everlasting cumulonimbus cloud. So, basically, I relived a horrible scene from an equally horrible Jennifer Aniston movie and walked five blocks in the rain to just turn around and go back on the original broken-down rail.

Side note: I later found out there was a direct bus to the street of my hotel right near the train stop.

2. During peak hours, work your way to the door well before your stop.

In Mumbai, India, the trains are packed sardine cans with bold and desperate commuters clinging onto the outsides while racing to their potential doom (or home, depending on what comes first or what you actually want). My good friend was one of the those unlucky souls packed so tightly in the middle of the car that he was unable to maneuver his way to the front in time for his stop; he watched the door close from within the train and he hurdled on to the next stop. This happened two or three more times on the same journey, with each stop bringing him significantly further away from his home. By the time he was able to battle his way off the train, he had traveled over 35 minutes away from his intended stop, forcing him to cross the platform and jump right back on the train and backtrack his route. This resulted in an extra hour-and-a-half commute back to his destination and a few veins bursting in his forehead.

3. Always have ample money on your bus pass or subway card; never let the amount run low.

If you are vacationing in a foreign city, look into investing in a day pass or something long-term instead of just a single ride. This way, you will save money in the long run if you plan on taking the trains a lot, and you won’t have to worry about the zones or specific costs of each stop. In addition, if you miss your stop, you won’t feel particularly wounded that you have to buy another ticket again. Save your dignity-reducing actions for later in the evening.

4. Do NOT make eye contact.

As a human, I understand the urge to people watch and casually observe, but when on public transport, staring at someone in a close proximity is extremely uncomfortable and can warrant some unnecessary responses. I generally get really into staring at the same smudged spot on the door or begin a highly detailed analysis of my nail cuticles.

My dear friend made the mistake of looking at a disheveled man sitting across from her on a New York subway, catching his gaze for a second too long. I’m not sure in which animal world a lingering gaze is a cue for self-pleasure, but the man was inspired to stand up, move closer to her, and stare at her while shoving his hands under his trench coat (they are always in trench coats!) and fondling his unmentionables. Utterly horrified, my friend sat paralyzed ‘til the next stop, where she immediately switched train cars. I’m not saying every time you look someone in the eye they masturbate, but I’m not NOT saying that either.

5. Exercise caution when taking out all your Apple products.

Fine, maybe Android for you heathens, but either way, I wouldn’t recommend carelessly waving your iPod, tablet, or smartphone around. The more you take public transit, the easier it is to let your guard down, but try to make it a point to really be aware of your surroundings. This sounds simple, but as an ardent breaker of this rule, I’m speaking on experience. When my friends and I were in Chicago taking the L back home around 9:30 pm, my friend was telling us a story, holding her brand new iPhone in her hand. Just as we were approaching a stop, a boy no older than 14 walked by us and immediately tried to snatch the phone from her hand and run out the door. Luckily, my friend had an iron grip on the phone and glass-shattering screams, and the boy ran off sans phone and sans hearing. Naturally, everyone else in the car pretended to be dead and didn’t bother to even blink at her screams.

So, whether you are a daily commuter in Boston or a novice navigating the trains of Bangkok, I suggest you follow these simple rules of public transit to ensure a stress-free ride.

Or you could take a ride on a South American’s Vespa for breakfast. I promise you, you won’t regret that, either.

Expectations vs. Reality: Living in Sin

“Ooooh, I guess things are gettin’ pretty serious, huh?”

If you are preparing to move in with your sig-o, get ready to hear that every day of your life for the foreseeable future.

But what the heck does that even mean… “Things are gettin’ pretty serious”? In the year 2013, what qualifies as a “serious enough relaysh” that you’d consider moving in together? Only you and your guy/gal can accurately answer that question. It’s different for everybody, so this won’t be a discussion about how to know if it’s the right move. But whether you’re gearing yourself up to put a ring on it or cruising along at a gentler pace, one thing remains constant: living together changes (almost) everything. You might not expect it to, especially if you’ve practically been living together the entire time you’ve been dating. But, as one half of a couple that just took a jaunty stroll down this road, here are a few realities of the situation that might differ a smidge from your expectations.

The actual physical moving of apartments was rather eye-opening for me. I think I’ll start with that. Moving day is about as relaxing as that moment when your best friend just became a zombie, and you must decide whether or not to blow his head off because in about five seconds he’s going to eat your face. Moving is a dangerous dance! It’s likely you’ve never seen your sig-o handle stress of this kind before. Our move went a little something like this: we decided to do it ourselves, with friends and a U-Haul. Except, in the end, only one super-dedicated friend actually stuck with us the whole day, the U-Haul rental place was far away and threw off our whole schedule, and we were not as well-packed as we thought we were. A mattress was thrown off a balcony. Things of a somewhat vile variety were uttered. So… my advice for the big day? Fork over the cash, and hire a moving company. Really. U-Haul often tacks on all kinds of extra fees anyway, so in the end it’s not that much cheaper. If you hire movers, you can focus on the excitement of your first awesome apartment together instead of: “Hey, Liz, please don’t hold that chair like you have 6-inch T-Rex arms, the legs are going to—!”“Uhh, do we have a hot glue gun? The legs of this chair all fell off.”

But if you do decide to DIY, take comfort in this: if your relationship comes out of moving day intact, it can probably survive anything!

Something else I wasn’t quite expecting was the fact that just because we liked each other, it would not necessarily mean we liked each other’s stuff. Once we got through the move and started putting things in their proper places, there were several instances of, “Oh… wait, we’re hanging that? On an actual wall in our actual home?” When we lived in our respective apartments with roommates, we always had our own rooms—spaces that were completely our own. But now, for the first time ever, the entire space was shared space. The solution in this case is simple, but it requires patience. Over time, invest in nice, new things that you both like. If you’re not lucky enough to have your tastes perfectly align, I recommend having a joint “cool new shit” fund. It doesn’t have to cost an arm and a leg, either. Go to the flea market together and get an antique desk or a funky painting (then do as I do, and go home and watch Flea Market Flip for 3 hours and proclaim, with bloated self-confidence, “We could totally make that table, why aren’t we on this show?!”).

Which obviously leads me to this addendum: Definitely try to make some of this stuff if you’re crafty types! In the end, you might have to make a few concessions. But focus on getting new stuff together, instead of stewing over how much you know he/she loathes your antelope-shaped candelabra (yeah, that’s mine).

Also, speaking of joint purchasing ventures: maybe you were expecting the money questions to kind of answer themselves, or that you’d both be impeccable about splitting all household expenses evenly. But you need to chat about it. My philosophy is 50/50, all the way—on everything from the cable bill to groceries, no matter which person the food “belongs” to (so this means, yes, I spend just as much on his ground beef as he does on my veggie burgers and tofu). But definitely have an honest conversation about your finances before you move. If one of you is a little more solvent than the other, that’s okay. Maybe you agree on 70/30 or 60/40. But whatever you decide, have a mathematical layout and stick to it. It’s easy to get sloppy with that kind of thing, but it’s also the thing most couples wind up fighting about!

Another notable change is the sharing of people. Two-Buck-Chuck-Ladies-Night-In will take on a different form. As will five-hour Xbox/Chipotle-scarfing marathons. Your single-social behavior is going to change, which is weird, right? It’s not like either of you were “single” before this. But now, when you have friends over, even if you have the space for each person to operate independently, you may feel it’s necessary to try to include one another. And that’s great! I love when the important people in my life get to know one another better. My heart is easily warmed by everybody getting on like peanut butter and jelly. But I definitely wasn’t expecting this change in the social atmosphere. Now every friend visitation is pre-examined, case-by-case. If my best girlfriend needs to drink half a bottle of wine and give me a very graphic play-by-play of her latest sexcapade, I will suggest a trip to the bar instead of inviting her over, as was our usual M.O. when I was living alone.

This accomplishes two things: firstly, it stops you from inadvertently making your sig-o feel like they’re intruding just because they’re there. Sloppy secondly, it gets you the hell out of the apartment, which leads me to another unexpected possible side effect of co-habitation. “Co-Hermitation,” I like to call it. It happens to pretty much everybody. It’s totally normal. You’re together, so you’re being social even if you’re staying in. It’s a scientific fact. But if you can break the cycle now and then, have at it!

Now, here’s the thing that I think is the biggest expectation-buster of them all. And, a lot of the time, it could be an expectation that other people have imposed upon you because you made this decision. But here’s the thing: moving in together is an enormous sign of commitment. Yes. But there’s a reason you signed a lease instead of a marriage certificate. Living together might be a step in that direction, but if you ask me (which you sort of did because you continued to read up until this point!), moving in with someone you love should be treated as the ultimate personal experiment. You did it because you wanted to be 30000% sure that this is the right person for you, and there are certain things you’ll only understand about your relationship and the “rightness” of it if you’ve lived with this person. That’s what you needed, so that’s what you decided to do. Not everybody needs this “experiment.” Your parents may not have needed it (as they might endlessly point out to you). But this is the 21st century and, more often than not, this is how we roll as adult people who love each other.

However, let it be known that if this experiment does not meet your expectations, if something changes and this relationship no longer makes you happy, living together does not have to mean that you’re in-it-to-win-it for life. Try to make it work. Try and try again, dammit. Not every day is going to be a rollicking honeymoon. But in the end, if it’s just not meant to be, don’t let anyone guilt you into treating it like a divorce. You moved in with this person so you’d know what they’re really all about. And that’s exactly what you came out of it understanding. I SALUTE YOU if this is you presently or if it ever has been you.

Now, I don’t want to leave anyone feeling sad, because who would I be if I did that? Sheesh. So before I sign off, here are a few more hints, practical or otherwise, that you may or may not find useful in your newfound co-habitative bliss:

  • If you have pets, then guess what: your girlfriend/boyfriend also inherited said pets. You may have said things like, “I promise, the dog is mine, you don’t have to clean up after him or feed him or anything, he’s just gonna exist in the house.” But if you all exist in this household together, man and beast, it’s highly likely that that animal will become a greater shared entity than you expected, for better or worse. So, like… definitely make sure the dog isn’t keen on pooping in his/her shoes.
  • If the fact that she throws wet towels on the bed after a shower makes you rage, for the love of God, just tell her! She probably doesn’t even know she’s doing it, okay? Old habits die hard. It’s a hard knock life, living alone. Nobody tells you not to do this kind of stuff!
  • Same goes for cleaning in general. If you have a different definition of the word “clean,” you should probably come to grips with it and find a harmonious happy medium. People like slobs just about as much as they like that OCD 6 am vacuumer.
  • Two TVs or no TV. I’m so serious. One in the bedroom and one in the living room or none at all! I think everybody appreciates what I mean by this!
  • And one more thing, coming at you from the bed where I currently sit, battling a sore throat that I’m convinced is morphing into flu symptoms minute-by-minute: get familiar with each other’s sick day behavior. People usually treat sick people how they want to be treated when they’re ill, whether that’s with 24/7 doting or with a suck-it-up-hands-off approach. As I sit here contemplating whether or not I want to get up and make some honey-lemon tea, I wonder whether or not he knows that I might want somebody to make it for me. Hmmmm.

Stay tuned for next month’s article on how to maximize your sickness sympathy potential (a beginner’s guide).

Moving in w_your sig other square

Photo by Sara Slattery

What to do if you are hit by a car

Traffic accidents are zero fun. Whether yourself or another driver caused them, it inevitably leaves you feeling shaken and vulnerable. But fear not, because it is not the end of the world! Here are a few tips if your car is hit by another vehicle.

Photo by Sara Slattery

Traffic accidents can range from fender benders (which are minor and can sometimes be worked out between the drivers without insurance or police) to full-on impacts that leave cars totaled. Though, hopefully, this piece will help you with your situation, it is important to remember that every accident is different and some situations might differ significantly from what is stated here.

Keep Calm and Pull Over

First things first—when a car hits you, do not panic. This may seem like a hard thing to do, especially if airbags have been deployed, but it is important to remember that staying calm helps other passengers or drivers remain calm as well. Check and see if your passengers are okay. Then, if you can, pull over to the side of the road and put your hazards on. In some cases, it may not be wise to move your car, in case of further damage. Depending on where on the road you were hit, you can determine if it’s safe to pull over or not. (Never leave the scene of an accident without first consulting the other driver or people involved in the accident. If you do, and someone or something is damaged, you could face charges for a hit-and-run, which is much, much worse than any traffic accident).

If this is your first time in an accident, it may feel like the end of the world!  But believe this from someone who has been on the road for a while: as long as your car isn’t totaled, it will be fine (and might look even better than before!) after the insurance pays for it to be fixed up.

Check Out Your Car

The next step is to assess the damage to you and your car. If you don’t have any injuries, you can check your car next. Are there scratches that weren’t there before? What about a dent on the door? Are the mirrors still fully functioning? By running your eyes up and down your car and feeling the area of impact, you will be able to tell what kind of damage you are dealing with and how it affects your car overall. Many times, cars can fully function if it’s not a significant impact, but unless you are an automotive expert, it is better to be safe than sorry.

If you have a camera phone, it’s common to whip it out at this point and document the damage to both cars.

Get Their Digits

Next, exchange information with the other driver: name, phone number, email, address, license plate number, make and model of the car, and their insurance (if they have it). You will need all this information when you contact your insurance company to file a claim. You need to give your information to the other driver, so if you don’t know it off the top of your head it is wise to keep all this info in the passenger glove compartment. If you don’t carry a pen and a pad of paper in your glove compartment, use a camera to photograph their information, or type it into your phone. (And then throw a pen and a writing pad in your car for next time!)

You should also be aware of your state’s requirements: in California, even the victim of a fender bender can get a ticket if they are found without their insurance and registration in their car. To find out if it is required for you, just look on your state’s DMV website: they will give you an outline of requirements for owning your car.

Call the Police

After getting all the information, it’s time to call the police. It might feel weird actually dialing 9-1-1, but the police will be able to act as a mediator between you and the other driver. A police report will be filed with your information, too, which is always helpful when filing insurance claims. Officers are usually very nice when it comes to traffic accidents and will only ask one or two questions depending on the damage done. If your story is different from the other driver’s, don’t panic and stick to your story.

It is important to note here that it is wise to never admit fault to the other driver or the police until you talk to your insurance company or, if necessary, legal counsel. This might sound untruthful or wrong, but sometimes traffic accidents can be chaotic and it might not be evident whose fault the accident was. Just keep your cool, tell your story, and you’ll be fine.

Examine Your Witnesses

If you talk to any witnesses, get their information as well. If it is a significant accident, police will often do this job for you, but you might need the witnesses’ help if you have to proceed legally. Ask them what they saw and if they have witnessed other accidents in the same area before. Usually you won’t need witnesses unless there is significant damage done to you or your car, so it’s up to you whether you want their help or not.

File a Claim

Finally, it’s time to contact your insurance company. Call them and tell them exactly what happened, or go online and file a claim from their website. If you lie, you could be denied coverage in the future. This phone call is very easy, though tedious, but insurance workers are usually very helpful and specific about what they need from you. As long as you have all the necessary information for your car and from the other driver, it will be as simple and quick as possible.

If your accident is minor, then your insurance company should have the matter worked out within a couple of weeks. However, the more significant the damage to you or your car, the longer the matter can take to settle, so keep track of what’s happening! Keep any pictures of any injuries and damage to your car safe and organized. Get estimates of property damage, and cooperate with your insurance company. And be patient! Sometimes it takes a while for claims to be reported or settled. Your insurance company will be in contact with you when they need you.

Being hit by a car can be exhausting, tedious, and heartbreaking, depending on the damage. But as long as you and everyone else at the incident is okay, you will be able to get through it. And never buy a car unless you can also afford insurance: it could be what saves your life!

The Perfect Lipstick

Lipstick can be difficult. You’re going for a sultry pout or flirty hot pink, but according to the mirror at the end of the night, you look like a 6-year-old caught playing with mom’s make-up. Not cool!

Photo by Sara Slattery

Here are some step-by-step instructions to get long-lasting, even lip color. I’ve also included some product recommendations (focusing on affordable options, because $30 for one tube of lipstick usually isn’t exactly budget-friendly)!

This article is specifically for lipsticks. Lip glosses, stains, balms, and translucent lip colors will probably not get the best results. But, if you want to try it, go ahead! We’d love to hear your results in the comment section.

Warning: Please spot-test before trying new products, because you never know how your skin will react to them! Put a dab of a new product on your inner forearm and wait a few minutes to see how you react. For people with sensitive skin, it may be wiser to wait a full 24 hours. If you’re allergic to anything, always read the labels!

1. Exfoliate

Exfoliating clears your lips of dead skin that can catch on to lipsticks, making them bleed or flake. This can be easily done with stuff you have at home: mix equal parts oil and brown sugar until you get a paste, then scrub your lips! You can use coconut oil, olive oil, jojoba oil, or any kind of oil you might use on your skin. Wait a minute to let the oil sink in to your lips before moving on to step two. Rinse off with water, and voila! If you don’t have brown sugar, you can also scrub your lips with a bit of oil on a clean toothbrush or washcloth.

You can also buy lip scrubs, but they can be costly. Try not to use a body scrub, as they are harsher and can tear the skin on your lips! This could lead to flaking or infections.

Check out some popular lip scrubs from Sephora, Fresh Sugar, and Lush.

1a. Prime (Optional):

If you’re feeling extra fancy, you can use a lip primer or a foundation to even out your skin tone. Primer can be used under or instead of lip liner.

Some great primers can be found at Eyes Lips Face and Urban Decay.

2. Line

Using a lip liner, fill in your entire lip. Yes, your entire lip: not just the edges! This gives your lipstick more staying power. If you wanted to make your lips appear fuller, now would be the time to line slightly outside the line of your lips.

The liner will even out your lips. If you have visible veins or dark lips, use a beige or lighter colored liner, especially under bright lipsticks. This will help your lipstick look more opaque. You can also match the liner to the color of your lips or to your lipstick itself for slightly different looks.

Popular lip liners are sold by Wet ‘n Wild, Maybelline, Rimmel and MAC.

3.  Moisturize

Because it sticks to your skin so well, lip liner can be drying. If you have particularly dry skin or your lips start to flake, try a simple balm over your liner. Anything you get at the drugstore works, but make sure it’s clear and not tinted!

Much-loved moisturizers are available from Burt’s Bees, NIVEA, and Chapstick.

4. Color

Time for lipstick! Carefully apply the lipstick. Do a few layers, and then rub your lips together.

Picking out lipsticks can be fun! L’Oréal is a classic drugstore brand, while MAC is very popular but more expensive. Wet ‘n Wild is a great way to try different colors on the cheap. Revlon has popular matte lipstick and moisturizing, buildable lip butter.

5. Blot

Take a clean washcloth or tissue and carefully press it to your lips, as if you’re giving a kiss. Just once! This creates a deeper stain.

5a. Powder (Optional)

If you want really long-lasting color, you can apply translucent powder to your lips at this point. I don’t particularly like what this does to the texture of my lips, but it does work! With a finger, press a small amount of powder all the way around your lip. Let it set for a minute. Remember, only use translucent powder—a skin-toned powder will take away from the lipstick’s color!

New York Color and Sally Beauty offer translucent powders.

6. Brush

This is where lip brushes come in! Transfer color from the lipstick palette or tube to your lips with a lip brush, making small, even strokes parallel to your lips. For some reason, the staying power using a brush is much longer than swiping it on, so this is definitely worth your time!

Eyes Lips Face has a lip defining brush and retractable lip brush, and Ecotools offers a detailed lip brush and multipurpose brushes. Both are affordable, quality options.

6a. Matte, Glossy, or Full? (Optional)

If your lipstick isn’t matte already and you are going for a matte look, blot your lipstick again.

If you want glossy lips, you can apply gloss over your finished lipstick. This looks especially nice with creme finishes, because pearl and frost finishes already have some shine to them.

To make lips look fuller, apply a gloss or a lipstick one shade brighter to the center of your lips. Blend outwards with your finger or by rubbing your lips together.

7. Clean-Up

You’re probably in front of a mirror, so check your teeth to make sure you didn’t get any lipstick on them! If you are re-applying your lipstick on the go, you can stick your index finger in your mouth past your teeth, and then pull it out against your lips, like eating a Popsicle. This takes color off your teeth and the inside of your lips, guaranteeing a smudge-free smile.