Tag Archives: Featured

The Five Day Summer Cocktail Challenge

This whole experiment had but one simple catalyst: for the first time ever, I have a pool. It is summertime and I have a pool!

This has never happened before, and as a result there have been a lot of impromptu instances of, “Hey come over, and let’s sit by the pool and drink!” But there are only so many bottles of “Pinot Greeg” one can chill at a moment’s notice, so I decided that, for five days, I would create a new summer cocktail each evening using only the ingredients I currently had in my fridge and liquor cabinet.

Five summer cocktails

Here is a rough list of the items I had to work with:

  • Lemonade
  • Orange juice
  • Frozen raspberries and strawberries
  • Black Cherries
  • Lime Sparkling Water
  • Cranberry-Raspberry juice
  • Rum
  • Tequila
  • Whisky
  • 1/4 a bottle of margarita mix
  • White Wine
  • Rosé Wine
  • Fresh basil
  • Cucumbers
  • Honey

And here are the results!

Sidenote: I tend to like my drinks on the stronger side. If you are of the lighter persuasion, you may want to cut the alcohol ratios in half or double the juice ratio. Whatever you fancy!

DAY ONE

Named after my dear friends who once made me a very similar cocktail on a sweltering New York day in August, I call this sweet thang The Brosman-Keach.

1

Day One: Ingredients

2

Day One: Drink

INGREDIENTS:

  • lemonade
  • whisky
  • frozen raspberries (keep them frozen, like juicy little ice cubes!)

Add ingredients in no particular order. I don’t typically do exact measurements, but this is pretty much 1 part whisky per every 2 parts lemonade. Mix to taste, however, if you like yours stronger. Serve in a glass on the rocks.

Simple, tangy, and super refreshing. The best part is the syrupy, boozy raspberry juice at the bottom once you finish it!

DAY TWO

My basil plant had basically begun to commit seppuku in this 100+ degree heat, so I thought it best to utilize it in a drink before it passed on to herb heaven. (Confession: even sans global warning, I still kill all my houseplants.)  The result? Frozen Boozy Basil Lemonade.

3

Day Two: Ingredients

4

Day Two: Drink

INGREDIENTS:

  • lemonade
  • tequila
  • 4-5 basil leaves
  • ice
  • 1 slice of cucumber for garnish

Blend 2 parts lemonade for every 1 part tequila with the basil leaves and the ice and serve frozen, garnished with the cucumber.

Much like a mojito, a little kick from a fresh herb goes a long way! The only stumbling block I encountered here was that the drink and the crushed ice did not want to be friends. They just kept separating, as indicated in the photo above. This can be alleviated, however, by just drinking it right away!

DAY THREE

I thought I’d make my poolside go-to work overtime and give me a little sangria action. The result? Triple Berry Threat White Sangria, baby.

5

Day Three: Ingredients

6

Day Three: Drink

INGREDIENTS:

  • frozen raspberries and strawberries (again, keep ‘em frozen so they melt in the drink!)
  • fresh black cherries (pitted and cut in half)
  • 2 parts chilled white wine (I used pinot grigio here)
  • 1 part rum
  • a splash of OJ
  • a splash of lime sparkling water.

Pour liquids over berries.

Addendum: As I was drinking this one, I realized it could do with a little simple syrup, as it’s quite sour! Since I didn’t have any simple syrup (i.e. I was too lazy to make it myself in that moment), I decided to get a little sassy and improvised with a drizzle of honey on top. You may want to do the same if it’s too tangy for you!

DAY FOUR

I’m convinced that I got progressively better (and drunker) at this game with each passing day, so I am telling you right now that these last two drinks are definitely my MVPs. This bad boy here was borne of a need for twice as much margarita mix as I currently had in my liquor cabinet. Necessity, the mother of invention, would like to introduce you to… The Cran-Razarita!

7

Day Four: Ingredients

8

Day Four: Drink

INGREDIENTS:

  • 1 part Tequila per every 2 parts cran-raspberry juice
  • a splash of margarita mix
  • frozen raspberries (yes, as before, keep them frozen!)
  • ice

Blend the above, serve frozen, and rim with salt (if that’s your jam). Or, however you usually like your margaritas!

I’ll bet they didn’t think of this on that episode of Mad Men where they’re trying all the different Ocean Spray flavors!

DAY FIVE

I really don’t like rosé wine. Every time I buy it, I think I’m just craving a change in my world that manifests itself in a weird wine choice instead of a healthy life choice.

Point being, I did that. I bought rosé wine recently. But as luck would have it, I finally figured out what to do with it! It was pretty much destiny in the form of … Hard Cherry Lemonade!

9

Day Five: Ingredients

10

Day Five: Drink

INGREDIENTS:

  • 2 parts Rosé or white zinfandel wine
  • 1 part rum
  • 1 part lemonade
  • a handful of black cherries (cut in half and pitted)

Some of you Los Angeles–dwelling vino aficionados might recognize the Malibu Wines shoutout on the glass here: apropos for the girliest drink on the menu. And yes, although this is the girliest drink, it is also probably the strongest! Drink slowly! Or don’t. :)

What You Don’t Know About Sex Trafficking

I first heard about sex trafficking from a speaker at my high school who had gone to Southeast Asia and co-founded an organization called Love146. (There’s a very interested story behind the name that I recommend reading!) Love146 was created to abolish sex trafficking and exploitation all across the world and has become very successful.  I didn’t know anything more than the term before, but he piqued my curiosity and inspired my activism, and I have studied sex trafficking ever since: writing a feature narrative script about the victims of sex trafficking and, currently, working on a short film I created based off of that feature.  (If you would like to check out the progress of the film, please visit our Facebook page!)

Photo by Sara Slattery

Photo by Sara Slattery

Sex trafficking is an issue that occurs all over the world: some places are more common than others, but it even happens here in the United States.  Southeast Asia has a huge ongoing issue with sex trafficking, specifically counties like Cambodia and Thailand, because it is common for law enforcement to turn their heads on this issue.  The U.S. is obviously stricter, but that doesn’t stop trafficking from occurring!  The U.S.’s stronger laws simply force the traffickers to be more creative in their business. And yes, the traffickers look at capturing and selling children as business and only business.

Love146’s website shares many real-life stories of victims.  One story entails a girl named Robin who was 7 years old when she contracted an STD after her mother pimped her out to make $50 per customer.

A large percentage of American runaway children become prostitutes, many of whom are tricked and forced into this lifestyle where they have no choice in the matter. Traffickers in the U.S. use all sorts of tricks to capture children and lead them into a life of sexual trafficking and abuse.  In one method, male or female traffickers will pretend to be from modeling and acting agencies in order to find children they can coerce into trusting them. Some men trick young girls into falling in love with them, telling them everything a young girl could want from a man.  They spoil them and pretend to care for them until the girl puts all her trust into him.  Traffickers know how to look for children who are naive, have low self-esteem, or have bad family situations, and they use these weaknesses against them; however, this does not exclude upper- and middle-class children, as traffickers will utilize any opportunity.  Some children are not coerced, but abducted from their neighborhoods and homes. And some are even sold by their own family members.  Traffickers use decoys like massage parlors, bars, and homes to create a cover for what is actually going on behind closed doors.  But sex traffic isn’t just a domestic market: not only are children taken from their neighborhoods in America, but women and children are also shipped into and out of the United States.

The Internet has been a huge source for traffickers to find and/or sell women and children.  When I was in college, a petition was circulating to end one of Craigslist’s sections devoted to classifieds: traffickers had found a way to use the “adult services” section to sell women and children for sexual purposes. The section has since been shut down entirely.

What does sex trafficking entail exactly?  You’ve probably seen and read news stories about children and women who are kidnapped and forced to perform sexual acts on their capturers.  Other common situations force the victims to have sex with various clients—up to dozens of customers daily.  The victims do not usually see any of the money their pimp makes using them.  On the website of Mark Ridley-Thomas, an LA County Supervisor, it states that these women are forced to make between $500 and $1000 a night and forced to perform sexual acts to men as much as three times their age.

Even though sex trafficking seems far from our own lives and cities, it is actually happening right in our backyard.  It’s reported that, each year, the number of victims has increased in Los Angeles since 2010: California Attorney General Kamala Harris stated that “there were 304 victims from April through June of [2012],” and continued that it’s “a figure that is triple the 100 victims during the same period of 2011.” This number reflects all of human trafficking, which includes labor trafficking along with sex trafficking.

Recently, a man was arrested in Long Beach, accused by U.S. Attorney spokesman Thom Morzek of “forcing the 17-year-old girl to work 12 hours a day to perform sex acts with about 50, and possibly more, men, in just the course of a couple of weeks, and forcing her to give every single dollar that she earned to him.”

If you pass by Sixth Street and Ceres Avenue in downtown LA, you will notice a mural painted on an auto repair shop.  The painting shows the face of a young woman along with a quote saying “I am a survivor of sex trafficking.”  The woman depicted is a sex trafficking survivor who was forced into prostitution at the age of 11 and lived this life for over ten years.  She recently was able to escape and now she is a mentor.

If you are interested in learning more about sex trafficking and learning about how you can take a stand against it, there are many great organizations to check out like Polaris Project, Not for Sale, Shared Hope International, and Somaly Mam Foundation.  There are so many ways you can get involved in the fight against human trafficking, from raising money to just telling a friend about this issue. One of the most important ways to help end this ongoing issue is awareness.  The more people who know about this issue, the more people who can help bring this issue to and end.  There can be a good ending to all of these children’s stories.

How to Paint a Room

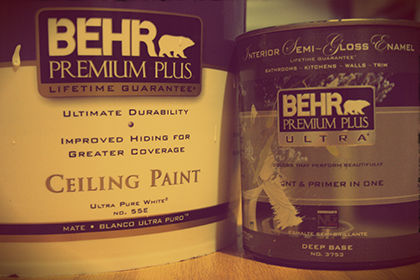
Whether you are painting your dream house or just touching up your bedroom walls, painting can be a very enjoyable, yet daunting, activity for those unfamiliar with the process. This is something that you’re going to have to look at every day, so it is important to do a good job! If you have never painted before, here are the basic steps to help you get started.

Materials You Might Need

This is a basic list of the materials you will need. Every job dictates slightly different tools, but this will get you in the right direction. Talk to the color specialist at your local hardware store for better information about what tools are best for your specific job.

  • Paint/Primer
  • Brushes/Rollers
  • Trays
  • Plastic/Drop Cloths
  • TSP/Cleaning Supplies
  • Spackle/Putty Knife/Sandpaper
  • Ladders
  • Mineral Spirits/Solvents
  • Sand Paper
  • Imagination! (Not Optional.)

Prepping

Before you start painting, you’re going to need to prep your work area.

First, you will want to cover or clear the room of any furniture or other things you don’t want to get paint on. You can use plastic sheeting or drop cloths in order to protect your floor from splattering paint. To make it easier to navigate and prevent trip hazards, you may want to secure the sheeting to the floor with blue masking tape, also known as painter’s tape (or any other tape that won’t leave residue).

If you have a different color trim or need to achieve a nice, crisp line at the edge of where you are painting, you will have to use tape. Often, people use regular blue masking tape because it is relatively cheap; however, if paint is left on the tape for too long, it is very likely to seep beneath the tape and leave hairy looking lines along your edge. What you should use is a tape with some type of foam chemical laced on the edge that will form a seal that prevents any paint from leaking. I recommend using FrogTape, which is the original paint block tape. Any contact with water will activate the chemical, so painting over it with water-based paint will automatically activate it. To use it with oil-based paints, you have to manually activate the product with a damp cloth before painting. Tapes like these can be left up much longer, and your paint will not bleed. If you insist on using regular masking tape, be sure to remove the tape as soon as possible.

The next step is to prepare the surface on which you will be painting. Depending on what type of paint project you are working on, there are several things you may have to do.

For older walls, perhaps already painted once before, you may need to fill in any cracks or nail holes with spackle or nail hole filler. These can be easily applied with a putty knife and are usually around five or six dollars for a small tub. A popular type of spackle for painters is lightweight spackle. If your brand new tub of spackle feels practically empty, it is probably a lightweight spackle. The benefits are that it will dry much faster than regular spackle and, in many cases, they contain primer, making small patch jobs a breeze. Lightweight spackle is not very durable though, so I would only recommend it for small holes and cracks. If you’re working in a bathroom or place with a lot of moisture, use vinyl spackle or one that will dry flexible. These types of putties are less likely to crack when exposed to moisture. Once the putty is applied and dried, just sand it down to the level of the wall with some sandpaper.

Cleaning

The next step is to thoroughly clean the surface you will be painting. At the very least, give the wall a good cleaning with warm soap water, and then rinse it off. However, many people prefer to use Trisodium Phosphate (TSP for short), an all-purpose cleaner that also helps prepare the surface to be painted.

Priming

The last thing to do before painting is optional depending on several factors. Many people argue over whether you actually have to use a primer to paint your wall, but it all comes down to what is currently on your wall and what kind of paint you are using. A good rule to remember is that if it is a surface that has never been painted before, you need to prime it. Even with extra coats of paint, it just won’t stick as well without the high levels of titanium dioxide found in primer. (This is essentially what makes the primer adhere to the wall and your paint.) Today, most paints are labeled as “Paint and Primer in One,” which many people assume means they won’t have to prime. Typically, a Paint-and-Primer-in-One paint simply has added titanium dioxide, but it’s not nearly at the same levels as a true primer. What the Paint and Primer in One does is save you from re-priming the previously painted surfaces. However, if you are painting over a deep color and trying to achieve a light color, you will most likely need to prime anyway, otherwise your color will appear much darker because of the previous color underneath.

Painting

Once your work space is ready and your primer is completely dry (your can of primer will have instructions specifying how long to wait), you are ready to paint!

Now that you are all prepped, the actual painting process is actually pretty straightforward. Many people have different preferences regarding the order of things to paint, but traditionally you start with a brush on the edges of the wall and then use a roller to finish the main portion. Many paint manufacturers have different suggestions depending on what type of paint you use, as well. Be sure to read all of the information on your particular can of paint.

To begin, open your can of paint with a screwdriver or a paint can key (you can buy these at most hardware stores for a dollar, and they help preserve the integrity of your can’s lid). Use a stir stick or other stirring device to mix your paint up a bit to ensure none of the pigment has settled on the bottom. If your paint has been sitting for a while, it might even be necessary to have your can of paint shaken again. As long as the can is still in good condition and the can is more than half full, most hardware paint departments will be happy to shake your old can of paint, even if you didn’t buy it from them. Worst case scenario, you can shake the paint by hand in circular motions.

Next, pour some of your paint into a small cup or other paint carrying device. Use your angled brush and dip it about half way into the paint. Wipe off any excess paint, and then cover the edges of the wall. The benefit of the angled brush is you can get a closer, more even application of paint with less risk of getting the paint where you don’t want it. Reapply the paint on your brush occasionally, never letting it get too thin or too thick. If it is too thin, your wall will turn out splotchy. Too much, and it will not dry properly, potentially leading to many other problems later on. There are also smaller rollers designed to be used for this purpose; however, I personally find that a brush gives you a lot more control.

Now that you have finished your edges, you can move onto the main portion of the wall. Pour some paint into your tray (the deeper end). Place your roller into the tray and pull back, bringing some paint with you. You then roll the roller back and forth on the textured portion, ensuring you get a nice, even coverage of paint. If you get too much paint on your roller, it will not roll properly, and is liable to splatter paint back at you when you roll. Too little and you will have to reapply the paint to your roller more frequently. If you are right handed, start from the right end of the wall and work your way left. If you are left handed, do the opposite.

Many people assume the best application with a roller is vertical lines, but in order to get the best coverage and smoothest final product, you should actually apply the paint in a slight angled fashion resembling a narrow W or N shape, and finish with a straight line all the way to the top when your roller starts to run dry. This is so you don’t leave huge gobs of paint at the edge of the ceiling. Every time you finish one strip, your next should overlap by about half the size of the paint roller. To finish up you do a rollover, which is just rolling over the area you just painted with your roller, without applying more paint. This is only to help even out your paint and make sure you didn’t leave any areas particularly thick.

Drying

The last step is to sit back and watch paint dry. I’ll wait for you…

Okay, I guess you should clean up while you wait. It is actually very important for the integrity of your brushes that you clean them immediately after you finish using them. If you are using a water-based paint, this is as simple as using warm soapy water. If you are using an oil-based paint, you will need to use mineral spirits instead.

Last, make sure your brush is left to dry with the bristles hanging down so the water or mineral spirits drains out properly. (This is why paint brushes have holes on the end: so you can hang them up to dry!) The roller can also be cleaned with soap and water. If you have to use it again right after cleaning it, you can buy a roller spinner that will help dry it much faster. It’s important not to use a damp brush or roller, because that will potentially water down your paint.

Assess whether or not your paint job requires a second (or third) coat. If so, repeat. Happy painting and share your stories with us in the comments!

Photo by Sara Slattery

Photo by Sara Slattery

Avoiding Roommate Drama

The joys and follies of living with roommates are many and varied. On one hand, you have things like cheaper rent, people to always hang out with, and new friendships that can last a lifetime. On the flipside, you may have to put up with things like less parking, less time to sleep in before work if you want to take a shower, and a daily morning obstacle course of your roommate’s passed-out friends from partying the night before. Whether for better or worse, many of us have to live with roommates at least once in our lifetime. In this article, I’m going to give you a set of guidelines that have helped me resolve issues that otherwise could have resulted in a huge headache for everybody involved.

Imagine something that your roommate does to annoy you. It might be something in the spectrum of forgetting to turn off the TV or rarely doing dishes. No matter what the issue is, the next time you get mad, rather than charging in and confronting them about it, I want you to stop and ask yourself the first of several questions:

Does it happen regularly? The answer to this may dictate the future of your relationship. If the answer is “no,” I suggest you drop the issue and give your roommate the benefit of the doubt that they made an honest mistake. If the answer is “yes,” then move on to the next question.

Is it something I can fix on my own? I find that, more often than not, the thing that is annoying you can be completely overcome by doing a little creative critical thinking. For example, if the house is messy, maybe you need to create a new system of cleaning or hire a once-a-month cleaning service. No matter what your problem is, put a bit of constructive thought into solving the problem. If after wracking your brain for a peaceful solution is unsuccessful, you may ask yourself the next question.

Am I willing to move out if this problem is not solved? The answer to this question puts the importance of your dilemma to the test. If you are not bothered enough by the situation dedicate the effort to finding a new home (while likely burn bridges in the process), you should probably take a deep breath and let it slide. If you find that the issue is so unbearable that you can’t possibly live with it any longer, move on to the next final question.

Will my roommate be open and receptive to a conversation or does he/she get defensive? Now, you are going to have to make a real judgment call. You must ask yourself if your roommate is someone who takes criticism easily and makes an honest effort to change, or if he/she is someone who will likely scoff in your direction and try to bother you even more or shut down and give you the silent treatment. The reason this step is so delicate is that people tend to attach to their behaviors: no matter how persuasive you are in telling them that their behavior may not be acceptable to everyone, they may take the constructive criticism with a dosage of contempt. Some people are good at brushing it off, while others may take it to heart, depending on how much they value the actions in question.

Discussing the Situation

If you decide that you cannot live with your roommate’s behavior but a discussion is not worth the risk, I suggest you begin looking for a new place to live and try to end things on a good note. However, if you can, try to approach your roommate politely and diplomatically so that you can work on solving your predicament together. Be prepared with a couple of solutions to suggest. If you and your roommate decide that you need some help selecting the appropriate solution, consider involving an impartial third party to help act as a mediator.

Living with people can strengthen relationships or break bonds, and the way that you approach the hurdles you encounter will impact the quality of your relationships for the rest of your life.

Photo by Sara Slattery

When I Was Catfished

Once upon a time, I was “catfished.” It was an experience that messed me up for a bit, but now I’m pretty glad it happened. “Catfishing” is the act of interacting with another person under a false identity on the Internet. You may have heard of it from the movie that came out back in 2010 or the reality TV series with the same name currently running on MTV (oddly enough, I haven’t seen either). It’s a very obvious process, but as a naive and hopeless romantic, I let myself see what I wanted to see.

I was lonely, and had started talking to strangers in chat rooms. I promise it was innocent chatting! When I first started, I was already in a long-term relationship. But my boyfriend and I had been drifting apart for at least a year, and I think each of us was waiting for the other to say it was over. And, in addition to that excruciating situation, I also hadn’t been keeping up with any of my friends. So the people of the internet became my social outlet: blogs, chat rooms, Tumblr, and message boards.

And then I met “him,” and we just hit it off. It was as if we had been best friends our whole lives. His name was Matthew, and we had stupid mundane things in common, like our enthusiasm for mashed potatoes, an affinity for puns, and our birthdays, which were one day apart. He was way too cute. He was athletic, played at least three instruments, was the lead singer in his band, and was getting over the wounds of an ex who had cheated on him. He was basically a character in an indie rom-com. How could I not fall in love? Five days after I met Matthew online, my then-boyfriend had a party where I proceeded to get sloppy drunk for the first time and realized that I had feelings for this online dude. We broke up the next morning.

Matthew and I would talk for hours on MSN Messenger, and when we weren’t online we were constantly texting. He was like my own personal diary: I could tell him everything and anything. I could be completely real with him! We exchanged many photos of our lives, and this was what abated my concern over his lack of a webcam. At this point, I was still in that initial high and I wasn’t thinking about the plausibility.

As we started getting more romantic, he started getting darker (of course). He would pick fights with me over nothing. If I didn’t respond to texts immediately or if I was out with friends for a night, he assumed that I was out “sluttin’ it up” and cheating on him (and we weren’t even in an official relationship). He would get drunk and hurl hurtful accusations my way, all the while revealing personal stories of abuse and deception. These included stories about how his father abused him and threatened him, how his ex-girlfriend cheated on him, how he was responsible for the death of his best friend, and how he attempted suicide. He would say to me, “No one could ever love me,” and I tried to reason with him that it wasn’t true.

There were so many red flags, I saw them and ignored them. “What if this isn’t a false alarm? How could I abandon him?” I felt I couldn’t live with those what-ifs, so I continued to talk to him. Plus, I thought he understood me, and that felt so rare.

About a month after we met, he had another one of these episodes where I had to talk him down and reassure him that he was deserving of love. He ended the night by telling me that he loved me, and then I didn’t hear from him for three days. Three days of nothing was like a slap in the face after a month of constant conversation. I was extremely worried, given his past threats. I searched the internet for his name, location, and the keyword “death” and was relieved when nothing popped up. Relieved but, at the same time, unsettled. Nothing came up for him, even without adding “death” to the search. His MySpace was just his band’s page, and  even that had only one photo of an indeterminate person and four untitled songs. No bio, and only five “friends” who were just advertisement pages. He had a Facebook, but it was private and offered no helpful information. Googling his email and usernames only ended up with “no results found.” And a reverse look-up of his phone number gave me a name that didn’t match his or any of his immediate family members. So after not hearing from him, I sent him an email and decided que sera, sera (what will be, will be).

Of course, once I let go, I received an IM from him. He said it was hard to explain, but he had OD’d the night we last spoke, and had spent the past couple of days in the hospital under supervision. As a result, his mother cancelled his phone subscription in order to prevent him hanging out with the people from whom he had received the drugs. This added up with what he had been telling me for the past month, so I believed it. But cue the creepy music: this is the part in the horror movie where you don’t understand why the main character has to go deeper into the woods—just turn around and go back home, you darn fool! I decided to not bring up what I had found (or what I hadn’t found) when searching for him. I was more concerned about appearing like a complete creeper than getting direct answers. Maybe I was also a little afraid of finding out the truth as well. And so things continued on, just as dysfunctional and needy as they were before.

Exactly one month later, he drops another bomb on me—he has Hodgkin’s Lymphoma and has known about it for the past year. Now, I know this is all bullshit, I KNOW IT. But there’s still that .01% of me that can’t turn my back on him. It could be real. I usually like this quality of mine, this overwhelming need to find the good in everybody, but man, it would be so much easier if it wasn’t there. Anyways, I’m worried sick about him and prepared to do anything he wants in order to help him get through this tough time. But just like last time, I would wake up the next morning and wouldn’t hear from him. This time, the silence lasted for about three months. This time, I was really done. Or at least that’s what I told myself, in between writing him weekly emails. Welp.

When he contacted me again, we pretended like nothing happened. The intensity was also gone. I would try to subtly drop hints that it would be okay if he were to tell me who he really was, that I wouldn’t judge him. He never did. One day, I tried Googling the name that I had found linked to his previous phone number, and I found a family tree blog. The woman had the same birth date as his mother, and the ages of her husband and children matched the ages of Matthew’s family. I Facebooked all of them, and found out that the daughter was basically a male version of Matthew. Her school, major, favorite television shows were all details of his life. She only had one band listed under favorite music, and wouldn’t you know it was just the craziest thing—all of their songs were his band’s songs.

I felt so triumphant that I had finally solved this mystery, and had found what I was looking for. But was I satisfied? I never confronted her about it: I wanted her to be the one to tell me. The one thing that I never got from my search was a “why.” I’m sure this is just me overthinking emotional situations and motivations again, but maybe I gave her the chance to figure herself out. Maybe she wanted to try out being in a relationship with a female, and didn’t have the courage to do it any other way. Maybe we really did connect in that initial meeting, and it snowballed from there. I’ll probably never know. As for me, it gave me the chance to figure myself out. I was unhappy with myself and that led to loneliness, which made it easy for me to be emotionally manipulated. Honestly, I probably needed something stupid like this to happen to me. Now I love who I currently am, the loneliness is gone, and I’m the happiest I’ve ever been. I genuinely hope that she is too.

Photo by Remi Coin

Put Your Goddamn Shoes Back On

Every summer, hundreds take to the parks and beaches, ditch their shoes, wiggle their toes in the grass and the sand—and with every step, I cringe.

Photo by Meaghan Morrison

Just in case you were raised by wolves, allow me to educate you: you need to wear your goddamn shoes. You should not run about willy-nilly in public places like beaches, forests, or parks without wearing some protection! I say this from personal experiencing the perils of ignoring common sense and my mother’s advice (but more on that later).

Cuts, Stings, Bites

There is a whole world of things that typically pass beneath your soles with no event: bent nails, flattened snails, and even those little pokey balls of death. But without shoes, the ick has no sympathy for your feet.

On the beach, sea glass is lovely stuff—smooth, pastel, beautiful. But do you know how it got that way? By rolling around, broken, in the water or through the sand for quite some time. And when you’re just walking innocently along the waterline, that newly donated (read: littered) glass will take no mercy on your unshod feet. Since water shoes are some of the dorkiest things to hit department stores since fanny packs, I typically go with some ol’ fashioned flip flops. They protect my feet from the bad stuff, while still allowing me to enjoy the water and sand.

Walking on soil in forests or fields can also expose you to a much livelier problem: hookworms. If you step on hookworm larvae, they can enter your body through your skin, causing rashes, allergic reactions, and infections. The hookworms will take up shop in your intestine, and requires some seriously nasty meds to flush out. What were you thinking, taking off your hiking boots like that?!

Last but not least, bees reign supreme as that minor annoyance that will completely ruin your picnic (and discomfort you for the next two weeks). Even with the generous assumption that you have been blessed without a bee allergy, tromping across a grassy field has never inspired as much regret as that moment when bee stinger meets squishy inter-toe flesh. If only you had slipped on some tennis shoes…

Broken Bones

So what makes me so passionate about pedal protection? Running around barefoot landed me with four broken bones.

Once upon a time, I attended a lovely beginning-of-summer BBQ, pumped to catch some rays and eat some burgers. Obviously, I decked myself in the quintessential California summer uniform: jean shorts, a tank top, and my comfiest sandals. After our second round of gooey, semi-charcoal’d cheeseburgers with a side of sour-cream-and-onion Lays, one of my compatriots whipped out a disc and challenged us all to a cut-throat game of Ultimate Frisbee.

Game on!

Of course, my similarly shod friends and I chucked off our sandals and commandeered the largest patch of grass we could: running, laughing, overthrowing the Frisbee.

My team—currently in the lead—was just about to thump our opponents with yet another landmark goal, when a defenseman ran up to block my catch. I turned, trying to thwart his attempt, and three of my toes twisted in the grass and folded under my foot. As my weight shifted onto my toes, they broke, and I fell to the ground. Instinctively, I brought up my forearm to protect myself—but instead of my arm breaking my fall, my fall broke my wrist.

It took all of my summer break for my wrist to heal, overlapping with a vacation to New York (in which I schlepped around in a bootie and sling and had to explain the game of Ultimate Frisbee to every single New Yorker in town) and my university orientation days (when I broke down in tears because I couldn’t write all the information being thrown at me).

So listen up, kids. You do not want to deal with all that. Put on your damn shoes.

Washing Your Car

It’s important to wash your car regularly, especially if you ever plan on selling it. Someone who is looking to buy a used car is more likely to buy a car that looks clean, and your paint job is the first thing people will see. A car that isn’t washed regularly will have its paint eaten through by sap, dirt, and other debris, which cause visible flaws in the paint and will make reselling the car much more difficult.

Photo by Sara Slattery

Washing your car by yourself can be a frugal and relaxing way to spend an afternoon. Getting all the necessary supplies to wash your car does have a small initial investment, but after you have all the supplies, you’ll be able to wash your car for about $1 each time (the cost of the soap and water). Much cheaper than a drive-thru car wash, and you have the peace of mind of knowing that everything was cleaned properly!

Washing by hand is the only way to wash a convertible car, and will save the paint job on any car! Drive-thru car washes that contact the paint with brushes strip your paint off each time and will cause your paint to fade prematurely. Washes that use high pressure nozzles have the same effect, albeit lesser.

1.       Supplies

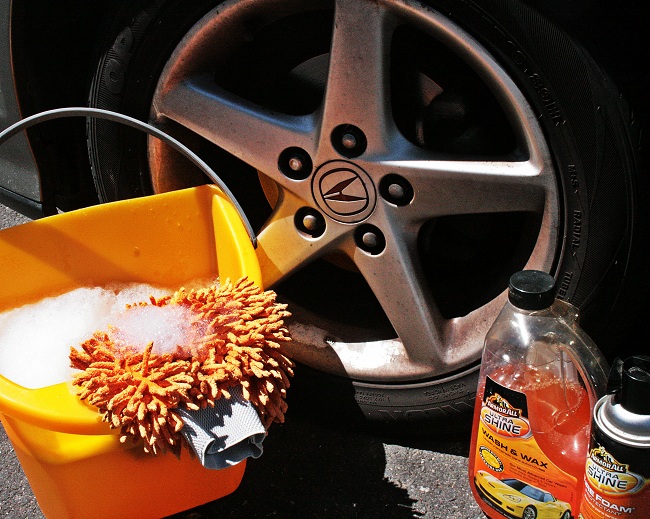
You only need a few supplies to wash your car. You’ll need two buckets, three or four microfiber cloths, a wash mitten or car sponge, and some car soap. Do not use anything except car soap! Dish soap and other soaps can strip away the wax and clear coat on your paint. Additionally, microfiber cloths are ideal for washing and drying because they trap the dirt particles in their fibers, whereas a rag or a paper towel will drag the dirt along, scratching the paint.

You should be able to pick up everything you need at your local auto parts store for around $20.

2.       Preparation

Before you start washing the car, it’s best to find some nice shade to park under. If you can’t find any shade, you can go to a do-it-yourself carwash or wait until the right time of the day so that the sun isn’t directly blasting your car. Another option is to rinse your car in the sun, and then quickly park somewhere nice and shady.  If shade just isn’t an option, you’ll have to wash and dry the car one section at a time in order to prevent water spots from occurring.

Fill up one of your buckets with soap and water, and fill the other bucket with only water. Next, lift your windshield wipers up until they ‘click’ and stay off the windshield.

You’re almost ready to wash your car, but first double-check that all the windows are rolled up and all the doors are closed.

3.       Rinsing

When rinsing the car, don’t use a hose or a nozzle with too much water pressure: too much pressure will end up scratching your paint! A garden hose with a trigger spray attachment is perfect.

Start by rinsing the car from the top down. Start with the roof and work your way down to the sides of the car. This should remove or break loose most of the dirt, preventing scratches when you scrub the car with the sponge.

If you live in an area with snow, you’ll want to pay special attention to the wheel wells, as the salt used on the roads builds up and can cause corrosion if ignored.

4.       Washing

After you’ve finished rinsing the car, you’re ready to soap it. Grab your sponge and soak it in the soapy water. You’ll need to go around the entire car with the sponge, starting from the top and working your way down to the bottom of the car. Go section by section, making sure that you’ve removed all dirt and debris from each area of the car before moving on to the next. A good order is to start with the roof, move on to the hood/front bumper of the car, then work your way back along the passenger side until you reach the trunk/rear bumper, and then work around the driver’s side to the front of the car, starting with the top of each section and working your way down.

As you finish each section, it’s best to rinse the sponge off in the clean water bucket and then re-soap it in the other bucket. This prevents dirt from building up on the sponge, making it clean better and preventing scratches to your paint. Some parts of your car will be much dirtier than others, and you may have to rinse the sponge off multiple times in order to get one panel clean.

Once you’ve finished all the body panels, move onto the wheels. Grab a clean microfiber towel, dip it in the soap water, and wipe down the wheels, making sure you get the brake dust off of all the visible surfaces. Make sure that the towel you use for the wheels is kept as a wheel-only towel for all future washes, as leftover brake dust will scratch your paint.

5.       Rinsing (again)

This is the same as step 3, but now to rinse all the excess soap off. It’s important to rinse off all the excess soap because soap residue can cause damage to your car’s clear coat.

Instead of using a hose, you can choose to use a second sponge with the clean water bucket. Make sure to rinse the sponge out in the clean water often. Make sure not to use too much pressure on the sponge; all you want to do is break the dirt loose.  This method saves a lot of water, but can be a bit more time consuming.

6.       Drying

This is the part that becomes a race against time, and it is the reason for that nice shade you found earlier. When drying the car, start with the top and work your way down. This prevents water from the top running down to an area that you’ve already dried. Use one of the microfiber towels to wipe down the car and remove most of the excess water, making sure to wring it out as necessary. Once you’ve wiped the car down once with the first microfiber, grab another dry microfiber and go over the entire car again. This gets the car completely dry and prevents the water from evaporating off and leaving dirty residue or hard water stains.

After you’re satisfied that you’ve gotten everything dry, do a pass around the car to look for any water residue or streaking on the windows. If you find any residue or streaking, rub the second drying towel on that area and it should wipe off and shine clean.

7.       Waxing (optional)

Now is the perfect time to wax your car, if you so desire. When waxing, you want to use a minimal amount of wax. If white streak marks are visible after you’ve passed over an area, you’re using too much! Use a wax applicator pad to apply the wax, and wait approximately 5 minutes until the area hazes over before buffing with a clean microfiber towel. It’s best to apply and buff one section at a time. Waxing your car is important because it acts as a shield between your clear coat and the dirt, and your car shine for longer so you don’t need to wash your car as often.

If you’ve waxed your car using a high-quality wax (and followed the instructions properly), it will only be necessary to wash your car once a month. If you opted out of waxing your car, it’s best to wash it every week to prevent debris from eating through your clear coat and ultimately your paint.

Wax essentially acts as an extra layer of paint, keeping your car cleaner for longer while simultaneously protecting your paint and clear coat.

Things to note

Should you happen to have a convertible car, do not wash the soft top with a hose unless you’re absolutely positive you have no leaks. If you only have minor leaks, it’s ok to scrub it off by hand with a clean sponge and dry it off with a microfiber towel. Keep in mind that a fabric-like convertible top is not waterproof, it is just water resistant, while a vinyl top is waterproof.  If you’re unsure what kind of material your convertible top is made out of, you can ask your car dealership or a local auto parts store. It’s best not to use car soap on a convertible top, since most car soaps contain some sort of shine-enhancing oil, which the top will absorb and become a dust magnet.

If you have a truck, the steps above are almost the same. The only difference is that you will need to open the bed and rinse it out. If you have a bed liner, there’s no need to dry off the bed; but if your truck bed has no liner, then you need to dry inside the bed to prevent rust, residue, and hard water stains.

How to Order Meat & Eggs

Confession—I love meat, but I don’t eat beef. However, my street cred in understanding meat comes from dating ardent beef-eaters (I grew up in the Midwest, y’all), much to the dismay of my Hindu mother.

Photo by Sara Slattery

Recently, I dated a gentleman who was well-versed in beef and beer. Dinner conversations generally involved the words yeast, fermentation, and rare, which in hindsight points to signs that we were probably destined to break up.

So, while the only beefeater I prefer is gin, I will thank my relationships for imparting some worldly knowledge. I’ve eaten dinner with enough weirdoes to learn my restaurant etiquette, so you don’t have to!

Here’s my breakdown on the different ways to order steak and eggs (my specialty!) at a restaurant, without looking like a complete vegetarian.

STEAK:

First of all, steaks are any piece of meat that is considered a “fast cooking” cut: a cut that does not require long time to cook. Flavor and tenderness tend to have a mutually exclusive relationship; generally, the more lean or tender the steak is, the less flavor it has, because the flavor really comes from the fat. In addition, the muscles that do the most work such as the legs and neck tend to be more lean and tough as compared to their “lazier” counterparts.

Now, let’s put the grade and type of beef aside. There are two ways to tackle steak: cut and temperature. Let’s start with the different cuts or, to be crude, the areas of the cow which are available for your carnivorous pleasure. Depending on the cut, the tenderness, flavor, and cooking method can vary widely, but I’ve listed the popular ones below.

  • Forequarter cuts: These cuts are near the front of the cow, or “forequarters.”
    • The Rib: Pretty self explanatory: this meat can be short ribs, prime ribs, and rib eye steaks. The cow’s muscles near the ribs generally do not work hard or exercise; therefore, there is a great amount of marbling (intramuscular fat), making the meat relatively tender.
  • The Loins: Now, the hindquarter cuts can be broken down into three type:
    • Sirloin: While less tender than short loin, sirloin is generally more flavorful. It can also be further divided into top sirloin and bottom sirloin.
    • Tenderloin: This can be considered a sub-type of the loin. Staying true to its name, it is the most tender. Filet Mignon is a form of tenderloin. This comes from two relatively small pieces of tenderloin muscle in cattle, making the coveted steak pricier than its counterparts.
  • Miscellaneous: Other steaks like the chuck, round, and flank come from their respective areas and tend to be the tough cuts.
    • Chuck: A cut from the neck to the ribs. Many times, this steak includes shoulder bones and is generally is less expensive than its rib-based steak counterparts.
    • Rump Steak: Take a guess where this meat comes from! The rump meat is tough and is generally roasted.
    • Round Steak: This lean meat is from the thigh of cattle; due to the lack of fat, it does not tenderize quickly, so it is more suited to slow cooking methods such as roasting.
    • Flank Steak: This substantially tough steak is long and flat. The meat requires marinades and other slow cooking methods and are not ideal for steaks.

Now that you’ve figured out what part of the cow you’re eating, how would you like it served? High-end steakhouses may have their own variations, but here is a general guideline to temperature:

  • Rare: Cool, red center
  • Medium Rare: Warm, red center
  • Medium: Hot, red Center
  • Medium Well: Hot, pink Center
  • Well: No pink, brown

Photo by Sara Slattery

EGGS:

Now let me introduce my expertise—eggs. As a meat eater with a pretty strict vegetarian family, eggs are the only dishes that count as a free pass for everyone in my household to foray into the animal kingdom. In fact, most of my family turns a blind eye to eggs as long as the dish meets strict scientific requirements or, you know, doesn’t “smell eggy.”

  • Scrambled: The most common type of egg preparation, scrambled eggs are basically the yolk and the whites (unless you specify whites only!) beaten briskly to incorporate air and constantly stirred in a pan to produce large puffy curds of egg.
  • Over easy/medium/hard: These are all fried eggs that refer to the consistency of the yolk. For example, over easy implies a runny yolk with solidified whites, but over hard means to cook on both sides ‘till the yolk hardens.
  • Sunny-Side Up: A caveat of fried eggs, sunny-side up refers to one side of the eggs being fully cooked, while the yolk remains runny.  Crack an egg over low heat and let one side cook without flipping or pushing it around the pan. The difference between an over easy and a sunny-side up egg is that in preparing sunny-side eggs, you let only one side fry, while any “over” preparation requires you to flip the egg to the other side to cook the egg whites.
  • Poached: A poached egg has a smooth unbroken yolk that is surrounded evenly by a casing of eggs whites.  The preparation involves submerging the yolk in water, as opposed to letting it cook straight on the pan. Crack an egg into a bowl, without breaking the yolk, before sliding the contents into a pan of simmering water for cooking. Wait until the egg white has solidified, but the yolk stays soft. The key to success here is getting the freshest eggs possible and timing it right!
  • Boiled: Boiled eggs remain in their shells until they reach your plate. Despite the name, boiled eggs should not actually be boiled throughout the entire cooking process. Instead, bring eggs (with shell intact) to a boil and then remove them from the heat. For soft- or medium-boiled, let them stand for 2-3 minutes; but for hard boiled, let the eggs sit in the boiling water for 12 minutes. After your remove the eggs, plunge them immediately into a bowl of ice water to facilitate peeling off the shell.

While there is a wide spectrum and range that varies from country to country and restaurant to restaurant, this serves a general guide to understanding the steak and egg lingo.  The real key takeaway is that if you know how to order eggs and meat, you should definitely ask me out.

A Religions Primer

I’m not sure that there is any other part of human existence that is so often disputed as religion. Alongside politics and money, most won’t touch it with a ten-foot-pole in polite company, yet belief systems have formed and continue to form the foundation of life for many societies and individuals. “Religion” can be many things to many people: a set of guidelines for how to live a good life, a part of their culture, a guide to connecting with the divine, a source of oppression and violence, or simply nothing at all. My goal here is not to give the end-all-be-all breakdown of world religions and how to choose one—you can do that here, or here, or with this (taken with a grain of salt, of course)—but to look at the tip of the iceberg and share some ideas that might be helpful if you are interested in exploring a particular faith or faiths.

Photo by Sara Slattery

Let’s take a moment or two to consider why humans have gravitated towards religion throughout our existence and what basic characteristics distinguish religions from each other. A little “Religions 101,” if you will.

There are several main camps into which people fall when you look at their perspectives of religion: materialistic, functional, and belief-based.

  • A materialistic perspective proposes that humans have imagined that the supernatural exists, when in fact the material world is all that is real. (Marx and Freud fell into this camp: Marx felt that religion provided a false security to people and was used to oppress them; Freud thought that religion was no more than a “universal obsessional neurosis.”)
  • A functional perspective proposes that, regardless of whether or not the supernatural exists, religion is useful for both societies and individuals to create harmony and health, to further the human species, and/or to create a sense of purpose and security.
  • A belief-based perspective proposes that there is a larger-than-life supernatural reality, and religions are humanity’s responses to that reality. (Many names have been given to encounters with that reality, like enlightenment, realization, illumination, kensho, awakening, self-knowledge, gnosis, ecstatic communion, and “coming home.”)

If you feel that you have a functional or belief-based perspective about the supernatural or divine reality, exploring the kinds of religions that might suit you could be the next step. However, it’s helpful to be aware of how your perspective influences your interest in religion. If you have a functional perspective, then the lifestyle, daily practices, or community aspects of a religion may be the most important to you. If you have a belief-based perspective, then the ideas and beliefs of a religion may be more important, though those often will still include the lifestyle, practices, and community elements.

Once you know why you want to explore religions, it can help to think about the different kinds of religions that are out there, in case certain types resonate with you more than others.

Some religions (like Christianity or Judaism) distinguish between the profane existence of our everyday world and the sacred existence of the spiritual world. Some religions (such as Taoism) say that the profane and the sacred co-exist or aren’t different realities at all. Certain religions (like Buddhism) teach that the sacred is immanent or present in our lives, whereas others (such as Hinduism) teach that the sacred is mostly transcendent, existing in another sort of reality that can be accessed through prayer or ritual.

Then there are the concepts of a sacred being or entity. Depending on the religion, there may be a personal being: a Mother, Father, Teacher, Friend, or the Beloved; or, there may be a specific being with a name and a life-story. These beings often serve to personalize some or all aspects of the divine in a way that allows practitioners to connect with it. These deities may also serve as examples for how humans should live. And, sometimes, the divine is characterized as something other than a person—as elements of non-human nature, as all of existence, or as a pervasive force or love that exists in the world supernaturally.

Religions are often categorized by the number of sacred beings or entities they believe in—monotheistic religions have one, polytheistic religions have many, monistic religions hold that there is a divine nature underlying everything, and nontheistic religions don’t attribute the divine to any particular being or entity.

Whether you are atheist (believing that there is no deity), you are agnostic (not sure whether the divine exists), you believe in something but want to give it more structure, or you were raised in one religion and don’t feel like it is spiritually fulfilling anymore, understanding why you are interested and what basic types of religions are out there is a good start! If you find that you want to learn more about particular religions, you can check out resources like BBC’s religions guide website; though beware of the plethora of biased and inaccurate information about religions that exists online. To play it safe, you can find many basic comparative religion books, like John Bowker’s World Religions or Huston Smith’s The World’s Religions.

Console Wars: Here We Go Again

It’s that time again. A wave of next-generation video game consoles are lined up for gamers, with the three console giants (Microsoft, Sony, and Nintendo) offering up their latest and greatest products. With consoles becoming a dying breed, and their sales dwindling compared to social and PC gaming, what should you know about the next generation, and which console is right for you to buy when they are released this holiday season?

Nintendo Wii-U – $299

In an attempt to get a headstart on the competition, Nintendo released their next-gen console a year in advance. As such, it is already glaringly obvious from the Wii-U sales that Nintendo’s new high-definition console has fallen quite far from the innovation of its predecessor.

The Wii-U’s two main selling points are the inclusion of HD graphics (finally) and the new gamepad. While an interesting piece of hardware, the gamepad has yet to be utilized by game developers in a way that enhances gameplay beyond that of the Wii. The inclusion of HD is something that should have been a part of the Wii from the start, and now feels like Nintendo is just playing catch-up at this point.

The problem with the Wii-U is that it ultimately doesn’t amount to much more than a glorified Wii system with new hardware that is hardly used by developers. The Wii’s innovative design was quite groundbreaking at the time, and it created a gaming market for an age group that was otherwise uninterested in gaming. Now, the Wii-U is a poor attempt at marketing towards the hardcore gamer market. Nintendo used to be the top in hardcore gaming and game consoles; however, since the release of the Wii, Nintendo fans have criticized the company for neglecting the hardcore market. The Wii-U was ambitious by trying to please both casual and hardcore markets, but the result is a console that fails to please either side of the spectrum.

Who Should Buy It: Anyone interested in a lower-priced gaming console and casual gaming who doesn’t already own a Wii, or a gamer who is really committed to Mario and Zelda games.

Microsoft Xbox One – $499

The Xbox One is Microsoft’s answer to an all-in-one media hub. The Xbox 360 was best known for its Xbox Live service, as well as its Kinect motion sensor. In the Xbox One, Kinect will be integrated right out of the box and, in addition to the regular Live service, Xbox One users will have access to movies, television, music, and internet browsing, as well as the library of games.

One of the biggest criticisms of the Xbox One was their integration of the user’s console with their network, as well as their harsh DRM (Digital Rights Management) rules. Originally, the console was required to connect to the Internet at least once every 24 hours, potentially alienating gamers who prefer to play offline. Games bought in a store were also meant to be linked to a particular player’s account in order to work, making reselling or lending a game to a friend a difficult process.

Thankfully, Microsoft recently backtracked on these due to negative feedback. To me, this says two things. First, they are actually listening to their potential buyers. Second, if they back-pedaled this easily on something they were so adamant about when the console was announced, it doesn’t send a strong sense of confidence about the Xbox One in general. While it is important for companies to listen to consumers, it is the company’s job to ultimately decide what is delivered in the final product. Innovation is the responsibility of the company itself.

Maybe they should just call it the Xbox 180.

Who Should Buy It: Anyone looking for a device that integrates various media, is particularly fond of previous Xbox products, and can afford the heftier price tag.

Sony PlayStation 4 – $399

The PlayStation 4 has been the thing of rumors for years. When the PlayStation 3 was initially revealed, its presentation and subsequent lack of promised features led to parody and ridicule. The PlayStation 4 reveal, however, was simple and to the point: the PlayStation 4 is designed for hardcore gamers, who have lacked a proper dedicated console for a long time.

 The PlayStation 4 is pretty much a powerful gaming PC wrapped in a console. In addition to the powerful hardware, the PlayStation 4 does not stray far from the controller PlayStation fans have become accustomed to for nearly two decades. (Speaking of PlayStation history, there are plans to include previous PlayStation titles in a streaming cloud service to solve future problems of backwards compatibility.)

In comparison with the Xbox One, the PlayStation 4’s selling points are its price, the way they have handled used-game resale, and its Digital Rights Management. The PlayStation 4 will sell for one hundred dollars cheaper than the Xbox One. In addition, Sony’s policy towards used games (from the start) is that, if you buy a copy of the game, you have the right to trade it in, let a friend borrow it, or keep it forever.

Who Should Buy It: Serious gamers, and that’s pretty much it. As exciting as the PS4 sounds, it seems to be doing the opposite of what the Wii did years ago, and seems likely to alienate casual gamers.

Fifteen years ago, there wasn’t a lot of variation in the game market to guide the creation of new systems. However, today we have huge divides between many factions of gamers. Some systems will be best for casual gamers, while others will be better for the more serious gamers. Personally, I believe if you are a casual gamer, the perfect system already exists for you: the Wii. If you haven’t bought a Wii yet, that might be a good reason to buy the Wii-U. For the serious gamer, the PlayStation 4 seems more likely to challenge and entertain. The Xbox One seems to be somewhere in the middle, for your semi-casual, semi-serious gamers who sometimes just want to binge-watch Arrested Development instead of pwning noobs.

next gen consoles square