A couple months ago, I wrote an article about figuring out how to cook chicken. Since then, I’ve been challenging myself to become a better chef. This past month, the challenge was to purchase five produce items that I wouldn’t normally buy and figure out how to cook them:
- a turnip
- an eggplant
- a spaghetti squash
- a bag of Brussels sprouts
- two pears
Let the games begin.
THE TURNIP
Okay, so first I’ll admit I didn’t cook the turnip. But I tried to! Do you know how hard it is to find good turnip recipes? I wasn’t in the mood for anything in the soup variety, anything involving mashing, or anything remotely close to fries, so I settled on a nice cheesy turnip gratin—which sounded delicious until I realized a modest-sized block of Gruyere cheese (only enough for this one recipe) was $12. Yes, I know good things cost money, but $12 worth of a cheese I don’t even know if I like? Suffice to say, the neglected white and purple ball of guilt is still sitting in my refrigerator… fine, I’ll get some Gruyere at the store tomorrow.
EGGPLANT PARMESAN
I’m pretty sure the only thing I’ve ever eaten with eggplant in it was eggplant parmesan. I figured that was a good place to start. I found this seemingly easy, highly rated recipe (two criteria I always look for) and got to work.
|
Ingredients: |
||
|
AllRecipes.com |
What I Used |
My Commentary |
|
3 eggplants, peeled & thinly sliced |
1 eggplant, sliced |
I probably should have peeled the eggplant, but I forgot I owned a vegetable peeler, and peeling without one… not so easy. I also didn’t “thinly” slice my eggplant, but I’ll be better about that next time. The thicker pieces didn’t cook as well and ended up being a bit tough and chewy. |
|
2 eggs, beaten |
2 eggs, beaten |
I don’t know how this lady thought 2 eggs would cover 3 eggplants. I needed both just to coat my 1 eggplant. In the future, with even thinner slices—meaning more sides to coat—I will probably need 3. |
|
4 cups Italian seasoned bread crumbs |
A container of Italian seasoned bread crumbs. |
Have enough to use “as needed.” |
|
6 cups spaghetti sauce, divided |
A jar of spaghetti sauce. |
This is what “divided” means in cooking. I just poured from the jar, again, “as needed.” I ran out of sauce really quickly, though, so I probably should have used 2 jars. |
|
1 (16 ounce) package mozzarella cheese, shredded and divided |
A ball of mozzarella that was on sale at Ralph’s. |
I think it was 16 ounces… |
|
1/2 cup grated Parmesan cheese, divided |
Poured from my Costco jar of pre-grated Parmesan. |
Clearly there is an “as needed” trend going on here. |
|
1/2 teaspoon dried basil |
… |
Oops. |
|
Directions: |
|
|
AllRecipes.com |
My Commentary |
|
1. Preheat oven to 350°F. |
To reduce potential bitterness, the comments suggested sweating the eggplant by sprinkling them with salt, letting them sit for 30 min, rinsing with cold water, and patting dry with a paper towel. I did none of this and did not notice, but I still might try it next time. |
|
2. Dip eggplant slices in egg, then in bread crumbs. Place in a single layer on a baking sheet. Bake in preheated oven for 5 minutes on each side. |
Add foil to your baking sheet for easy clean up. Bake for 10 minutes on each side, as suggested by the comments and my own experience. |
|
3. In a 9×13 inch baking dish, spread spaghetti sauce to cover the bottom. Place a layer of eggplant slices in the sauce. Sprinkle with mozzarella and Parmesan cheeses. Repeat with remaining ingredients, ending with the cheeses. Sprinkle basil on top. |
I did this until I ran out of sauce. Then I just kept layering eggplant and cheese, it all worked out in the end. Forgot about the basil, which might have been a nice touch. |
|
4. Bake in preheated oven for 35 minutes, or until golden brown. |
I had to bake mine for at least 45 minutes and most of the comments suggested something in the 40-60 minute range. Be your own judge of this. Undercooking might lead to tougher eggplant: I wish I had cooked mine even longer. |
All in all, this turned out to be a success. I’d do it again with thinner slices and a longer baking time. I ended up serving it by itself with some salad, but next time I’d serve it over some plain spaghetti (which is what I did with the copious leftovers and it was delicious). The breaded eggplant was definitely the best part so now I’ve got big plans to make these breaded eggplant sticks with my next eggplant.
BROWN SUGARED ROASTED BRUSSELS SPROUTS
Emily Knight did a whole piece for UE on the excellence of Brussels sprouts. She also dazzled me with them in person a couple years ago and wrote up the recipe on her blog. I tried to replicate to her success with my bag of Brussels sprouts.
|
Ingredients: |
Directions: |
|
Brussels sprouts |
1. Preheat the oven to 400°. |
|
Olive oil |
2. Prep the Brussels sprouts by cutting off the icky end bit, slicing them in half, and then rolling them around in a bowl with some olive oil. |
|
Brown sugar |
3. Sauté the Brussels sprouts for about 5 minutes with plenty of brown sugar and more oil so they can get soft and sweet. |
|
4. Spread the Brussels sprouts out on a baking tray and cook for 30 minutes. |
This seemed so easy that I’m actually impressed that I screwed it up. See, when Emily said “plenty” of brown sugar, I channeled all my childhood memories of horrible boiled Brussels sprouts—and put in a copious amount of brown sugar. So much brown sugar, there was in fact a caramelized liquid to drizzle over the sprouts before I baked them. Sounds like a recipe for awesome, right? Not so much. Unfortunately, and I can’t believe sweets-loving me is saying this, this made them too sweet and not nearly as good as Emily’s. But this will definitely not be the last time I attempt this side dish.
SPAGHETTI SQUASH SPAGHETTI
I’d been intrigued by spaghetti squash since my neighbor first introduced me to it. As a lover of noodles, I’ll admit, I was a little skeptical. But after hearing several friends repeatedly rave about the dish, I was ready to give it a try.
Before you even get to making the spaghetti sauce, you must first “prep” the spaghetti squash:
|
Directions: |
|
1. Cut the squash in half (AKA hack the shit out of this tough squash until it splits in half). |
|
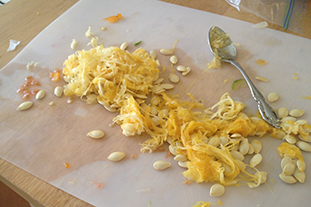
2. Remove the seeds / pulp. Pumpkin carving flashbacks are optional. |
|
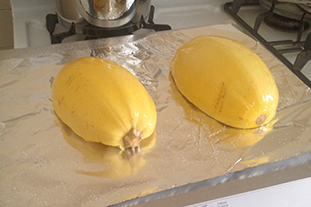
3. Douse with olive oil, salt, and paper and then turn flesh side down on a foil covered baking sheet and cook for 30-40 min at 450°F. |
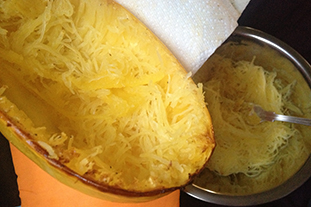
The “spaghetti” comes out like buttah when scraping it with a fork and has the consistency of angel hair noodles. I may have overly enjoyed this step, but noodles are being created from squash, it’s meant to be enjoyed.
 |
 |
 |
Making the Sauce:
Spaghetti is one of the few things I’ve actually been able to cook for years, though it’s really not that hard when you are just cutting up vegetables and stirring in jarred tomato sauce. This time I decided to add ground beef, which I’d only ever cooked once before.
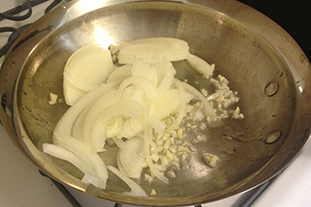
For anyone who, like me, feared ground beef, it’s actually even easier than chicken. I put some olive oil in a frying pan, added the garlic and onion first, gave them a minute or two, and then added the ground beef. Brown the ground beef (until you see no more pink) and add in the zucchini when it’s almost done. Continue cooking until you see no more pink in the meat, then add the jar of sauce. I usually let the whole thing come to a boil and then simmer for a few minutes. But really, you can eat it as soon as it’s hot. I also usually add in the chopped tomatoes last, so they retain some of their original consistency when I serve. Seeing as how I made this entire recipe up, it’s really a use-what-you’ve-got-and-go-with-it situation.
 |
 |
 |
Serve your sauce over your spaghetti squash “noodles.” I added some grated Parmesan cheese and had to salt and pepper my “noodles” a bit more (so I’ll probably add salt and pepper to the squash post–baking-and-forking next time), but otherwise I’d say this was every bit delicious as I had heard. I barely noticed that I was eating squash, in fact, I might have even liked it more than pasta but don’t tell anyone.
FRUIT CRUMBLE
With all the use I’d been giving my oven, I’d yet to bake a dessert in it. This was clearly not okay! I decided to rectify this with my pears and some remnant raspberries I had left in my refrigerator. I Googled pear and raspberry crumble, found this, and went to town.
|
Ingredients: |
||
|
CanadianLiving.com |
What I Used |
My Commentary |
|
FILLING |
||
|
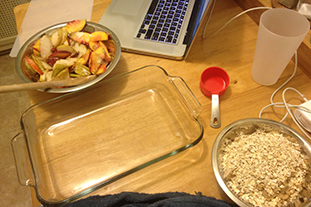
4 cups sliced peeled pears |
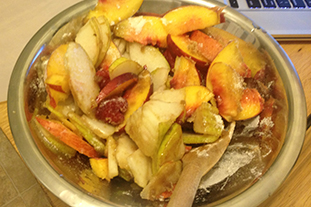
Two sliced, unpeeled, pears |
I didn’t even notice the skin, but now that I’ve found my peeler, I might peel next time. |
|
2 cups frozen raspberries |
a handful of fresh raspberries |
Unfortunately, when I went to get my raspberries, I realized many of them had gone to the other side and I found myself with far fewer than I’d anticipated. |
|
… |
a nectarine |
To compensate, I added in a nectarine. |
|
… |
a couple grapes |
This is where I went a bit off the rails, but I was bolstered by this grape and pear crisp recipe (and I was still lacking fruit!). You’ve got to work with what you’ve got! |
|
1/3 cup packed brown sugar |
1/3 cup packed brown sugar |
|
|
2 tbsp all-purpose flour |
2 tbsp all-purpose flour |
|
|
1/2 tsp nutmeg |
… |
Yeah, I don’t keep nutmeg on hand. Probably should. |
|
TOPPING |
||
|
3/4 cup all-purpose flour |
3/4 cup all-purpose flour |
|
|
3/4 cup packed brown sugar |
3/4 cup packed brown sugar |
|
|
3/4 cup quick-cooking rolled oats |
3/4 cup quick-cooking rolled oats |
|
|
1/3 cup butter, melted |
1/3 cup butter, melted |
Melted in the microwave. |
 |
 |
 |
|
Directions: |
|
|
CanadianLiving.com |
My Commentary |
|
1. In large bowl, gently toss together pears, raspberries, brown sugar, flour and nutmeg. Spread in 8-inch square glass baking dish. |
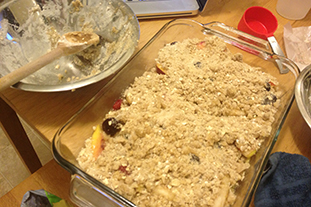
I did this with my fruit additions and omitted the nutmeg. |
|
2. In separate bowl, stir together flour, brown sugar and rolled oats. Drizzle with butter; stir until crumbly. Sprinkle over fruit. |
|
|
3. Bake in 350°F oven until golden and bubbly and fruit is tender, 45 to 60 minutes. |
Watch one episode of Breaking Bad, then eat. |
I served this warm with some whipped cream and had to hold myself back from going for seconds.
Cooking used to be so daunting to me but when I remind myself of these simple rules/guidelines
More Meals = More Practice
Make dinner every night. Even when I don’t feel like it, I cook. By doing this I learned (1) cooking is not nearly as hard as I thought it was, (2) it is possible to do it both well and quickly, and (3) it’s a great, fun way to switch gears after a long day even if it feels like a chore when you first start.
Improvise AKA Get Creative
Don’t make cooking harder than it needs to be, follow the instructions, but don’t be afraid to switch ingredients or adapt recipes to your equipment/time/skill level. I usually combine several recipes and look closely at reviewers comments and see what their experience was like.
Don’t Skimp on Essentials
Substituting and improvising can be a wonderful adventure, but skimping on essentials like oil, butter, eggs, milk and cream can severely effect the taste of a meal (and not in a good way). If it says it wants A WHOLE CUP OF ACTUAL BUTTER, put in a damn cup of ACTUAL butter! Not margarine, not half a cup, not anything else. I could start linking to all the articles and arguments about butter being better for you than all of its substitutes but I’m going to go with this line from Michael Pollan: “Eat food, not food products.” Or this line from me: “It tastes so much better.” Eat in moderation, exercise, be smart, and put down all the junk food before you blame butter.
Leftovers are your friend
Always make enough to take for lunch the next day and, if possible, even more to keep in the freezer. If you don’t eat it for lunch, it can be there for another dinner. There’s nothing better than coming home from a long day and turning some frozen leftovers into a new 15 minute meal.