Tag Archives: eating

Picky Eating and Overcoming the Fear of Fine Dining

I’ve been a picky eater ever since I can remember. I don’t like vegetables or most fruit. I generally don’t like green foods. I absolutely hate the fibrous crunch of lettuce, celery, broccoli—you name it. Going out to eat in my high school years with friends was basically me ordering a dish, picking off 50% of the contents, and eating what little remained, unless I was fortunate enough to find the one dish that wasn’t covered in a salad and coleslaw. So how did I fall in love with food? It seems unlikely, considering that I entirely hate a major food group.

My family went on vacation the summer after my sophomore year, and my mom desperately wanted to eat at this restaurant she’d seen reviews for. It was her birthday, and I was dragged along, slightly against my will. What was wrong with just going to the Outback for another Bloomin’ Onion and some of their ridiculously portioned cheesecake slices? What about their awesome dark brown bread they served with a huge knife running through it?

I didn’t know it, but I was about to lose my footing. Birthday dinners would never be the same for me.

I swooned after one bite of something utterly and impossibly amazing. One little piece of steak. It looked so sad on this large white plate, all by itself. I pitied it, put it on my fork, and put it in my mouth. What I tasted was this juicy, creamy, melt-in-your-mouth slice of heaven. Just barely crispy on the edges, but succulent all the way through, it teased every sense out of my feeble teenager mouth. It was heavenly, and suddenly Outback seemed boring, for peasants only. I was awestruck that something so small could pack such a punch, bring up so many wonderful food-related feelings. When the time came to order dessert, I decided to be adventurous and ordered something with fresh fruit. A raspberry “napoleon”: chantilly cream layered with fresh berries with crispy pastry tuilles in between. The order shocked my parents. I astounded them again when I ate bite after bite of my dessert (previously, I’d only been interested in artificial fruit flavors).

From then on, there was a small obsession with finding a perfect bite to meet that piece of meat. Now that my parents were not as worried about me finding something to eat on any given menu, we tried new restaurants. I was enjoying new flavors, but I kept running into all of these pesky vegetables. They were on every entrée, present as a garnish on every appetizer. Sometimes, they even made it to dessert, which disgusted and horrified me. About a year after the best piece of steak ever, my mom grew tired with me leaving half the plate behind. She told me, “Finish your plate or you can pay for your share of the food,”—and with those prices, I was horrified. When a dish was a solid week’s worth of earnings at my then-shitty-semi-retail job, avoiding the vegetables was clearly not worth it when I wanted to go to Disneyland over Spring Break.

So I put the piece of asparagus in my mouth, chewed briefly, and swallowed. And it wasn’t love. It was still mild disgust, but the idea of paying for something and not eating it (at least at a high price point) started to gall me. Bite after bite, frown after frown, the vegetables went away and the plate was empty. It wasn’t the worst thing ever, but it wasn’t something I’d choose to do on an everyday basis. My family found it entertaining, that I would break such a hard-and-fast eating rule for a fancy meal.

I’d like to say that day changed something in me, but it didn’t. I still don’t like greens, though I’ve compromised and started to enjoy some fresh fruit more often. The love of food, great food made with immense care, pushes me to keep trying new and exciting things. So I keep trying different restaurants with exotic menus and preparations. And I’ll have you know, I recently ate a large slice of cucumber with eggplant relish and didn’t throw a tantrum (or throw up).

Photo by Sara Slattery

Photo by Sara Slattery

Learning How to Actively Take Care of my Body Without Hating It

As a lady who lives on Earth, I have some body issues. Luckily, these didn’t really start for me until I was 17 (which is apparently, and distressingly, a pretty late age to begin worrying about this stuff, considering that some start as young as 9 years old.)

The Old

So, what happened at age 17? The birth control pill. Over the course of the first two to three months I was on it, I gained 20 pounds. I was definitely never skinny to begin with, but this was the first time I thought of myself as actually “fat.” Before the year was out, I was on Weight Watchers and I stuck to it pretty diligently. I lost that 20 pounds after following the program for a few months but even though the scale said 145, I still looked in the mirror and felt 165. And, yet, despite insisting that the fat-free ice cream (which, as someone who has since made her own ice cream—how is that created??) tastes just as good as the regular,  religiously checking the calorie count on all the breads at the supermarket and weighing that against the size and density of the slices, going to bed hungry and looking forward exclusively to eating in the morning, I was done.

Policing one’s weight is hard work. I didn’t want to do it anymore. But I had been raised to be a hard worker, to not quit just because I haven’t succeeded, and to excel at all the things I do. So a few months later, I tried again, with some other plan. And then another. And another. They really all blurred together over the next six years or so. But in trying and failing to lose weight, I gained it. And kept gaining. Sometimes, just deciding to count calories again would be enough and I wouldn’t even lose anything, just start to slowly gain. I would constantly berate myself with the pinpoint-accurate, harsh criticism that only I can inflict on myself. Too bad fat shaming doesn’t actually motivate weight loss and actually predicts weight gain instead, ‘cause that’s what happened.

It took a long time to realize that my sizeism was hurting me. (How interesting—there is a red squiggly line under this word. “Did you mean ‘sexism’?” Microsoft Word asks. No. Then again…) It took even longer to realize that the reason I had trouble (strike that, have trouble) letting go of my sizeism is because that would mean that I would have to reject that idea that if I were just less lazy and weak-willed, I could be better. To accept the idea that I’d been going about it all wrong for five freaking years. But I had been.

Dieting does not work. Not even if you don’t call it a diet. Not even if you are just “trying to eat healthier” or “just eating whole foods” or “counting calories.” It is actually, as that last link explains and my body can tell you firsthand, a predictor of future weight gain. Because, of course, those things do work! For a while. And then they don’t anymore and you end up with more health problems than you would have if you had just stayed kinda fat, which is, in fact, not a health problem.

As you can probably tell, this is something I have spent a lot of time and feelings on. About a year ago, I was seriously freaking out. I weighed more than I ever had, I was feeling like crap about myself, and whenever I even thought about dieting, my body started freaking out from deprivation anxiety and I couldn’t last a week. The definition of insanity is when a person tries the same thing again and again and blahblahblah… I’m still fat. That’s when I went crazy with the online research. That’s when I finally admitted I had a huge body image problem and a terrible relationship with food. That’s when I went to see a body image counselor.

The New

Here is what I do now: I practice intuitive eating. I do not restrict what I can eat—I’ll eat whatever I damn well please, since restricting it is what screwed me up in the first place. But I do pay attention to my fullness. I do consider how my body will feel—not look, feel—after eating whatever I’m considering. And I do work to take care of my stress, unhappiness, loneliness, and whatever-other-feelings with methods that are not soothing them with tasty food. My love of cooking has been both a help and a hindrance to this. I cook what I want, just like I eat what I want, but I still try to consult with my digestive tract to figure out what is going to make me the happiest. I try—and this is always a battle—to truly and honestly consider my health, vitamins, nutrients, and essential food groups, etc. over my weight when making dinner. This is the hardest thing I still struggle with.

As for exercise, I similarly exercise where and when and how I want. I try to refuse exercise that I feel like I “should” do and only do what I want to do. Instead of daily runs and elliptical work, I get to do an activity that I actually really enjoy doing, instead of just appreciating it as a way to burn calories. I regularly practice yoga, bike to work, dance in tap classes, and play Quidditch. Doing exercise because I like it while I’m doing it instead of just feeling self-congratulatory afterwards gives me the opportunity to do it without the guilt and self-pressure to exercise as a means of eating more. I can’t tell you how many times I’ve gone for a run (a thing I despise) instead of riding my bike because it was a faster calorie burn and I was having people over for dinner later. This is a recipe for a terrible relationship with both exercise and food.

Finally, a part of what I do that you won’t find in any size policing plan: managing my psyche. Real talk: I’d love to lose some of the weight I’ve gained from my past dieting experiences. It would be awesome. But to avoid dieting again—a constant temptation despite my past experiences—I work hard to make sure I feel happy and beautiful how I am. As a big Pinterest fan, I noticed I felt lousy every time I went on—because all the fashion boards I follow have only skinny white women. I immediately found five “fat fashion” boards to follow. Seeing these beautiful women of all shapes and sizes and colors makes me feel like I can be beautiful too. We see obese people in the world a lot, nearly always portrayed as lazy, stupid, face-stuffers. It is no wonder that nearly everyone is sizeist, even fat and obese people! Seeing them as beautiful and sexy everyday does wonders.

Clothes shopping is another battle against feeling good, but I do it because I like fashion and want to get dressed every morning feeling like I look stylish and fun. For a long time, I kept thinspiration clothes in my closet, hoping, knowing that I would fit into them someday. What a great way to feel like shit every morning! I have since gotten rid of them and replaced them with things that look good on me now.

Keeping up with fat acceptance and fat positivity bloggers has been awesome. This is more deprogramming of my sizeism and it makes me a better human to both others and myself. Isabel Foxen Duke is sassy and funny and sends weekly e-mails reminding me to continue the awesomeness. Others: Dances with Fat, Nude Muse, and Fat Nutritionist.

The Future

To even suggest, let alone say outright, that I am all fantastic and super happy all the time in my fat body and always make the best choices would be ridiculous. I’m still learning. But I do:

  • Refuse to bully myself or let others bully me around food and exercise choices
  • Actively work to love myself and how I look
  • Allow myself to thoughtfully eat whatever the hell I want to and exercise however and whenever the hell I want to
  • Seek out others who will support my positivity

Let me tell you: these things make a huge difference. It’s a lot of work to love yourself, especially if that self is not deemed “loveable” by society. But it is most definitely worth the effort.

Photo by Michelle White

Photo by Michelle White

Saucepan Recipes That Are Easier Than You Think

Cooking, for whatever reason, can be intimidating. Maybe it is the fire and knives? Maybe it is the possibility of poisoning yourself or your loved ones? Or maybe it’s just because being a chef seems like a glamorous career for geniuses. The thing is, though, it’s not as hard as it seems. Like any other skill, it just takes some learned skills, practice, and the willingness to make a few mistakes.

I consider myself a chef, though I am not “in the industry,” which was my response when a waiter at an upscale brunch place asked me where I worked after seeing my culinary-inspired tattoo. And, you know what? That’s okay! People are quick with an apologetic, “Oh, I’m a terrible cook!” when it’s time for the staff meeting potluck. Instead, I challenge you to appreciate the effort you put in to feeding yourself! Let me start you off with three intimidating foods that are easier than they sound, and all of which can be cooked in a saucepan. Which is a pot, by the way. A small pot, that in restaurants might be used for sauces, but in many 20somethings’ kitchens is mostly used for 1-2 servings of Annie’s mac and cheese.

1. Boiled Egg

Why Make It?

Have you ever sliced a hard-boiled egg with fresh ground pepper for a mid-morning snack? Piped some tasty egg yolk and mayo mixture into delicious deviled eggs? Slurped a warm soft-boiled beauty with your miso-filled ramen bowl? They are well worth the effort.  Though this first dish might be like skating through easy-town for some readers, I do give some tips and tricks (one I just learned last week!) to make things easier, so check it out.

The Technique

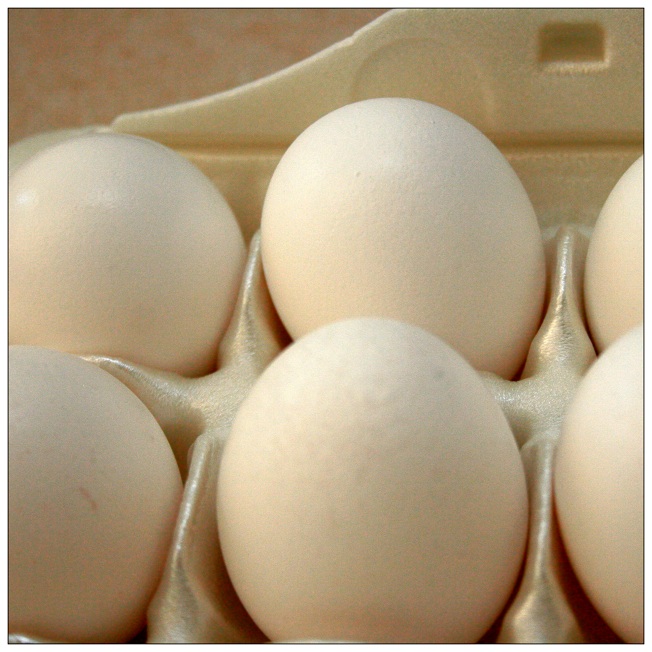
You will need a saucepan, a medium sized bowl, and eggs for this.

Place the eggs in your saucepan and fill it with enough water to cover the eggs about an inch. Don’t go running for a ruler; I usually just approximate with the first joint of my index finger.

Cover the saucepan and bring it to a boil. It is important to boil the water with the eggs already inside because 1) the cook time accounts for the cooking they’ll do as the water boils and 2) if you drop them into already boiling water, they will crack and not be beautiful and perfect.

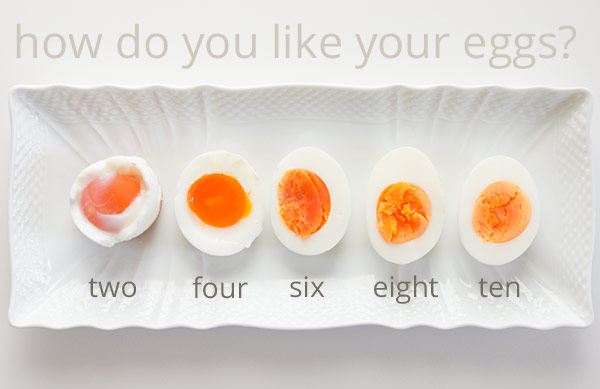
When the water is boiling, turn off the heat and move the saucepan to a cool burner, leaving the lid on to keep the heat in. Set the timer for your desired egg done-ness using the following useful chart from No Recipes (this site has an extensive egg boiling article—definitely worth a read!):

Saucepan Recipes That Are Easier Than You Think

Photo via No Recipes

2 minutes – The white isn’t fully set, and the yolk is totally raw

4 minutes – The white is fully set, but the yolk is thick and runny

6 minutes – The white is fully set, and the yolk is mostly set but still a little runny in the middle

8 minutes – The white is fully set, and the yolk is set but tender

10 minutes – The white is fully set, and the yolk is fully set

As you wait, prepare your ice bath: fill the medium-sized bowl with cold water and ice cubes. I usually leave it in the sink so I can do a quick dump. I hold the lid partially on to keep the eggs in the saucepan while I dump out the water, then I move the lid out of the way to dump the eggs right into their ice bath. This is because I am lazy about dish-washing; a colander would suit just fine.

After a minute or two in the ice bath, they will be cool enough to touch. I pick them up, bang them on all sides with the back of a spoon to make cracks all over the shell, and put them back in the water. If I want one right away, I might pull it out and peel it then and there, but ideally they should sit for a bit so the water can get under the shell and loosen it to make peeling easier. And you’re done!

Tips and Tricks

By far the biggest issue for egg boiling is the peeling. If you’ve ever found yourself attempting to peel and egg and instead removing chunks of tasty white (that’s food in there!), you know what I mean. This is especially annoying if you want to serve these to people and want them to look smooth and flawless.

My mom always told me to just use older eggs (as in, near their expiration date). This does work for science reasons that I don’t understand just yet. But if you can’t wait that long (and who can?), there is another trick. Before cooking your egg, take something with a small but rounded edge (I used the butt of my rolling pin handle). Take your raw egg in one hand and hold the rolling pin steady with the other. Whisper a short prayer to your deity of choice, and then tap the wide butt end of the raw egg gently against the tip of the rolling pin handle. You want to hear a tiny crack that breaks a bit of the shell but not the membrane of the egg. I was sure this would end in a mess and tears, but it totally worked and made peeling at the end a lot easier.

2. Jam

Why Make It?

When most people picture jam-making, they picture a kitchen full of Laura Ingalls Wilders, out in the middle of nowhere, all wearing kerchiefs over their hair and wiping sweat from their brows with their forearms as they use both hands to stir an enormous, thick vat of goo that will last the winter. But that is not at all an accurate depiction of the time and effort involved! Jam is actually fairly quick and easy to make, especially if you are only making a couple jars and do not plan on proofing (sealing the lids so they can sit out at room temperature for ages). And with the delightful ability to mix flavors to your own personal preference and look like a gourmet BAMF, there is no reason not to.

The Technique

First, supplies: To make jam, you’ll need some sterile* mason or Ball jars (with the flat lids and twist rings), fruit, sugar, lemon juice, and pectin (available at most larger grocery stores, in the baking aisle, by the Jello). Choose the No Sugar Needed Pectin—it works the best even if you do use sugar (which you will, I imagine).

You’ll also want a pot and probably a funnel, to ease more jam into the jar.

* To sterilize them, boil the jars, lids, and rings in a big pot before you put the finished jam inside. This kills all bacteria. Washing the in dishwasher will do the trick too.

Now, recipes: Different jam recipes have different ratios, so I’ll start with a specific favorite of mine: strawberry lavender. For lots of recipes, proofing times, and just generally great advice, check out PickYourOwn.org, a website with terrible design but a lot of knowledge. It walked me through my first canning experience.

Strawberry Lavender Jam

Buy/pick some strawberries! You’ll need about twice as many cups of whole strawberries as you want cups of complete jam. So if you want 6 cups of jam, you’ll need 12 cups of whole berries.

Wash them, hull them (cut the leaves and white part out with a small knife), and cut them into pieces. The smaller you cut them, the faster they will break down in the jam.

Prepare your sugar by blending 4 cups of sugar in a food processor with 4 tablespoons of edible lavender buds (available at specialty spice stores). I do this one cup at a time ‘cause my food processor is small. You could also probably get away with chopping up the lavender very finely as well.

In your saucepan, mix ¼ cup of your lavender sugar with 1 ½ packages of pectin (SureJell or another brand, doesn’t matter). Feel free to play with this amount as you cook. As you make more jam, you’ll find the perfect ratio for you.

Cook this mixture over medium high heat for about 5-10 minutes, until the mixture is at a full boil (remains boiling even when you stir).

Add the rest of the sugar and allow it to come to a boil again. Don’t raise the heat too high, though, as that creates more foam. Keep at a full boil for 1 minute. Speaking of foam, feel free to scoop that off and toss it in the sink. It’s just bits of jam with too much air.

Remove from heat and test for thickness. Do this by keeping a teaspoon in a glass of cold water. When you take the saucepan off the heat, dip the spoon to get a bit of jam and let it cool to room temperature. If it looks thick enough, hooray! If not, add a little more pectin and cook a bit longer.

When the jam is cooked to perfection, use a funnel to move it into the jars. If you plan to use and eat or give away the jars to people who will use or eat them right away, you don’t need to proof them. If you want to save them, then…

Proofing!

If you want to make more than a jar or two, you’ll likely want to proof (or seal) your jars to get rid of all bacteria and allow them to sit safely on the shelf without going bad.

To proof them, fill with jam, screw on the lid and ring, and place them into a big pot of boiling water. There should be a few inches of water over the top of the lid. Depending on the jam, they will need to proof for different amounts of time—check online. When the time’s up, remove them from the pot and let them sit out and cool overnight at least. Within 30 minutes, you should hear a “pop” to tell you the can has properly sealed—if not, keep it in the fridge and eat it soon. Aside from a big pot, you’ll probably want something to lift them out of the boiling water (I used big tongs once, but then I went to Target and got an actual jar lifter and it was fantastic).

Tricks and Tips

Jam-making includes a lot of equipment and, for that reason, it’s super helpful to have everything lined up and ready to go. Make sure you have your sugar and pectin measured out and lots of oven mitts and hot-thing-holders on hand. Your jars, lids, and twist rings should be clean and ready, too.

You also want to be aware of temperature. Pouring hot jam into a cold jar could cause the glass to break, so you will want to sterilize your jars while prepping your jam. I usually do this by allowing the jars to boil away for about 10 minutes in a big pot on the stove while I’m cutting up the fruit. If I’m just making a few jars worth and not planning on proofing, I wash the jars in hot water to warm up the glass while the jam thickens.

Depending on the fruit you are using, your jam will be different consistencies at different temperatures. I found, for example, that blackberries thicken up nicely in the saucepan and stay at a similar consistency in the fridge. Strawberries and prickly pears (the fruit of cacti), however, don’t seem to thicken much in the saucepan, causing you to bite your nails and continue adding pectin, which all comes together strongly when the jar is cooled, making your jam a bit stiffer than desirable. So don’t worry if it doesn’t thicken like you think it should—it could just be the type of fruit. Do more research online.

Finally, note that pectin will lose its magical thickening abilities if you up the recipe too much, so work in small batches. The recipe I provide above is about as much as you want to do at one time in one pot. But there is no reason not to have two pots going at once!

3. Pastry Cream

Why Make It?

Pastry cream, though super delicious, probably seems like something that Julia Child or Martha Stewart would make, not you. What do you do with it anyway? Well, if you’re like me, you use it to impress your friends and neighbors! Obviously pastry cream is integral for tasty pastry creation, if you’re working on fruit tarts or Danishes or donuts. But it is also an integral ingredient in a very simple, very fun, very beautiful dish know as a trifle. This dish is meant to be made ahead and then refrigerated, making it easy to bring to potlucks and get-togethers, impressive and convenient to serve at a dinner party, and fun to assemble and eat with groups for a bridal or baby shower or a birthday party.

Pastry Cream Recipe

You’ll need:

  • 2 cups of milk/cream (I usually combine 1 cup of whipping cream and 1 cup of milk; half and half works too)
  • ½ cup sugar
  • Pinch of salt
  • 5 large egg yolks (save the whites – you can make an omelet later!)
  • 3 tablespoons cornstarch (flour is fine too)
  • 4 tablespoons of butter (1/2 a stick)
  • 1½ teaspoons vanilla extract


Before you start cooking, prepare an ice bath to quickly cool your pastry cream. Get two large bowls, one slightly (but not much) bigger than the other. Fill the bigger one with cold water and ice and float the small inside the larger. Finally top it off with a mesh strainer balanced on the top. Put this ice bath to the side for the end of your recipe.

Heat the cream/milk in a saucepan until simmering. Watch out! Milk comes to an overflowing boil within seconds of starting to simmer. Keep an eye on it.

Whisk the sugar, pinch of salt, and 5 egg yolks together in a large bowl. You want to whisk for a good long time, until the mixture turns more of a paler yellow than the brighter yellow it started out as. Add in the cornstarch/flour.

If the milk has started to simmer by now, please, feel free to remove if from the burner and turn off the stove.

Now it’s time to combine the two mixtures. Be careful—doing this too fast will cook the eggs. You are going to do a process called tempering, in which you add a little bit of the hot milk/cream to the egg, sugar, flour mix to slowly warm it up. Drizzle about a tablespoon of hot liquid into your bowl and immediately whisk it to spread the heat evenly and avoid cooking one small spot. Repeat this a few times—you should be whisking for as much of this time as possible. I usually add about 1/3 of my cream this way.

When the mixture seems to be fairly warm, use a spatula to scrape the mixture back into the saucepan with the rest of the hot milk/cream. Return it to medium heat. Using a whisk or silicon spatula or wooden spoon, stir constantly while the mixture cooks. You are heating up the cornstarch/flour so it thickens the mixture, plus kills any bacteria in your eggs.

Continue whisking, even though you are super bored, for about 5 minutes. It could take longer or shorter, depending on the temperature of your ingredients. If you let it sit, you will scorch the bottom of the pastry cream. You’ll know it’s time when you see these cool-looking, thick bubbles of pastry cream in the saucepan. When you see that, continue for 30 seconds to a minute longer, then remove saucepan from the burner.

Off the stove, add in your butter and vanilla, and stir to combine.

Now, turn to your ice bath. Use a spatula to scrape the custard into mesh strainer, to get rid of any lumpy bits. It won’t fall through on its own, so you’ll need to hold the strainer and use the spatula to push it through.

Allow it to sit 10-15 minutes and cool a bit, then take plastic wrap and cover the bowl. Make sure the plastic wrap comes down inside the bowl, pressing against the top layer of pastry cream and coming up the inside sides of the bowl. Sounds weird, but this keeps the pastry cream from developing a skin. Allow it to set for at least 3 hours in the refrigerator.

Tips and Tricks

Believe it or not, this is one of the easiest fancy things to make. As long as you don’t add your hot milk to your cold eggs too fast or cook the final product without stirring, your pastry cream will be delicious.

To play with other flavors, consider soaking herbs in the milk/cream while it heats. Mint is delicious, but basil and even rosemary create a really unique and tasty final product. Make sure you remove the leaves before combine the milk with the eggs and sugar.

You can also add chocolate chips at the end with the butter and vanilla for a tasty chocolate-y flavor!

And that’s it! Hopefully you will be breaking out your saucepan for more exciting things this weekend!

We Don’t Know Shit About Food

“[T]he thinkings and unthinkings and giving and taking of the diet industry and numerous health experts and peer-reviewed journals and your mom and my mom and that guy over there and your yoga instructor have turned into a veritable cluster fuck of information that all circles around food, but never actually settles down to just talk about it. It’s quickly leading me to believe that we literally (in the actual sense of the word) don’t know shit about food.” – Nikki Steele, “We Don’t Know Sh** About Food, Do We?” on Food Riot

Maybe it’s just me, but I’m about to give up on food and just consume Soylent for the foreseeable rest-of-my-life.  Keeping up on “this is bad for you” and “that is bad for you” is like standing with one foot each on a Volvo semi-truck, but without the balance and flexibility of Jean-Claude Van Damme’s stunt double.  No matter what, you’re going to fail, and you have no idea how horrible the consequences might be. For all I know, they’ll come back in a year and tell me Soylent is bad for me too (but at least this version isn’t made of people).

I hear I’m supposed to drink water all day—but plastic is bad for me (and even worse for the environment).  I should make my own meals instead of buying so much fast food—but don’t even think of microwaving that in plastic Tupperware.  Don’t you know you’re supposed slowly heat everything up on the stove, dirtying a pan, a spatula, a pair of tongs, a plate, and a fork and knife?  But, by the way, your city is in a drought, so don’t overuse water when you clean all those dishes.

And that’s just how you eat.  Don’t even get your mother, brother, cousin, mailperson, dog, registered dietician started on what you eat.  Paleo and keto are all the rage (I can’t even tell how they’re supposedly different).  It’s like Atkins 2.0—I think.  For a carboholic like me, it’s hell: I tried giving carbs up for Lent a couple years ago, and it turned me into an angry ball of stress.  My friends highly encouraged me to quit a week early in order to preserve our relationships.

The only thing that’s obvious is that culture and society have fucked us up.  We’ve been encouraged at a young age to suppress our natural full indicator and “clean your plate, because children in Africa are starving.”  Our own food industry is more interested in a profit than in healthy consumers, so Lord Monsanto calls all the shots.  I change my mind on GMO foods every other week.  And, as a 20-something female, I’m pretty sure it’s physically impossible for me to achieve the idealized American femme fatale physique without seriously impacting the happiness I find in the bottom of a bowl of ice cream.

How do you deal with the information overload?  Do you have a resource with whom you entrust your health and happiness? Please enlighten me!

Meggyn Watkins is the Managing Editor of the UNDERenlightened. Fiction reader, local art prowler, concert-goer, BBC watcher, world traveler, and San Jose Sharks lover! @meggawat

Photo by Michelle White

Photo by Michelle White

Fridgeology 101

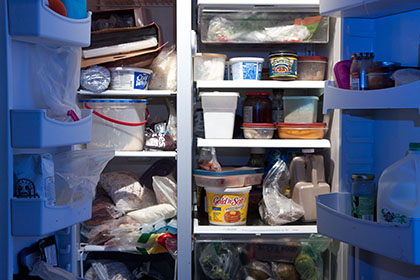
Last month, I moved into my own studio apartment. Contrary to popular belief, the best part about living alone isn’t the ability to walk around pantsless or let dirty dishes pile up in the sink for a week. Actually, it’s that—for the first time in my life—I indulge in the privacy of my own fridge and freezer. Having spent significant time over the past six years sharing fridge space with roommates (some friends, some strangers), employers, coworkers, and other people who have flickered in and out of their lives—and therefore mine—I have come to learn that a glimpse into other people’s refrigerators reveals the most essential, and sometimes most intimate, facets of their lives.

We’re probably all familiar with the proverbial scene in a rom-com in which a girl snoops through her love interest’s medicine cabinet to uncover the skeletons in his closet. If I were getting ready to launch into a serious relationship, though, I’d look through his fridge and freezer to find out what he’s hiding.

Freezer full of chicken soup in Tupperware? His mom still delivers him prepared meals every week.

Dannon Light and Fit? There’s definitely another woman in the picture.

Based on an unofficial ethnographic study, conducted over a six-year period, across several neighborhoods across New York City, what this reporter has come to deem the “fridge-forage” has proven to be a surprisingly accurate litmus test for the habits and personalities of the test subjects. Names have been removed from the vignettes that follow in order to protect the identities of the people who failed their diet plans, served their children expired yogurt, and drank their roommates’ milk.

Chapter 1: City Parents

My first case study comes from when I was a freshman in college, babysitting for a couple with a newborn baby on the Upper East Side, and naïve enough to fall for the “help yourself to anything in the fridge” trap. As soon as the parents headed out, and the baby was fast asleep, I excitedly tiptoed into the kitchen, thinking I’d whip up a meal with the groceries I imagined working adults in New York kept on hand. Instead of the freshly baked hearth breads, heirloom vegetables, and mélange of dips I’d envisioned, I found moldy cheese (and not the good kind of mold), a jar of mustard three years past the expiration date, and a half-finished bottle of white wine. Conclusion: Despite being proud parents, this couple, a little older than the average first-time parents, were not ready to give up certain aspects of their New York routines from life before parenthood. Living in the one-bedroom apartment he’d owned since bachelorhood, and subsisting on a steady diet of takeout and leftovers were vestiges of their former life stage, anachronistic next to the baby food on the bottom shelf of the wine rack and Lipitor next to the takeout menus. “Transitioning Your Fridge: An Emotional Journey” is, apparently, lacking on the millions of “How to Prepare for Life with a Baby” blogs.

A second family, which I’ve tracked over the entire six-year period, lives in a large apartment on the Upper West Side with three kids under the age of five, and they keep Kosher, a set of Jewish dietary laws that I also observe. When I first met the family, I imagined their pantry would resemble the one in my house growing up. The first Saturday night I babysat for this family, the kids were finishing up their eggs, ketchup, grapes, and mashed peas, and the parents told me to “seriously help yourself to anything.” As had become my babysitting routine, when the kids headed to bed, I headed into the kitchen with an empty stomach and a head full of ideas about the bounty of treats I might find in a large household. In this case, sure that I’d find something that people over the age of 10 would find edible, and expecting lots of snacks, I peered into the fridge, only to land upon a grocery aisle’s worth of Gogurt, string cheese, bananas, ketchup, whole milk, Grape-Nuts, and Slim Fast shakes. There was one apple in the drawer. Conclusion: Busy parents who order Fresh Direct for Sunday delivery and have kids with nut and sesame allergies, do not have peanut butter and hummus on standby, end up eating like their kids most of the week, and have babysitters so they can eat out on Saturday nights. As they’ve moved past the pregnancy stage and into the world of Soul Cycling moms, these parents have exhibited a nod to health-conscious eating habits through the proverbial apple a day and cottage cheese. (Note that I have since opted to bring my own dinner for this babysitting gig.)

Chapter 2: The Roommate Experience

Observing life in someone else’s home is enlightening, but there may be no greater human experiment than the roommate experience in New York City, and from an ethnographic research perspective, living with the study subjects is the best way to gather evidence. Essentially, New York living boils down to people who consider each other to be friends—in the traditional sense, or, more likely, in the Facebook way—sharing the amount of space that people in the rest of the country call a closet. You quickly learn quirks and habits that you wish you didn’t know about the people you live with, and the fridge partition encapsulates that dynamic.

The apartment I shared with five roommates—not including my roommates’ boyfriends—made our fridge a Petri dish ripe with samples for my study. Each sixth of the fridge was an accurate reflection of the person who occupied the space. One roommate’s parents would drive into the city from Long Island every other Sunday with an SUV trunk full of Shop Rite brand yogurt. Conclusion: Parents from Long Island, having conducted a cost-benefit analysis of delivering groceries into the City on heavy traffic days, found that this arduous process relieves their children of the task of grocery shopping, allowing the students more time to study, and, as a result, earn better grades and ultimately higher-paying jobs.

A second roommate kept little in her section of the fridge. Instead, she would purchase a frozen burrito, microwavable Indian dish, or instant pad Thai every night, based on what she was craving. Conclusion: To become the highest achiever in the academic and extracurricular spheres requires allocating fewer brain cells to more mundane, organizational aspects of life, such as meal-planning and nutrition facts.

I would be remiss not to share a few of the high notes from my most recent post-college roommate situation, which jarringly brought to light the idiosyncrasies and extremes of each of our personalities, and ultimately the reasons I needed to find a room of my own. The fridge, never a clean three-way split, was constantly littered with remains of leafy greens, drips of coconut oil, and stains from dietary supplements, based on whichever made-for-TV diet one roommate was swearing by that week. She juiced everything in her NutriBullet and then separated the pulpy mush into small containers, which would topple out of the freezer every time I opened it. Curiously enough, all of her diets seemed to involve nightly consumption of an entire pint of chocolate ice cream, the traces of which would appear stuck to the counter every morning. Conclusion: All evidence pointed to an adult who was haphazard, scatterbrained, and searching for something life-changing—maybe weight loss—as she was single, approaching forty, and living with two twenty-something roommates who had to remind her to pay her bills on time.

Chapter 3: The Real World

Between roommates and siblings, friends and subletters, I entered the working world thinking that as green as I was in professional experience, I was seasoned at facing the interpersonal challenges of office life. At a company where the majority of my coworkers are under the age of thirty and don’t have children, I quickly appreciated the inspiration for episodes of The Office. My coworkers’ profiles were similar to mine in age, educational background, and social values. Within my first week of work, though, I was shocked by my observations of the way other people ate, and by what they thought of me because of my food choices. The single fridge, shared amongst 100 employees, was a steaming stank of half-eaten McDonald’s burgers, forgotten fountain sodas, moldy cheese from last Christmas’s potluck, expired Greek yogurts, half-finished juice cleanses, soggy tater tots, frozen mini tacos, a forgotten Tupperware, and beer.  Conclusion: We are the typecast weight-watching, microwave “cooking,” starving by choice and by default, young urban professionals of NYC.

Even a surface-level fridgeology of my current, personal refrigerator would enable you to draw accurate conclusions about the person who inhabits this apartment. My fridge is neatly sectioned off by product type—produce, fruit, dairy, grains, and, for the most part, condiments—each of which is then ordered by expiration date. Vegetables are peeled, sliced, and placed in Tupperware on Sunday nights. Lunch is prepared before bed in Scandinavian BPA-free containers, placed on the shelf that I can reach with most efficiency on my way out the door each morning, and promptly shoved into the fridge upon arriving at work in order to secure prime real estate before the sticky leftover-bringers roll into the office. Conclusion: The first sweep of my fridge would reveal an Upper West Sider captivated by kale, quinoa, and Greek yogurt, somewhere on the spectrum of genuine and trendy health-conscious vegetarianism. A more detail-oriented look speaks to the measured and calculated way I approach decisions, which extends to how I choose what to eat. You’d see the struggle with balancing being on a budget and indulging in the Whole Foods groceries that are equally as expensive as they are nutritious , between regretting that I didn’t settle for takeout and feeling proud when I was determined to cook beans from scratch at 11 pm on a work night, and, ultimately, coming to terms with calling frozen yogurt and granola “dinner” two night in a row.

Reviewing this analysis, it’s not surprising that our refrigerators are gateways to our most genuine sense of self. It’s the fridge that knows first when we’re grazing like we’ve just gone through a break up, munching like we feel fat, snacking like we feel poor, or binging on our “skinny days.” We eat our feelings in the privacy of our own fridges, doors flung open, digging directly into that pint of ice cream, jar of salsa, or lame bag of salad we eat because we should. I don’t pretend to think my library-like fridge conveys more of a sense of “normal” than my coworker’s unassuming obsession with McDonald’s or those parents’ half-hearted ingestion of Slim Fast. What I have learned from this study is that, as people come in and out of your life, and jobs, relationships, and living situations are precarious, it’s important to have a strong sense of self, grounded in the way you keep your fridge. And, it’s probably best to keep it clean—after all, you never know who may be peeking inside.

Photo by Andy Sutterfield

Photo by Andy Sutterfield

Let’s Ask A Nutritionist While Making Daikon Cake

Registered Dietitian Emily Bostrom sat down again with her cousin, Alyssa Kurtzman, to talk nutrition while they tried their hand at making Chinese daikon cakes.

Alyssa: Just to give a little background on this particular project, we used to live near Chinatown, specifically near a Chinese deli that sold something called daikon cakes. They’re square, white, starchy, and kind of have the consistency of a gummy bear, if a gummy bear were savory and had chunks of Chinese sausage in it. We also discovered them to be the Best. Hangover. Remedy. Ever.

Recently, we found this recipe in The Hairpin and decided to try it (and document it) while I ask Emily some of the many food-related questions that pop into my head on a daily basis. All ingredients were purchased at an Asian supermarket in Manhattan’s Chinatown. Since it happens to be Oscar night, we’re also judge-watching the red carpet show.

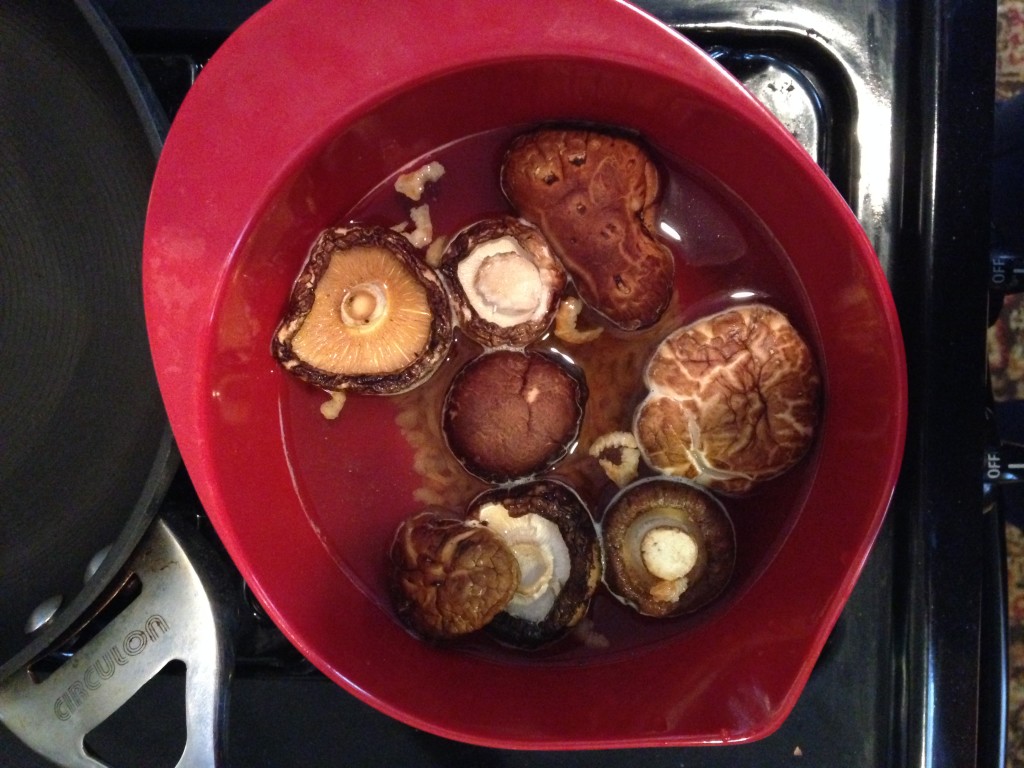
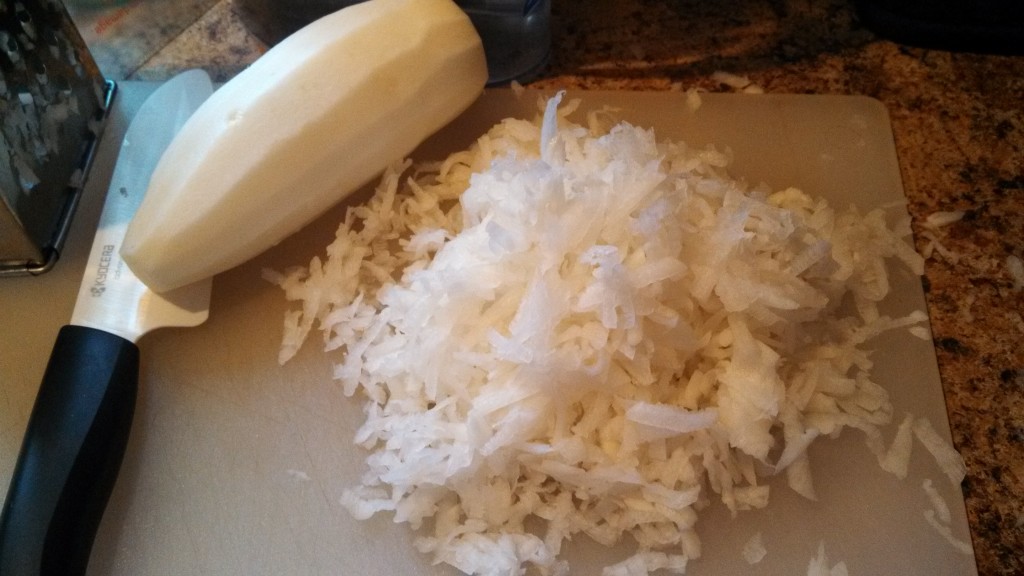
To start, Emily is grating the daikon radish, while Alyssa soaks the mushrooms with some teeny dried shrimp before chopping ensues.

Soaking Mushrooms

Soaking Mushrooms

Emily also smartly brought some chewy ginger candy, which is gluing our mouths shut and thus preventing us from eating all this deliciously peppery daikon raw.

We throw the grated daikon into a pot of boiling water to let it cook for about 15 minutes. While that happens, we chop up some Chinese sausages and throw them in a hot skillet with about a tablespoon of oil. After a few minutes, we pick out the big pieces and eat them because, yea. Then we toss in the soaked mushrooms and shrimp. Smells great so far.

Grated Daikon

Grated Daikon

Time for Question 1:

QUESTION 1: WTF is so wrong about carbs, anyway?

Emily: Oh, carbohydrates. The big scary monster in the pantry. We love you carbs!!! But we hate you! It’s all very complicated. Carbohydrate intake is a super polarizing topic in the nutrition world, so right off the bat I will say that I am a relatively “moderate, middle of the road” Registered Dietitian (RD) who relies heavily on evidence when making nutrition recommendations. I also recognize that depending on the client’s health history, all of this information could change. There are health conditions (they are pretty rare… if you had one you would know) which are best treated by an almost entirely carbohydrate free diet. However, for the general, healthy, active US population, I think carbohydrates are great in moderation (boring, I know). People tend to think carbohydrates are evil because a diet really rich in carbohydrates tends to (1) leave you feeling hungry an hour after a large meal, (2) make you feel sluggish after said meal, (3) prevent your body from utilizing any stored fat, and (4) sometimes storing more energy as fat, depending on your daily calorie intake. A serving size of cooked carbohydrates is only ½ cup. Compared to what we are used to eating, that is tiny. So, no need to avoid carbohydrates, but try to be cautious about how much you’re putting on your plate.

The best sources of carbohydrates in your diet are fruit, vegetables, dairy, and whole grains. Allowing as few “simple carbohydrates” as possible is really the best. This means pick brown rice instead of white, sweet potatoes over white, and try to lean toward whole wheat, grainy breads.

Alyssa: Which are way more delicious, anyway.

Once the mushrooms, shrimp, and sausage have cooked for a while, we add the cooked and drained (with liquid reserved) daikon, and mix the whole thing together before it cooks for about 10 minutes. Then, we dump it all into a mixing bowl, add a little of the reserved daikon-cooking water, throw in about a cup of rice flour (which looks so much like powdered sugar that Alyssa needs to keep it in a separate cabinet), and stir until it’s all kind of sticky.

Batter

Batter

Emily: This kind of looks like we’re making latkes! Like as if we’re making latkes with glue.

Alyssa: Mmmmmmm…?

Then, it’s steamy time.

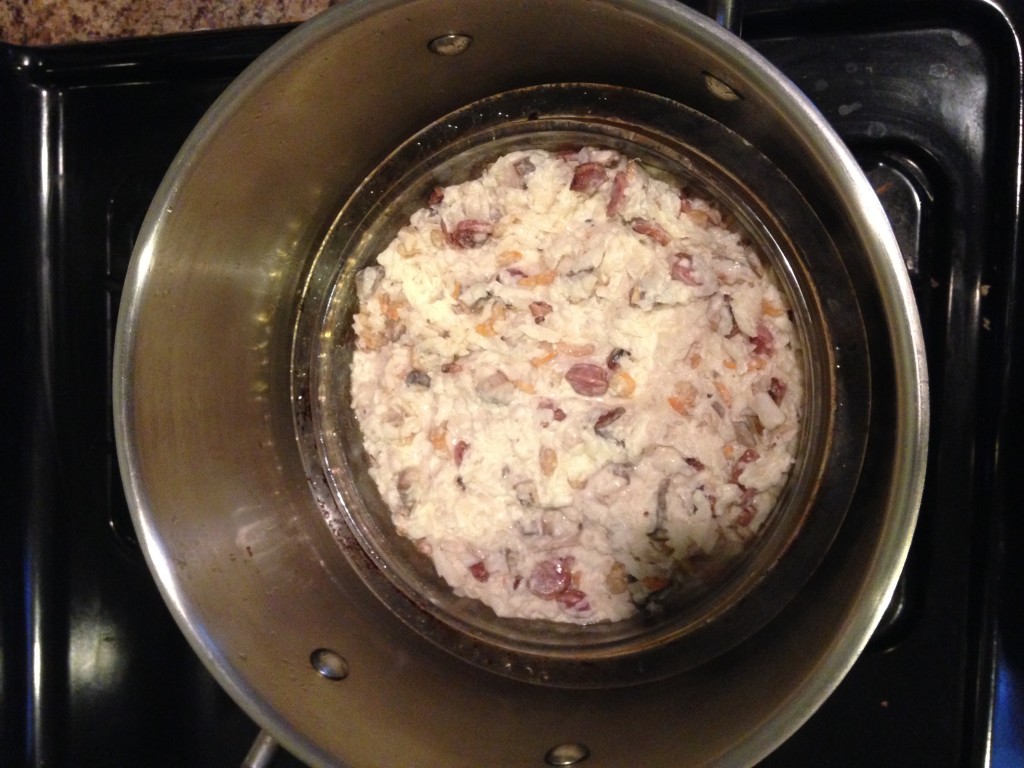
We pour this weird gelatinous mix into a glass dish, which we carefully lower into a “steamer” that we jerry-rigged using a stockpot and an overturned mug. Right now, it looks kind of like a pot filled with white vomit.


Cake Pre-Steaming

Cake Pre-Steaming

Now, it has to steam for an hour, most of which is spent talking about the following topic:

QUESTION 2: Should I be using coconut oil? It seems to be all the rage.

Emily: That’s a really good question. The answer is, we don’t really know yet. With the rise in popularity of the “Paleo Diet,” it sure is a hot item these days: it’s one of the few oils—along with olive and canola oil—that are allowed on that diet. Coconut oil is quite high in saturated fat, but also high in lauric acid, which is a medium chain tryglyceride (MCT), which is why people think it might be good for you. Studies have shown that coconut oil might have a beneficial effect on your healthy cholesterol, but these studies are very limited, and include both human and animal populations. MCT oil in general, has been shown to raise both your healthy cholesterol (HDL) and your unhealthy cholesterol (LDL) levels. Since the jury is still out on this, the general recommendation is to use coconut oil only in moderation, since it is still a source of saturated fat. Overall, you should stay away from partially hydrogenated coconut oil.

Refined coconut oil is good for cooking at high temperatures, since it has a high smoking temperature, but if using “virgin” coconut oil, it’s best for baking and medium heat sautéing.  I WILL say coconut oil makes a delightful hair mask. But don’t rub it into your roots. Trust me.

(Read here for more information)

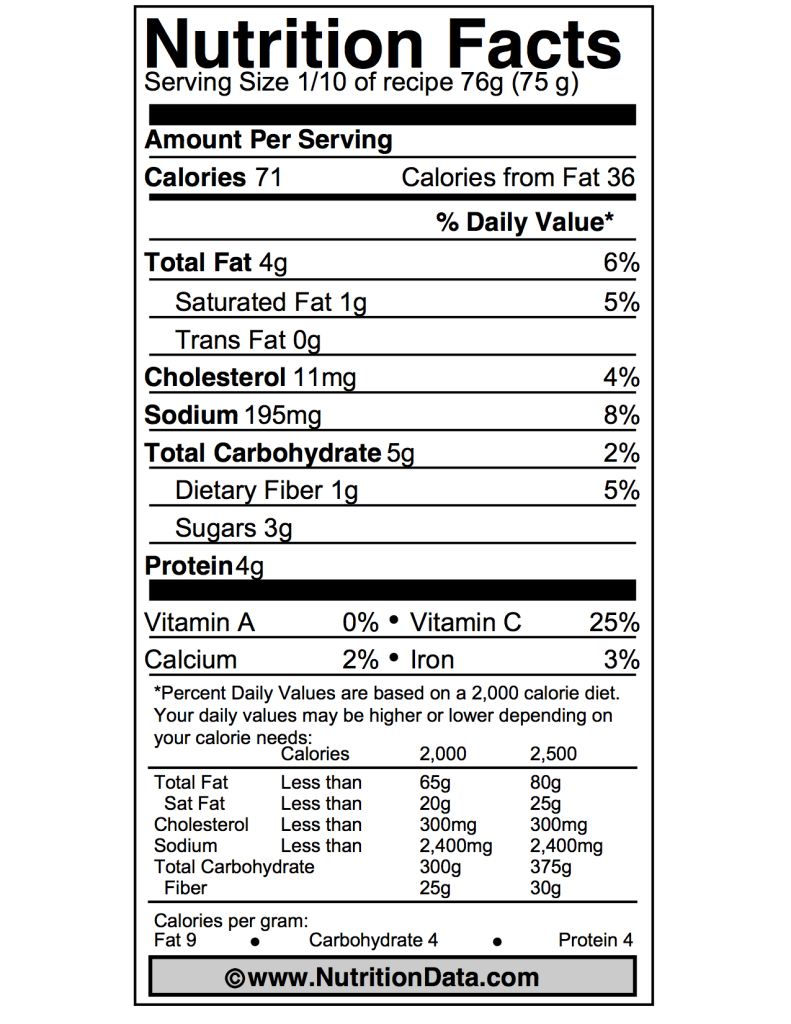
Next, we have some fun typing the ingredients into nutritiondata.self.com to figure out the nutritional content of a daikon cake.

(Emily: The label says it’s for 1/10 of the whole thing; it’s really more like 1/12.)

Daikon Cake Nutrition Facts

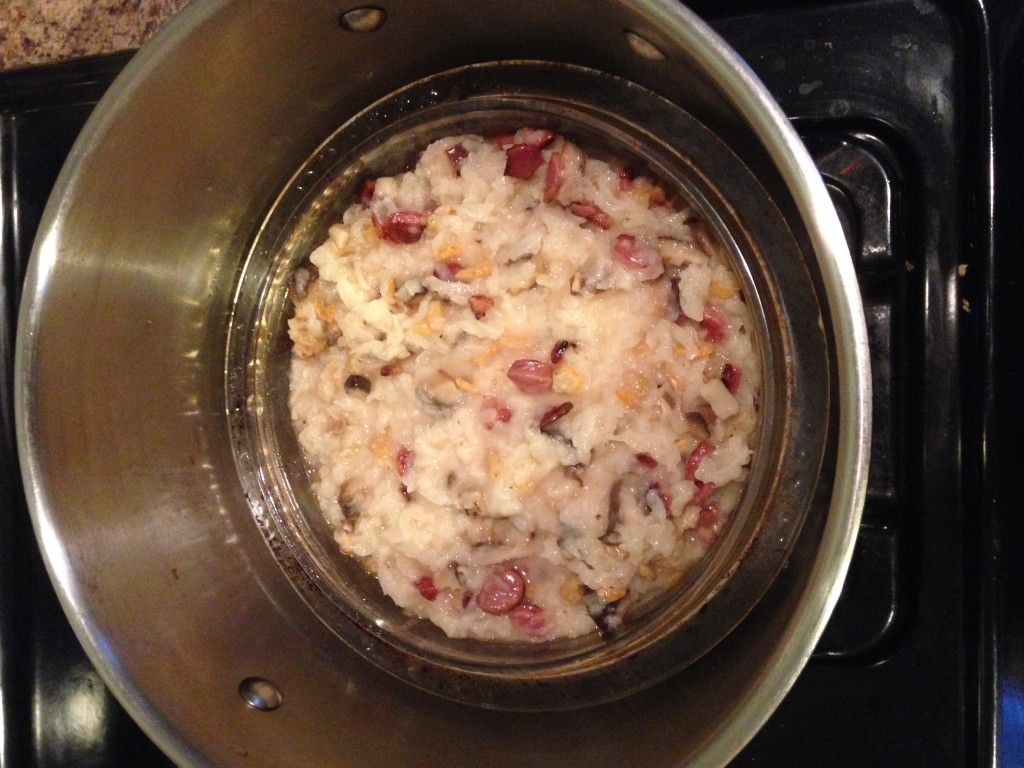
By this point, we’re running out of ginger chews and getting ready to taste this concoction, which after an hour looks like… solidified white vomit. Yum. Time for the big taste test….

Cake Post-Steaming

Cake Post-Steaming

And the consensus is: delicious! Shockingly close to the cakes we used to buy in Chinatown! We don’t bother to cut ours up into individual wedges, though, because—duh—we’re family. And although ours is much lumpier than the three-for-$1.50 ones we used to binge on after long nights of drinking, the consistency is almost the same. It’s as if the daikon and shrimp melted into the rice flour and water. And the chunks of mushroom and sausage are like little umami explosions. If we were Olympic judges, we would give it a 7.5 for taste and maybe a -5 for appearance.

So, we tuck into our successful little dish, with some rice vinegar for dipping, while Emily addresses one final question:

QUESTION 3: Last week, right before she danced with some vegetables, Michelle Obama apparently said some stuff about new food labels. What’s all the fuss about?

Emily: Oh, Mrs. First Lady, RD’s everywhere were singing your praises last week. Thank goodness for all the awareness she is raising for nutrition’s role in health and well being! I have one giant, fruit-and-veggie-driven girl crush on Michelle Obama. Also, on her arms. So good.

Alyssa: So sculpted.

Emily: She would be Oscar gown ready at any moment. Anywho, she announced that nutrition fact labels will be changing soon, for the first time in almost 20 years. This is big! And here are some of the major changes to be expected:

Serving sizes: Instead of a serving of, say, ice cream, being listed as 1/2 cup (has anyone in history ever eaten a measly 1/2 cup of ice cream?!), they have decided to make a “serving” on the container listed as a much more likely 1 cup. This way, instead of glancing at the label and seeing that the ice cream has only 150 calories per serving, you’ll see 300 and realize what you are actually going to eat. I approve!

No more calories from fat: The current food label was written in the fat-fearful 1990’s, which is why there is that strange, seemingly useless “calories from fat” label is right at the top. Now that we love (healthy sources of) fat, evidence is showing that we shouldn’t really care about “calories from fat” and should instead focus more on…

Added Sugars: Hallelujah! I am so excited to have this addition to our food label (I’m realizing as I write this that I’m likely more excited than most people). When counseling and educating clients, I am always speaking about the difference between “naturally occurring sugars” and “added sugars.” But, it’s still confusing when all of the sugars on the food label are under just one heading! Now, when you pick up that yogurt, you will see the “total sugars” listed as 21g, and “added sugars” as 13g. This will be so helpful for people looking to avoid too many added sugars, but who understand that the lactose in that yogurt is not what they’re trying to avoid. Things like 100% fruit juice will still have no added sugar listed, but things like fruit purees (applesauce, preserves, jelly) will tell you exactly how much of that sugar on the label will be from the super healthy fruit, and how much will be from sugar, agave, high fructose corn syrup, evaporated cane syrup, honey, etc. I must say, this is a good time to be a Dietitian.

About a third of the way through the daikon cake, we remember to take a photo.

Us With Finished Product

Us With Finished Product

Just in time to start watching the Oscar ceremony! Come on, guy from Captain Phillips!

Until next time…

Emily Bostrom, RD, is a Registered Dietitian with degrees from Rutgers University and the University of Medicine and Dentistry of New Jersey, who eats, cooks and thinks about food. You can also find her singing loudly in the car and at http://www.emilybostrom.com/

Alyssa Kurtzman is a Content Manager at @CLIPTAMATIC and works on the UE social media staff. Life mantra: It’s never too hot for soup. @KURTZMANIA


Negotiating My Peace Treaty With Food

This article deals with an account of learning to overcome an eating disorder and finding ways to enjoy food again. Its content may be triggering to some people.

I used to do this thing. Maybe you also used to do this thing. Maybe you still do.

I kept a diary of every bite of food that went into my mouth, the margins scrawled with discouraging messages to my future self. A Diet Dr. Pepper and an apple was considered a passable lunch (dinner, too). I taped down my bra so I’d look flatter and more “waif-like.” I avoided being photographed at all costs. And, above all, I abhorred a full meal—whatever, let’s be honest, I abhorred food in general. I was fucking miserable, but for some reason, I felt like I had no other choice.

All of this started when I was about twelve. Growing up, I never really had the whole “your body is becoming something beautiful” chat (though who knows if it would’ve made much of a difference). I felt like my body was turning into something unfamiliar, something grotesque and lumpy and disproportionate. I had daily panic attacks that went undetected by my parents for at least a year. They probably thought I was way too young to have any real issues—they were holding out until high school for that. But it made sense: I’d always been a bit of a control freak, and this was just another facet of my life that I was desperate to have control over—i.e. “No, body. Stop that. You are not in charge. I AM.” So I started starving myself. The whole thing was pretty cut and dry. I don’t think we need to go down the rabbit hole of “why” and “how” this kind of thing happens. The internet is already chock full of that: “Why do we allow our daughters suffer from poor self image? Is the media to blame? Are other women to blame?” Et cetera, et cetera, et cetera.

But this isn’t about that. This is about how I learned to love food again and how, 15 years later, I even began identifying as an amateur Foodie. This is the peace treaty I negotiated with food.

Hey, food. So as it turns out my body really, really needs you. Like, a lot. Like I will actually physically cease to be without you. So let’s start there…

Because I absolutely must eat food, because I do not have a choice in the matter despite how long I withhold it, I might as well not treat dinnertime like a trip to a renaissance-era torture chamber. I might as well eat stuff that doesn’t suck.

And by “stuff that doesn’t suck,” I don’t necessarily mean indulgence 24/7. I’m not talking about In-N-Out Burger or Girl Scout Cookies (although sometimes, yes, I absolutely am talking about those things). But in this particular instance, I’m talking about awesome, unique, complex flavors. Food that goes crunch! Food that melts in your mouth, spices that clear up that sinus infection in 5 seconds flat, or just the perfect amount of saltiness. I’m talking about the experience of eating.

Regardless of whether it was a carrot I consumed fridge-side on my way out the door or lasagna and red wine at my favorite Italian restaurant, I forced myself to enjoy fueling my body. I re-tooled my brain with enjoyment. Recently, while training my dog, I learned that this is what is referred to as “counter conditioning.” Give the dog a treat every time she sees a skateboard? Eventually she’ll stop howling at the skater kids.

Do I have off-days? Yeah, obviously. Anyone who tells you there’s such a thing as being 100% free of such a warped perspective is bullshitting you—I’ll probably never pound that coveted In-N-Out burger without having to silence those dumb, self-deprecating thoughts at least once. I have to remind myself, time and time again, that eating is wonderful and good for me and fun.

I think that’s one of the reasons I became such a Food-Network-Watching-Restaurant-Week-Enthusiast: it was a way to make food fun. Thank God we live in the age of Alton Brown and Gordon Ramsay and her holiness, GIADA. Learning how to cook is an awesome, totally viable hobby, and more importantly: eating is cool. Seeking out hidden culinary gems in my city and telling people about them is so exciting for me, like passing on a juicy rumor. The pleasurable experience of eating, as a whole, is what helps me keep it together. There’s so, so much more to it than forcing calories into a body that’s running on fumes. This might sound like a no-brainer to most people, but for someone like me, it’s taken 15 years to wrap my head around.

Learning to love the body you’ve got can be hard. A lot of people can’t ever fully master that, try as they might, despite what their families and friends tell them. I think maybe this is because “love” is too strong a word: it’s too tall an order. We’re told to love our bodies. But sometimes we don’t love ourselves, and we feel like we have failed somehow when people tell us that we should. I think “acceptance” is a much better word to use. We can all learn to accept what we’re working with. But learning to love food… that, in my opinion, is totally within reach—the same way you might fall in love with a new band or a series of books. When a person with an eating disorder eats something they think they shouldn’t, there’s a tendency to tie the event to the very definition of their self worth. But to me, viewing eating as a hobby keeps me from internalizing the experience in a negative way. It’s something you do, not who you are, so it’s somehow easier to swallow (pun absolutely intended).

If you’re trying to claw your way out of a similar hole, I highly recommend cozying up to a marathon of Chopped, Yelping your neighborhood’s newest gastropub, or learning to make some really crazy dish, like paella or homemade pasta from scratch. Food is going to be a part of your life if you want to continue having a life, so you might as well make peace with it. You might even surprise yourself in the process: you might even have fun. 

Photo by Michelle White

Photo by Michelle White

The 21 Day Sugar Detox

When I try to explain my relationship with sugar, I tend to refer to it as that ex who is  just no good for me. Once I finally saw past the sweet, candy-coated, emptiness of the calories I was consuming, all that was left was how lethargic, heavy, and stuffed I felt. So finally I declared, “That’s it, Sugar, you’re not good for me” and I cut him out of my life. I un-friended him on Facebook and I even bought a vegetable slicer—because, hell, I’m replacing all those noodles with zucchini spaghetti. And for a while, I’m good. I feel more energized, more focused, I sleep better, and I breathe better. It’s awesome.

Photo by Andy Sutterfield

Photo by Andy Sutterfield

But then Sugar comes back around and he’s like, “Hey girl, I heard you were having a party… I brought you those brownies with peanut butter cups inside that you love so much.” And I’m all, “Nope, I don’t do sugar anymore.”

But as the night wanes, I tell myself, “Well, just a taste of this peanut butter cup brownie won’t hurt.” It’s comfortable and familiar and it makes me feel good. Before I know it, the love affair is back on, full throttle, and all I want is pad thai and pizza dough. For who understands me, knows me, and never judges me like a slice of apple spice pound cake?

It’s an unsustainable relationship. And Sugar and I will mend ways and break up, I fear, many more times before I’ve really wrapped my head around how much better I feel without him.

I won’t bore you with the oh-so-bitter details of why sugar is bad for you because you can learn more about them here, here and here. Be warned, there is definitely a good amount of fear mongering out there when it comes to sugar and gluten intake, but it’s important to know the facts about the negative impact that sugar has on our bodies and also be aware that, as with anything, excess consumption is bound to have negative repercussions. Excessive sugar intake has been linked to diabetes, obesity, high cholesterol, heart disease, eczema, and gum disease. Not to mention that it’s highly addictive.

I’ve never exactly been the picture of healthy eating habits and I never gave much thought to just how much sugar I was consuming—either natural or processed. After all, the bottom of the food pyramid, the category we’re told to consume the most of, is a giant spread of rice, bread, and noodles. So for all intents and purposes, I figured I’d nailed it. Turns out—and you may have guessed this by now—the sugar found in said rice, bread, and noodles is not actually good for us. At all. Which is why I decided to do my first sugar detox.

Here are the rules I followed for my 21-day sugar detox. They’re actually pretty simple!

  1. DON’T eat anything with sugar. All bread/pasta/rice products are out. Baked goods, obviously, are a no. Avoid potatoes, corn, quinoa, and legumes.
  1. DO eat lots of meat, protein, vegetables and anything else you can find that’s high in fat or fiber. Nuts are great, and so are eggs. Get creative, or don’t, but stick to the rules.

Depending on what level of the detox you commit to (i.e. how many allowances you intend to make for yourself), sweet potatoes are on the sometimes list. So are green bananas. Both of these guys are definitely sugary in their own natural way, but far less so than regular potatoes and ripe bananas. It’s recommended that you incorporate one serving daily of either of these if you work out regularly.

It’s also important to buy meat and eggs that are organic and grass fed, since so many chickens and cows are corn-fed and grain-fed it means that if they’re consuming it, when you eat them, you are too. You’ll also get to avoid a world of hormones, growth promoters and antibiotics that so often wind up in the meat we eat.

Part of this process is about keeping your blood sugar levels as even as possible. Therefore, if you’re going to partake in dairy products during this detox, you should stick to whole-fat dairy because your body processes non-fat and reduced fat dairy in the same way it processes any kind of sugar: it will lead to crazy blood sugar spiking of the unwanted variety.

With this knowledge and a vague plan, I set off for Whole Paycheck Whole Foods to get my high-protein / high-fat / gluten-free on. Now, the key to success for any detox is utter and total preparation. Boil some eggs, bag some almonds and keep that ish on you all the time. Especially at first. That’s my best and most prominent piece of advice—be ready to feed yourself something high in protein and sugarfree at the drop of a hat.

Another trick that helps a lot is to find ways to replace what you’re cutting out. If you’re like me and live on a steady diet of noodles and sauce, crack open a spaghetti squash, or get a julienne peeler and make noodles out of sweet potatoes or zucchini. If you’re all about those Yukon gold mashed potatoes, make your best cauliflower mash with garlic and butter. Before you know it, you will forget you’re only eating vegetables.

Make some treats for yourself. There are hundreds dozens of gluten, sugar, and dairy-free baked goods online that turn out to have a real natural flavor and a deeply satisfying texture. Take this from someone who spent a whole Saturday during my first detox just looking at bread recipes online. Do yourself a favor and make some imitation bread.

Another tip: drink water. Drink all the water. Put lemon in it, steep tea in it, put it on ice and drink it all day long. It’ll wash the toxins out of your body, stave off cravings, and generally make you feel more awesome.

There will probably be some side effects, not unlike anything you’ve felt if you’ve ever tried to give up coffee. You might feel achy, you might have headaches, and there’s a pretty good chance that your body will revolt a little bit. You may discover midway through your detox that when you need to use the restroom, there’s a sense of—erm—urgency, if you will. That tummy ache you’re feeling is Candida die-off. Candida is a fungus that lives happily and symbiotically in your small intestines so long as we keep feeding it sugar. Stop feeding it and, well, it’s going to die. And that can be kind of unpleasant. (Sorry.)

After about 7 days of the detox, a really magical thing happened for me. My sinuses opened completely. For as long as I can remember, I’ve suffered from what the fancy medical professionals refer to as sinusitis. It’s a chronic inflammation of the nasal cavity, which makes breathing through my nose a non-starter. It can also cause a lot of sinus pressure headaches. As it is, sugar, gluten, legumes, and dairy are all inflammatories, and when I cut them out of my diet my sinuses became less inflamed and I could breathe through my nose. It was amazing.

For me, that was the health benefit that sealed the deal. A lot of people I know now who detox from sugar do it to lose weight, feel less bloated, and because it makes them healthier. It will help you achieve all of those things, and a lot of people experience benefits that far surpass the basics. Some people with minor gluten intolerances discover that rashes and acne clear up, and that they end up needing less sleep.

You will also find that after 21 days, that brownie sundae won’t look so tempting. Your body will have adjusted so wholly that you’ll think it’s too sweet. You’ll have a new appreciation for the natural sweetness of foods like grapes, sweet potatoes and bananas: healthy sugars that you can gradually reintroduce to your diet. There’s a lot of winning to be had.

So then, day 22 rolls around and you’re probably wondering what happens next. You’ve stabilized your blood sugar, reacclimated your taste buds to life’s natural sweetness, and you’ve even killed off that funky bacterium that was living in your intestines. Sure, now you can start to reintroduce natural sugars back to your diet, like fruit, and well… fruit. So it’s totally smooth sailing from here on out right? That depends. If you have also completed the detox you may have discovered that sugar is literally in everything. Ketchup, and buffalo chicken wings, and taco shells.  So it gets pretty tough to avoid. I’m willing to guess that even the most diligent among us (a group that does not include myself) struggle to truly steer clear of sugar long-term.

Yes, that means I fall off the wagon. It means my cheat days turn into cheat months where I fall several paces behind the wagon, sipping pumpkin spice lattes and eating Nutella crepes. It happens often enough, but I can tell you my body has not let me forget the benefits sugar-free eating. I can’t get halfway through a plate of pasta before I can feel my sinuses begin to close. So I try to go easy and be fair on myself when “just this one peanut butter cup” turns into all the french fries at In ‘N’ Out. I try to avoid bread and pasta and potatoes and for the most part I succeed. Everything else I try to keep attainable: I’m not a stickler about sauces or cheeses, and I have reintegrated beans and rice into my diet. The goal is to improve quality of life after all.

There’s little else that the heart of a carboholic like myself wants more than a big pile of noodles, covered in cheese, topped with breadcrumbs, wrapped in a sourdough bowl. Followed by a brownie, covered in cake. (Duh.) So take it to heart when I say that, although the 21 Day Sugar Detox was probably one of the most challenging things I’ve ever done for myself, it’s absolutely been one of the best things and I’d do it again.

Here’s the link to the full program for those of you eager to give this a go yourselves.

Adventures of an Aspiring Chef: The Produce Challenge

A couple months ago, I wrote an article about figuring out how to cook chicken. Since then, I’ve been challenging myself to become a better chef. This past month, the challenge was to purchase five produce items that I wouldn’t normally buy and figure out how to cook them:

  • a turnip
  • an eggplant
  • a spaghetti squash
  • a bag of Brussels sprouts
  • two pears

Let the games begin.

THE TURNIP

Okay, so first I’ll admit I didn’t cook the turnip. But I tried to! Do you know how hard it is to find good turnip recipes? I wasn’t in the mood for anything in the soup variety, anything involving mashing, or anything remotely close to fries, so I settled on a nice cheesy turnip gratin—which sounded delicious until I realized a modest-sized block of Gruyere cheese (only enough for this one recipe) was $12. Yes, I know good things cost money, but $12 worth of a cheese I don’t even know if I like? Suffice to say, the neglected white and purple ball of guilt is still sitting in my refrigerator… fine, I’ll get some Gruyere at the store tomorrow.

EGGPLANT PARMESAN

I’m pretty sure the only thing I’ve ever eaten with eggplant in it was eggplant parmesan. I figured that was a good place to start. I found  this seemingly easy, highly rated recipe (two criteria I always look for) and got to work.

Ingredients:

AllRecipes.com

What I Used

My Commentary

3 eggplants, peeled & thinly sliced

1 eggplant, sliced

I probably should have peeled the eggplant, but I forgot I owned a vegetable peeler, and peeling without one… not so easy. I also didn’t “thinly” slice my eggplant, but I’ll be better about that next time. The thicker pieces didn’t cook as well and ended up being a bit tough and chewy.

2 eggs, beaten

2 eggs, beaten

I don’t know how this lady thought 2 eggs would cover 3 eggplants. I needed both just to coat my 1 eggplant. In the future, with even thinner slices—meaning more sides to coat—I will probably need 3.

4 cups Italian seasoned bread crumbs

A container of Italian seasoned bread crumbs.

Have enough to use “as needed.”

6 cups spaghetti sauce, divided

A jar of spaghetti sauce.

This is what “divided” means in cooking. I just poured from the jar, again, “as needed.” I ran out of sauce really quickly, though, so I probably should have used 2 jars.

1 (16 ounce) package mozzarella cheese, shredded and divided

A ball of mozzarella that was on sale at Ralph’s.

I think it was 16 ounces…

1/2 cup grated Parmesan cheese, divided

Poured from my Costco jar of pre-grated Parmesan.

Clearly there is an “as needed” trend going on here.

1/2 teaspoon dried basil

Oops.


Directions:

AllRecipes.com

My Commentary

1. Preheat oven to 350°F.

To reduce potential bitterness, the comments suggested sweating the eggplant by sprinkling them with salt, letting them sit for 30 min, rinsing with cold water, and patting dry with a paper towel. I did none of this and did not notice, but I still might try it next time.

2. Dip eggplant slices in egg, then in bread crumbs. Place in a single layer on a baking sheet. Bake in preheated oven for 5 minutes on each side.

Add foil to your baking sheet for easy clean up. Bake for 10 minutes on each side, as suggested by the comments and my own experience.

3. In a 9×13 inch baking dish, spread spaghetti sauce to cover the bottom. Place a layer of eggplant slices in the sauce. Sprinkle with mozzarella and Parmesan cheeses. Repeat with remaining ingredients, ending with the cheeses. Sprinkle basil on top.

I did this until I ran out of sauce. Then I just kept layering eggplant and cheese, it all worked out in the end. Forgot about the basil, which might have been a nice touch.

4. Bake in preheated oven for 35 minutes, or until golden brown.

I had to bake mine for at least 45 minutes and most of the comments suggested something in the 40-60 minute range. Be your own judge of this. Undercooking might lead to tougher eggplant: I wish I had cooked mine even longer.

All in all, this turned out to be a success. I’d do it again with thinner slices and a longer baking time. I ended up serving it by itself with some salad, but next time I’d serve it over some plain spaghetti (which is what I did with the copious leftovers and it was delicious). The breaded eggplant was definitely the best part so now I’ve got big plans to make these breaded eggplant sticks with my next eggplant.

BROWN SUGARED ROASTED BRUSSELS SPROUTS

Emily Knight did a whole piece for UE on the excellence of Brussels sprouts. She also dazzled me with them in person a couple years ago and wrote up the recipe on her blog. I tried to replicate to her success with my bag of Brussels sprouts.

Ingredients:

Directions:

Brussels sprouts

1. Preheat the oven to 400°.

Olive oil

2. Prep the Brussels sprouts by cutting off the icky end bit, slicing them in half, and then rolling them around in a bowl with some olive oil.

Brown sugar

3. Sauté the Brussels sprouts for about 5 minutes with plenty of brown sugar and more oil so they can get soft and sweet.

4. Spread the Brussels sprouts out on a baking tray and cook for 30 minutes.

This seemed so easy that I’m actually impressed that I screwed it up. See, when Emily said “plenty” of brown sugar, I channeled all my childhood memories of horrible boiled Brussels sprouts—and put in a copious amount of brown sugar. So much brown sugar, there was in fact a caramelized liquid to drizzle over the sprouts before I baked them. Sounds like a recipe for awesome, right? Not so much. Unfortunately, and I can’t believe sweets-loving me is saying this, this made them too sweet and not nearly as good as Emily’s. But this will definitely not be the last time I attempt this side dish.

SPAGHETTI SQUASH SPAGHETTI

I’d been intrigued by spaghetti squash since my neighbor first introduced me to it. As a lover of noodles, I’ll admit, I was a little skeptical. But after hearing several friends repeatedly rave about the dish, I was ready to give it a try.

Before you even get to making the spaghetti sauce, you must first “prep” the spaghetti squash:

Directions:

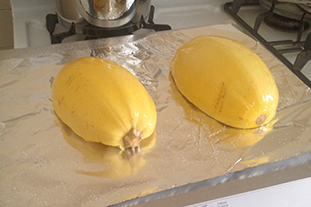
1. Cut the squash in half (AKA hack the shit out of this tough squash until it splits in half).

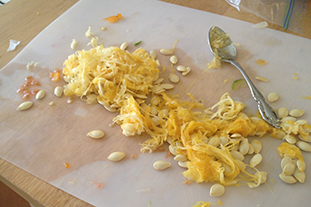
2. Remove the seeds / pulp. Pumpkin carving flashbacks are optional.

3. Douse with olive oil, salt, and paper and then turn flesh side down on a foil covered baking sheet and cook for 30-40 min at 450°F.

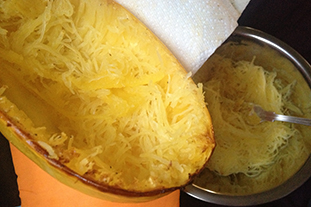
The “spaghetti” comes out like buttah when scraping it with a fork and has the consistency of angel hair noodles. I may have overly enjoyed this step, but noodles are being created from squash, it’s meant to be enjoyed.

Making the Sauce:

Spaghetti is one of the few things I’ve actually been able to cook for years, though it’s really not that hard when you are just cutting up vegetables and stirring in jarred tomato sauce. This time I decided to add ground beef, which I’d only ever cooked once before.

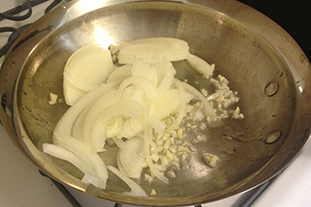
For anyone who, like me, feared ground beef, it’s actually even easier than chicken. I put some olive oil in a frying pan, added the garlic and onion first, gave them a minute or two, and then added the ground beef. Brown the ground beef (until you see no more pink) and add in the zucchini when it’s almost done. Continue cooking until you see no more pink in the meat, then add the jar of sauce. I usually let the whole thing come to a boil and then simmer for a few minutes. But really, you can eat it as soon as it’s hot. I also usually add in the chopped tomatoes last, so they retain some of their original consistency when I serve. Seeing as how I made this entire recipe up, it’s really a use-what-you’ve-got-and-go-with-it situation.

Serve your sauce over your spaghetti squash “noodles.” I added some grated Parmesan cheese and had to salt and pepper my “noodles” a bit more (so I’ll probably add salt and pepper to the squash post–baking-and-forking next time), but otherwise I’d say this was every bit delicious as I had heard. I barely noticed that I was eating squash, in fact, I might have even liked it more than pasta but don’t tell anyone.

FRUIT CRUMBLE

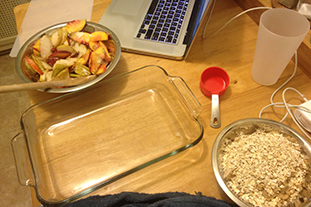
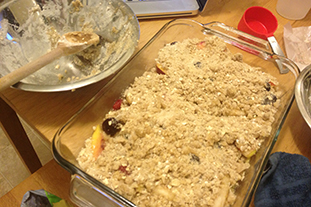
With all the use I’d been giving my oven, I’d yet to bake a dessert in it. This was clearly not okay! I decided to rectify this with my pears and some remnant raspberries I had left in my refrigerator. I Googled pear and raspberry crumble, found this, and went to town.

Ingredients:

CanadianLiving.com

What I Used

My Commentary

FILLING

4 cups sliced peeled pears

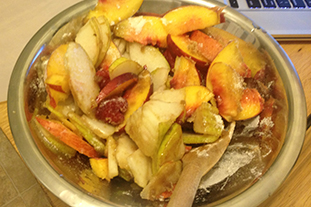
Two sliced, unpeeled, pears

I didn’t even notice the skin, but now that I’ve found my peeler, I might peel next time.

2 cups frozen raspberries

a handful of fresh raspberries

Unfortunately, when I went to get my raspberries, I realized many of them had gone to the other side and I found myself with far fewer than I’d anticipated.

a nectarine

To compensate, I added in a nectarine.

a couple grapes

This is where I went a bit off the rails, but I was bolstered by this grape and pear crisp recipe (and I was still lacking fruit!). You’ve got to work with what you’ve got!

1/3 cup packed brown sugar

1/3 cup packed brown sugar

2 tbsp all-purpose flour

2 tbsp all-purpose flour

1/2 tsp nutmeg

Yeah, I don’t keep nutmeg on hand. Probably should.

TOPPING

3/4 cup all-purpose flour

3/4 cup all-purpose flour

3/4 cup packed brown sugar

3/4 cup packed brown sugar

3/4 cup quick-cooking rolled oats

3/4 cup quick-cooking rolled oats

1/3 cup butter, melted

1/3 cup butter, melted

Melted in the microwave.


Directions:

CanadianLiving.com

My Commentary

1. In large bowl, gently toss together pears, raspberries, brown sugar, flour and nutmeg. Spread in 8-inch square glass baking dish.

I did this with my fruit additions and omitted the nutmeg.

2. In separate bowl, stir together flour, brown sugar and rolled oats. Drizzle with butter; stir until crumbly. Sprinkle over fruit.

3. Bake in 350°F oven until golden and bubbly and fruit is tender, 45 to 60 minutes.

Watch one episode of Breaking Bad, then eat.

I served this warm with some whipped cream and had to hold myself back from going for seconds.


Cooking used to be so daunting to me but when I remind myself of these simple rules/guidelines, it’s just another tasty challenge:

More Meals = More Practice

Make dinner every night. Even when I don’t feel like it, I cook. By doing this I learned (1) cooking is not nearly as hard as I thought it was, (2) it is possible to do it both well and quickly, and (3) it’s a great, fun way to switch gears after a long day even if it feels like a chore when you first start.

Improvise AKA Get Creative

Don’t make cooking harder than it needs to be, follow the instructions, but don’t be afraid to switch ingredients or adapt recipes to your equipment/time/skill level. I usually combine several recipes and look closely at reviewers comments and see what their experience was like.

Don’t Skimp on Essentials

Substituting and improvising can be a wonderful adventure, but skimping on essentials like oil, butter, eggs, milk and cream can severely effect the taste of a meal (and not in a good way). If it says it wants A WHOLE CUP OF ACTUAL BUTTER, put in a damn cup of ACTUAL butter!  Not margarine, not half a cup, not anything else. I could start linking to all the articles and arguments about butter being better for you than all of its substitutes but I’m going to go with this line from Michael Pollan: “Eat food, not food products.” Or this line from me: “It tastes so much better.” Eat in moderation, exercise, be smart, and put down all the junk food before you blame butter.

Leftovers are your friend

Always make enough to take for lunch the next day and, if possible, even more to keep in the freezer. If you don’t eat it for lunch, it can be there for another dinner. There’s nothing better than coming home from a long day and turning some frozen leftovers into a new 15 minute meal.

How to Order Meat & Eggs

Confession—I love meat, but I don’t eat beef. However, my street cred in understanding meat comes from dating ardent beef-eaters (I grew up in the Midwest, y’all), much to the dismay of my Hindu mother.

Photo by Sara Slattery

Recently, I dated a gentleman who was well-versed in beef and beer. Dinner conversations generally involved the words yeast, fermentation, and rare, which in hindsight points to signs that we were probably destined to break up.

So, while the only beefeater I prefer is gin, I will thank my relationships for imparting some worldly knowledge. I’ve eaten dinner with enough weirdoes to learn my restaurant etiquette, so you don’t have to!

Here’s my breakdown on the different ways to order steak and eggs (my specialty!) at a restaurant, without looking like a complete vegetarian.

STEAK:

First of all, steaks are any piece of meat that is considered a “fast cooking” cut: a cut that does not require long time to cook. Flavor and tenderness tend to have a mutually exclusive relationship; generally, the more lean or tender the steak is, the less flavor it has, because the flavor really comes from the fat. In addition, the muscles that do the most work such as the legs and neck tend to be more lean and tough as compared to their “lazier” counterparts.

Now, let’s put the grade and type of beef aside. There are two ways to tackle steak: cut and temperature. Let’s start with the different cuts or, to be crude, the areas of the cow which are available for your carnivorous pleasure. Depending on the cut, the tenderness, flavor, and cooking method can vary widely, but I’ve listed the popular ones below.

  • Forequarter cuts: These cuts are near the front of the cow, or “forequarters.”
    • The Rib: Pretty self explanatory: this meat can be short ribs, prime ribs, and rib eye steaks. The cow’s muscles near the ribs generally do not work hard or exercise; therefore, there is a great amount of marbling (intramuscular fat), making the meat relatively tender.
  • The Loins: Now, the hindquarter cuts can be broken down into three type:
    • Sirloin: While less tender than short loin, sirloin is generally more flavorful. It can also be further divided into top sirloin and bottom sirloin.
    • Tenderloin: This can be considered a sub-type of the loin. Staying true to its name, it is the most tender. Filet Mignon is a form of tenderloin. This comes from two relatively small pieces of tenderloin muscle in cattle, making the coveted steak pricier than its counterparts.
  • Miscellaneous: Other steaks like the chuck, round, and flank come from their respective areas and tend to be the tough cuts.
    • Chuck: A cut from the neck to the ribs. Many times, this steak includes shoulder bones and is generally is less expensive than its rib-based steak counterparts.
    • Rump Steak: Take a guess where this meat comes from! The rump meat is tough and is generally roasted.
    • Round Steak: This lean meat is from the thigh of cattle; due to the lack of fat, it does not tenderize quickly, so it is more suited to slow cooking methods such as roasting.
    • Flank Steak: This substantially tough steak is long and flat. The meat requires marinades and other slow cooking methods and are not ideal for steaks.

Now that you’ve figured out what part of the cow you’re eating, how would you like it served? High-end steakhouses may have their own variations, but here is a general guideline to temperature:

  • Rare: Cool, red center
  • Medium Rare: Warm, red center
  • Medium: Hot, red Center
  • Medium Well: Hot, pink Center
  • Well: No pink, brown

Photo by Sara Slattery

EGGS:

Now let me introduce my expertise—eggs. As a meat eater with a pretty strict vegetarian family, eggs are the only dishes that count as a free pass for everyone in my household to foray into the animal kingdom. In fact, most of my family turns a blind eye to eggs as long as the dish meets strict scientific requirements or, you know, doesn’t “smell eggy.”

  • Scrambled: The most common type of egg preparation, scrambled eggs are basically the yolk and the whites (unless you specify whites only!) beaten briskly to incorporate air and constantly stirred in a pan to produce large puffy curds of egg.
  • Over easy/medium/hard: These are all fried eggs that refer to the consistency of the yolk. For example, over easy implies a runny yolk with solidified whites, but over hard means to cook on both sides ‘till the yolk hardens.
  • Sunny-Side Up: A caveat of fried eggs, sunny-side up refers to one side of the eggs being fully cooked, while the yolk remains runny.  Crack an egg over low heat and let one side cook without flipping or pushing it around the pan. The difference between an over easy and a sunny-side up egg is that in preparing sunny-side eggs, you let only one side fry, while any “over” preparation requires you to flip the egg to the other side to cook the egg whites.
  • Poached: A poached egg has a smooth unbroken yolk that is surrounded evenly by a casing of eggs whites.  The preparation involves submerging the yolk in water, as opposed to letting it cook straight on the pan. Crack an egg into a bowl, without breaking the yolk, before sliding the contents into a pan of simmering water for cooking. Wait until the egg white has solidified, but the yolk stays soft. The key to success here is getting the freshest eggs possible and timing it right!
  • Boiled: Boiled eggs remain in their shells until they reach your plate. Despite the name, boiled eggs should not actually be boiled throughout the entire cooking process. Instead, bring eggs (with shell intact) to a boil and then remove them from the heat. For soft- or medium-boiled, let them stand for 2-3 minutes; but for hard boiled, let the eggs sit in the boiling water for 12 minutes. After your remove the eggs, plunge them immediately into a bowl of ice water to facilitate peeling off the shell.

While there is a wide spectrum and range that varies from country to country and restaurant to restaurant, this serves a general guide to understanding the steak and egg lingo.  The real key takeaway is that if you know how to order eggs and meat, you should definitely ask me out.