Tag Archives: decorating

Taking Your Workspace From Bleak to Chic on the Cheap

Due to office reorganizations and cross-country moves, I’ve worked in seven different office spaces in the past four years. None of them had similar layouts or color schemes, and all of them had different sets of supplies. Through these moves, I’ve put together a few strategies to add a little personalization to a space that is built to be one-size-fits-all.

Personalizing my office has some serious benefits for me: I stay more committed to the job because I feel at home in the space. I am happier to be at work because I am surrounded by things that make me happy. People who come to my office get much more of a sense of my personality and probably remember me better, because I make my space bright, cheery, and inviting. Also, I am way more motivated to keep my desk clean when it is cute and cheery, rather than covered in piles of paper. I even dust when I feel a little ownership over my space.

For my current office, I took on a few simple projects that made a big impact on my space. My hope was to infuse some color, happiness and whimsy into the area that I look at for eight hours a day—but I wanted to keep things simple so that I didn’t use too much work time setting it up. Most importantly, I am a university advisor, and sensitive issues often come up when I am meeting with students. I always want my space to be as inviting as possible. I want people who come in my office to feel like they know me, at least a little, from the moment they sit down.

Before
Before

After

After

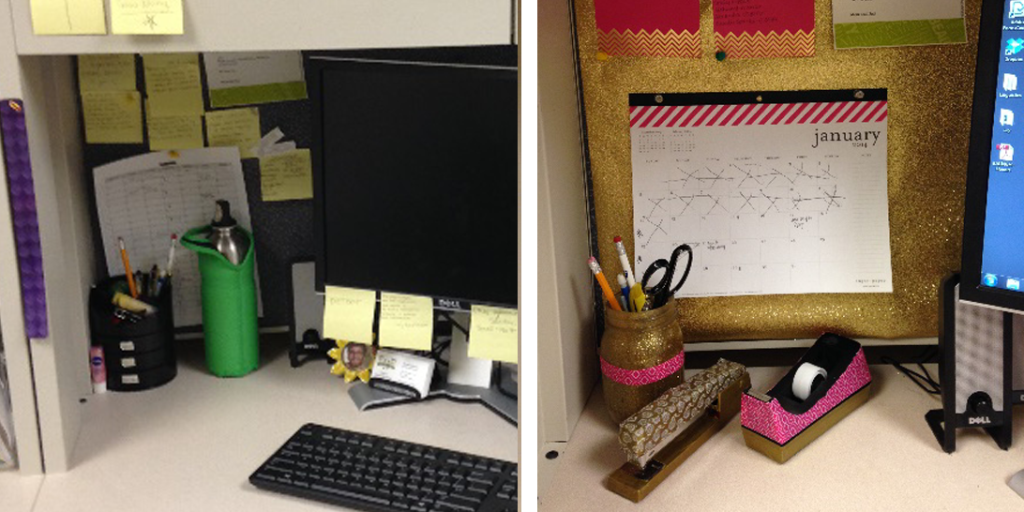
My before picture is blank, uninviting, uninspiring, and cluttered.

The after is much better. Glitter! Pink! Gold! Coordinated! Neat! More functional! Common theme! I actually enjoy working in my space more because it is so bright and fun. The office is still beige, and I can’t swap the furniture, but it feels great to have things be a little more personal.

Going through these projects, there were a few things that stood out to me as being really important to avoid frustration. First, choose a color scheme early. If I were really smart I would’ve used my school’s colors, but instead I just chose colors that I really like (side note, does glitter count as a color?). Second, make sure everything is temporary. I can rip all the washi tape off cords super easily, so if anyone gets a bee in their bonnet, I can take it all off. Third, make sure to stretch your materials: this will keep costs down, and is an easy way to keep things looking coordinated.

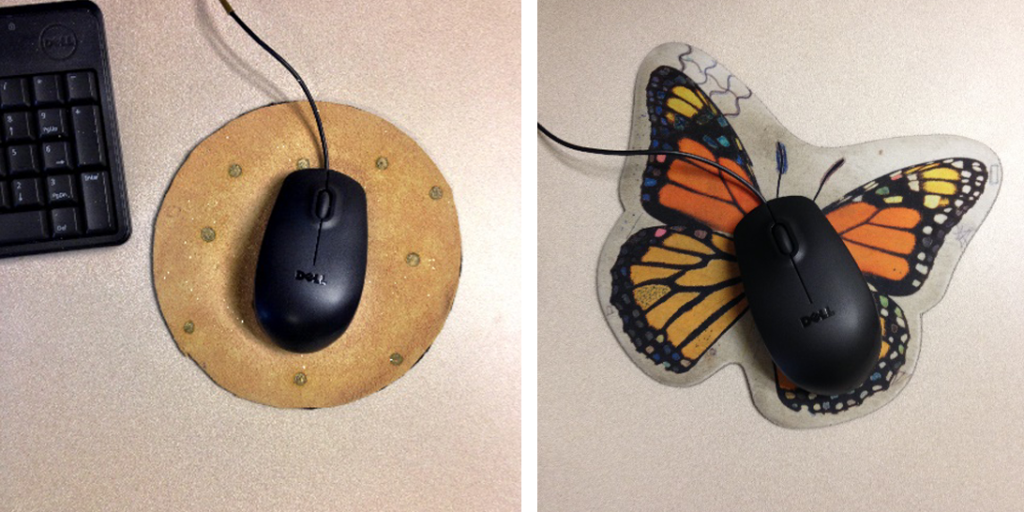
If there are any aspects of your office that actively bother you, change those first. For me, it was the stupid butterfly mouse pad left by the last person to use my office. Not only did it make me look like one of those women who is obsessed with butterflies, but it was also covered with ballpoint pen doodles, which I felt made me look unprofessional and sloppy. When I ditched that stupidity for my DIY, subtle, and in-theme mouse pad, I felt about a million times better. It might be superficial, but I no longer felt like I was projecting cat-lady whenever I met with someone.

Most importantly, consider both form and function. The washi tape on my cords is all about cord management, so that I don’t have a tangle of black cords on my desk. It was a huge plus that they came out so cute! If you don’t use a calendar, don’t hang one up. If you hate getting glitter all over everything, I suggest you choose materials accordingly. It’s worth noting that I hung glitter wrapping paper on my corkboard behind my monitors ten days ago, and I am still finding glitter in my purse, on my clothes, and sometimes in my hair. This doesn’t bother me, but it might bother you.

Don’t forget that implementation is critical. You definitely don’t want to spend a bunch of time at the office making these things, because then your boss might see you as less committed, rather than more. On the other hand, you don’t want to look like you are stealing office supplies, so you have to be a little strategic about how you prepare for your upgrades. I made the mason jar, bunting and mouse pad at home, and then spread the washi tape application and paper gem making over three or four lunch breaks. For the glitter background, I stayed about ten minutes late to take everything down from my corkboard, and the next day came in about 15 minutes early to hang the backing and put back my papers.

Here is the breakdown of what I did in my office, with links to tutorials:
Before and After

Before and After

I swapped the supply tower for a glitter pen jar, because I never use those supplies and that tower was just ugly. I covered my tape dispenser and stapler in washi tape, added a new calendar, took all the info off sticky notes and put it on cute stationary, and a hung glitter wrapping paper on my corkboard for a seriously sparkly background.
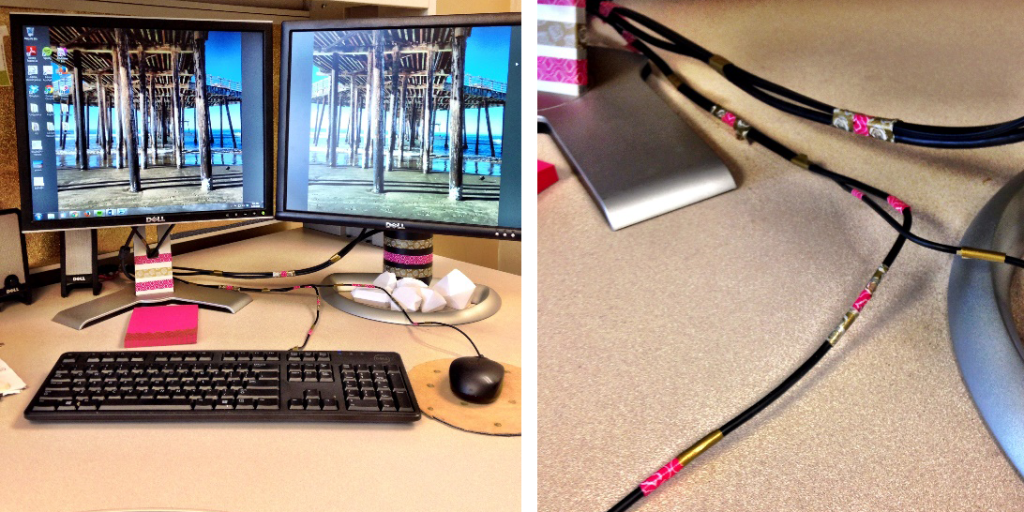
I controlled my cords, and added a little pop
I controlled my cords, and added a little pop

No more cat lady mouse pad!
No more cat lady mouse pad!

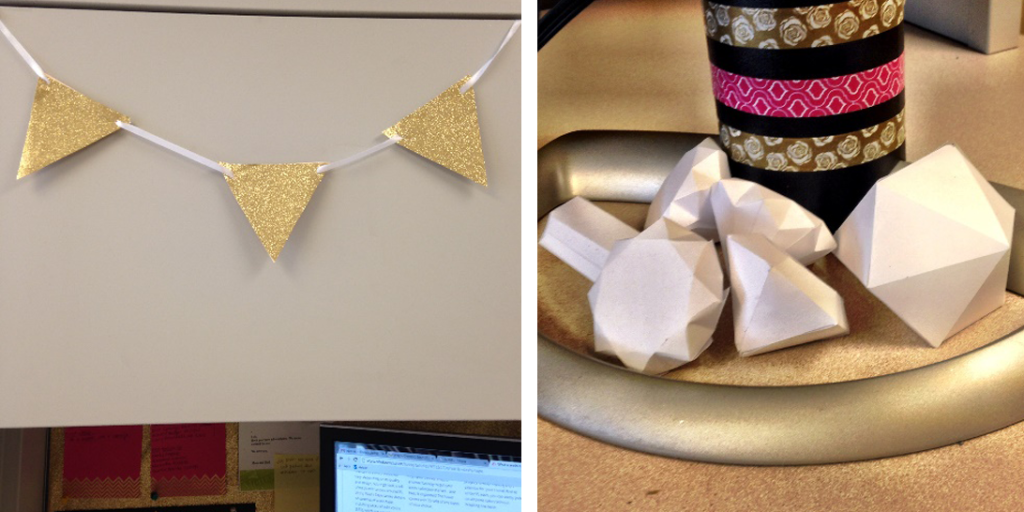
Hung some adorable glitter bunting and created a Paper Gem Garden.

Hung some adorable glitter bunting and created a Paper Gem Garden.

All in all, this cost me $35. Here is the budget breakdown (any repeated or free item marked with an asterisk):

Project Supply Source Cost
Bunting Glitter Wrapping Paper Michaels $3.00
Mod Podge Michaels $3.00 for a small bottle
2 File Folders * *
Ribbon Michaels $1.00 for 20 yds
Corkboard Background Glitter Wrapping Paper * *
Staples * *
Calendar Pre-made Target $1.50
Paper Gems Printer Paper * *
Mod Podge * *
Washi Tape Cords, Supplies Washi Tape, Three Rolls Target $9.00
Glitter Mason Jar Mason Jar Target $2.00
Modge Podge * *
Glitter Michaels $2.00
Washi Tape * *
Mousepad Basic Mousepad Target $1.50
Leather Piece Michaels $6.00
Mod Podge * *
Gold Paint Pen Target $1.00
Paper Pad Pre-made Local Stationary Store $5.00
TOTAL $35.00


Photo by Andy Sutterfield
Photo by Andy Sutterfield
Home (Theater) Improvement

“This is the end of life as we have come to know and love it.” I thought as I watched thirty five square feet and 1080 progressively scanned lines of glorious television walk out of my life forever. My roommate, along with his beloved projector, was headed for greener pastures, leaving the rest of us to languish away into sad, lonesome, standard-def obscurity.

The Projector

There’s a lot of good literature out there on the Googles that will help guide you to the perfect projector. Since we had become accustomed to a certain standard of television, we were looking for a 1080p projector, 60Hz would do, with a minimum contrast ratio of 1:2000. But In terms of what kinds of projectors are available on the market (from the $200 VewSanic knock-off to the $20,000 3DMax Sound-O-Vision Extreme), the price range we were expecting was between $500 and $1000. But for us our wallets, we were just looking for something to “scrape by.” So, when we found an $800 projector that hit our minimum requirements, but was available for $580 through a special refurbished program, we jumped at it. BOOM. And we had a projector again.

Everything was hooked up to the cable and DVR—we turned it on and… there’s no sound. Maybe we should have thought this out better. With a trip to RadioShack for a ⅛” stereo to ¼” mono adapter, we were able to jury rig my fiancée Meggyn’s bass amp in as a temporary sound system. Well, at least it was loud and thumpy!

The Mount

Bliss settled in, until we realized we were merely maintaining the status quo. Like cavemen watching the firelight flicker across the wall. With the projector haphazardly settled on an end-table with a book underneath to prop it up, the risk of inebriated guests leaving open-topped drinks on the same table and toppling them into the delicate internals—the horror, the horror!—was just too high. Of course, I’d just dropped an inordinate sum of money on a brand new projector, so I wasn’t keen on the idea of dropping even more moolah on a television mount that wouldn’t directly affect the viewing experience.

One of the nice things about living in a leased house is that you never know what surprises you might find! After hunting around for extra shelving, I came across an old television mount up in the back corner of the garage (the kind for those tube TVs that could smash toddlers to atoms). And so began the next obstacle: the mount was bolted into a high wooden rafter in the garage, but we only had drywall in the living room… To Google! It turns out that as long as there’s a stud behind wherever you’re screwing in the mount, it should hold weight. After a trip to the local Ace hardware to buy some screws that could be used to drill to China and a quick download of the Bubble Level app—to make sure we weren’t setting ourselves up for a neck kink—we got to work. (Contrary to Meggyn’s expectations, the level app did a good job!)

And then failure struck—we broke two of the screws because we thought we could get away without drilling pilot holes. It’s TOOL TIME! We borrowed a drill (thanks, mom!), and we raised the projector up like the Mennonites raising a barn. Then we cracked open a few beers to celebrate exactly like the Mennonites would not have.

The Connections

Now we were getting somewhere! We could no longer inadvertently destroy all of our wonderful video goodness without some extra effort of lobbing liquids towards the ceiling. The next failure, of course, being that we couldn’t actually connect the cable or the power to our ascended projector. Who wanted to get lost in the details of connecting this, right? What are we, rocket surgeons?

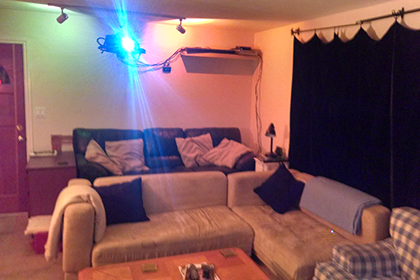
To solve our connection problems, I repurposed some unused bookshelves I had bought for my room. With a few more marks and holes in the wall next to the projector mount, I added a shelf in the living room that we loaded up with every bit of television-related electronics. To paint the picture for you, we now had the projector on the old TV mount (in the dead-center of the wall), an overburdened shelf stacked with enough boxes with blinking lights that it may have been flagged by the NSA, a bass amp on the floor, and so many power cables and audio/video cables strewn about that they might as well have been vines in a nightmarish Lovecraftian dystopian future of cybertronic Amazonian forest… Let’s leave it at “messier than a dorm room during finals” and be done. But now that everything worked, I was at: “Please, for the love of God and all that is holy (and not blinking lights at me), let me be done.”

The Organization

Now we had a beautiful 1080p picture taking up the front wall and plenty of loud thumpy sounds to accompany it. Except if you changed the input from the cable to the Wii. Or to the Chromecast. Or to the Xbox. Was I the only one around here who understood which colors get connected to which inputs on the back of this thing?! Rather than attempting to teach every person who came to the house which cables to disconnect/reconnect to switch the audio whenever you switched the video feed (I just wasn’t up for writing the Connectionist Manifesto), I decided that another trip to RadioShack was in order. There I found an A/V switch for under $20 along with a few new A/V cables and a shiny new sound bar with subwoofer for definitely not under $20 (Meggyn was complaining about wanting her bass amp back and, hey, it was payday!). I returned to our humble, if electrically dangerous, abode armed with my new equipment, a sharpie, some wire ties, some labels, and as much determination as I could muster. I tackled the monumental task of improving our sound system, organizing our A/V shelf, wire managing all of the dangly bits (can’t leave any extra 1s or 0s), and setting our theater system up in such a way that at the press of a (CLEARLY LABELLED) button, my roomies, or any of our guests, could switch between video and audio streams at will.

The Finishing Touches

Life almost seemed perfect. It was simple enough to use the newly organized system, the new sound system was much more balanced than a 15 Watt bass amp, and whatever we watched was beautiful (except the Wii… stupid standard-definition output). But if you can’t find a problem to fix, then you aren’t looking hard enough. Some of the darker colors were being washed together by the projector, and it was sometimes hard to tell what was going on during scenes that took place in the dark. Blackout curtains became the next addition to the room. We got these thanks to a generous donation of leftover fabric from Meggyn’s mom. They just barely cover the full width of our window, but it works. Now, we can watch the projector during the day as if it were the middle of the night (without that pesky bedtime thing). Our last improvement was to go to OSH and buy some cinder blocks, push the couch forward so that it was closer to the wall (or rather, the screen), drop the cinder blocks behind the old couch and ADD ANOTHER  COUCH. Because couch. Now, we’ve got theater-style seating to go with our home-theater!

I still don’t think we’re done making improvements, but for the moment we’re pretty happy with how everything turned out. And the only really spendy parts were the projector itself and the sound bar—things which will be following us to our next house! Thanks to some successful craigslist foraging, the new couch was free, and the cinder blocks we used to prop it up were a few dollars apiece. We used five blocks for the couch and another three to make a recycled-plywood footrest.

All-in-all, we could have done a much worse (much more expensive) job of converting our living room into one radical home theater.

Photo by Michael Cox

Photo by Michael Cox

The Gospel of Removable Wallpaper

I don’t want to spend more energy than I really need to decorate my current apartment. I want a well-curated space, but at the moment I’m not entirely sure that I have the energy or cash to put that together. While the lease on my apartment does permit me to paint, I am loathe at this point to start a project that will require things like primers and sanding and taping and testing various colors at different times of the day. I want a maximal change with minimal effort. This brings me to removable wallpaper.

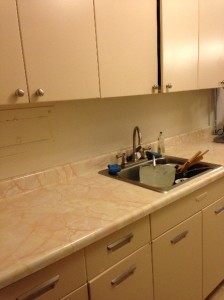
Before

Before

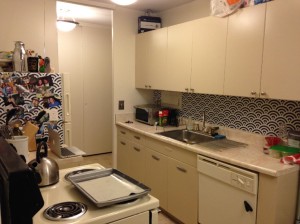
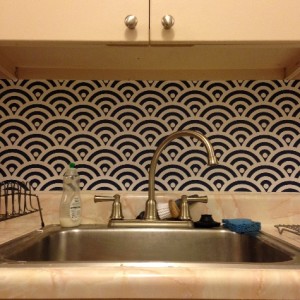
After

After

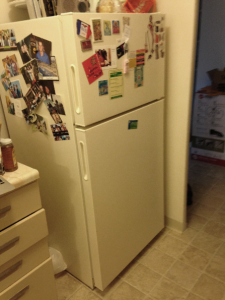
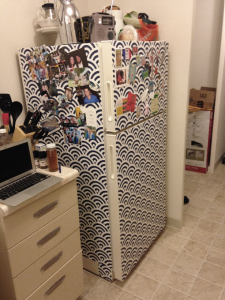
Removable wallpaper is one of my favorite ways to change a space because it is so versatile and so low risk. You peel off a backing and then stick it to the wall. Press out all the air bubbles, maybe trim around the edges, and you’re all set. Change your mind? Peel it down. Done and done. Removable wallpaper can be used on walls, of course, but also all over your house. Cover a refrigerator or other appliances, line the backs of shelves, refinish a blah tabletop (such as IKEA’s LACK series), spice up the inside of a tray for serving guests, even create the appearance of a grand and stately headboard. All completely possible and so easy.

So far, I’ve redone the backsplash and refrigerator in my kitchen and one wall in my apartment, and were it not for my spouse saying he’s done with patterns, I’d be covering all the rest of the flat, smooth surfaces in our apartment with bright, cheerful colors and designs. The kitchen took all of forty five minutes to get done, and the trickiest part was matching the pattern repeat.

While, at first glance, removable wallpaper may look like the more expensive option, I’ve found that after you buy all the supplies to paint walls or hang art (tarps, brushes, pans, rollers, sandpaper, painters tape, primers, and multiple buckets of paint; or frames, mats, and custom fitting), the total cost is much lower. In total, I spent about $100—shipping included. Not to mention, you won’t ruin your favorite jeans when you think to yourself “Ah, but I’ll be so careful!” The only cost is the paper itself. It is also completely possible to make temporary wallpaper yourself with contact paper.

Before

Before

After

After

Don’t know where to start?

Check out the whole host of resources available online about where to buy and what to do with temporary wallpaper:

Removable wall paper can be bought at:

Feeling crazy? Try starching fabric to the wall. (I haven’t tried this, so don’t blame me if it pulls all the paint off your walls…)

And I’m not the only one who is totally into removable wallpaper! Read more on Oh Happy Day and Apartment Therapy.

Enjoy!

Enjoy!

Curating Your Art Collection Without Busting Your Budget

Decorating on a budget is not easy.  Sure, you might do some great DIY projects, maybe find some decent furniture on Craigslist, but if you really want to make your place look great without spending a whole paycheck (or five), it takes a lot of work.  Fortunately, even if you have to live with a dingy 5-year old sofa that may have at one point belonged to the mother in What’s Eating Gilbert Grape (too soon?), here are four simple and affordable ways to invest in your own personal style.

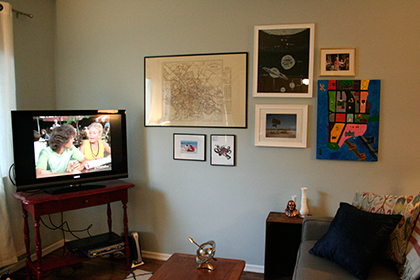
1. Use your own photos.  Why spend money on art when you have plenty of your own photographs just waiting to be framed on your wall?   I remind you that photographs were invented before the Facebook photo album, and a special photo will be a great conversation starter with your guests.  If you worry your pictures aren’t ‘artsy’ enough, get them printed in black and white!  Sugarfish is a great affordable service to get photos printed, and you can even order prints of your Instagram masterpieces on Shutterfly.

2. Maps, postcards, old records, anything flat you can put in a frame.  If you’re like me, you’re always finding a cool postcard you bought on vacation but never sent, or the ticket to that epic Dashboard Confessional show you went to in high school.  Rather than sticking it back in a drawer to be rediscovered in another five years, throw it up on the wall to break up all of your fabulous photographs.  Old maps are a particular favorite—both affordable and pretty!  Never been anywhere?  Fake it with the $3.95 map wrapping paper  from Paper-Source!

3. Affordable art prints and photos are easy to come by if you’re looking in the right places.  I like to shop around, but most of the sites below feature several different mediums (prints, photos, text graphics, even actual paintings) so if you don’t have the time or patience for scrolling through 40 pages of options, you would do well at just one of these.  The more affordable pieces from these sites do in fact still cost some money (many items in the $15-40 range, depending on the size), so I try to only purchase things I really love and would want to look at every day on my wall.  Minimalist and fan-made movie posters are a personal favorite that look nice and reflect my true passions.

  • 20×200 (www.youshouldbuyart.com):  Run by a gallery owner in New York, they have a great stockpile of photos and prints by up-and-coming artists.
  • Society 6:  Not only do they deal in art, but if you find a design you like, you can get it printed on t-shirts, mugs, pillowcases, phone cases, and more.
  • The Working Proof:  Art for a cause—15% of each sale goes to the charity of the artist’s choice.
  • Etsy:  A perennial favorite for all things, art included.  Perhaps pay tribute to the cinematic classic I mentioned earlier with this!


4. Don’t be afraid to create an original painting yourself!  I know the canvas–and-paint section at the art store can be intimidating, but delve in, and make your own masterpiece to hang on your wall. It’s easier to splurge on something when it’s half off, so double-check for coupons before you go in to your favorite craft store. Even if you don’t see yourself as “creative,” geometric patterns in a good color scheme look just as nice as a detailed landscape—and you still get kudos for having an actual painting on your wall!  Too shy to go it alone?  Try out Painting with a Twist (or any of the similar BYOB painting classes across the country) with a couple friends and a bottle of wine, and come home with a beautiful painting as well as some new memories (aww).

In all, I think the key to curating an art collection while not over-spending is to make every piece you own individual to you.  Whether it’s meaningful because you made it yourself or just because you love it, I guarantee that a piece of art with personal meaning that also looks great will justify any cost.  Now please, just promise me you won’t hang all of your beautiful acquisitions and discoveries with painter’s tape and thumbtacks. *

*Before you even try, I direct you to Michael’s (they almost always have a coupon for 50% off on their website) or Aaron Brothers (they have a buy one, get the second for 1 cent sale on frames and canvas in January and July every year).

Photo by Michelle White

Photo by Michelle White

It’s Not Too Late to Decorate!

For as long as I can remember, I have been in love with Christmas. Not just the day, but the entire holiday season—there’s something so special about this time of year that puts me in a jolly mood.  I love the giving and loving spirit of people during this time, I love driving through neighborhoods, seeing them all lit up. I love getting together with family and friends. If I were to continue, it would go on for pages! But aside from spending time with my loved ones, my favorite thing to do is decorate.

As we grow up and move away from our childhood homes, there may be holidays we have to spend away from family and friends—for me, this is my first Christmas away.  And even though it will be difficult, I know I can still enjoy Christmas and Christmastime by surrounding myself with beautiful embellishments to lift my spirits. One thing that always brings me such joy during the holidays is sitting in a room lit with Christmas lights with the scent of a fresh Christmas tree.  Add some hot cocoa and a Christmas movie, and I couldn’t be happier!

Since those of us in our 20s usually don’t have buckets of money to throw at things like Christmas decorations, especially during this time of year, this is how I plan to decorate and save money while doing so.

For me, one essential decoration is, of course, the Christmas Tree.  I’ve found that real trees are far cheaper short-term than artificial trees if you shop for a good deal, even though they only last one season.  You can go to a hardware store and find real trees as cheap as $25 for a 6’ tree. Now, if you’re planning on investing in a tree to continue using year after year, then artificial is the way to go, but expect to pay more upfront.  I personally prefer to get a real tree.  It’s so much fun going and picking one out, even though I just go to Home Depot and not the forest to chop one down, but hey, it’s still fun. And oh, how I love the scent of a real pine tree during Christmastime—why spend money on buying sprays and candles when you can get the natural pine smell for free from your tree!?

This time of year, practically every store you go into has aisles and aisles of Christmas decorations—I’ve seen stores selling Christmas decorations since September!  But if you’re looking to decorate on a budget, be aware of where you are shopping.  It may be easiest to go to Target and get everything there, but they do not always have the greatest deals: I also check out places such as IKEA and the dollar store… yes, the dollar store!  You can find some great things like wrapping paper, bows, garlands, stockings, and great little stocking stuffers that other stores tend to mark up.  Michael’s is always one to have great sales during this time of year for quality products.  If you’re more of a DIY type, Michael’s is definitely the way to go.

If you enjoy decorations but aren’t much of a decorator, invite friends and make a night of it.  Every year, my family would put our Christmas tree up together.  We would make a big fun evening out of it, with snacks, eggnog, music and Christmas movies.  Last year when I moved to LA, it was the first time I wasn’t home to decorate my family tree, so I decided to keep that idea going by inviting my friends over.  I got a bunch of ornaments and paint pens, and we spent the night designing our own ornaments, stringing popcorn, and hanging them on the tree. Creating your own ornaments is not only inexpensive, it’s a perfect way to personalize your tree.  Year after year you will hang the ornaments and think of the memories creating them.  It’s really simple and fun—and for those of you who think you wouldn’t be good at it, it’s really a lot easier than you think.  You can buy glass balls or plastic (plastic is cheaper, but I prefer glass).  Grab some permanent markers, paint pens, glue, fake snow, glitter pens and really anything else you can think of!  One of my favorite ways to decorate an ornament is to draw a design, like a snowflake, with glue and sprinkle artificial snow on it.  It takes a plain decoration and makes it much more festive.  I also love taking off the top of the ornament and pouring artificial snow or Epsom salt in it.  Or simply use permanent markers, glitter pens, or paint pens to draw designs on it.  Last year, my friends and I signed one of the glass ornaments and dated it.  That one puts a smile on my face every time I see it.

I also love to hang garland around the house, but instead of plain bows of evergreen, I like to spruce up my spruce by twisting them with sets of lights. I also like to add extra Christmas color to my garland with berry garland. The little red berries pop, adding a nice festive touch.

If you don’t want to go all out, you can always add small accent pieces scattered around your place. Candles and hand towels add a little something extra that’ll get your holiday spirit up! They even make Christmas cookie candles, so you can make it smell like you just baked, even if you haven’t gone near your oven in months. (But, like with the smell of a fresh pine tree, you can always opt for the real things and bake some fresh cookies instead!)

Decorations can be subtle or extreme, but all are fun. It’s a chance to express yourself, so go out there and get creative with it!

Photo by Rob Adams

Photo by Rob Adams

Decorating on a Budget

Usually good style comes at a price: though minimalist decor is in right now, even that style is not minimal on your wallet. But what I have learned from a little experimenting is that you actually can design on a budget, if you get a little creative, and do things yourself instead of buying them. I tend to stay away from the lengthy, more complex projects, so I found some easy DIY projects that will make your simple home more exciting.

Bookshelves

Bookshelves

Photos by Christina M. Tedesco

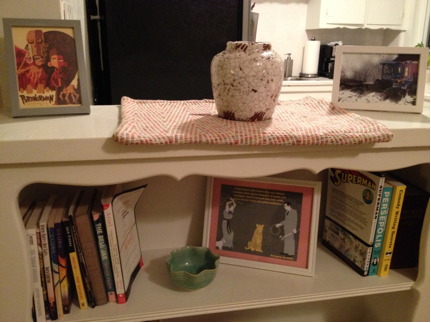
One way to spruce up your bookshelves is to de-clutter! Usually when things don’t look right, we instinctively add more to it; however, you can make your bookshelves look super cute by taking away all the busy stuff and only displaying a select group of things. Bookends come in handy here, whether you buy them or find something unique to hold the books in place. This way, you can spread your books throughout the bookshelf and add some things in between to please the eye (i.e. a small vase, a picture frame, a decorative bowl, etc.). This makes the whole shelf flow much better.

Instead of painting bookshelves, which takes time and money, I read an article about covering the insides with wallpaper. Now, wallpaper can also be a little expensive and difficult to work with, so an alternative is contact paper—it’s cheap, cute, and removable. Plus, if you get bored with it, you can keep switching it out with new designs!

Dresser

Photos by Christina M. Tedesco

DIY Dresser

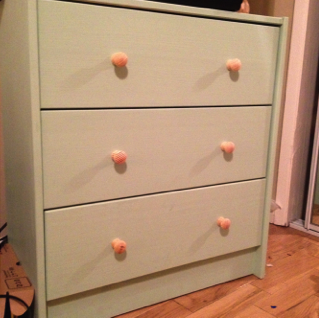
This one was exciting! I only needed a small dresser to hold some things I could not hang up. I found a solid wood dresser at IKEA for only $35. Choosing solid wood over other choices gives you the option of being a little more creative with it. I wanted to go for cute, but simple. I bought the smallest can of paint I could find for $5, assembled the dresser, and painted it. I also plan to order new knobs for it. Knobs can be pretty pricey, but it makes a difference! Urban Outfitters has super cute knobs for a good price. The total cost of my custom dresser came to $76.

Vase1

Photos by Christina M. Tedesco

Not Your Normal Vase

One thing I learned upon being a “grown up” is that flower vases can be surprisingly expensive! In this category, some thinking out of the box can go a long way. I had a cheap soap pump whose look I really loved, but the actual pump had stopped working. I threw away the pump and tied a ribbon around the top of the bottle. I arrange smaller flowers in there, and it makes a great piece to fill up an empty space.

Vase2

Photos by Christina M. Tedesco

Changing out flowers in your vase based on the season is a great way to bring a theme and some color into your home. Right now is a perfect time for tulips, daffodils and any of the more vibrant flowers. I also use a tin watering can as a vase, this goes well with dried flowers or autumn flowers.

Plants

Another great way to brighten up a room is to grow or buy plants. Growing your own plants is fun and cheap, but definitely time-consuming. It takes a while for a seed to fully bloom, but it’s so exciting when you first see it start to poke through the dirt. A short cut for those lacking green thumbs, or patience, is buying your own plants: this way, you don’t have a bunch of pots with just dirt all around your house while you wait for a sprout. Though buying plants is a little more expensive than growing your own, you can look for cheaper ones at your local nursery. When buying plants or seeds, pay attention to how big they grow and the amount of sunlight needed. If you don’t have space outdoors for them, they can always liven up a windowsill.

Plant

Photos by Christina M. Tedesco

A great way to add some decor to the kitchen, and save some money on spices, is to have a windowsill spice garden! Mine adds a great aesthetic to my kitchen, and it definitely makes me feel good when I can cook with something that I’ve grown! Spice plants are only a couple bucks from a nursery and are small enough to sit on your windowsill.

Dress Those Walls

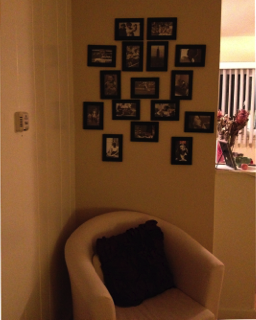
Dressing up your walls makes a big difference. But when buying pictures and frames, the money starts to add up. One thing to remember is that you can do something fun with a bunch of small pictures instead of hanging a big one.

One of my favorite things I did with my current apartment was going online (in my case, to life.time.com) and finding 16 photos I loved. I cropped them to 4×6, then found frames at IKEA for only $2.99 per two pack. This total project cost me $24 and took up a big part of my wall. I just printed the photos on a normal printer: since the photos are pretty small and framed, it’s hard to tell that they’re on computer paper rather than (more expensive) photo paper.

Walls

Photos by Christina M. Tedesco

Posters

I love different film posters, and especially minimalist posters. Now, I know my limits, and I for-sure cannot make an awesome minimalist poster. But, I did play around in Photoshop with some photos and quotes from favorite movies and books and created my own 11×14 posters. I asked a co-worker in our art department to print them out for me, so I didn’t have to pay for printing! (If you don’t know anyone with a photo printer, I would highly recommend using Costco. If you don’t have a Costco Card, ask around: I’ve had lots of friends let me use theirs. Their prices are great and the quality of the photo is really nice.) At IKEA, I bought some 11×14 frames for $8 each.

Counter Space

Counters can seem plain and empty, but it’s easy to fill them up just using normal kitchen supplies, especially when you don’t have a lot of cabinet space. I really liked the idea of canisters with chalkboard labels, but I couldn’t find any cheaper than $8 each. But, on Amazon.com, I was able to buy a whole roll of chalk-paper to then affix to a $10 canister set I found on sale. You can cut out chalk-paper labels into your own designs or buy a paper-shape cutter and make the labels yourself. I also put the metal tins of my favorite tea out on my counter. It adds some color and the tins are actually really cute!

Keep in mind that you need to arrange your appliances in a way that makes use of your space, but you can also show off all your appliances at the same time. If you’re short on cabinet space, another decor idea is stacking your coffee cups against the wall. Or you can buy ceiling hooks, screw them under your cabinets, and hang up your mugs.

Counterspace

Photos by Christina M. Tedesco

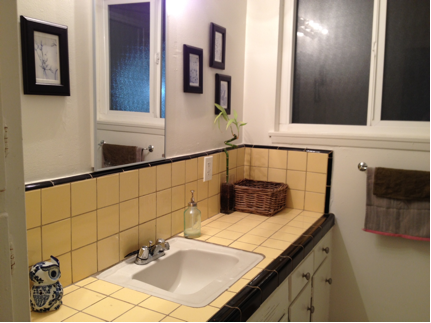
If you have counter space in your bathroom, there’s a lot you can do to keep it organized while adding flare. Plants and candle holders are one good way to add that extra something that your bathroom is lacking. Wooden baskets are useful for holding hand towels and will also make your counter look less empty. Pretty jars with lids hide away Q-tips, cotton balls, and other necessities. Finally, a nice soap pump always adds a good touch.

In my bathroom, I also have a lot of wall space, so I bought more frames and some postcards from IKEA to keep my walls from looking empty and boring.

There are plenty of simple DIY ideas out there to make a difference in your home but not in your wallet—all it takes is some experimenting and creativity! If you have some more suggestions for our readers, feel free to leave a comment: we’d love to hear your creative ideas!