Tag Archives: Being Green

DIY Household Cleaning Products and Haircare

If you had asked ten-year-old me what baking soda and vinegar were good for, I would have peered into my mother’s kitchen cabinets, scrunched my face in confusion, and hazarded these guesses: “Baking soda goes in waffles to make them fluffy. Vinegar just smells bad.” And thus, I lived most of my life in darkness, never realizing the true power of these two lackluster kitchen staples.
CleaningSquare

Photo by Heather Griffith

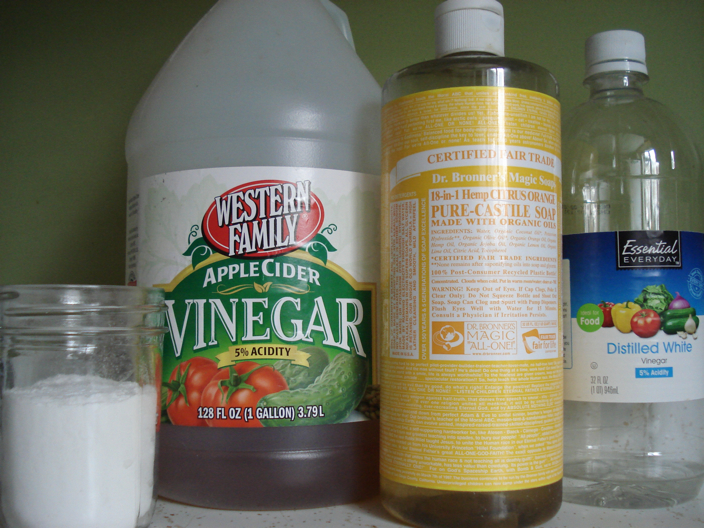
One look at the list of ingredients on any household cleaning product and your head will start to spin. (Unless you’re a chemistry nerd, in which case, you might actually understand what you’re reading.) Sometimes I wonder if it isn’t just a big hoax to get us to buy more petroleum-based products so oil companies can make money. Whether that’s true or not, you can bet your bottom dollar that you can save your bottom dollar by making your own cleaning products, and even shampoo, for a fraction of the cost of your usual products. The secret ingredients? Yup, baking soda and vinegar—they form the foundation for most of these recipes, with a few other household products playing supporting roles:

All-Purpose Cleaner

Use in place of Windex, 409, Mr. Clean, Lysol, or any other spray cleaner.

What you need:

- a spray bottle

- 2 cups water

- 2 cups white distilled vinegar

- 3 teaspoons liquid castile soap (like Dr. Bronner’s, sold at Trader Joe’s and some drug stores)

- 1 teaspoon of tea tree oil

Pour all ingredients into a spray bottle and shake well. If your spray bottle holds less than four cups of liquid, just cut the recipe in half. The castile soap and tea tree oil are optional, but they add cleaning and disinfecting properties.

Surface Scrub

Use in place of Comet, Scrubbing Bubbles, Soft Scrub, or any other abrasive cleaner.

What you need:

- a clean glass jar with a lid that seals tightly

- 2 cups baking soda

- ½ to 2/3 cup liquid castile soap

- 5 drops essential oil such as lavender, tea tree, rosemary or any scent you prefer

Mix ingredients together in the jar and store in a cool, dark place. (It should have the consistency of a goopy toothpaste.) Slap some of it on a sponge whenever you need to tackle some tough grime. The essential oil is optional, but will add antibacterial qualities.

Cheater version: add just enough water (start with ½ cup, and add ¼ cup at a time until the mixture is moist enough) to 2 cups of baking soda to form a wet paste and store in the jar. The baking soda will still work wonders, even without the soap and essential oil.

Toilet Bowl Cleaner

Use in place of Clorox, Lysol, Scrubbing Bubbles, or any other toilet cleaner.

What you need:

- 3 tablespoons to ¼ cup baking soda

- ¼ cup white distilled vinegar

Sprinkle the toilet bowl with baking soda and drizzle the vinegar on top. Let it soak for about a half an hour—go for a run, do some reading, get lost on Pinterest—and then scrub with a toilet brush.

Drain Opener

Use in place of Drano, Liquid-Plumber, or any other drain de-clogger.

What you need:

- ½ cup baking soda

- ½ cup white distilled vinegar

- 2 cups boiling water

Pour the dry baking soda down the drain, then vinegar. Cover with a small plate or jar lid and let sit for 10 minutes to a half an hour, and then pour boiling water down the drain. Don’t worry if your drain seems to “belch up” air bubbles: that’s totally normal.

Shampoo and Conditioner

Use the baking soda solution instead of shampoo and the vinegar solution instead of conditioner. It sounds weird, but trust me, it’s worth a try. Baking soda strips your hair of all of the grease and gunk, while vinegar detangles, seals your follicles, and makes your tresses shine.

What you need:

- 2 clean plastic squeeze bottles (reuse empty shampoo and conditioner bottles!)

- baking soda

- apple cider vinegar (not white distilled vinegar this time)

Into one bottle, mix 1 tablespoon baking soda for every 1 cup of water. Pour 1 tablespoon apple cider vinegar for every 1 cup of water into the second bottle. Make sure to shake each bottle before squeezing some of the solution onto your hair. Start with the baking soda solution: squirt some onto your hair, massage, and rinse. Use the same technique for the vinegar conditioner. (The intense vinegar smell goes away by the time your hair is dry, I promise. If you’re still nervous, add a drop of essential oil or vanilla essence to counteract the smell.)

Note: the ratio of baking soda to vinegar can vary between hair types. If your hair is too dry after using this ratio, try using less baking soda in your shampoo.

Recipes adapted mostly from Women’s Voices for the Earth and here and here on Grist.org. If this gets you on a DIY cleaning and personal care kick, the possibilities are endless! This primer on DIY household cleaners and this list of homemade self-care products are great places to start.
Compost vs. Recycle vs. Trash

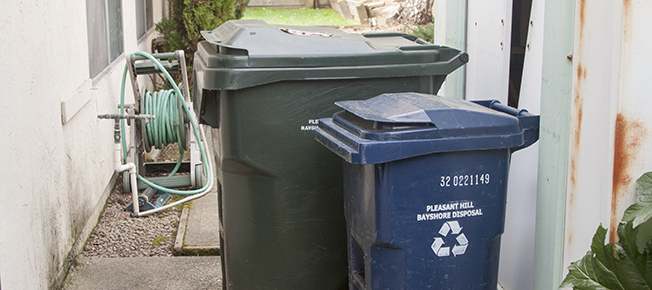
You’ve just finished sipping down warm peppermint tea at a farmers’ market, and you pause in front of the large plastic bins. They loom, inscrutable—challenging you to the Sphinx’s riddle of what to do with your now-empty paper cup, plastic lid, and teabag. Well, the paper cup can be recycled, right? But…it’s wet from holding tea, so does it have to go in the trash? The plastic might have to be thrown away, or maybe it can be recycled. And the teabag is a conundrum in itself: it’s made from plants, so it can be composted, except that it’s also made from paper, so it should be recycled…?

A few weeks later, you and your friends tidy up after watching the game and chowing down on take-out pizza and a few drinks. You again find yourself pausing, this time in front of the small trash can and recycling bin in your friend’s kitchen. You confidently rinse out the glass bottles, rinse and crush the soda cans, and put them all in the recycling bin. But then there’s the pizza box, its paper liner filled with grease and cheese scraps. It’s made of cardboard, so it could be recycled…but there’s grease on it, so maybe it has to go in the trash. None of your friends know the answer, either, so you shrug your shoulders and forget about it.

Okay, let’s drop the pretense. This “you” was me. Though I proudly wear my tree-hugging heart on my sleeve and I was an RA at a college that emphasized waste reduction, I suffered from waste disposal anxiety for years.

I’m here to share what I’ve gleaned from friends whose jobs are to educate the public about these things, from studying the lids of municipal recycling bins and looking up tips from the omniscient Internet.

COMPOST

Foreign though it may seem, figuring out what to compost is actually the most straightforward of all waste disposal skills.

If…

    • it is a plant or part of a plant (vegetable scraps, fruit peels, grains, tea leaves, coffee grounds)
    • it was made from plants (for example, bread or anything made from flour.
    • it is an egg shell

…you can compost it.

Don’t compost anything that came from an animal, or anything that’s greasy. (That means no meat and no dairy!)

Note: Those fancy compostable dishes and biodegradable bags that you might see at farmers markets are biodegradable, but usually only if they are taken to a special composting facility that is more high-tech than your average worm bin. If you get your home compost picked up by a municipal service, then you should be able to throw that potatoware right in, but if you’re doing it yourself, it might take awhile.

RECYCLING

Things get a little more complicated when it comes to recycling, and you should make sure to check the guidelines for what is recyclable in your county.

I’ve lived in California, Texas, and Montana, so to give you some perspective: in the Bay Area, most paper, glass, plastic, and aluminum products are recyclable for free; in the suburbs of Houston, you have to pay for a recycling service; in Missoula, Montana, you have to bring glass recyclables to a drop-off location so they can be shipped to a recycling plant in Washington.

You should be able to find guidelines for what and how to recycle on your city or county website. I’ll outline some general tips, but it’s always good to double-check what services are available where you live.

Important rule: when you recycle food containers, it’s important to make sure they are cleaned of any food residue.

  • Paper and Cardboard

You can usually recycle most items made of paper or cardboard: newspaper, phone books, cereal boxes, egg cartons, etc. Pizza boxes can sometimes be recycled—as long as you take out the liner and there isn’t any grease/cheese residue on the box itself. (Some counties can even recycle it if there’s a little grease on the cardboard, so check the details for where you live.)

Watch out for soymilk (and other alternative milk) containers. Because they’re actually a combination of paper, plastic, and metal, they’re pretty impossible to recycle.

  • Plastics

Ooh boy, plastic materials may be the most complicated. For starters, look on the plastic you’d like to recycle. If there’s no triple-arrow recycle symbol, then it’s gotta go in the trash. But even if there is a recycle symbol, you still have to be careful. You should see a number (1 through 7) inside the symbol, which indicates what type of plastic it is. Most places recycle plastics 1-5, but 6 and 7 aren’t always guaranteed. Again, it’s worth the little bit of time spent on the Internet to learn what types of plastics can be recycled in your county.

Pay attention to plastic bags. Many recycling centers can now recycle plastic bags, but the types that are recyclable vary. In any case, make sure the plastic is clean and dry.

  • Glass

Any kind of bottle or jar can usually be cleaned and recycled. If the bottle or jar has a metal lid, make sure to take it off so that it gets properly sorted.

  • Metal

Any metal can is recyclable—as long as it doesn’t have food residue and it’s empty (in the case of spray canisters). Aluminum foil, pie plates, and trays are also good to go (sans traces of food).

  • Other Possible Recyclables

Electronics can be recycled! But they must be taken to a specific electronic waste recycling center. Check online to see if there’s one near you.

TRASH

And, well, everything else is garbage. Remember that Styrofoam (including those little packing peanuts) is never recyclable or compostable. Things like CDs and batteries aren’t either. (In fact, batteries really shouldn’t even go in the trash. Several chain stores offer programs to accept your old batteries for disposal or recycling.)

This might all seem pretty overwhelming. That’s okay. I used to feel that way, too—it doesn’t mean that you’re an ignoramus or anti-environment. These things take time to learn, just like any worthwhile habit. I’ll leave you with a few simple, easy-to-remember nuggets:

  • If it came from a plant, compost it.
  • If it is clean paper or plastic or glass or metal, you can probably recycle it.
  • If it came from an animal or it’s Styrofoam or anything else that doesn’t fit in the first two categories, trash it.

Like Captain Planet says, “The power is yours!”

Compost1Hero

Photo by Meaghan Morrison

Reusing that Jar: Making Whipped Cream

Okay, let me get this out of the way right now: I’m kind of a hippie. Ok, I am a hippie. I live without a microwave, a working dishwasher, or a hand mixer. I also love to cook. Being a poor grad student, and a little low-tech, but still wanting to try out the latest recipe for mint-lemon crème brûlée (or whatever Martha Stewart is up to these days) means I have to get a little creative in the kitchen.

Whipped cream is one of those delicious accents of sweetness that makes nearly any dessert go from good to mind-blowing. If you’ve ever had homemade whipped cream, then you know it tastes way better than whatever you can squirt out of a can. So, how on earth did Mom, or Aunt Josie, or Grandpa Steve, ever get cream to fluff like the clouds baby angels live on? They probably used an electric mixer. But I’ll tell you a secret: You can use a mason jar instead. (Extra bonus: buffed arms!)

Yes. That’s right. A mason jar. You know, like a jam jar, one of those things that all the hipster kids (including me) are using as drinking glasses and vases right now? They totally make great travel mugs, flower vases, containers for leftovers, and pencil holders… but that’s another article. Or five.

Back to whipped cream—let’s talk about how this works:

What you need:

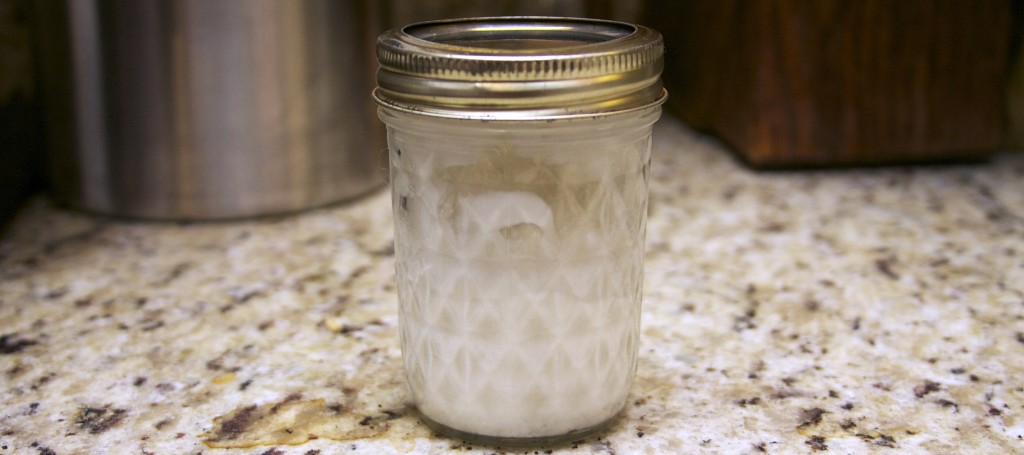
  • One (clean!) mason jar (or an old tomato sauce jar, applesauce jar, or really any glass jar with a tightly sealing lid)
  • A freezer
  • Heavy whipping cream (often sold in pints, like the mini milk cartons you used to get in elementary school)
  • Powdered sugar (totally optional, often labeled “confectioner’s sugar”)
  • Vanilla extract (also totally optional)

What to do:

1. Put your clean glass jar in the freezer—with the lid off—for 15 to 20 minutes before you need to make the whipped cream. (This step isn’t entirely necessary, but it’ll help your cream get fluffier faster.)

2. Take the jar out of the freezer and fill it no more than halfway full with cream. If you fill it more than halfway, the cream won’t have enough room to expand and won’t reach its optimum fluffiness.

3. Here’s where you can add the powdered sugar and vanilla if you’d like. A tablespoon of powdered sugar should be plenty, but it depends on how sweet you want it to be. (No measuring spoons? A tablespoon comes out to be about as much as a rounded average spoonful.) A teaspoon of vanilla extract is enough (about 1/4 of an average spoonful).

4. Now the exercise comes in! (Who said dessert can’t be healthy?) Screw the lid tightly onto the jar, and shake shake shake, shake shake shake, shake that… jar. Vigorously. (Make sure the lid is securely screwed on, otherwise you could end up in the whipped cream version of the Marine World splash zone.) You can even take turns with friends—passing around a jar of cream and making Shake Weight jokes is an excellent way to wait for those brownies to finish baking.

5. The time it takes for your cream to become fluffy goodness depends on how hard you shake that thang and the size of your jar. You’ll know it’s getting close when the cream coats the sides of the jar and makes it hard to tell how full it is.

6. Check after 5 minutes or so of quality shaking, and every few minutes after that. A larger jar—like a quart jar or an applesauce jar—can take a little longer. It’s whipped cream when it’s so fluffy that it doesn’t pour or drip out of a spoon easily. (Sometimes I’m impatient, and I only wait till it’s fluffy but still pourable—a great option if you’re serving it over fruit, ice cream, or pudding, etc.)

Editor’s Note: In an effort to fulfill our goal of road testing some of our articles (and because whipped cream in a jar is ridiculously delicious), Elise and I attempted to follow Heather’s instructions. We discovered that over shaking can lead to undesirable (and inedible) curdling. (Not to be confused with curling—a winter sport popular in Canada.) This can happen quite suddenly. Be careful to check your cream every 15 seconds or so after it starts to coat the sides of your jar. (Seriously, don’t over shake. When you think it’s done—STOP! We can tell you, bickering over the appropriate fluffiness level does not end well.)

7. If you need more whipped cream, spoon and scrape what you’ve got out of the jar into a bowl, wash the jar, and repeat until you have enough for everyone.

8. Enjoy!

What-ifs:

  • If you have leftover whipped cream: store it in the jar or another airtight Tupperware-style container in the fridge. It’ll keep for a few days, but will be iffy after more than a week. Besides, who can let whipped cream sit for that long without devouring it?
  • If you don’t use your heavy whipping cream before the “use by” date: you’re outta luck. I tried freezing my heavy whipping cream once… it was in a glass bottle, and I opened the freezer to find the bottle cracked and frozen to the cream. Then I tried defrosting the cream, even straining out the shards of glass, in an effort to salvage the situation. (I would not recommend this.) It ended up being something in between butter and milk and not all whippable.
  • If you want to get fancy with your whipped cream: go ahead! Experiment with adding a dash of cinnamon or nutmeg when you add the sugar and/or vanilla. (A dash is one shake of the spice jar, if it has a lid with little holes, OR a mound—a little smaller than the size of a dime—in your palm.)
whippedcream

Photo by Meaghan Morrison