An Introduction to Cosplaying

Costume play, more widely known as cosplay, is the hobby of dressing up as characters from various fandoms such as anime, video games, TV, movies or comics. Cosplaying has been gaining popularity since the 90s, but it has been around much longer (Trekkies of the 1960s, anyone?).

Photo by Meaghan Morrison

Because cosplaying has been gaining pop culture’s attention so rapidly, there are many misconceptions about what the cosplay community is. We’re not all antisocial, Japanese-obsessed, overly sexualized, master seamstresses!  The community is made up of all different types of people—people with different body types, different fandoms, and different levels of craftsmanship.

All bodies welcome

Many people in the community (or outside the community) think that, in order to cosplay, the cosplayer must have a body type that exactly matches the character. While I don’t support this idea, I know there are many bigger women out there who work hard to cosplay to fit their body type, simply because they prefer to cosplay that way.

Several of my friends will take an existing character’s costume and make small adjustments in order to make themselves feel more comfortable in the costume. I’ve seen girls take a nearly thong bottom of a character such as Kitana from Mortal Kombat and change it into shorts: this method maintains the idea of the character while allowing the cosplayer to stay in their own personal comfort zone.

Clever craftsmanship

Craftsmanship is also a big area of discussion in the cosplay community. Not everyone has the skills or resources to make everything from scratch, but thankfully China exists. There are many websites that sell a variety of premade costumes from popular series for a relatively low cost, such as EZCosplay or Hello Cosplay. But, be aware: it is a cheaper costume, so it isn’t always the best quality—less money spent usually means cheaper fabric and shoddy stitching! If you are willing to spend more than $150, there are many people who do costume commissions. Commissions can be perfect for your body and style, but can easily skyrocket in price because you are paying for a person’s time and energy on top of the materials that go into making the costume.  If you’re interested in commissioning a costume, try finding a costume artist on Etsy, Storenvy, or Cosplay.com.

Those who are able to make their own costumes are able to make costumes for a lot less than even pre-bought costumes in most cases. Making your own costume doesn’t necessarily mean buying the fabric and making all the pieces from that. Depending on the costume and the complexity, it is really easy to go to a local Goodwill, Salvation Army, or any other second hand store to find pieces that will work for your specific costume. I know I’ve even pulled some random clothes out of my closet, put on a wig, and called it a Mary Jane Watson cosplay.

Photo by Meaghan Morrison

There are many things that can be done to make an affordable costume depending on the series. Granted, if you are trying to make full body armor, it probably won’t be inexpensive. Several of my friends make full body armor or chainmail costumes that easily take up to several months to complete. I haven’t had the opportunity to make such a complicated costume yet, but with all the sewing I do for my costumes, I put in twenty to fifty hours of work start-to-finish per costume.

When I look to make a new cosplay, I start by choosing a series I really enjoy and then pick which character I want to make. I tend to pick characters based on my opinion of the character, as well as the character’s design—I don’t want to make anything that isn’t visually appealing! From there, it’s all about gaining as much reference material as possible: the more angles I can get of the character, the better off I am for my fabric decisions and overall construction.

The pros of cons

Cosplaying is an easy way to make friends through various events and conventions. Events and cons can range from several hundred people, such as hyper-con, to tens of thousands of people (such as San Diego Comic-Con or WonderCon). There are many events going on—it’s just a matter of finding them near you!

Events and cons are easy to find via Google or even just by talking to other people in the community. The cosplay community is a very tight-knit and strives to help one another to be successful in the hobby. To start a discussion online, try visiting Cosplay.com for tips on building your cosplay, or share pictures of your art with other cosplayers on DeviantArt.

How to Turn 26

In the weeks before I turned 26, a tide of nausea briefly rippled through my stomach. It was equal parts vanity, regret, and mortal terror. Turning 26 is not as easy as turning 25, 27, or even the dreaded 23 (when nobody likes you, because, what’s your age again?). There are no more additional perks that come with age—renting a car at reduced cost came at 25, and there is nothing else coming down the pike until Social Security (hah) and being able to get the senior discount at movie theaters and Denny’s (assuming your digestive tract somehow grows an iron coating, or perhaps you stop caring about having to buy new underwear). When you turn 26, you leave the 18-25 demographic—meaning that advertisers now care less about what you think because, statistically, you act and buy and think like a young person no longer.

Photo by Sara Slattery

I began to think of all the things I hadn’t done, all the plans I’d made and failed to live up to, all the ambition that couldn’t measure up to the demands of reality. The thought popped into my head “…what if I am turning 30/40/65/on my deathbed, and I still feel this regret?

Suffice to say, I got quite inebriated that night. But, there is really nothing quite like existential terror to shake you out of your routines or thoughts or beliefs that are, for lack of an accurate and more polite term, bullshit. There is nothing quite like existential terror to make you really step back and evaluate what you are doing, why, and whether or not it’s the right thing to do.

1. Vanity – “I’m too old for this sh*t.” – Roger Murtaugh, Lethal Weapon

You have to take a look at the things you do and the things you did. Some folks can line up shots on Tuesday night and be fresh and ready to go for round two at 5 pm Wednesday. If you are 26, chances are you are not one of those people—I certainly am not.  Put down the Keystone Light and the shot of vodka if you know deep-down you’d rather have a pint of a microbrew or maybe a nice glass of red wine.

At first, when I had this epiphany, I just thought that it was about me getting old and boring, but this couldn’t be further from the truth. It meant I cared more about the journey than the destination—less about getting messed up, and more about really enjoying a nice thing. Youth is turbulent and extreme, and this is just the curve of human experience normalizing. The volume on life doesn’t need to be at 11 all the time. Also, you may now come to understand that these types of volume-11 activities were stupid or embarrassing more often than you are comfortable admitting out loud.

2. Regret – “Sometimes I can hear my bones straining under the weight of all the lives I’m not living.” J. S. Foer, Extremely Loud and Incredibly Close

Life is a game in which you have a finite number of points to allocate to skills, and a finite amount of experience. You must understand that you cannot be both a cowboy and an astronaut—a choice must be made, and that pragmatism will do everything it can to micturate upon the rug that brings together the room that is your life. Money and your means of living will do everything they can to dominate your decision making, making them predicate to happiness—if you let them. It’s your job now, as a 26 year old, to carve out happiness from the charred husk of post–Great Recession America. This will require willpower, creativity, and periodic bursts of self-destruction borrowed from your youth (known prior to your 26th name day as “fun”). This project will take you roughly 30-40 years, so plan it out.

And speaking of “fun,” if you are still doing this stuff well into your 30s and it isn’t otherwise causing your life problems, then don’t listen to critics who’ve “grown up”—if you like doing it, find folks who also like doing it, and make them your friends. Don’t feel bad: remember, it’s keeping you sane and letting you live your life the way you’ve planned it. Unless it’s hurting your health or relationships, don’t be easily shamed by people, especially older critics. (If you feel particularly saucy, remind them that the economic meltdown was voted in by their generation, and that you are dealing as best as you can with the mess they made. It seems to be popular to hate on Millennials—don’t tolerate it. Stand up for yourself.) Eat. Drink. Be merry.

If you wanted to do something, take the time now. Nominally, you’re still young. Go on that adventure, that trip overseas, the road trip across America. Do that thing you always talked about doing, but never got around to doing. Do it now, and let no mortal stand in your way.

Most importantly, do away with the notion that you or anyone else in your peer group has this part of life figured out. If it looks like it, they’re only good at faking it. I’m pretty sure even Mark Zuckerberg went through a “what does it all mean” phase while sitting on a throne made of 100-dollar-bill bricks rubber-banded together and stacked like cocaine-stained legos. There is a relative scale, but more or less we all feel it. Don’t try to compare yourself to other people—they aren’t you. They don’t want what you want, and they haven’t been through what you’ve been through. I was surprised to find that some people I know who are happy on paper are filled with the same existential terror and they question themselves even harder than I did. If you still haven’t found what you’re looking for, go out and find it.

3. Mortal Terror – “Someday, I am going to be dead.” Everyone ever on at least one night, staring at the bedroom ceiling

Yeah, you’re going to die. Unless humanity manages to pull its crap together and invent clinical/biological immortality (which, awesomely enough, exists in lobsters), you are probably going to feel the icy grip of death wrap around your chest and squeeze out your final breath. Did that make you uncomfortable? Good, that means you’re paying attention.

Let it inspire you. Let it motivate you. That mortal terror you feel is a fire underneath you that you need to transition through this phase and accomplish what you wish you had already done. You are down two touchdowns in the game of your 20s, and you need to rally a comeback.

Let your life be worthy of a bard’s song. Hit each day like it’s a good day to die (as if you were a Klingon). Your days aren’t long, and they’re getting shorter.

Establishing a Face Care Routine

“Maybe she’s born with it, maybe its Maybelline.” I don’t know about you, but I have grown up hearing these words spoken in commercials, seeing them written on advertisements, and watching them parodied in many improv shows. Maybelline wants us to believe their products are so natural, no one can tell you are wearing any makeup at all.

Photo by Sara Slattery

Though the sentiment is okay, I never really liked wearing that much makeup and don’t particularly like companies telling me I have to wear it in order to look the way I want to. So, I established my own face care routine early on to try and find what makes my skin feel the best—that way, on days when I am the laziest person in the world, I can still venture out into the real world as confident as if I had been airbrushed by professionals that morning.

Here are a few tips for establishing the right face care routine for you. Whether you be male, female, or an alien from outer space, taking care of your skin is important!

First things first: Wash your face!

First and foremost, to ensure your skin is looking radiant, find a cleanser that works best for your skin. There are a lot of different products out there, so do your research and (if possible) talk to a dermatologist about your skin and what would work best.

Feel really oily all the time? Try products that help balance your pores, such as Cetaphil Cleansers. Or if your skin is really dry and needs extra moisturizer, try products that have lotion in their cleansers such as CeraVe. Or if you are like me and get stress acne, Neutrogena Stress Control acne cleanser works very well for exfoliating my skin. Regular soap and water works… but not that well, and it can dry out your skin. What’s great about cleansers is they are specifically made for the skin on your face.

The right cleanser for you all depends on what your skin reacts to the best. But be realistic! A lot of cleansers contain chemicals or ingredients that help some people’s skin but create problems for others’, so you will need to try a few before settling down. Commercials and beauty ads will always try to sell you on The Next Big Thing but these cleansers are usually just trends that come and go like any other product. Take a long look in the mirror before you browse the cleanser aisle and think about what works best for you. Your skin reacts to the world around you, be it stress, weather, or hormones, so finding a cleanser that works great in all areas will be one that lasts.

How often should I wash my face?

This is also something that will depend on your skin and how it reacts to products. Overall, the best skin routines include washing your face once or twice a day. I know a lot of people who keep their products in the shower and wash their face when they wash their hair. However, depending on what your day, week, or month has been like—whether it’s been super stressful or you are spending all your time outside in the dirt—you might need to change up this routine.

If you wear a lot of makeup, washing your face is paramount because of the extra products on your skin. Wash your face before you apply and after you take it off to make sure all the extra products are gone. You also shouldn’t scrub your face too much. The skin on your face doesn’t go through the same wear and tear that your hands or your feet do, so extra scrubbing or cleaning will eventually strip your skin of its natural nutrients and could dry it out, creating more problems in the long run.

After you wash your face, apply a gentle non-scented moisturizer such as Vaseline or Neutrogena face creams to ensure your skin won’t dry out. If you have oily skin, there are moisturizers that help to prevent extra oil while still moisturizing your skin, such as Cetaphil Oil Control Moisturizer.

What about facials or face-wipes?

I won’t advertise for super expensive and fashionable beauty products, but some of them are really fun to use and make your skin feel great afterwards! You’ll find the fun facial products such as charcoal masks, salt scrubs, and sparkly soaps in a number of stores like Lush or Sephora. Though a daily skin routine doesn’t need these to be successful, they are fun to have and to use. If you are interested in buying some mask products or facial creams, do some research and ask question of the sales representatives about what would work best for your skin and won’t undo all the hard work you’ve put in your daily routine! Use these products at most once a week to give your face a shiny new start.

For those who are on-the-go or just lazy like me, there are some face-wipe products that allow you to clean your face of dirt, sweat, and makeup in a flash, keeping your pores clean and clear. Neutrogena Face Wipes and Oxy Daily Cleansing pads are a good shortcut for those who don’t want to go through the whole process every day. These face wipes can be used as a substitution for most of your facial cleaning, but their powers only go so far. Nothing can replace a cleanser and hot water when it comes to getting dirt out of your pores.

Can I still wear makeup?

For those who wear make-up, the best way to help your skin is to use as little pore-covering makeup as possible. Heavy foundations, if applied too often and not cleaned off properly, can cause some major issues for you
r skin. The best way to help your face stay as clean and clear as possible is to find foundations that are light and let your skin breathe throughout the day—such as a mousse or a light cream. If you can, only apply foundation to problem areas, such as old acne scars or under your eyes. That way, the rest of your skin can enjoy its natural state.

Powder foundations are also a good substitute. After you apply your moisturizer, use a fluffy brush to apply the foundation power on your face, creating a light and even tone. At the end of the day, make sure to wipe all of your makeup off and wash your face so it can breathe overnight!

Popular beauty and skin care brands will offer a wide range of products that cover every problem that your skin could have. Morning puffiness, blackheads, whiteheads, oily, dry, spotted—you name it, there is a cream or a scrub that claims to take care of it. Even though a lot of these products sound really great, a lot of them are just like any other scrubs and cost twice as much. So, when it comes to super cool facial creams that promise to fix everything under your skin, think twice before you purchase and first find out if it’s something you really need or want.
It also takes a while for your skin to react to this new cleaning routine, so don’t be surprised if there are no results within the first couple days of your new regimen. Sometimes cleansers react badly to skin, so if you see angry red blotches on your skin or it gets exponentially oily or dry, find some new products. But, if by the end of one to two weeks you are starting to see a cleaner brighter self in the mirror, then go forth with confidence!

Let Me Fix You: The Pink Chest

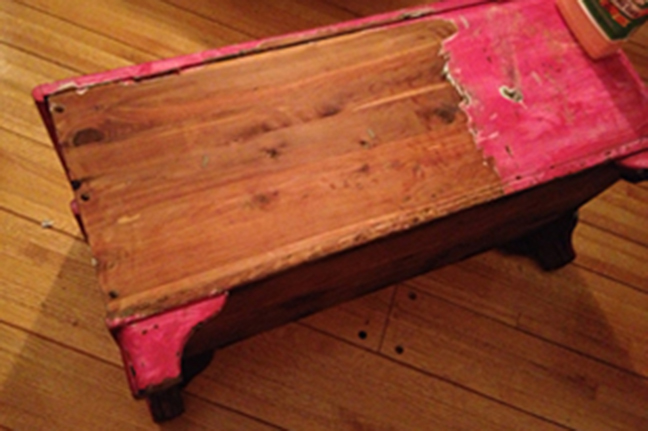
When you live with someone who has a trunk obsession, you might one day find an ugly, ugly, ugly hot pink cedar chest sitting in your living room. Now, because you have taste (and they do too thankfully), the only way this atrocity can stay is if you take it back to its original wooden self. Bring. It. On.

Before I get started though, let me warn you that this is not so much a DIY instructional as it is story time: the trials and tribulations of someone who’s just gonna do stuff and hope for the best.

The paint job was straight up shit. Bad paint jobs mean one of two things: either the previous owner was a crap painter or they were trying to cover something up. You never know what you’re going to find, but with the beautiful, untouched cedar wood visible inside, there was a very good chance that treasure lay beneath.

The Stripping

First I wiped the chest down with Murphy’s Oil Orange Multi-Use Wood Cleaner Spray (think Windex for wood). The goal wasn’t to clean it, just to get the crusty chunks of dirt off. I decided to start with the back of the trunk, figuring this is where I’d do the least damage if things went awry. In lieu of the regular, noxious smelling paint stripper I’d used years ago, I decided to try Citristrip because it claimed to be low on fumes yet high on results (since my work space was doubling as my living room).

The basic idea behind all paint strippers is that you apply a coat on top of the paint, wait, and then scrape the paint off. I poured out the Citristrip (which has the consistency of melted Gak) smeared it around, poured some more and smeared again. The directions suggested using a paintbrush, but I opted to finger paint with a pair of rubber gloves. And then I waited the requisite 30 minutes for it to do it’s mojo (and another 10 because, well, I forgot to check on it).

With Citristrip, you don’t see the paint bubble up like you do with the oh-so-fun smelling stuff, but the paint will discolor enough to let you know it’s working. You can keep it stripping for up to 24 hours, though I never left it on more than two. But the thicker it is and longer you leave it, the easier the paint scrapes.

I used a 3” putty knife to scrape. I tried to follow the grain, scraping in one direction for the longest possible pass so that most of the paint ended up on my putty knife. Then I wiped it off on a paper towel, threw it into a plastic bag, and got ready for the next long swipe. Most of the paint scraped off like buttah. For the paint stuck in cracks and gouges, I used Ikea’s curved paring knife. Beware: aggressive scraping leads to wood shavings. If (and when) I saw strips of wood peeling off, I stopped and moved on.

pinkchest_648x431

Because I was only working on a modest sized towel, and I like my furniture and my shiny hardwood floor, I had to be very careful about dripping and spraying. This meant I could only strip one side at a time instead of doing the whole thing at once.

The Scrubbing

Even after you scrape off most of the paint, there’s still a goopy, residue left on the wood that just smears if you try to wipe it up with a paper towel. In my head this gunk was full of stripping chemicals that were going to hurt the cedar if they stayed caked on. So I washed each side individually after I stripped it and then I threw it in the bathtub (where it fit perfectly) to scrub it some more.

Originally I was using the Orange Cleaner spray with grade #00 steel wool (steel wool comes in several grades). But by the time I’d stripped 3 sides, I only had a 1/4 of the orange spray bottle left, so I moved on to the more economical Murphy’s Original Oil Soap. The steel wool not only picks up the gunk left by the paint stripper, but it also acts as a gentle sander. Unfortunately, the #00 was just a bit too fine which meant it would get matted with all the crud much more quickly. I almost went through the whole 12 pack, hence switching to the coarser grade #1 steel wool which was much better at lifting up stubborn paint.

The advantage of doing this in a bathtub (or if you’re lucky enough to be outside near a hose) is that there’s a constant supply of water and boy oh boy did that liquid blacken. The water that came off was nasty (a putrid diarrhea color) and it sprayed everywhere. Good news was that it smelled nice. It was probably in the bathtub for hour until the water finally ran beige.

The Sanding (or My Big Mistake)

I left the trunk to dry overnight and when I woke up in the morning it looked awful. I have scrubbed this thing to an ashy death, killing all the potential I spent hours scraping and scrubbing into existence… not really, but it felt like it. Having already read things like this, I was aware that this was another step in the process but it wasn’t any less horrifying.

My naivety led to me to think that all the ashy discoloration would simply go away with some oil and that sanding was only for the rough patches. The wear and tear was cool, why sand that away? So I gave it a mild sanding with some 320 grit sandpaper (yes, sandpaper has grades too) and then I moved on to oiling. In retrospect, this was my big mistake, but more on that later. The only thing I actually sanded was the trim because it had this funky peach fuzz going on along with a faint greenish hue left by the original olive colored paint.

The Finish (But Not Really)

Now for what felt like the daunting part: choosing a finish. There were way too many choices, but I surmised the standards were oil, varnish, shellac and laquer. My biggest concern was ease-of-use in a small space, but I also wanted a natural shine, not a plasticy one, so I went with oil.

Typical oil finishes are Danish Oil, Teak Oil, Tung Oil and Linseed Oil. I didn’t want to stain the cedar wood, I just wanted to, ya know, “moisten” it. Linseed was crossed off simply because none of the pretty, DIY blog posts I’d read used it, Danish oils usually have some stain and other chemicals in them, and Teak tends to darken the wood, so the last man standing was: Tung Oil.

Turns out most stores don’t sell the real stuff (the one I found at Home Depot was a Tung “finish” that had more chemicals than oil in it) so I ended up buying Hope’s 100% Tung Oil from Amazon.

I snapped the rubber gloves back on, poured the honey-like oil on a rag (the size of a wash cloth courtesy of an old towel) and rubbed it in. The smell wasn’t amazing (burnt chestnuts?) but tolerable. I did two coats and let it dry.

For the sallow colored trim, I discovered that Minwax made stain pens with which I could essentially Sharpie my furniture. I picked the Red Mahogany color and even though it didn’t stain perfectly even, probably because I’d oiled it first, it gave the illusion of natural wear over the years.

Finally, I waxed the chest with Feed-N-Wax (because other people said to) and hoped that I was done.

The Real Finish

Unfortunately, even after the wax had dried, there were still noticeable parts of the lid that looked ashy/greenish/blah. Annoyed but determined, I found some 60 grit sandpaper in the toolbox and started sanding my little heart out. Not only did the sanding clear up the discolorations, it actually brought out more the wood grain than I expected.

I’m halfway done with sanding and kicking myself that I didn’t do this earlier. What can I say, I’m an idiot perfectionist. The current plan is to try out a power sander and then oil it back up sans annoying imperfections. I might hold off on the waxing though, it dries matte and I’m not sure I like it. I know I’ve sanded away the shine, but I’m making the prettiest goram chest I can, even if I have to backtrack.I started this project having no idea what I was doing, but at the end of the day it’s all trial and error whether you have a manual or not. Just accept that you might screw it all up… or you might not. I’m still figuring it out.

Extra Credit: Apparently, to avoid spontaneous combustion, this is how you dispose of oil soaked rags:

Planning Your Overwhelming Trip Overseas

When the Venice ferry stopped at the Rialto station and several Italian men in serious-looking uniforms boarded and started checking people’s tickets, I thought, “Man, I coulda planned this better.” My best friend and I did not have a ticket for that particular ferry, and we were promptly and sternly written a 70 euro ticket (each!) and deposited—red-faced and stammering excuses—at the next stop, a 45 minute walk from our hostel.

When traveling abroad, it can sound fun to go with little to no plan. It sounds very romantic and exciting to frolic about Europe (or wherever you’re headed) with every intention of going wherever the winds of adventure take you and departing whenever these winds happen to blow. That might work out really well for some people. For most of us, though, that might lead to being stranded in Milan with no money, no place to sleep, no plane ticket home, and numerous bags of expensive Italian dresses.

I consider myself a fairly thorough trip planner and, aside from the misstep with the ferry police, my 3-week trip to Paris, Venice, Florence, and Rome was amazing and filled with safe, clean hostels, cleverly-purchased transit tickets, top-notch food, and a plethora of art and activities for the student budget. How did I plan it, you ask? That’s what I’m here to tell you! Though this article comes from my personal knowledge traveling France and Italy, these tips can definitely be of use when planning any trip!

Step 1:

Make a “Places to go, Things to see” list. If you are going with a friend or group of friends, it is important to consult with them early about this. Maybe the biggest problem you’ll face is that your friend digs architecture while you want more paintings. Maybe, though, your friend wants to hit up every DVNO nightclub he can find, while you expect him to get up for your 6 am snorkel appointment. Even if you are good friends, it’s important that you discuss styles of vacationing (I’m a big “main attractions” and “foodie spots” girl; others are into nightlife, outdoor adventure, leisurely relaxation, etc.), as well as pace of vacationing (squeeze in 3 museums, 1 monument, 2 long meals, and a play every day or slow it down some?).

Step 2:

Narrow down that list to fit in to your budget (both time and money). Again, pace of the vacation plays a big role here. If you want to fill each of your days to the brim, go for it! Just be wary of wearing out. Also keep in mind the locations of all these “must sees.” If your budget allows you to hit up every European capital and then go to Greece before heading home, that’s awesome! But most of us can’t make that happen. Remember that it costs both time and money to move around a country or continent, and it might ultimately be worth it to you to skip out on Madrid in order to spend two more days in Barcelona.

As you research, you will probably have to do steps 1 and 2 several times, but that’s okay. Better to go to wherever you’re going with a practical sense of what you’ll be able to do, rather than be there and either spend your time running around like crazy or leave fuming about missing the second, smaller Jewish History Museum in NYC.

Step 3:

In order to do step 2 more effectively (and you’ve probably already done this), it’s now time to start making choices and estimating and adding up prices.

  1. Airfare – Use sites like Kayak and TripAdvisor to find the cheapest airfare. You can even set up alerts for your chosen trips!
  2. Accommodations – Hostels are the way to go for the discerning, frugal traveler. Websites like HostelWorld and HostleBookers can help you out with reviews and amenities of tons of places.
  3. Travel within City/Country/Continent – Look for youth and student discounts for trains. Also, most city subways and bus systems have a week long traveler pass for a discount.
  4. Food Budget – If you want to splurge on food, plan on it and save! Also, use Yelp or travel books to figure out how much your average meals will cost to budget.
  5. Attractions and Shopping Budget – This will be very different for different types of travelers, but planning it out will help you stick to a budget.

I’ll share more on these next week in my article about Budgeting for your Overwhelming Trip Overseas.

Step 4:

Chart out your course. Now that you have brochures, maps, bookmarked webpages, some sort of budget, and hopefully a travel guide (believe me, I used mine everyday!), you are ready to set out an itinerary. “But,” you protest, “I don’t want to plan out every millisecond of my trip! I want to play some things by ear, check out the local scene, have some freedom!” Of course you do—this is your vacation after all. However, planning ahead, even with a vague sketch of a plan, can save you a lot of money and can help ensure that you make the most of your time abroad, so you never have to say, “Man, I wish I knew that electro K-pop festival was coming to Berlin before I left for Moscow.” Which is a thing I am sure countless disappointed electro K-pop fans have said.

When charting your course, your finalized list of necessary stops and cities is invaluable. You want to amp up the research at this stage, looking into the goings-on of these cities. Are there festivals or events or holidays you really want to be there for? Are there any of these that you want to avoid? I was in San Francisco for Pride a few weeks ago and, let me tell you, I did not envy the clueless tourists trying to navigate BART to get to the airport with 80 pounds of luggage. You definitely want to avoid experiences like that—though enjoying Pride in the city on foot with nowhere to get to except for your hostel that night would be awesome.

Of course, you also want to use logical proximity to chart your course. Keep in mind the general order of your destinations. Also, decide if you want to do a circular route so you can fly in and out for the same city (cheaper) or a straight route from, say, London to Budapest (no backtracking, but pricier airfare). Like I said above, you can often tweak your plans for hopping from city to city and country to country, especially with an open rain pass. That way, all you need is the general timeline of your trip and you can change the rest to suit your whims.

Some people (me, for instance), are a bit more diehard in the planning department. I know that my traveling style is squeezing every last drop out of cities, and with that trait comes a bit of a micromanaging vacation planning style. In a three-day trip to London, I managed to get in more than my travel partner would have done in a week on his own. If this sounds like you, then you will be doing even more research. Which night is 80s night at that club? Pencil it in. That antique store closes on Mondays? We’ll do the zoo that day instead. The tactic I found most useful for my short London trip was to jot down the times each of my necessary attractions was open and pin those times to a tourist map. Then, I used iCal (no Google Calendar yet, but that would have been perfect) to set aside times to do each item on my long list. I moved everything around based on open times and location until I had a strict 9:00 am – 8:00 pm schedule for each day, squeezing in Harrods, Buckingham Palace, Parliament and Big Ben, the London Eye, the Tower, Westminster Abbey (my favorite!), the British Museum, Saint Paul’s, the Globe (play included), Covent Garden, and Hampton Court Palace. Probably you fall somewhere between that (my highest level of dedication to trip planning) and complete laissez-faire (homelessness in Europe, basically). Do the level of charting that seems appropriate to you to make sure you feel comfortable and confident but not overwhelmed.

Step 5:

Get out of here! You’ve set a plan for your adventure, you’ve got your tickets, your passport is burning a hole in your pocket—it’s time to go! But, before you do, remember: not everything will go according to plan. The Eiffel Tower might be closed for maintenance, the Great Wall might have crumbled a little bit, Venice might sink! Your superb planning cannot account for every little thing, so it’s important that you roll with the punches and stay flexible.

That can get tough sometimes, but remembering that you’re on vacation and it is your job to have fun (or at least be relaxed) can often help. Even if things don’t “go wrong,” don’t be afraid to change your plans. You can have an amazing, unexpected adventure that way! One of my favorite days in Rome was one when we were too tired to navigate the city on our own and signed up for a bus tour of a vineyard with our hostel. Totally unplanned, totally amazing.

Stay sensible, stay safe, and most importantly, have fun!

EuropeSquare

Recognizing and Helping Depression

In thinking about writing this post, there were a lot of angles I considered coming from. Do I talk about how, in my work at a university, I frequently see students who are buried under the weight of this nebulous and frightening disease? Do I talk about family members or partners or friends or other loved ones whom I have been able to help or, in some terrible cases, not been able to help? What I hope my internal editorial struggle conveys is that depression is incredibly common. According to the CDC, about 1 in 10 adults report experiencing depression in their lifetimes. The number is even higher for young adults.

Seeing a friend, family member or loved one who might be depressed can be scary and overwhelming. But depression is both recognizable and treatable. This should bolster you, knowing that if you can catch depression in yourself or recognize it in a good friend or loved one, you can go a long way toward making someone’s life better.

Depression and other mental health issues are still incredibly stigmatized in the U.S., and so it’s important to remember a few things: people are never, ever at fault for their mental health problems, and treating them like they are only alienates them and makes it harder to help them. Second, you will probably not get a bouquet of roses from someone you are helping, but that does not mean you didn’t make a difference.

Below are some basic signs that you or a loved one might be depressed. Keep in mind that depression is complex, that this is not an exhaustive list, and that this is not in order of importance. It is a good place to start, however, if you are feeling concerned. Here are some common aspects of depression:

  • Feelings of hopelessness and/or pessimism—like nothing will ever get better.
  • Feelings of guilt, worthlessness, and/or helplessness—like nothing matters or you can’t do anything right.
  • Irritability, restlessness, or being easily angered (this is especially common for men).
  • Sharp and unexplained change in behaviors, including the following:
    • Disinterest in activities, hobbies or work that were once very important or fun;
    • Feeling very tired or excessive sleeping;
    • Insomnia, early-morning wakefulness;
    • Change in eating behavior, like overeating, skipping meals, or a loss of appetite.
  • Difficulty concentrating, remembering details, and making decisions, especially if this was not an issue before.
  • Thoughts of suicide or suicide attempts.
  • Persistent aches or pains, headaches, cramps, or digestive problems that do not get better, even with treatment.

If this sounds like someone you know, it’s really important that you reach out to them. Here are some basic steps for talking about depression with someone you love:

  1. Express your concern. If you see something, say something. Depression can be incredibly isolating, and so it’s very important to show that person you notice and are concerned.
    • Do this with as much care and kindness as possible, in a private and controlled environment. This is not a good discussion to have on the bus or in a crowded coffee shop. Talk about specific behaviors you’ve noticed, but don’t make the observations sound like you are accusing them of having done something wrong. Something like “I’ve noticed you’ve been missing a lot of work recently, I’m concerned that something might be wrong” is much better than “Why have you been missing so much work?” because it is less accusatory.
    • The person you are speaking with may rebuff you, get angry, or be relieved that they have someone to share with. It feels best when people are relieved, but don’t expect this reaction 100% of the time. If the person you are concerned about is angry at you, do not take this personally. Depression can come along with strong feelings of shame and anger, and this can make it easy for the person to deny the severity of what they are experiencing and lash out at you. Remember, bravery isn’t a lack of fear, it’s doing something despite your fear. Even if you are worried about their reaction, it’s still important to reach out.
  1. Listen. Give your friend the space to express themselves and really listen. Don’t jump in, don’t talk about your own experiences (especially don’t tell that story about your cousin’s friend’s brother), and don’t give advice. Also, don’t be offended if they are not interested in telling you their life story. Create a welcoming and safe space, and allow your friend to be supported by you.
  1. Refer. I know, I know, we just talked about not giving advice, but this is different. Having a resource or two on hand to give to your friend is incredibly important. This can be anything from a hotline, to the number for your therapist, to the counseling center at your university (if you’re still in school), to an article online talking about depression.
  1. Follow Up. Check back in with your friend after a day or two and see how they are doing. Again, express your concerns, and listen. You can’t make someone get help, and you shouldn’t follow up in order to make sure that they do. This is mostly to let them know that you are consistently going to be there for them, and that you are not going to bail after one (likely very intense) conversation.

Lastly, here are some resources to keep in your pocket:

  • In an Emergency: Call 911 – If someone is thinking about attempting suicide or if they have already attempted suicide,  it’s critical to get highly trained professionals on your side. Don’t hesitate to call 911.
  • National Institution of Mental Health – Information about Depression: Interested in some more information about the prevalence and effects of depression? That is provided here in a helpful way and contains much more information about the many types of depression, treatment options, and experiences of those who have been diagnosed with depression.  http://www.nimh.nih.gov/health/topics/depression/index.shtml
  • Suicide Hotlines: Sometimes it’s critical to have someone to talk to and give you strategies to not harm yourself, or to help you work through whether a friend is in need. These are free and most are available 24 hours.  They have services specifically for veterans, Spanish speaker, and teens, among others. Call if you need help yourself, or if you need help helping someone else. Sometimes friends aren’t available or don’t have the right tools, and this is where these folks come in. http://www.suicidepreventionlifeline.org/
  • Online Emotional Crisis Support: Not everyone feels comfortable on the phone or has access to a private place to have a conversation. This is the chat room version of the service above.  http://www.crisischat.org/
  • College Student Helpline: Depression for college students is very common. 18-24 year olds experience a wide range and, according to some researchers, the highest prevalence of mental health problems. These folks are specifically trained to help college students.  http://www.ulifeline.org/
  • Grad Student Helpline: Many studies have shown that for whatever reason (high stress, high pressure environment, self-selecting factors), grad students are at a very high risk of poor mental health. Like the resource above, this helpline is specifically geared to help graduate students and to understand the issues they face. http://gradresources.org/

DepressionSquare2

The Five Day Summer Cocktail Challenge

This whole experiment had but one simple catalyst: for the first time ever, I have a pool. It is summertime and I have a pool!

This has never happened before, and as a result there have been a lot of impromptu instances of, “Hey come over, and let’s sit by the pool and drink!” But there are only so many bottles of “Pinot Greeg” one can chill at a moment’s notice, so I decided that, for five days, I would create a new summer cocktail each evening using only the ingredients I currently had in my fridge and liquor cabinet.

Five summer cocktails

Here is a rough list of the items I had to work with:

  • Lemonade
  • Orange juice
  • Frozen raspberries and strawberries
  • Black Cherries
  • Lime Sparkling Water
  • Cranberry-Raspberry juice
  • Rum
  • Tequila
  • Whisky
  • 1/4 a bottle of margarita mix
  • White Wine
  • Rosé Wine
  • Fresh basil
  • Cucumbers
  • Honey

And here are the results!

Sidenote: I tend to like my drinks on the stronger side. If you are of the lighter persuasion, you may want to cut the alcohol ratios in half or double the juice ratio. Whatever you fancy!

DAY ONE

Named after my dear friends who once made me a very similar cocktail on a sweltering New York day in August, I call this sweet thang The Brosman-Keach.

1

Day One: Ingredients

2

Day One: Drink

INGREDIENTS:

  • lemonade
  • whisky
  • frozen raspberries (keep them frozen, like juicy little ice cubes!)

Add ingredients in no particular order. I don’t typically do exact measurements, but this is pretty much 1 part whisky per every 2 parts lemonade. Mix to taste, however, if you like yours stronger. Serve in a glass on the rocks.

Simple, tangy, and super refreshing. The best part is the syrupy, boozy raspberry juice at the bottom once you finish it!

DAY TWO

My basil plant had basically begun to commit seppuku in this 100+ degree heat, so I thought it best to utilize it in a drink before it passed on to herb heaven. (Confession: even sans global warning, I still kill all my houseplants.)  The result? Frozen Boozy Basil Lemonade.

3

Day Two: Ingredients

4

Day Two: Drink

INGREDIENTS:

  • lemonade
  • tequila
  • 4-5 basil leaves
  • ice
  • 1 slice of cucumber for garnish

Blend 2 parts lemonade for every 1 part tequila with the basil leaves and the ice and serve frozen, garnished with the cucumber.

Much like a mojito, a little kick from a fresh herb goes a long way! The only stumbling block I encountered here was that the drink and the crushed ice did not want to be friends. They just kept separating, as indicated in the photo above. This can be alleviated, however, by just drinking it right away!

DAY THREE

I thought I’d make my poolside go-to work overtime and give me a little sangria action. The result? Triple Berry Threat White Sangria, baby.

5

Day Three: Ingredients

6

Day Three: Drink

INGREDIENTS:

  • frozen raspberries and strawberries (again, keep ‘em frozen so they melt in the drink!)
  • fresh black cherries (pitted and cut in half)
  • 2 parts chilled white wine (I used pinot grigio here)
  • 1 part rum
  • a splash of OJ
  • a splash of lime sparkling water.

Pour liquids over berries.

Addendum: As I was drinking this one, I realized it could do with a little simple syrup, as it’s quite sour! Since I didn’t have any simple syrup (i.e. I was too lazy to make it myself in that moment), I decided to get a little sassy and improvised with a drizzle of honey on top. You may want to do the same if it’s too tangy for you!

DAY FOUR

I’m convinced that I got progressively better (and drunker) at this game with each passing day, so I am telling you right now that these last two drinks are definitely my MVPs. This bad boy here was borne of a need for twice as much margarita mix as I currently had in my liquor cabinet. Necessity, the mother of invention, would like to introduce you to… The Cran-Razarita!

7

Day Four: Ingredients

8

Day Four: Drink

INGREDIENTS:

  • 1 part Tequila per every 2 parts cran-raspberry juice
  • a splash of margarita mix
  • frozen raspberries (yes, as before, keep them frozen!)
  • ice

Blend the above, serve frozen, and rim with salt (if that’s your jam). Or, however you usually like your margaritas!

I’ll bet they didn’t think of this on that episode of Mad Men where they’re trying all the different Ocean Spray flavors!

DAY FIVE

I really don’t like rosé wine. Every time I buy it, I think I’m just craving a change in my world that manifests itself in a weird wine choice instead of a healthy life choice.

Point being, I did that. I bought rosé wine recently. But as luck would have it, I finally figured out what to do with it! It was pretty much destiny in the form of … Hard Cherry Lemonade!

9

Day Five: Ingredients

10

Day Five: Drink

INGREDIENTS:

  • 2 parts Rosé or white zinfandel wine
  • 1 part rum
  • 1 part lemonade
  • a handful of black cherries (cut in half and pitted)

Some of you Los Angeles–dwelling vino aficionados might recognize the Malibu Wines shoutout on the glass here: apropos for the girliest drink on the menu. And yes, although this is the girliest drink, it is also probably the strongest! Drink slowly! Or don’t. :)

What You Don’t Know About Sex Trafficking

I first heard about sex trafficking from a speaker at my high school who had gone to Southeast Asia and co-founded an organization called Love146. (There’s a very interested story behind the name that I recommend reading!) Love146 was created to abolish sex trafficking and exploitation all across the world and has become very successful.  I didn’t know anything more than the term before, but he piqued my curiosity and inspired my activism, and I have studied sex trafficking ever since: writing a feature narrative script about the victims of sex trafficking and, currently, working on a short film I created based off of that feature.  (If you would like to check out the progress of the film, please visit our Facebook page!)

Photo by Sara Slattery

Photo by Sara Slattery

Sex trafficking is an issue that occurs all over the world: some places are more common than others, but it even happens here in the United States.  Southeast Asia has a huge ongoing issue with sex trafficking, specifically counties like Cambodia and Thailand, because it is common for law enforcement to turn their heads on this issue.  The U.S. is obviously stricter, but that doesn’t stop trafficking from occurring!  The U.S.’s stronger laws simply force the traffickers to be more creative in their business. And yes, the traffickers look at capturing and selling children as business and only business.

Love146’s website shares many real-life stories of victims.  One story entails a girl named Robin who was 7 years old when she contracted an STD after her mother pimped her out to make $50 per customer.

A large percentage of American runaway children become prostitutes, many of whom are tricked and forced into this lifestyle where they have no choice in the matter. Traffickers in the U.S. use all sorts of tricks to capture children and lead them into a life of sexual trafficking and abuse.  In one method, male or female traffickers will pretend to be from modeling and acting agencies in order to find children they can coerce into trusting them. Some men trick young girls into falling in love with them, telling them everything a young girl could want from a man.  They spoil them and pretend to care for them until the girl puts all her trust into him.  Traffickers know how to look for children who are naive, have low self-esteem, or have bad family situations, and they use these weaknesses against them; however, this does not exclude upper- and middle-class children, as traffickers will utilize any opportunity.  Some children are not coerced, but abducted from their neighborhoods and homes. And some are even sold by their own family members.  Traffickers use decoys like massage parlors, bars, and homes to create a cover for what is actually going on behind closed doors.  But sex traffic isn’t just a domestic market: not only are children taken from their neighborhoods in America, but women and children are also shipped into and out of the United States.

The Internet has been a huge source for traffickers to find and/or sell women and children.  When I was in college, a petition was circulating to end one of Craigslist’s sections devoted to classifieds: traffickers had found a way to use the “adult services” section to sell women and children for sexual purposes. The section has since been shut down entirely.

What does sex trafficking entail exactly?  You’ve probably seen and read news stories about children and women who are kidnapped and forced to perform sexual acts on their capturers.  Other common situations force the victims to have sex with various clients—up to dozens of customers daily.  The victims do not usually see any of the money their pimp makes using them.  On the website of Mark Ridley-Thomas, an LA County Supervisor, it states that these women are forced to make between $500 and $1000 a night and forced to perform sexual acts to men as much as three times their age.

Even though sex trafficking seems far from our own lives and cities, it is actually happening right in our backyard.  It’s reported that, each year, the number of victims has increased in Los Angeles since 2010: California Attorney General Kamala Harris stated that “there were 304 victims from April through June of [2012],” and continued that it’s “a figure that is triple the 100 victims during the same period of 2011.” This number reflects all of human trafficking, which includes labor trafficking along with sex trafficking.

Recently, a man was arrested in Long Beach, accused by U.S. Attorney spokesman Thom Morzek of “forcing the 17-year-old girl to work 12 hours a day to perform sex acts with about 50, and possibly more, men, in just the course of a couple of weeks, and forcing her to give every single dollar that she earned to him.”

If you pass by Sixth Street and Ceres Avenue in downtown LA, you will notice a mural painted on an auto repair shop.  The painting shows the face of a young woman along with a quote saying “I am a survivor of sex trafficking.”  The woman depicted is a sex trafficking survivor who was forced into prostitution at the age of 11 and lived this life for over ten years.  She recently was able to escape and now she is a mentor.

If you are interested in learning more about sex trafficking and learning about how you can take a stand against it, there are many great organizations to check out like Polaris Project, Not for Sale, Shared Hope International, and Somaly Mam Foundation.  There are so many ways you can get involved in the fight against human trafficking, from raising money to just telling a friend about this issue. One of the most important ways to help end this ongoing issue is awareness.  The more people who know about this issue, the more people who can help bring this issue to and end.  There can be a good ending to all of these children’s stories.

How to Paint a Room

Whether you are painting your dream house or just touching up your bedroom walls, painting can be a very enjoyable, yet daunting, activity for those unfamiliar with the process. This is something that you’re going to have to look at every day, so it is important to do a good job! If you have never painted before, here are the basic steps to help you get started.

Materials You Might Need

This is a basic list of the materials you will need. Every job dictates slightly different tools, but this will get you in the right direction. Talk to the color specialist at your local hardware store for better information about what tools are best for your specific job.

  • Paint/Primer
  • Brushes/Rollers
  • Trays
  • Plastic/Drop Cloths
  • TSP/Cleaning Supplies
  • Spackle/Putty Knife/Sandpaper
  • Ladders
  • Mineral Spirits/Solvents
  • Sand Paper
  • Imagination! (Not Optional.)

Prepping

Before you start painting, you’re going to need to prep your work area.

First, you will want to cover or clear the room of any furniture or other things you don’t want to get paint on. You can use plastic sheeting or drop cloths in order to protect your floor from splattering paint. To make it easier to navigate and prevent trip hazards, you may want to secure the sheeting to the floor with blue masking tape, also known as painter’s tape (or any other tape that won’t leave residue).

If you have a different color trim or need to achieve a nice, crisp line at the edge of where you are painting, you will have to use tape. Often, people use regular blue masking tape because it is relatively cheap; however, if paint is left on the tape for too long, it is very likely to seep beneath the tape and leave hairy looking lines along your edge. What you should use is a tape with some type of foam chemical laced on the edge that will form a seal that prevents any paint from leaking. I recommend using FrogTape, which is the original paint block tape. Any contact with water will activate the chemical, so painting over it with water-based paint will automatically activate it. To use it with oil-based paints, you have to manually activate the product with a damp cloth before painting. Tapes like these can be left up much longer, and your paint will not bleed. If you insist on using regular masking tape, be sure to remove the tape as soon as possible.

The next step is to prepare the surface on which you will be painting. Depending on what type of paint project you are working on, there are several things you may have to do.

For older walls, perhaps already painted once before, you may need to fill in any cracks or nail holes with spackle or nail hole filler. These can be easily applied with a putty knife and are usually around five or six dollars for a small tub. A popular type of spackle for painters is lightweight spackle. If your brand new tub of spackle feels practically empty, it is probably a lightweight spackle. The benefits are that it will dry much faster than regular spackle and, in many cases, they contain primer, making small patch jobs a breeze. Lightweight spackle is not very durable though, so I would only recommend it for small holes and cracks. If you’re working in a bathroom or place with a lot of moisture, use vinyl spackle or one that will dry flexible. These types of putties are less likely to crack when exposed to moisture. Once the putty is applied and dried, just sand it down to the level of the wall with some sandpaper.

Cleaning

The next step is to thoroughly clean the surface you will be painting. At the very least, give the wall a good cleaning with warm soap water, and then rinse it off. However, many people prefer to use Trisodium Phosphate (TSP for short), an all-purpose cleaner that also helps prepare the surface to be painted.

Priming

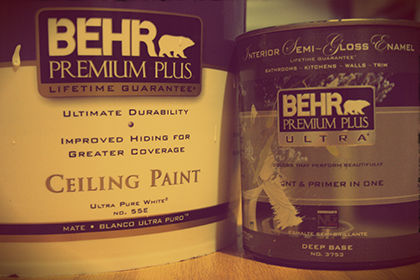
The last thing to do before painting is optional depending on several factors. Many people argue over whether you actually have to use a primer to paint your wall, but it all comes down to what is currently on your wall and what kind of paint you are using. A good rule to remember is that if it is a surface that has never been painted before, you need to prime it. Even with extra coats of paint, it just won’t stick as well without the high levels of titanium dioxide found in primer. (This is essentially what makes the primer adhere to the wall and your paint.) Today, most paints are labeled as “Paint and Primer in One,” which many people assume means they won’t have to prime. Typically, a Paint-and-Primer-in-One paint simply has added titanium dioxide, but it’s not nearly at the same levels as a true primer. What the Paint and Primer in One does is save you from re-priming the previously painted surfaces. However, if you are painting over a deep color and trying to achieve a light color, you will most likely need to prime anyway, otherwise your color will appear much darker because of the previous color underneath.

Painting

Once your work space is ready and your primer is completely dry (your can of primer will have instructions specifying how long to wait), you are ready to paint!

Now that you are all prepped, the actual painting process is actually pretty straightforward. Many people have different preferences regarding the order of things to paint, but traditionally you start with a brush on the edges of the wall and then use a roller to finish the main portion. Many paint manufacturers have different suggestions depending on what type of paint you use, as well. Be sure to read all of the information on your particular can of paint.

To begin, open your can of paint with a screwdriver or a paint can key (you can buy these at most hardware stores for a dollar, and they help preserve the integrity of your can’s lid). Use a stir stick or other stirring device to mix your paint up a bit to ensure none of the pigment has settled on the bottom. If your paint has been sitting for a while, it might even be necessary to have your can of paint shaken again. As long as the can is still in good condition and the can is more than half full, most hardware paint departments will be happy to shake your old can of paint, even if you didn’t buy it from them. Worst case scenario, you can shake the paint by hand in circular motions.

Next, pour some of your paint into a small cup or other paint carrying device. Use your angled brush and dip it about half way into the paint. Wipe off any excess paint, and then cover the edges of the wall. The benefit of the angled brush is you can get a closer, more even application of paint with less risk of getting the paint where you don’t want it. Reapply the paint on your brush occasionally, never letting it get too thin or too thick. If it is too thin, your wall will turn out splotchy. Too much, and it will not dry properly, potentially leading to many other problems later on. There are also smaller rollers designed to be used for this purpose; however, I personally find that a brush gives you a lot more control.

Now that you have finished your edges, you can move onto the main portion of the wall. Pour some paint into your tray (the deeper end). Place your roller into the tray and pull back, bringing some paint with you. You then roll the roller back and forth on the textured portion, ensuring you get a nice, even coverage of paint. If you get too much paint on your roller, it will not roll properly, and is liable to splatter paint back at you when you roll. Too little and you will have to reapply the paint to your roller more frequently. If you are right handed, start from the right end of the wall and work your way left. If you are left handed, do the opposite.

Many people assume the best application with a roller is vertical lines, but in order to get the best coverage and smoothest final product, you should actually apply the paint in a slight angled fashion resembling a narrow W or N shape, and finish with a straight line all the way to the top when your roller starts to run dry. This is so you don’t leave huge gobs of paint at the edge of the ceiling. Every time you finish one strip, your next should overlap by about half the size of the paint roller. To finish up you do a rollover, which is just rolling over the area you just painted with your roller, without applying more paint. This is only to help even out your paint and make sure you didn’t leave any areas particularly thick.

Drying

The last step is to sit back and watch paint dry. I’ll wait for you…

Okay, I guess you should clean up while you wait. It is actually very important for the integrity of your brushes that you clean them immediately after you finish using them. If you are using a water-based paint, this is as simple as using warm soapy water. If you are using an oil-based paint, you will need to use mineral spirits instead.

Last, make sure your brush is left to dry with the bristles hanging down so the water or mineral spirits drains out properly. (This is why paint brushes have holes on the end: so you can hang them up to dry!) The roller can also be cleaned with soap and water. If you have to use it again right after cleaning it, you can buy a roller spinner that will help dry it much faster. It’s important not to use a damp brush or roller, because that will potentially water down your paint.

Assess whether or not your paint job requires a second (or third) coat. If so, repeat. Happy painting and share your stories with us in the comments!

Photo by Sara Slattery

Photo by Sara Slattery

Avoiding Roommate Drama

The joys and follies of living with roommates are many and varied. On one hand, you have things like cheaper rent, people to always hang out with, and new friendships that can last a lifetime. On the flipside, you may have to put up with things like less parking, less time to sleep in before work if you want to take a shower, and a daily morning obstacle course of your roommate’s passed-out friends from partying the night before. Whether for better or worse, many of us have to live with roommates at least once in our lifetime. In this article, I’m going to give you a set of guidelines that have helped me resolve issues that otherwise could have resulted in a huge headache for everybody involved.

Imagine something that your roommate does to annoy you. It might be something in the spectrum of forgetting to turn off the TV or rarely doing dishes. No matter what the issue is, the next time you get mad, rather than charging in and confronting them about it, I want you to stop and ask yourself the first of several questions:

Does it happen regularly? The answer to this may dictate the future of your relationship. If the answer is “no,” I suggest you drop the issue and give your roommate the benefit of the doubt that they made an honest mistake. If the answer is “yes,” then move on to the next question.

Is it something I can fix on my own? I find that, more often than not, the thing that is annoying you can be completely overcome by doing a little creative critical thinking. For example, if the house is messy, maybe you need to create a new system of cleaning or hire a once-a-month cleaning service. No matter what your problem is, put a bit of constructive thought into solving the problem. If after wracking your brain for a peaceful solution is unsuccessful, you may ask yourself the next question.

Am I willing to move out if this problem is not solved? The answer to this question puts the importance of your dilemma to the test. If you are not bothered enough by the situation dedicate the effort to finding a new home (while likely burn bridges in the process), you should probably take a deep breath and let it slide. If you find that the issue is so unbearable that you can’t possibly live with it any longer, move on to the next final question.

Will my roommate be open and receptive to a conversation or does he/she get defensive? Now, you are going to have to make a real judgment call. You must ask yourself if your roommate is someone who takes criticism easily and makes an honest effort to change, or if he/she is someone who will likely scoff in your direction and try to bother you even more or shut down and give you the silent treatment. The reason this step is so delicate is that people tend to attach to their behaviors: no matter how persuasive you are in telling them that their behavior may not be acceptable to everyone, they may take the constructive criticism with a dosage of contempt. Some people are good at brushing it off, while others may take it to heart, depending on how much they value the actions in question.

Discussing the Situation

If you decide that you cannot live with your roommate’s behavior but a discussion is not worth the risk, I suggest you begin looking for a new place to live and try to end things on a good note. However, if you can, try to approach your roommate politely and diplomatically so that you can work on solving your predicament together. Be prepared with a couple of solutions to suggest. If you and your roommate decide that you need some help selecting the appropriate solution, consider involving an impartial third party to help act as a mediator.

Living with people can strengthen relationships or break bonds, and the way that you approach the hurdles you encounter will impact the quality of your relationships for the rest of your life.

Photo by Sara Slattery