Category Archives: Style

Hirin’ Attire: Job Interview Wardrobe Tips

You only get one chance to make a good first impression.

Usually, I can’t say I agree with that old-fashioned adage. But a job interview isn’t an ordinary real-life scenario. It’s the only situation in life, aside from maybe a first date, in which you are placing yourself in front of another person and fully preparing yourself to be judged. And, just like a first date, even if you’re a dazzling conversationalist and your resume (or OkCupid profile) is full of all the perfect catch-phrases—if you don’t look the part, you might not get to second base. By which I mean a second interview.

Because I am a 20-something in the year 2013 and because every publication under the sun tells me this is true, I will go on roughly a hundred thousand job interviews within my lifetime.  I’ve already been around the job interview block, and I probably won’t be stopping any time soon.

Here are a few things I’ve learned about interview wardrobe choices since my days as a newly minted college grad, clutching my BFA for dear life, and praying for health insurance.

Fancy Footwork

Gentlemen, this might not be as intense a topic for you. The height and style of your shoe is rarely an issue, but even if it’s a “totally laid-back workplace” and you’re wearing your loafers or leather low-rise boots with jeans, I absolutely suggest that you polish your shoes! Shoe polish is easily accessible and they even sell these nifty all-in-one polishes at places like CVS or Walgreens. A grown man polishes his shoes—and gets that job!

Ladies, I know that a high heel makes you feel confident and powerful. I know you love the way it click-clacks on the tile floor, as if to say, “Hey everyone! I have arrived!” But I urge you to leave those amazing Loubotin look-alikes you scored on JustFab.com at home. Don’t risk being taller than your interviewer and doom yourself to some really awkward handshakes. Besides, if those shoes could talk, they’d tell you they want to be at a bar, not under a desk.

A few easy solutions are a stylish pair of patent leather or animal print flats, a small kitten heel, or leather or suede ankle boots. If you’re normally a little shy in the face of fashion risks, that’s totally okay, but don’t be afraid of a pop of color or a bold print! There’s no law that says all footwear has to be black nowadays.

SUIT UP! Or don’t?

This will differ depending upon the industry of your dream job and the company’s office environment. Try your very best to research what the dress code is before you go in, though sometimes it’s hard to gauge unless you know someone who works there!

But here’s a tip, for both guys and gals: be absolutely sure you need to wear that suit. If you’re interviewing at a place like a law firm or a major corporation, it’s definitely advisable to suit up, especially for the guys. But I’ve seen many male candidates stroll into casual office environments wearing their best suits, looking super uncomfortable, both physically and mentally. You don’t want to come across as stodgy or old fashioned.

For guys, you can always get away with a nice pair of black slacks and a collared dress shirt. (Tucked in with a belt! For real, this goes without saying!). Bring a blazer that you can throw on at the last second if you’re feeling under-dressed.

Ladies, a black pencil skirt is your best bud. Buy one and love it and pair it with anything and everything. A business-casual blazer also goes a long way in life, so it’s great to have that handy, too. If you don’t feel like wearing a skirt, black skinny pants or flowy black slacks are a great alternative. There’s a lot of debate surrounding black jeans, but I say that if the material is denim to the touch, then thems be jeans and you probably shouldn’t wear them! Skinny pants that are cut like jeans but are made of non-denim material are a much safer bet, especially when paired with a semi-formal top.

Also, an addendum on formal shorts: I adore a good formal short. And once you land this dream job, you might totally be able to get away with wearing them. But maybe leave them at home for your interview. Some people still view shorts as too casual a look, no matter how much pleated realness they’re serving.

Hey You, Yeah You with the FACE.

Ladies, very simple day-time makeup is advisable. Go easy on the eyeliner. You want your potential new boss to focus on the brilliant words tumbling from your lips, not your Amy Winehouse impersonation. Do wash and style your hair, but don’t go overboard with a new style you don’t usually rock (i.e. maybe not those Heidi braids you still can’t do without spraining your wrist).

Guys, if you’re going to style your hair, opt for a small dash of pomade. It’s much more flexible and easier to work with than gel.

And one more tip, take it or leave it: if you’re a glasses wearer, leave your contacts at home! This could be nothing but a silly coincidence, but every time I wore my glasses to an interview, I was offered the job. True story! Maybe I looked more trustworthy? More collegiate and organized? Who knows! But hey, it can’t hurt.

Conversation Pieces

If you’re like me, you dread even the slightest awkward pause and would jump out the window before letting the conversation run dry. Here, you could kill two birds with one stone by incorporating a fashionable accessory that could also potentially lead to this: “Hey, I love your (necklace/tie/bracelet/etc.)! Where’d you get that?”

Guys, this could be anything from a really nice wristwatch to a bold new tie. We’re talking, like, Joe Biden bold. Not the Homer Simpson Christmas tie you got from your mom in eighth grade.

As for the gals, know that a statement piece doesn’t have to break the bank! Stores like H&M, Forever 21, and the sale rack at Anthropologie have some really fun jewelry that will absolutely do the trick. My tip is to choose ONE piece: a vintage locket or a pair of chandelier earrings. But not both at once!

Do you have any additional tips for job interview wardrobe choices? We’d love to hear what you think. Leave them in the comments below!
InterviewWardrobeHero

Photo by Meaghan Morrison

Plucking Your Eyebrows

Some people go for thin brows with a high arch (giving them a perma-shocked look we can thank the 90s for.) Others prefer for the strong, straight brow that’s becoming increasingly popular today. Whatever your eyebrow taste may be—here are tips on how you can keep people from confusing them with woolly bear caterpillars.

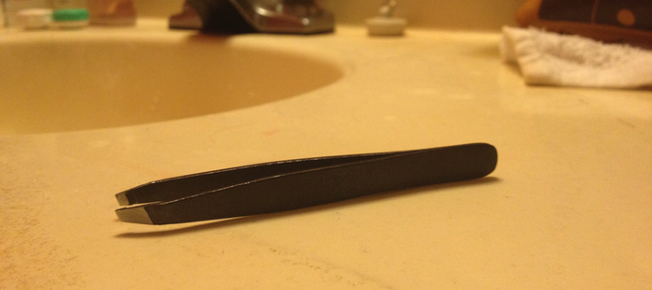
  • Tweezers — Finding the right tweezers is really a matter of personal preference so finding the perfect tweezers can be time consuming. You can either go with slanted edge tweezers or point tip tweezers. I prefer point tip tweezers because they are good for grasping difficult hairs and I find them to be more dexterous. Whatever you choose—make sure to pick stainless steel so they don’t rust.
  • Brow brush/comb — Many make-up stores (Sephora, etc.) sell these as a combined item but you can also find brow brushes that resemble mascara wands and combs that look like they belong in Barbie’s Dream House. I swear they do the job though.
  • Manicure scissors — Kiddie craft scissors are not acceptable substitutes. (Fine, they will work in a pinch.)

1.     Find Your Shape

Again, current fashion trends can dictate how you want your eyebrows to look but generally speaking there are rules about where your eyebrows should start and end. You can check your measurements using a brow pencil or another straight instrument.

If you take the pencil and place it next to your nose in a straight vertical line past the inner corner of your eye, you can find your starting point. Turn your pencil 45 degrees outward, and that’s the endpoint for your eyebrows. The brows should peak in line with the outer side of iris (sorry no pencil trick for this one).

2.     Brushing and Trimming

Shockingly, the first step to eyebrow maintenance is messing them up. Take your comb (not the brush) and comb your brows in the opposite direction of hair growth (if you don’t have a comb, your finger will do). It makes your hair stand up every which-way and you’ll look positively unkempt.

Don’t worry it’s about to get better. Take your manicure scissors and trim away any hairs that stray WAY above your defined brow line. These are hairs that have gotten a little long and out of control. Tame them and now you don’t have to worry about plucking them.

3.     Tweezing Time!

The next step is to brush your brows back in the direction the hair grows. It already looks better right? Now that they are in place again, take a look at your brow line. You’ll notice there are a couple of hairs growing below your brow line. These are the hairs to which you say goodbye. Grab the hair at the root and yank. (If this is your first time, it’s going hurt like a bitch, sorry!) Start with a few hairs on your dominant side and then switch to the other eye. (In my case, my dominant side would be my right eye because I’m right handed.)

Make sure to do this in a well-lit room in front of a standard mirror. No need to use a magnifying mirror—if you can’t see the hair normally, you don’t need to pluck it.

You also ALWAYS want to tweeze from underneath your brow. Never above—otherwise you might end up with bald spots. If you trimmed correctly—everything up top should be under control.

Make sure you don’t get too tweezer happy. Remember how I said to switch eyes? Well you want to tweeze a couple on one side, switch, and then compare so you don’t over-pluck. Specifically, people had a tendency to over-pluck their dominant side.

If you do over-pluck, have a soft brow pencil nearby to fill in any thin spots. But you don’t want to have to draw on your eyebrows everyday so take a step back to gain some perspective throughout the whole process. Walk away from the mirror and come back and see how they look, tweeze a few more then walk away again. Moderation is key.

Also, try not to pluck in the morning before work or before an important event, especially if your skin is sensitive. Obvious swollen red patches all around your eyes are not awesome.

Pro Tip: The best time to tweeze is after a warm shower. It opens your pores and softens up your hair so it’s an easier pull. If you are super sensitive, dab some numbing gel (like baby teething gel) before tweezing. Just keep it out of your eyes.

eyebrows2

Photo by Anastasia Heuer

No Dryer? No Problem.

I don’t know about you, but I am constantly plagued with wet or damp clothing that I never have enough time to deal with. I always seem to be out of time with a dryer that is nonexistent, broken, taken, or—like in my last apartment—seemingly incapable of drying clothing.

So, in the absence of self-drying clothing, I present you with the following five dryer alternatives for your dryer emergencies:

1. Direct Sunlight

The old school method: lay/drape/hang your clothes out in the sun and watch the magic happen! And by watch I mean go do anything else for six hours because—depending on the amount of sunshine, humidity levels, and temperature—this approach can be painfully slow. Keep an eye on the sun (remember it moves) and make sure to rotate (and/or flip over) your clothes at least once.

If you want to get fancy, use a clothesline. You might be able to find one in your backyard if you live in an older house/apartment building, but if not you can always jerry-rig one out of chairs/trees/fences/poles and some string/shoelaces/ribbons/computer cords. Then drape or clip your wet apparel on the line and let Mother Nature do her work. No super cheap clothespins lying around?  Binder clips, chip clips, and hair claws make for great alternatives.

2. Fan

While the outdoors is always best for maximum wind/sun exposure, if you’re without a yard, balcony, or trustworthy neighbors, you can also take advantage of the sunshine within your home and speed up the process with your favorite fan(s). Personally, I like to use hangers and a metal clothesline (aka my shower rod) or an awesome drying rack. But if that doesn’t cut it just hang your clothes on, or tucked into, other ledges around your home (i.e. dresser drawers, door handles, moldings). NEVER drape wet clothing over lamps. (Let’s just say, I’ve tried it… Two words: burn marks.)

The advantage of this method is that it does not require the sun (making it your best overnight option) and it is entirely environment controlled. Unfortunately, if you’re drying a lot of clothes, this method can take quite a bit of time. If I need dry clothes within an hour or two, I take a more direct approach: draping the clothes straight on to my fan. (This is probably definitely a fire hazard so I’m not recommending it.) Instead, try hanging what you need on the back of a chair, and pointing your fan directly at it to produce the same results.

3. Blow Dryer

You’ll need to own a blow dryer to embrace this option—so guys, you may be out of luck. This is my go to option under pressure—fast, efficient, and effective. It is, however, more labor intensive than any of the other methods. But it can also be a great approach for dealing with any unfortunate liquid mishaps. This will work with your clothes on or off, but for very damp clothing, off is better. I usually stick my blower right into an arm or leg, hold the other end closed, and let it fill up with air, rotating between sections every 10-15 seconds to make sure nothing burns. But again: fire hazard. So instead, let’s both try hanging our clothes in the shower and following the tips recommended by Wardrobe Advice.

4. Heater

This works better in the winter months because let’s be honest, no matter how badly you need that shirt, who wants to turn on the heat in July? (Plus, if it’s summer, umm sun?) I find the heater has a significant set it and forget it advantage over the blow dryer because, as long as you position your clothes just right (or weigh them down) to keep them from blowing off, you can enjoy your cereal from across the room. (Keeping an eye on them for rotation and safety of course.) This method is also especially effective for larger, or heavier articles of clothing (i.e. jeans).

5. Car Heater

Does it really get better than your own personal, traveling dryer? If you own a car, and are absolutely desperate, this may be your best option under extreme time pressure.

First, check and see if your car has a heater vent in the center console (the vent for the back seat). If so, drape your article of clothing in front of the vent (rotating every few minutes for maximum coverage) and voila! Your very own on-the-go dryer.

But, if you’re like me, and don’t have a handy back seat vent, you’re stuck with the dashboard vents. MAKE SURE you take the appropriate precautions for your personal safety and the safety of others before trying this—i.e. don’t be stupid and hold the shirt on your heater while you are driving.

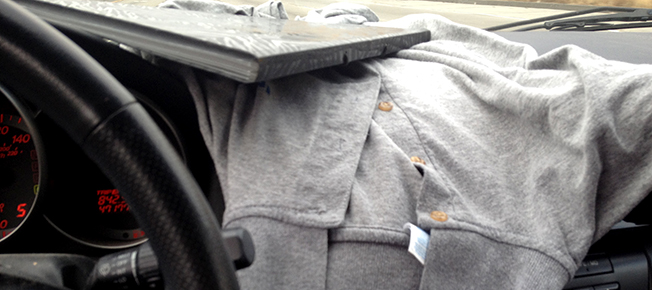
In the above photo, I used a handy expanding file folder (while driving in a straight line) to keep my desperately needed shirt in place. This is clearly not the safest option. Think about using clothespins (or any of the above clothespins alternatives) to keep your clothing attached instead. There is a rotation factor here, so please PULL OVER (or make sure you are stopped) when you rotate your clothing. No dryer emergency is worth a car accident.

Bonus Tip: Need to get wrinkles out?  Hang up your shirt up as close to the shower as you can without getting it wet. Turn the water on to the hottest setting, close the bathroom door, and let the steam give you a wrinkle free shirt in about ten minutes.

dryerhero

Photo by Anastasia Heuer

Disclaimer: This article is meant for your entertainment. You can read the UNDERenlightened’s full disclaimer in our User Agreement.

Wax on Wax off: The Bikini Wax

Many women hear the words “bikini wax” and cringe, blush, and/or clutch at their nether regions. A visceral reaction to hot wax and hair removal “down there” is expected, but a bikini wax isn’t something to be feared—it can be life changing. If you’ve ever been curious as to how to go about getting a bikini wax, let’s break it down:

I’ve been to many waxing places in my days and have had a multitude of experiences, and it takes some trial and error to find a place you like. Don’t underestimate the power of Yelp. Type in “bikini wax” to find reviews of good places in your location. I go to a special waxing-only salon in Beverly Hills, but I’ve found most hair salons and nail salons also have waxing beauticians. Spas also have waxing options, but I’ve found they’re usually overpriced and under-trained. Once, you’ve found a salon, call and book your appointment just like you would schedule a haircut.

What kind of bikini wax do you want?

Yes, there are KINDS. The different choices refer to the amount of hair being waxed off: Do you want it all gone? Mostly gone? Or just cleaned up a little? If this is your first bikini wax, I’d recommend starting off slow. Remember, if you’ve been shaving (or au natural) the hair has a very old root, so—I’m not going to lie to you—it’ll hurt. I recommend going for a standard bikini wax, just a bit off the sides and top. (You can always go back and remove more.) Or if you’re feeling more advanced, try a full bikini wax with a landing strip (which is exactly what it sounds like), or go bald and get a Brazilian (my personal preference). Remember, if you get too ambitious, and belatedly decide a Brazilian’s not for you, the greatest (or worst) thing about hair is that it grows back. Cost wise, the more hair you wax off, the more you’ll have to pay. Ranging from about $20-$50.

Do you have to do anything to prep?

If you already do your own personal maintenance, let your hair grow out to at least a half an inch, so there is enough to wax. If you’ve never groomed in your life, that’s totally fine, just make sure to tell your aesthetician (aka waxer). Remember: the more frequently you wax, the less and finer your hair will grow back, making it easier on both you and your waxer.

Regardless of your prior maintenance, when you meet your waxer, make sure you tell them that this is your first bikini wax. They’ll help minimize the pain for you by waxing faster in smaller sections. It’s their job; they don’t want you to suffer through it!

Take some steps to ease the pain:

  • Strategically schedule your appointment. Try not to get waxed the week before or after your period, as you’re more sensitive to pain during that time. Also, keep in mind that your pain threshold goes up as the day goes on, so be sure to schedule your appointment is in the late afternoon when your tolerance is at its highest.
  • Take an Advil or two about 45 minutes before waxing to help reduce your pain.

What does one wear to get a bikini wax?

My bikini wax shy friends always think the most embarrassing part is stripping down and having someone prod around their business. The most important thing to remember is: your waxer has been seen it all before—they are professionals, this is is their job. But, if you are still nervous, there are ways to get around total exposure. If you decide to go for a standard bikini wax, you can leave your undies on, which is why I recommend it for first timers, who are most likely to be intimidated by getting naked. But for those of you willing to go all the way, I’d suggest wearing a dress, or something similar, that won’t require you to feel so exposed. It’s good to let yourself “breathe” post-wax and a dress is great for that, too!

How long will it take?

Bikini waxes are quick (fifteen to twenty minutes) so you won’t be naked for long. But if you think you will feel super self-conscious, bring a distraction. Phones are the easiest, in my opinion. When I first started off, I would read on my phone and be done before I’d even read through a single chapter.

What do you do afterwards?

No sex, working out, or wearing leggings for the first day after your wax. All three can hurt and cause ingrown hairs because of the amount of friction against your baby-soft new skin.

But the best part? Don’t worry about booking another appointment for another 4-6 weeks, depending on how fast your hair grows. That means that two bikini waxes will suffice for an entire summer! (Compare that to shaving twice a week.) Efficient, right?

bikiniwaxhero

Photo by Meaghan Morrison