Category Archives: Home

8 Tools Everyone Should Own

In college, the only “tools” I owned were thumbtacks and painters tape. This worked for me until I bought my first piece of Ikea furniture and realized that I might need something more. They might say you can assemble everything using wood screws and elbow grease, but there’s no reason you can’t make it a little easier on yourself. Someday you might even upgrade your home projects to something more advanced, and the following items will become your best friends in all of your endeavors. Because that’s what a tool is—a friend to make every job easier and better, but without the power of speech to criticize your choice of curtain rod or doorknob.

1. Hammer

If you ever want to hang a picture frame or to fix a loose board in your house, you’ll need a hammer. There’s no question. If you’re truly desperate, you can use the sturdy heel of a shoe to bang in a nail. But do yourself a favor on bigger projects (especially ones where other people can see you, e.g. repairing your front porch) and get a hammer. Pro Tip: For removing nails with the opposite end of the hammer—go slow and wiggle the tool just a bit to avoid yanking out a chunk of your wall.

2. Phillips-head Screwdriver

Aka, the fancy one with the cross-shaped head. Since the flathead screwdriver is pretty clear which one it is by its name, I just think ‘the fancy one has the fancy name’ when I’m at the toolbox and can’t remember what I actually want. Apart from switch and outlet plates, most screws you’ll use in your home are meant for a Phillips-head. If you don’t have one and the tightness of the screw isn’t too firm, or doesn’t need to be, you may be able to put some gum or putty on the screw head to fill in the extra slots and use a flathead. Phillips screws are typically used when you might want to use a power drill, because the drill bit is less likely to slip out of the screw and damage your wall/furniture/etc. More on power drills later.

3. Flathead Screwdriver

Flathead screws can’t be ignored. They’re on your light switch plates and outlet covers all around your apartment, so you’ll definitely want to have one in your box if you ever want to paint your apartment. Or if you ever decide you want one of these. 

4. Flashlight

The last thing you want when you have a leak under your sink or when the power goes out is to be without a flashlight. Okay, when the power goes out, candles are more romantic. But laying on your back, under your sink, looking for a leak surrounded by candles inside your wooden kitchen cabinet? Not the best idea. I keep one in my bedroom and in my car.

5. Tape Measure

Yes, I know you still have a your ruler from high school math class. But guess what? Your apartment (hopefully) is more than 12 inches across. I spent years making hash marks along my wall when measuring where to hang things, and let me tell you, it’s about a million times faster to just open the tape measure. Also, they’re bendy, so you can take your body measurements–my (not) favorite use.

6. Level

Actually, maybe a level isn’t the best addition on this list, because once you don’t have to climb up and down your ladder over and over checking that your new poster is level (how to use a level), you might have to pay for a gym membership to supplement your Stairmaster workout. Apologies.

7. Ruler

I know I just said that you want a tape measure. And you do. But the main benefit of having a ruler in your arsenal is that they have flat, straight edges. When you have two frames you need to hang 10 inches apart, you can hold up your level (see above) in line with the ruler and get the hanging of your frames right the first time.

8. Power Drill

My personal favorite tool. After the first time I tried to screw a shelf into a stud in the wall and felt like my arm was going to fall off, I got a power drill. It did the same job in two seconds AND didn’t make a mess out of the wall like I did. Nothing will make your life easier than a power drill. Home Depot has a handy guide in what to look for in a drill. The standard homeowner/renter would do well with a 12 Volt drill (18 Volt if your projects are a bit more heavy duty). You don’t need to get the most expensive option, but don’t get the cheapest either. You can be a bit stingier with the drill bits you get to go with your new toy.

Runner-ups: 

Ladder/Step Stool – I include this as a runner up only because not everyone needs one for half of their home projects like I do, and it’s only sort of a tool. I’m short, so hanging curtains isn’t exactly an option without at least a small step ladder. Most people can just pull over a kitchen chair and use that, but I have to have more height. Same goes for replacing light bulbs. My roommate and I have a small ladder that fits into the corner of a closet, and it’s one of the best investments we’ve ever made in terms of maintaining sanity.

Duct tape – I’m a big believer in having the right tool for a job. But sometimes that right tool is the wherewithal to admit you don’t know what you’re doing and throw some duct tape on it. It usually works.

Photo by Meaghan Morrison

Taming Your Garbage Disposal

Exciting news! You have recently acquired a fabulous kitchen device called the garbage disposal. Amazing in that if you cook something, you just throw the scraps in there, hit a button and BAM—it’s gone! You save space in your trash can, the landfill, and get to take out some latent aggression on your produce.

But there are things you should never put in the garbage disposal. Save yourself the pain of throwing down money for a plumber with the following tips:

The DO-NOTs – Things you should NOT put down your garbage disposal:

  • Your Hand. In my opinion there were two awesome scenes from Season 1 of Heroes: When Claire (who can heal herself for those of you who haven’t seen it) walks out of the burning house charred from the nuclear explosion and when she sticks her hand down the garbage disposal to fetch a ring only to pull it up all mangled and bloody—showcasing EXACTLY why YOU should NOT stick your hand down a garbage disposal. It is a motorized rotating blade. Even if it is off—DO NOT RISK IT. One accidental flip of the wrong switch and…
  • Grease / Oil may be a liquid but it never should be poured down any drain. Why? Because as it cools, grease coagulates, and can clog your pipes
  • Starchy Veggies such as potatoes, broccoli, and other fiberful family members can also draw water and their long, tough, stringy fibers can tangle and jam the blades.
  • Bones & Fruit Pits will not meet defeat in the garbage disposal. These kitchen leftovers are simply too strong to be processed and can break the disposal’s blade. Be sure to dispose of them in a careful manner, keeping them out of reach of children and pets that could choke on them.
  • Shot Glasses, Plastics, Glass and Paper go in the recycling and not in the garbage disposal. This one should be obvious, despite what the UE Editor-in-Chief may think (Editor’s Note: I claim no knowledge of this, nor have I ever done this…if this had occurred, however, it was by pure and total accident, and ended very badly for everyone, particularly the garbage disposal.) Shot glasses and other broken household objects should never go in your garbage disposal because they will BREAK it.

The jury is still out…

  • Coffee Grounds are tough—there are two schools of thought: Some sources say that the grounds are greats for cleaning out your drain and freshening up odors. Others say they can stick and clog up the drains. I think it’s probably best to avoid putting these babies down the disposal and looking into some of these alternative re-uses for coffee grounds.

The DOs – Things you should put down your garbage disposal:

  • Lemon, Lime and other Citrus peels throw a couple of these peels down the drain and you’ll have a cleaner, better smelling garbage disposal in no time. One of the reason you find citrus fruits in so many household-cleaning products is that they are cleansing and non-corrosive. Citrus juice can even strip dirt from under your fingernails without much effort at all. (Think about that next time you order water with lemon.)
  • Ice, Ice, Baby. (Sorry, couldn’t stop myself.) Crunching large amounts of ice, and a bit of vinegar, in your garbage disposal will help sharpen and clean its blades.

Pro Tip: Is it hot and sticky in the summer? Is your home prone to fruit flies and other winged visitors? If you’re having trouble getting rid of them it’s probably because they are living in your sink drains. Kill them and prevent them from coming back by pouring large amounts of ice over your drain. This makes it too cold for them to lay eggs and survive.

Now that you’re an expert garbage disposal user—feel free to grind away!

Photo by Meaghan Morrison

Protect Your Shit: Renter’s Insurance

Congratulations, you signed your lease on your new apartment! You moved in all your furniture, your PlayStation 3, your MacBook Pro, and your collection of Christian Louboutins. Three weeks later, you arrive home to find that your downstairs neighbor didn’t realize blocking the built-in wall heater with a wooden cabinet was a bad idea. Your apartment is scorched, and your belongings have been reduced to ash. But don’t worry—your landlord has insurance, so you’ll be ok… Right?

Actually, no. Your landlord has insured the building but not your personal property within the apartment. Stories like this are why you should consider getting renter’s insurance.

What is renter’s insurance?

Renter’s insurance covers your personal property within your apartment. In the event that it is damaged or stolen, the insurance company will give you the money to replace the lost belongings. (Just like your parents’ house insurance.) Renter’s insurance also provides liability coverage, which can help you if someone gets injured in your apartment.

How much is it?

Most renter’s insurance plans run $10-$35 per month and the price is determined by the size of your apartment, the value of your belongings, and your deductible. Personally, I’d rather pay a little more per month for a lower deductible—to avoid shelling out $500 before the insurance kicks in—but it’s your choice.

But do I really need it?

That really depends on you. One way to determine if you need renter’s insurance is to add up the costs of all your belongings and decide if that cost merits purchasing insurance. (Try using a rate calculator like this one offered by State Farm.) If not, consider less expensive options, such as getting a safety deposit box at a bank for any priceless treasures.

Another thing to consider is the location of your apartment. What’s the crime rate in your area? Have there been a lot of break-ins? Do you live on the ground floor?  Do you live in a town where frozen pipes are common? Are you (or your roommate or your upstairs neighbor) likely to flood your apartment?

Finally, if you are a pet owner, and your pet was to bite another person, your renter’s insurance may be able to protect you from a liability lawsuit. (There is such a thing as pet insurance but it’s pet health insurance, similar to your medical insurance.)

How do I get it?

Progressive, AAA, Geico—any major insurance company—will offer renter’s insurance. I recommend trying to get a plan with the same carrier as your car insurance because they might offer a sweet multi-plan discount.

Am I missing anything?

Be sure to read the fine print for each plan and know exactly what your plan covers. For example some plans only cover damage on particularly valuable objects—such as musical instruments, electronics and fine jewelry—to a certain value. Others may have additional costs for liability coverage. Some policies will still cover stolen or damaged items even when they’re not at home (for example: in your car or hotel room).

But wait: you’re not done yet. Do you live in an area prone to natural disasters such as earthquakes, hurricanes, tornadoes, and/or floods?

You might have to purchase additional insurance to protect yourself. These plans have varying costs and restrictions. For example, residential insurance policies in California no longer cover damage sustained during an earthquake due to the losses sustained during the 1994 Northridge earthquake. You have to purchase additional insurance for this and other natural disasters, outside of your standard renter’s insurance plan. How this insurance is administered is regulated on a state-by-state basis.

In some cases, you may need multiple policies to cover one disaster. There was a lot of controversy after Hurricane Katrina as certain hurricane insurance policies only covered damage due to wind—despite the fact that hurricanes often bring rain and, therefore, floods. Many people were not covered since they had not purchased additional flood insurance.

I’m still not sure, where else can I get information?

Sites like this one from Allstate or this one from Insure.com have explanations of renter’s insurance that can help.

In the end, whether or not you purchase renter’s insurance is a personal decision. Just remember to make sure you know exactly what you’re getting. Nothing is worse than buying into a policy and, when it’s time to cash in, discovering you aren’t covered the way you thought you were.

rentersinsurancecropped

Photo by Michelle White

No Dryer? No Problem.

I don’t know about you, but I am constantly plagued with wet or damp clothing that I never have enough time to deal with. I always seem to be out of time with a dryer that is nonexistent, broken, taken, or—like in my last apartment—seemingly incapable of drying clothing.

So, in the absence of self-drying clothing, I present you with the following five dryer alternatives for your dryer emergencies:

1. Direct Sunlight

The old school method: lay/drape/hang your clothes out in the sun and watch the magic happen! And by watch I mean go do anything else for six hours because—depending on the amount of sunshine, humidity levels, and temperature—this approach can be painfully slow. Keep an eye on the sun (remember it moves) and make sure to rotate (and/or flip over) your clothes at least once.

If you want to get fancy, use a clothesline. You might be able to find one in your backyard if you live in an older house/apartment building, but if not you can always jerry-rig one out of chairs/trees/fences/poles and some string/shoelaces/ribbons/computer cords. Then drape or clip your wet apparel on the line and let Mother Nature do her work. No super cheap clothespins lying around?  Binder clips, chip clips, and hair claws make for great alternatives.

2. Fan

While the outdoors is always best for maximum wind/sun exposure, if you’re without a yard, balcony, or trustworthy neighbors, you can also take advantage of the sunshine within your home and speed up the process with your favorite fan(s). Personally, I like to use hangers and a metal clothesline (aka my shower rod) or an awesome drying rack. But if that doesn’t cut it just hang your clothes on, or tucked into, other ledges around your home (i.e. dresser drawers, door handles, moldings). NEVER drape wet clothing over lamps. (Let’s just say, I’ve tried it… Two words: burn marks.)

The advantage of this method is that it does not require the sun (making it your best overnight option) and it is entirely environment controlled. Unfortunately, if you’re drying a lot of clothes, this method can take quite a bit of time. If I need dry clothes within an hour or two, I take a more direct approach: draping the clothes straight on to my fan. (This is probably definitely a fire hazard so I’m not recommending it.) Instead, try hanging what you need on the back of a chair, and pointing your fan directly at it to produce the same results.

3. Blow Dryer

You’ll need to own a blow dryer to embrace this option—so guys, you may be out of luck. This is my go to option under pressure—fast, efficient, and effective. It is, however, more labor intensive than any of the other methods. But it can also be a great approach for dealing with any unfortunate liquid mishaps. This will work with your clothes on or off, but for very damp clothing, off is better. I usually stick my blower right into an arm or leg, hold the other end closed, and let it fill up with air, rotating between sections every 10-15 seconds to make sure nothing burns. But again: fire hazard. So instead, let’s both try hanging our clothes in the shower and following the tips recommended by Wardrobe Advice.

4. Heater

This works better in the winter months because let’s be honest, no matter how badly you need that shirt, who wants to turn on the heat in July? (Plus, if it’s summer, umm sun?) I find the heater has a significant set it and forget it advantage over the blow dryer because, as long as you position your clothes just right (or weigh them down) to keep them from blowing off, you can enjoy your cereal from across the room. (Keeping an eye on them for rotation and safety of course.) This method is also especially effective for larger, or heavier articles of clothing (i.e. jeans).

5. Car Heater

Does it really get better than your own personal, traveling dryer? If you own a car, and are absolutely desperate, this may be your best option under extreme time pressure.

First, check and see if your car has a heater vent in the center console (the vent for the back seat). If so, drape your article of clothing in front of the vent (rotating every few minutes for maximum coverage) and voila! Your very own on-the-go dryer.

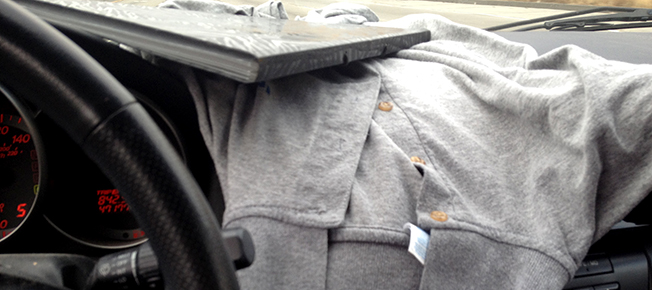
But, if you’re like me, and don’t have a handy back seat vent, you’re stuck with the dashboard vents. MAKE SURE you take the appropriate precautions for your personal safety and the safety of others before trying this—i.e. don’t be stupid and hold the shirt on your heater while you are driving.

In the above photo, I used a handy expanding file folder (while driving in a straight line) to keep my desperately needed shirt in place. This is clearly not the safest option. Think about using clothespins (or any of the above clothespins alternatives) to keep your clothing attached instead. There is a rotation factor here, so please PULL OVER (or make sure you are stopped) when you rotate your clothing. No dryer emergency is worth a car accident.

Bonus Tip: Need to get wrinkles out?  Hang up your shirt up as close to the shower as you can without getting it wet. Turn the water on to the hottest setting, close the bathroom door, and let the steam give you a wrinkle free shirt in about ten minutes.

dryerhero

Photo by Anastasia Heuer

Disclaimer: This article is meant for your entertainment. You can read the UNDERenlightened’s full disclaimer in our User Agreement.

Why You Should Own a Plunger

Why don’t you own a plunger? No, seriously, why in whatever-you-think-is-holy’s name don’t you own one?

Are you scared that you might actually have to use it?

Let’s be honest: everyone has a different digestive system and maybe you know what’s best for your needs in your humble abode, but there are people out there (ahem, me!) without the luxury of a happy stomach. And we visit you. And sometimes we eat cheese or ice cream or butter. Don’t underestimate the number of lactose intolerants in your life. There are a lot of us out there, and we’re here to tell you: GET A DAMN PLUNGER!

If I’m at someone’s house or apartment, before I sit down (and yes, I sit, every time), if I don’t have a visual check on a plunging apparatus, I get performance anxiety. Even if it’s only number one.

There is no good reason not to have one. Plus, they can be very useful, not only for the expected reason, but for other household issues. I’ve used mine to unclog an unruly kitchen sink after the garbage disposal cut out. Trust me, no matter how much you love your disposal, your disposal does not love potato or cucumber skins. Remember this the next time you’re making potato latkes. And keep the plunger handy.

For those of you who are just hearing about a plunger for the first time and have NO clue how to use it. Here’s a quick how-to:

  • You will need to engage your plunging skills if the water level in your toilet is very low or very high. Basically any extreme water level will need your services.
  • Raise the toilet seat and place the plunger inside the base of the bowl. Do slow, up and down motions, pushing the rubber section in and out. The water should go down to a very small amount.
  • Time to flush! Repeat the above steps as necessary.
  • Post plunger cleaning etiquette: Put the plunger back in the clean toilet water and flush! If your plunger requires further cleaning, try the tips recommended by eHow. They recommend pouring two cups of white vinegar in your toilet bowl before putting the plunger back in the water.

So, now that I’ve explained how to use a plunger and successfully convinced those of you who don’t own one to head out to your local Home Depot, Target, or Dollar Tree (yes!) and pick one up, let me tell you some signs of an adequate one:

  • Do not buy a plunger that looks like it’s for a five year old. The handle should stand at least 2 feet tall. Meaning you shouldn’t have to bend to pick it up. Those mini space-saving toilet tidy-ers will only cause more drama than is already at hand.
  • Don’t buy the cheapest one at the store. Unless you’re totally broke, this is just asking for trouble.
  • If you live on the East Coast, you will most likely need a more industrial-strength plunger. Those pipes are way too old to handle our oversized food–obsessed culture.
  • If you live in Middle America, or on the West Coast, your standard $10-$15 plunger should do.
  • Buy a pretty plunger. Try to have it “go” with your décor. Because why not?
  • Mine has a black base and clear, spindled handle. It’s elegant, yet efficient.
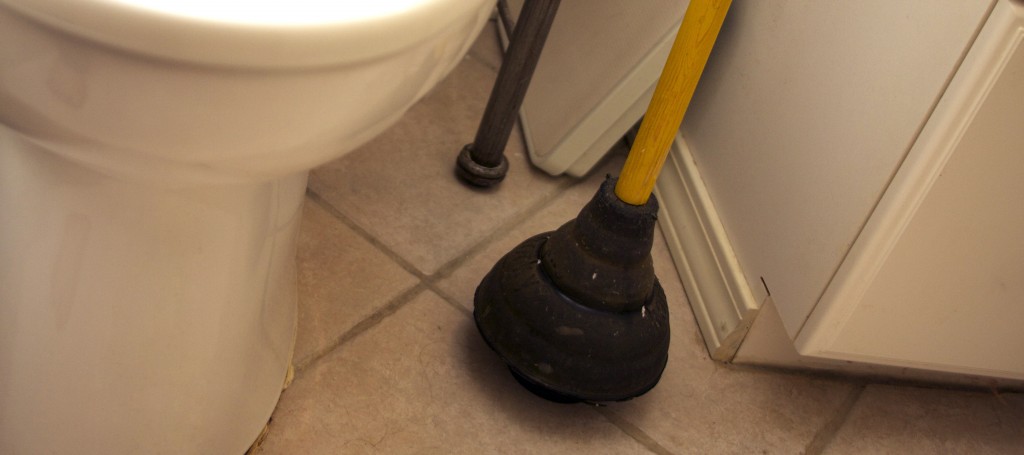
  • Lastly, display this thing right where everyone can see it. Next to the toilet, where it belongs. No hiding-it-under-the-sink-business. And there should be one in every bathroom—otherwise your party guests are going to have to go snooping around and eventually will have to ask for your help. WE DON’T WANT YOUR HELP. EVER. Let us plunge in peace.

Look, you can either heed my advice, go out and buy a plunger and welcome the many thanks of your friends, OR you don’t. It’s your choice. But everyone needs a best friend and your toilet is lonely. And shit gets messy. Pun intended.

plunger

Photo by Meaghan Morrison

FML: I’m Locked Out

Locking yourself out of your home can be stressful: a fact I know very well now after locking myself out of my apartment three times. There is no worse feeling than your stomach dropping when you realize you’re standing outside your own door with no way in.

The very first thing you need to do is make a copy of your key. Stop what you’re doing right now, go to Home Depot (or your local hardware store—heck even Wal-Mart copies keys), and get it over with. Go now! They’re open late, and it costs less than five dollars. It took me three lock-outs before I bucked up and got a spare key—don’t let that happen to you.

You have a couple options for what to do with your spare. You can hide the key somewhere nearby, but be smart about it. Don’t just put it under the mat—we all know about that one for a reason! Try to find a reliable friend to hold onto it (preferably a friend in relative walking distance in the event you get locked out without your phone).

Planning for a lockout is easy, but there’s nothing you can do if you’re without a spare key and already locked out. If you have a roommate, you could just wait it out if time isn’t an issue. But if you live by yourself, your roommate is out of town, or you’ve locked the baby you’re babysitting inside, you’ll need to reach out for help. If your building manager lives on site or is easy to reach, there is a very good chance they have a spare set of keys and can let you back in. If you haven’t already, program your manager’s phone number into your phone—this is also just a good thing to have. Unfortunately, my building manager was very helpful but didn’t actually have keys to any of the apartments in my building.

Before you call the dreaded locksmith, you’ll probably consider breaking into the apartment yourself—but wait! Unless you live in the middle of nowhere (where you can’t even walk to a gas station and/or borrow a phone) or it is a life-or-death emergency, DO NOT break in to your house or apartment. Trust me: no matter how much you want to just smash your way in, you’ll regret it. Plus, windows are expensive to replace (especially compared to the expense of the locksmith), one of your neighbors might call the police thinking you are up to something nefarious, and, if you live in a rental, you could be in serious trouble with your landlord.

Okay, so you actually need to call the locksmith. Finding a locksmith is one Google search away: that’s the easy part. If you don’t have a smart phone, call 411 to get the number for a locksmith. If you lock yourself out without your phone, you can either knock on neighbors’ doors (if you feel comfortable with that) or walk to the closest gas station or deli and borrow a phone.

When you call, ALWAYS get a quote over the phone first. The quote depends on location, time of day/week, and what they ultimately have to do to get the lock open. And, as expected with anyone with skills in demand, the locksmith will try to overcharge you if you don’t know what you should pay in advance. There’s a minimum price (a “service fee”) for having the locksmith drive out to you, even if you end up not using their services—usually this is about $50. It will be more if you’re locked out at night or on the weekend, so be prepared for that as well.

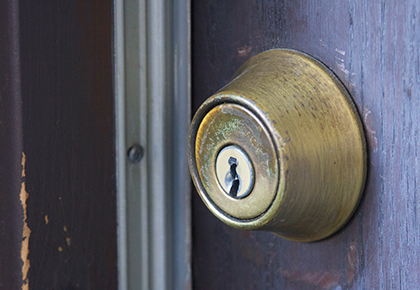
ALWAYS ask specifically what the price is for a Schlage doorknob lock (one of the most popular brands of quality doorknobs) or something similar. If you just ask for a nonspecific price, they’ll tell you what it will cost for a ‘minimum’ lock—think a crappy bathroom doorknob. The front door of your apartment is going to be a higher quality lock, not a ‘minimum’ lock, and will, therefore, cost more. The difference could be as much as $50-$100 dollars more! Don’t let yourself get caught off-guard. A typical lockout will cost about $90-$120, depending on where you are.

Don’t be afraid to ask if there is a possible discount if you pay in cash. The answer will almost certainly be yes, and the locksmith might even wait for you to get cash out from a nearby ATM if you ask nicely. If the phone operator tells you there won’t be a discount, ask the locksmith when he or she gets there. Locksmiths may be a bit more willing to work with you than the operator. If you have to pay with a card, unfortunately, this isn’t too helpful.

When the locksmith arrives, he or she will assess the lock before starting work and give you a quote for the work required. Again, this quote may differ from the quote you got over the phone, which is why it’s so important to be armed with the best information possible. DO NOT pay more than $200 to get your door opened, unless there’s a baby or a starving pet inside. Catching the new episode of Grey’s because you forgot to set it to record does not justify paying that much money. (Even for the season finale.) If you’re paying cash, in my experience, you shouldn’t pay more than $120 (and even that is pushing it). The key is to not be afraid of negotiation. The worst thing that can happen is that you get the price as low as they’ll go, even if it’s still out of your comfort zone. Being a bit of a bitch is your friend: embrace it! There’s no set price for what locksmiths do, so there is ALWAYS wiggle room. At the very minimum, tell them you’ll tip in cash even if you have to pay the rest with a card. Remember, they’re looking out for themselves too.

So, you’ve settled on price, and the locksmith goes to work. Every time I’ve called someone out to my apartment, they’ve tried to pick the lock unsuccessfully before telling me they have to drill the lock. While this is absolutely a trick of the locksmith trade, there’s a step in between the two that involves a hammer and a normal key, one of which the locksmith will definitely have with him. He puts the key in the lock and hits it with the hammer until the door opens. Yes this is technically breaking the lock, but once you’re inside, he can reset it with your newly repossessed key. Again, there is no harm in asking (even if you think you’re being more overbearing than necessary). If it works, there’s no lock replacement necessary (which is what would have happened if they had drilled).

Congratulations! You’re finally back inside! And it was only slightly painful, I hope. The fact of the matter is getting locked out can be embarrassing and expensive, but it doesn’t have to be stressful if you’re prepared. There’s always a way to get back in, even if it means paying the “idiot fee” to a locksmith because you don’t have a spare key stashed away yet. Which brings us back to where I started: GO TO HOME DEPOT AND GET A SPARE KEY. Even if you never use it, $5 is a lot cheaper than $150! And tell all your friends to do the same, before you have to deal with their lockouts too.

Photo by Meaghan Morrison

Photo by Meaghan Morrison