Category Archives: DIY

Home (Theater) Improvement

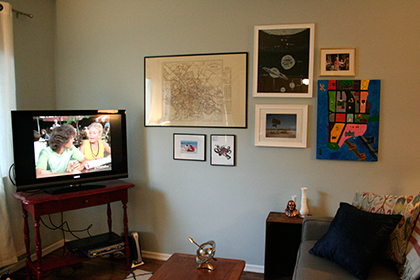
“This is the end of life as we have come to know and love it.” I thought as I watched thirty five square feet and 1080 progressively scanned lines of glorious television walk out of my life forever. My roommate, along with his beloved projector, was headed for greener pastures, leaving the rest of us to languish away into sad, lonesome, standard-def obscurity.

The Projector

There’s a lot of good literature out there on the Googles that will help guide you to the perfect projector. Since we had become accustomed to a certain standard of television, we were looking for a 1080p projector, 60Hz would do, with a minimum contrast ratio of 1:2000. But In terms of what kinds of projectors are available on the market (from the $200 VewSanic knock-off to the $20,000 3DMax Sound-O-Vision Extreme), the price range we were expecting was between $500 and $1000. But for us our wallets, we were just looking for something to “scrape by.” So, when we found an $800 projector that hit our minimum requirements, but was available for $580 through a special refurbished program, we jumped at it. BOOM. And we had a projector again.

Everything was hooked up to the cable and DVR—we turned it on and… there’s no sound. Maybe we should have thought this out better. With a trip to RadioShack for a ⅛” stereo to ¼” mono adapter, we were able to jury rig my fiancée Meggyn’s bass amp in as a temporary sound system. Well, at least it was loud and thumpy!

The Mount

Bliss settled in, until we realized we were merely maintaining the status quo. Like cavemen watching the firelight flicker across the wall. With the projector haphazardly settled on an end-table with a book underneath to prop it up, the risk of inebriated guests leaving open-topped drinks on the same table and toppling them into the delicate internals—the horror, the horror!—was just too high. Of course, I’d just dropped an inordinate sum of money on a brand new projector, so I wasn’t keen on the idea of dropping even more moolah on a television mount that wouldn’t directly affect the viewing experience.

One of the nice things about living in a leased house is that you never know what surprises you might find! After hunting around for extra shelving, I came across an old television mount up in the back corner of the garage (the kind for those tube TVs that could smash toddlers to atoms). And so began the next obstacle: the mount was bolted into a high wooden rafter in the garage, but we only had drywall in the living room… To Google! It turns out that as long as there’s a stud behind wherever you’re screwing in the mount, it should hold weight. After a trip to the local Ace hardware to buy some screws that could be used to drill to China and a quick download of the Bubble Level app—to make sure we weren’t setting ourselves up for a neck kink—we got to work. (Contrary to Meggyn’s expectations, the level app did a good job!)

And then failure struck—we broke two of the screws because we thought we could get away without drilling pilot holes. It’s TOOL TIME! We borrowed a drill (thanks, mom!), and we raised the projector up like the Mennonites raising a barn. Then we cracked open a few beers to celebrate exactly like the Mennonites would not have.

The Connections

Now we were getting somewhere! We could no longer inadvertently destroy all of our wonderful video goodness without some extra effort of lobbing liquids towards the ceiling. The next failure, of course, being that we couldn’t actually connect the cable or the power to our ascended projector. Who wanted to get lost in the details of connecting this, right? What are we, rocket surgeons?

To solve our connection problems, I repurposed some unused bookshelves I had bought for my room. With a few more marks and holes in the wall next to the projector mount, I added a shelf in the living room that we loaded up with every bit of television-related electronics. To paint the picture for you, we now had the projector on the old TV mount (in the dead-center of the wall), an overburdened shelf stacked with enough boxes with blinking lights that it may have been flagged by the NSA, a bass amp on the floor, and so many power cables and audio/video cables strewn about that they might as well have been vines in a nightmarish Lovecraftian dystopian future of cybertronic Amazonian forest… Let’s leave it at “messier than a dorm room during finals” and be done. But now that everything worked, I was at: “Please, for the love of God and all that is holy (and not blinking lights at me), let me be done.”

The Organization

Now we had a beautiful 1080p picture taking up the front wall and plenty of loud thumpy sounds to accompany it. Except if you changed the input from the cable to the Wii. Or to the Chromecast. Or to the Xbox. Was I the only one around here who understood which colors get connected to which inputs on the back of this thing?! Rather than attempting to teach every person who came to the house which cables to disconnect/reconnect to switch the audio whenever you switched the video feed (I just wasn’t up for writing the Connectionist Manifesto), I decided that another trip to RadioShack was in order. There I found an A/V switch for under $20 along with a few new A/V cables and a shiny new sound bar with subwoofer for definitely not under $20 (Meggyn was complaining about wanting her bass amp back and, hey, it was payday!). I returned to our humble, if electrically dangerous, abode armed with my new equipment, a sharpie, some wire ties, some labels, and as much determination as I could muster. I tackled the monumental task of improving our sound system, organizing our A/V shelf, wire managing all of the dangly bits (can’t leave any extra 1s or 0s), and setting our theater system up in such a way that at the press of a (CLEARLY LABELLED) button, my roomies, or any of our guests, could switch between video and audio streams at will.

The Finishing Touches

Life almost seemed perfect. It was simple enough to use the newly organized system, the new sound system was much more balanced than a 15 Watt bass amp, and whatever we watched was beautiful (except the Wii… stupid standard-definition output). But if you can’t find a problem to fix, then you aren’t looking hard enough. Some of the darker colors were being washed together by the projector, and it was sometimes hard to tell what was going on during scenes that took place in the dark. Blackout curtains became the next addition to the room. We got these thanks to a generous donation of leftover fabric from Meggyn’s mom. They just barely cover the full width of our window, but it works. Now, we can watch the projector during the day as if it were the middle of the night (without that pesky bedtime thing). Our last improvement was to go to OSH and buy some cinder blocks, push the couch forward so that it was closer to the wall (or rather, the screen), drop the cinder blocks behind the old couch and ADD ANOTHER  COUCH. Because couch. Now, we’ve got theater-style seating to go with our home-theater!

I still don’t think we’re done making improvements, but for the moment we’re pretty happy with how everything turned out. And the only really spendy parts were the projector itself and the sound bar—things which will be following us to our next house! Thanks to some successful craigslist foraging, the new couch was free, and the cinder blocks we used to prop it up were a few dollars apiece. We used five blocks for the couch and another three to make a recycled-plywood footrest.

All-in-all, we could have done a much worse (much more expensive) job of converting our living room into one radical home theater.

Photo by Michael Cox
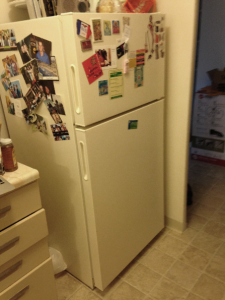
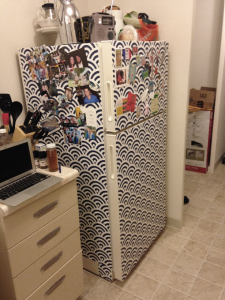
Photo by Michael Cox
We Don’t Know: Where 3D Printing Will Take Us

A year ago, many people barely understood what 3D printing was. Now, everything from cars to shoes to violins, even pizza (yes, you can eat it) are able to be 3D printed. The combinations (and the customization) are endless.

http://youtu.be/IS4Xw8f9LCc

In the medical world, 3D printing could change the way patients receive transplants. We can already print human kidneys and say goodbye to sonograms because now you can buy a 3D printed, life-size replica of your unborn fetus! (He/She/It comes in it’s very own satin-lined wooden box.) Printer’s have come a long way from printing on 2D paper.

These inventions make a compelling case for the important uses of 3D printing, but with printers now available for around $2000, and the instructions for how to print 3D guns widely available, is there a line to be drawn?

The Gospel of Removable Wallpaper

I don’t want to spend more energy than I really need to decorate my current apartment. I want a well-curated space, but at the moment I’m not entirely sure that I have the energy or cash to put that together. While the lease on my apartment does permit me to paint, I am loathe at this point to start a project that will require things like primers and sanding and taping and testing various colors at different times of the day. I want a maximal change with minimal effort. This brings me to removable wallpaper.

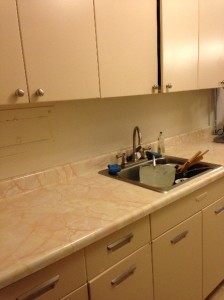
Before

Before

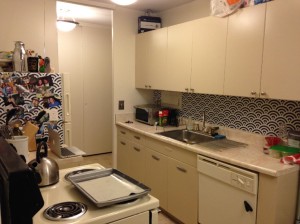
After

After

Removable wallpaper is one of my favorite ways to change a space because it is so versatile and so low risk. You peel off a backing and then stick it to the wall. Press out all the air bubbles, maybe trim around the edges, and you’re all set. Change your mind? Peel it down. Done and done. Removable wallpaper can be used on walls, of course, but also all over your house. Cover a refrigerator or other appliances, line the backs of shelves, refinish a blah tabletop (such as IKEA’s LACK series), spice up the inside of a tray for serving guests, even create the appearance of a grand and stately headboard. All completely possible and so easy.

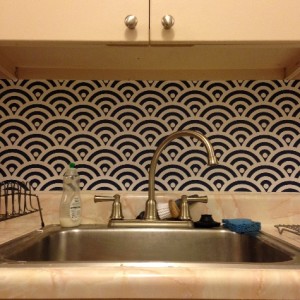
So far, I’ve redone the backsplash and refrigerator in my kitchen and one wall in my apartment, and were it not for my spouse saying he’s done with patterns, I’d be covering all the rest of the flat, smooth surfaces in our apartment with bright, cheerful colors and designs. The kitchen took all of forty five minutes to get done, and the trickiest part was matching the pattern repeat.

While, at first glance, removable wallpaper may look like the more expensive option, I’ve found that after you buy all the supplies to paint walls or hang art (tarps, brushes, pans, rollers, sandpaper, painters tape, primers, and multiple buckets of paint; or frames, mats, and custom fitting), the total cost is much lower. In total, I spent about $100—shipping included. Not to mention, you won’t ruin your favorite jeans when you think to yourself “Ah, but I’ll be so careful!” The only cost is the paper itself. It is also completely possible to make temporary wallpaper yourself with contact paper.

Before

Before

After

After

Don’t know where to start?

Check out the whole host of resources available online about where to buy and what to do with temporary wallpaper:

Removable wall paper can be bought at:

Feeling crazy? Try starching fabric to the wall. (I haven’t tried this, so don’t blame me if it pulls all the paint off your walls…)

And I’m not the only one who is totally into removable wallpaper! Read more on Oh Happy Day and Apartment Therapy.

Enjoy!

Enjoy!

Let’s Ask: How Do I Stain This?

Working in a hardware store, I come into contact with a lot of do-it-yourself-ers. While I admire their efforts, often they need an expert, or at least someone with a little experience, to help point them in the right direction. One of the most common problems customers bring to my attention involves staining, both interior furniture and deck stains. It’s a lot harder to fix mistakes made while staining than it is if you mess up while you’re painting, and many people jump into a large project without doing their research. Here are some of the FAQs that are often brought to me by customers:

How do I prepare?

The most important part of any home improvement project is the preparation. You need to have the proper tools and know the proper techniques, or you’re going to have a bad time. When it comes to staining, this comes down to knowing what type of surface you’re working with, and whether it is new or old. I frequently have customers tell me they aren’t sure if their piece is even made of real wood, or whether it has been stained in the past. The answer I usually give is to try a little stain on a small, hidden area, and see what happens. If it soaks into the wood, you’re probably fine to stain the whole thing. If it doesn’t, stop trying, it’s not going to work. If the stain is just pooling up on top of the piece, it either is not able to be stained, or there is another coating or stain already on the wood that needs to be removed. In terms of equipment, you should have a brush, a rag to wipe off excess stain, and something to clean your brush (soap and water for water-based stain, and mineral spirits for oil-based). Unless your stain is designed to be wiped on, you should always use a brush. Exterior stains can be applied with a brush, roller, or sprayer, but check your product for recommendations before beginning.

What does a stain do?

Another misconception a lot of customers have is that a stain, like paint, is just an exterior coating. One of the most common problems my customers have is that they’ve tried to apply a stain as if it was a paint and, in many cases, directly over existing paint, or other coatings. Stain only works on bare wood, because it needs to soak into the wood fibers. Imagine your wood as a bundle of drinking straws. The straws can soak in water, and other liquids. However, there is a limit to how much the straws can absorb, and, of course, if they are blocked by something, they won’t soak in anything at all. Stain needs to soak into wood, and when it dries the fibers of the wood grain lock the color inside. A paint or clearcoat goes on top of the wood, and will prevent other liquids from soaking in, and make the piece more durable. You typically go over interior stains with polyurethane when you are done.

How can I stain something that has been painted or sealed?

The basic answer is: you can’t. You have to remove the paint in order to properly stain the wood. This is by far the most frustrating part of staining for customers unfamiliar with the process. Many decide to try anyway, only to return in a few hours even more frustrated. Defiant to the end, I’ve seen customers go through darker and darker stains, thinking a darker color would just cover up their mistakes, rather than taking my previous advice. In the end, their piece was ruined, and as far as I can tell they never attempted to remove anything they applied to it.

What about removing an old stain?

Unless you’re changing your stain color or switching to a water-based stain from an oil-based, you usually don’t have to remove your old stain at all. Just remember, a water-based stain can’t go over an oil-based stain. Removing stain is not particularly hard, but it will take patience. For interior stains, you have the option to sand the wood, or strip it. I usually recommend stripping, because it requires the least amount of grunt work. Sanding is cheaper, but harder, and you are more likely to damage your wood from over sanding. Most strippers just need to be brushed on, and let sit for a while, and then rinsed off. For interior stains this isn’t that hard at all, but for exterior deck stains, it’s a larger and more complicated task. Exterior stain remover usually comes in a concentrated form (so you can make a large quantity of it) and should be applied to the entire surface you want to remove the stain from. Unlike some strippers, these types of removers usually require their own neutralizer product. At this point is when most customers decide to just paint their deck instead–just saying.

With this information, your next staining project should be a breeze! The real key to staining, and any other household project for that matter, is to take the time to understand the process, and what types of stumbling blocks you might encounter. Staining is never a simple project to undertake, so consider whether it’s really worth your time. It can make your furniture and deck look fantastic, but only if done properly. If you’re looking for a quick-fix, try painting instead.

Photo by Rob Adams

Photo by Rob Adams

Curating Your Art Collection Without Busting Your Budget

Decorating on a budget is not easy.  Sure, you might do some great DIY projects, maybe find some decent furniture on Craigslist, but if you really want to make your place look great without spending a whole paycheck (or five), it takes a lot of work.  Fortunately, even if you have to live with a dingy 5-year old sofa that may have at one point belonged to the mother in What’s Eating Gilbert Grape (too soon?), here are four simple and affordable ways to invest in your own personal style.

1. Use your own photos.  Why spend money on art when you have plenty of your own photographs just waiting to be framed on your wall?   I remind you that photographs were invented before the Facebook photo album, and a special photo will be a great conversation starter with your guests.  If you worry your pictures aren’t ‘artsy’ enough, get them printed in black and white!  Sugarfish is a great affordable service to get photos printed, and you can even order prints of your Instagram masterpieces on Shutterfly.

2. Maps, postcards, old records, anything flat you can put in a frame.  If you’re like me, you’re always finding a cool postcard you bought on vacation but never sent, or the ticket to that epic Dashboard Confessional show you went to in high school.  Rather than sticking it back in a drawer to be rediscovered in another five years, throw it up on the wall to break up all of your fabulous photographs.  Old maps are a particular favorite—both affordable and pretty!  Never been anywhere?  Fake it with the $3.95 map wrapping paper  from Paper-Source!

3. Affordable art prints and photos are easy to come by if you’re looking in the right places.  I like to shop around, but most of the sites below feature several different mediums (prints, photos, text graphics, even actual paintings) so if you don’t have the time or patience for scrolling through 40 pages of options, you would do well at just one of these.  The more affordable pieces from these sites do in fact still cost some money (many items in the $15-40 range, depending on the size), so I try to only purchase things I really love and would want to look at every day on my wall.  Minimalist and fan-made movie posters are a personal favorite that look nice and reflect my true passions.

  • 20×200 (www.youshouldbuyart.com):  Run by a gallery owner in New York, they have a great stockpile of photos and prints by up-and-coming artists.
  • Society 6:  Not only do they deal in art, but if you find a design you like, you can get it printed on t-shirts, mugs, pillowcases, phone cases, and more.
  • The Working Proof:  Art for a cause—15% of each sale goes to the charity of the artist’s choice.
  • Etsy:  A perennial favorite for all things, art included.  Perhaps pay tribute to the cinematic classic I mentioned earlier with this!


4. Don’t be afraid to create an original painting yourself!  I know the canvas–and-paint section at the art store can be intimidating, but delve in, and make your own masterpiece to hang on your wall. It’s easier to splurge on something when it’s half off, so double-check for coupons before you go in to your favorite craft store. Even if you don’t see yourself as “creative,” geometric patterns in a good color scheme look just as nice as a detailed landscape—and you still get kudos for having an actual painting on your wall!  Too shy to go it alone?  Try out Painting with a Twist (or any of the similar BYOB painting classes across the country) with a couple friends and a bottle of wine, and come home with a beautiful painting as well as some new memories (aww).

In all, I think the key to curating an art collection while not over-spending is to make every piece you own individual to you.  Whether it’s meaningful because you made it yourself or just because you love it, I guarantee that a piece of art with personal meaning that also looks great will justify any cost.  Now please, just promise me you won’t hang all of your beautiful acquisitions and discoveries with painter’s tape and thumbtacks. *

*Before you even try, I direct you to Michael’s (they almost always have a coupon for 50% off on their website) or Aaron Brothers (they have a buy one, get the second for 1 cent sale on frames and canvas in January and July every year).

Photo by Michelle White

Photo by Michelle White

It’s Not Too Late to Decorate!

For as long as I can remember, I have been in love with Christmas. Not just the day, but the entire holiday season—there’s something so special about this time of year that puts me in a jolly mood.  I love the giving and loving spirit of people during this time, I love driving through neighborhoods, seeing them all lit up. I love getting together with family and friends. If I were to continue, it would go on for pages! But aside from spending time with my loved ones, my favorite thing to do is decorate.

As we grow up and move away from our childhood homes, there may be holidays we have to spend away from family and friends—for me, this is my first Christmas away.  And even though it will be difficult, I know I can still enjoy Christmas and Christmastime by surrounding myself with beautiful embellishments to lift my spirits. One thing that always brings me such joy during the holidays is sitting in a room lit with Christmas lights with the scent of a fresh Christmas tree.  Add some hot cocoa and a Christmas movie, and I couldn’t be happier!

Since those of us in our 20s usually don’t have buckets of money to throw at things like Christmas decorations, especially during this time of year, this is how I plan to decorate and save money while doing so.

For me, one essential decoration is, of course, the Christmas Tree.  I’ve found that real trees are far cheaper short-term than artificial trees if you shop for a good deal, even though they only last one season.  You can go to a hardware store and find real trees as cheap as $25 for a 6’ tree. Now, if you’re planning on investing in a tree to continue using year after year, then artificial is the way to go, but expect to pay more upfront.  I personally prefer to get a real tree.  It’s so much fun going and picking one out, even though I just go to Home Depot and not the forest to chop one down, but hey, it’s still fun. And oh, how I love the scent of a real pine tree during Christmastime—why spend money on buying sprays and candles when you can get the natural pine smell for free from your tree!?

This time of year, practically every store you go into has aisles and aisles of Christmas decorations—I’ve seen stores selling Christmas decorations since September!  But if you’re looking to decorate on a budget, be aware of where you are shopping.  It may be easiest to go to Target and get everything there, but they do not always have the greatest deals: I also check out places such as IKEA and the dollar store… yes, the dollar store!  You can find some great things like wrapping paper, bows, garlands, stockings, and great little stocking stuffers that other stores tend to mark up.  Michael’s is always one to have great sales during this time of year for quality products.  If you’re more of a DIY type, Michael’s is definitely the way to go.

If you enjoy decorations but aren’t much of a decorator, invite friends and make a night of it.  Every year, my family would put our Christmas tree up together.  We would make a big fun evening out of it, with snacks, eggnog, music and Christmas movies.  Last year when I moved to LA, it was the first time I wasn’t home to decorate my family tree, so I decided to keep that idea going by inviting my friends over.  I got a bunch of ornaments and paint pens, and we spent the night designing our own ornaments, stringing popcorn, and hanging them on the tree. Creating your own ornaments is not only inexpensive, it’s a perfect way to personalize your tree.  Year after year you will hang the ornaments and think of the memories creating them.  It’s really simple and fun—and for those of you who think you wouldn’t be good at it, it’s really a lot easier than you think.  You can buy glass balls or plastic (plastic is cheaper, but I prefer glass).  Grab some permanent markers, paint pens, glue, fake snow, glitter pens and really anything else you can think of!  One of my favorite ways to decorate an ornament is to draw a design, like a snowflake, with glue and sprinkle artificial snow on it.  It takes a plain decoration and makes it much more festive.  I also love taking off the top of the ornament and pouring artificial snow or Epsom salt in it.  Or simply use permanent markers, glitter pens, or paint pens to draw designs on it.  Last year, my friends and I signed one of the glass ornaments and dated it.  That one puts a smile on my face every time I see it.

I also love to hang garland around the house, but instead of plain bows of evergreen, I like to spruce up my spruce by twisting them with sets of lights. I also like to add extra Christmas color to my garland with berry garland. The little red berries pop, adding a nice festive touch.

If you don’t want to go all out, you can always add small accent pieces scattered around your place. Candles and hand towels add a little something extra that’ll get your holiday spirit up! They even make Christmas cookie candles, so you can make it smell like you just baked, even if you haven’t gone near your oven in months. (But, like with the smell of a fresh pine tree, you can always opt for the real things and bake some fresh cookies instead!)

Decorations can be subtle or extreme, but all are fun. It’s a chance to express yourself, so go out there and get creative with it!

Photo by Rob Adams

Photo by Rob Adams

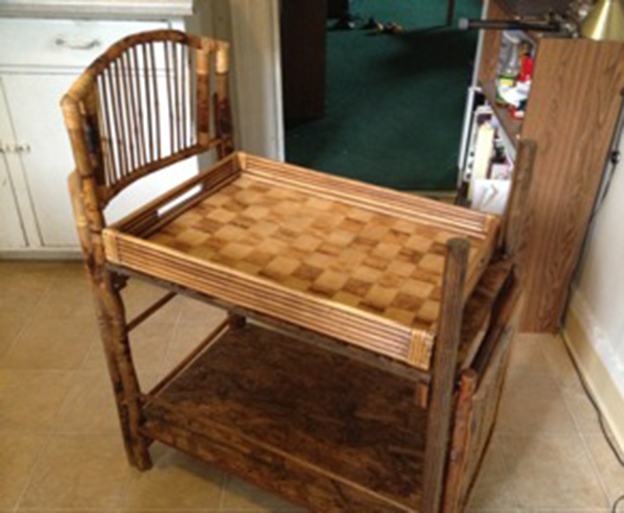
Baby’s First Building Project: from Folding Chair to Bar Cart

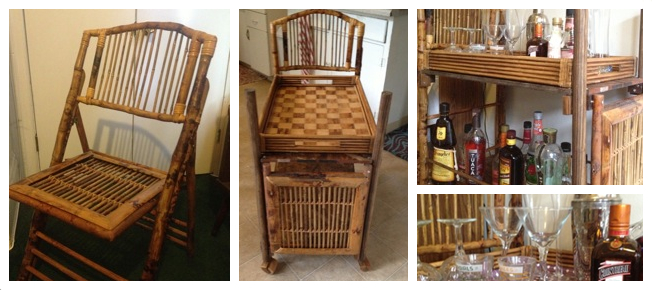
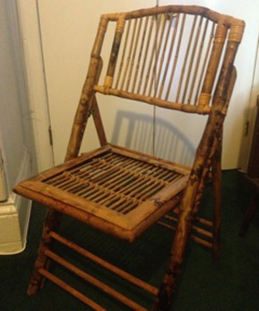
Dinner party with a dozen or so close friends, all gathered in the dining room of my house. Various friends and roommates bustle around, getting food on the table and pulling up chairs. Someone inevitably reaches for the bamboo folding chair and I tense up, clutching the plate of Brussels sprouts I’m holding. Our guest flips the chair open with a caviler flick of the wrist, drops it in front of the table and plops down heavily. My face contorts in an anguished wince as I hear the mournful creak of the old, vintage bamboo as it bends under the weight of our unsuspecting guest.

Bar Cart

After this scene had replayed itself several times, I began to wonder. Sure, I didn’t like seeing the pretty, antique bamboo chair that I had thrown down 20 bucks for at Urban Ore subjected to the torment of being sat on. However, it had occurred to me that this was, in fact, the primary function of said chair, and perhaps I should either come to terms with that fact or get rid of the thing.

Needless to say, I sat on this knowledge for a good year or so before springing in to action. And when that day came, I did not take either of the equally undesirable actions I had presented to myself. Instead, I thought, I should repurpose it into something. Something awesome. And finally, one day, after spending a good 2¼ hours pining over bar carts on Pinterest, I leapt to my feet, shouting—“I could use my bamboo folding chair for this! I could use it to make my bar cart!” Eureka.

Now, as the title suggests, I did not go into this endeavor with a whole lot of knowledge or experience. I had used a drill, which was great, and I had been to Home Depot before. That was fine, though: I used my networks, consulting with friends, family, and the Internet.

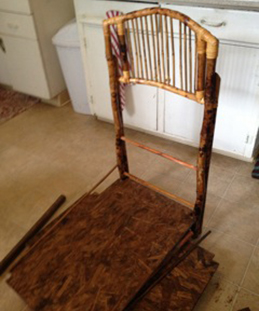
Starting from the brainstorm stage, I took the chair apart and maneuvered it to try to figure out how, exactly, my finished product would look. This also allowed me to take stock of what else I would need to buy to complete my project. Speaking from the wealth of experience I have gained by building exactly one item, I think that having something tangible to manipulate while you brainstorm can really help you visualize what you want and how you can get there.

Original chair! Chair in pieces on my floor as I brainstorm how to put it together. My wood shelves are there too.
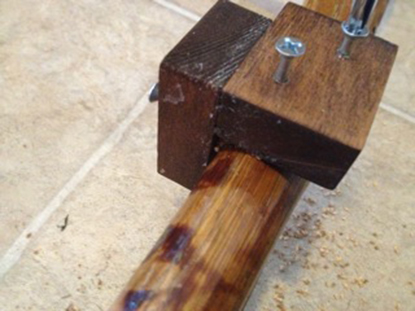
Here are my “L”-shaped supports for the wooden shelves. I just bought a long pice of rectangular wood and cut it into 2 inch pieces.


Per my dad’s suggestion, I also measured the materials I had and drew out a sketch, complete with piece measurements and where screws would go. This piece was invaluable—I referred to my sketch often throughout the process and you will too, should you take the prudent route and make a sketch for your own building project. Furthermore, my father’s experience and advice were extremely helpful: no doubt, I would have made a shoddier product were it not for a few of his suggestions. I definitely recommend going over your plan with an acquaintance who has even a tiny bit of experience building something.

In that same vein, when you go to the hardware store to purchase your materials, I also recommend conscripting an employee to help you. This person knows what they are talking about (most of the time, and if they don’t, find someone new). They can help you find the cheapest and best way to get what you need, which can save you money and time. In my experience, hardware stores are way too big and have far too many options for beginners.

Beginning the work back at home, I found the old adage “Measure twice, cut once” to be the best possible advice one could give—­particularly after I had to return to the hardware store after failing to abide by it. Once I finally had my pieces cut and ready, I laid them out to stain them.

A few words about wood staining: It took awhile to stain my pieces and let them dry before I could put the piece together, so if you will be using wood stain or paint, be sure to allow for the necessary time and plan a nice, outdoor place for them to dry without asphyxiating yourself. Also, if you use stain, know that you cannot just throw away the cloth you use, as wood stain is crazy flammable. You have to soak it in water and then do some hazardous waste disposal. (When someone writes an article on how to do that, I’ll let you know. And then, I’ll also finally be able to throw out the small can of water and used stain rag that is currently sitting on the floor of my pantry.)

Finished product, with awesome tray!

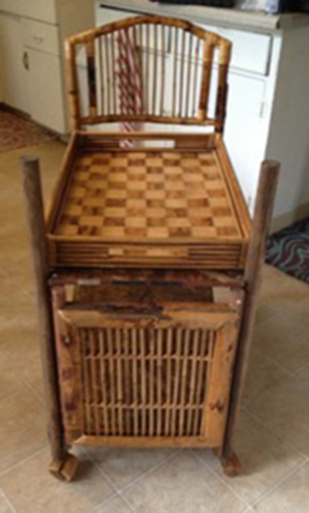
Finished product from a new angle – The back of the chair is farther back in the photo, and the seat of the chair is attached right there in the foreground.

While the stained wood was drying, I began to drill my holes. First, I drilled small holes to make and connect little “L”-shaped supports to set the shelf on. Getting those to be even took several rounds of measuring, recruiting people to hold things to getting, using the level, swearing when it wasn’t level, and measuring again. When I finally had those lined up and screwed on, I had a bigger drill situation to attack. I had, by beautiful, divine providence, come across the perfect bamboo hostess tray to sit at the top tier of my cart at an antique store. Perfect – things would now stay put stylishly. However, I still needed a way to keep the big bottles of rum at the bottom to feel and look somewhat secure. I decided to get two dowel rods, stain them, and make a little railing for the bottom tier.

At this time, I learned quite a bit about the drill that I didn’t know. After attempting to drill a hole big enough to fit my ¾ inch dowel rods only to have the drill whine and sputter at me, I learned that it is necessary start with a small hole and enlarge it gradually by using an increasingly larger bit to grow the hole. Though this may seem super obvious, it took me quite some time to figure it out, so I thought I’d save you the trouble. You will not be able to drill a ½ inch hole directly into solid wood. Start with 1/16 and work your way up. Since I was drilling on my beautiful antique chair, I did some practice drills on spare wood to gear myself up for it. Definitely would do again – I learned the hole enlarging tip that way and saved a bunch of heartache.

After all this crazy work of staining, drilling, and leveling, I could finally assembly my cart! I took the beautiful back of the chair propped it up and the “pushing” end of the cart. I used two mega thick dowel rods, stained to match my chair, and fixed them at the other end. To balance the motif of excessive bamboo rods, I took the seat of the chair and nailed it to the barren, dowel rod end of the cart, giving it more life and visual action. Then, I placed my wooden shelves on their little “L”-shaped supports and fit my dowel rods into their now enormous drill-holes and pushed the whole thing together. I dashed in circles around it, drilling anything that made me nervous, until, with a drop of the tired drill hand and a heavy sigh, I collapsed into a kitchen chair. My bar cart was done!

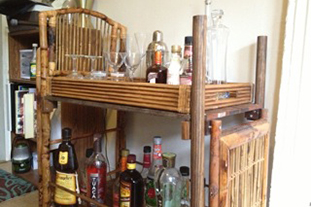
With drinks! And accouterments!

I know there are a million tips and tricks to have a successful building project, and I am still learning so many of them. Still, don’t forget to sand your edges to avoid splinters. Don’t screw screws in too close or the wood will crack. Don’t screw them into slivers of wood too small, either, or the same thing will happen. Use a level so your finished product doesn’t tilt. If the vintage wheels don’t go on, just keep hammering until they do. If you wander antique stores long enough, you’ll find exactly what you need. Make sure, at the end of your project, that you have someone with you whom you can excitedly scream at to “come look” every 5 minutes or so.

And good luck! May your building project bring you as much joy and inebriation as mine has brought me.

Let Me Fix You: Box Spring to Bed Slats

Scouring thrift stores can be a great, cheap solution for outfitting your space with vintage furniture, but it can also be the source for a growing to-do list of DIY projects. Such was the case with the beautiful wooden bed frame I found at my local Salvation Army. I scooped it up for $120 and brought it home to my new apartment only to discover that my box spring now posed two major problems: (1) the box spring, combined with my modern day super thick pillow-top mattress, made the bed too high to get into (like step-stool necessary), and (2) at some point during the move, my box spring developed this squeaking sound that creaked every time I rolled over.

So, I could get a new box spring (but it would set me back another $100 and it still wouldn’t solve the height problem) or I could replace my box spring with an alternative. I went online and discovered many mattresses today, particularly those of the pillow-top variety, don’t need to be flipped and thus don’t require a boxspring anymore. My first thought, of course, was: IKEA! They don’t believe in box springs either! Which would have been an excellent solution, if only my new bed frame had had a center rail—an integral structural support to the thin slats sold at IKEA. Not eager to test out their buckling potential, I looked into: a single sheet of plywood, which was nixed for its apparent susceptibility to mold growth, or a bunky board, except that they are designed to only be used in addition to slats (which made me question why people buy them at all?). This left me with only one option: it was time to make my own bed slats.

Step 0: Googling

I started researching making my own bed slats and found this excellent slat tutorial.

Step 1: Acquiring Tools

You know what’s awesome about doing all your previous DIY projects in your Stepdad’s back shed? Power tools. Do you know what my apartment doesn’t have? Power tools. It does, however, contain a wimpy (albeit visually appealing) toolbox! But, given the scope of this project, and even though I had some woodworking knowledge under my belt, doing this on my own was going to require purchasing a few things.

With the number of DIY projects starting to build up in my apartment, I decided it was time to invest in a power drill of my own. Turns out, a power drill/portable saw combo at Home Depot only costs $10 more than just a power drill. Considering I was already set to spend the money, naturally, I bought the combo. It was the cheapest brand, Ryobi, but at $99 I wasn’t being picky. I double-checked reviews online, compared the features to the other drills around it, made sure the set came with a lithium-ion battery (not nickel-cadmium, which was the former battery standard but is now being phased out), and that the battery pack would work with any future Ryobi power tools I chose to purchase (next buy: power sander!).

But once you’re the proud owner of a fancy new power drill, you still need two things before you can actually use it: drill bits and screws. I opted for a slightly larger drill bit kit because I wanted to make sure I had a set that included all the basic screwdriver heads. Because I had no idea what kind of screws I’d need for all my drill powered future projects, I settled on this assorted wood screw pack to get me started. I also purchased a variety pack of nails just in case this whole plan blew up in my face and I had to resort to my good ol’ hammer. (For more tips on what you should have in your toolbox, check out Michelle’s suggestions here.)

Note: I have yet to use my portable saw but my vastly more experienced Stepfather strongly suggested I buy myself a Work Mate before using it. It’s a foldable and portable work table with clamps that you can use to saw things more easily (read: without hurting myself).

Step 2: Acquiring Materials

Chances are, wherever you go for wood, they are going to have an overwhelming number of options. There are several key decisions that you will have to make:

Note: Before you go to a lumber supplier (in my case: Home Depot), it is important to measure–actually measure with a tape measure and everything. Don’t be rushed, and don’t skip this, or you’ll end up making the same mistake I did.

First thing you have to decide is what type of wood you want. For a project like this, where no one will be seeing the wood, you can go with a cheaper soft wood like pine or Douglas fir.

Next, you need to decide on what thickness and width you want your wood to be. When I think about lumber, “2-by-4” is more of a name than an actual description. Turns out it’s actually both. The first number is the thickness of the wood and the second is the width. So a 2×4 is 2” thick and 4” wide. Unfortunately, to be extra confusing, lumber is actually identified by what they call nominal lumber sizes, meaning that it is labeled as the size it was before the wood was planed and cut. Therefore a 2×4 was 2” thick and 4” wide. However, now as it lies in front of you, the wood is only 1.5” x 3.5”. Not confusing at all, right? I totally didn’t know that until I was researching for this article, so of course I took the length of my bed (72”) and decided I’d need eight 6″ wide boards. With each of the eight boards spaced 3″ apart this would give me: 48″ of wood + 24″ of space = 72″. When I got home and realized the real measurements of the wood, my 3” between each board turned into 3.5” but it still worked. I wanted the slats to be as thin as possible for the mattress to sit on while still being strong enough to hold it up without bowing, so I went with 1” thick wood. Don’t be afraid to ask for help! The blog post I was following had me looking at 2×12 boards, but the employee helping me saved me a ton of money by suggestion I use 1×6 boards instead.

The next thing you need to figure out is length. My 1×6 boards were each 72” long. (Again, the blog had suggested 16’ (192”) boards, but these were way more manageable and cheaper.)  72” is a lot longer than my full bed, so I needed to trim them down to size. I may now be the proud owner of a portable saw, but I still had the friendly folks at The Home Depot cut my wood for me. The first time I tried this, however, I had been lazy and rushed in my measuring, so the super quick measurements I scribbled down were actually wrong. When I got my perfectly trimmed 52.5” boards home, I discovered that they were too short by 1.5”. One thing the blog had right, which I ignored, was the common bed sizes: if I’d listened to them regarding the width, I would have cut my wood correctly (to 54”) the first time and not wasted $30.

When buying wood, it’s also important to check for defects (like these common wood defects) in each board. When I got home with my second round of correctly cut 54” wood, I realized I had one “weak” board, meaning that the board was easier to bend in the middle than the rest. I already had my boards spaced 3.5” apart and I didn’t want to lose a whole board and risk putting too much weight on the remaining ones. Instead, I put the weak board on top of the metal frame on the end, where it would be more supported and have the least amount of pressure on it.

bed 2Step 3 (which should have been Step 1): Designing using your vast structural engineering knowledge… or what you learned from Google

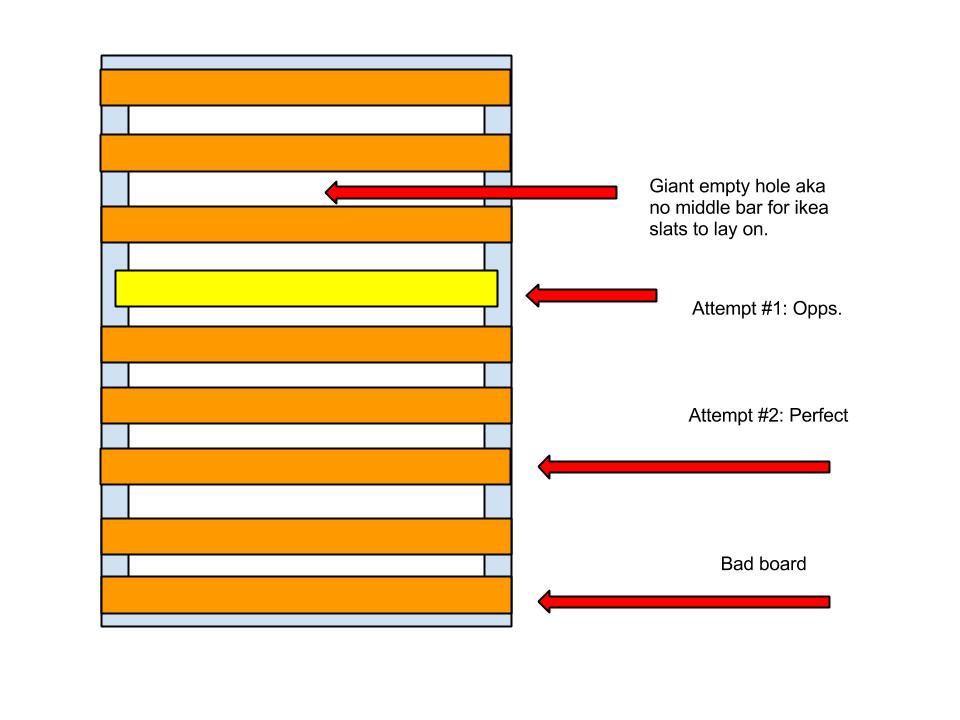
So, at first, the plan (devised from the blog I’d found) was just to get a bunch of boards and lay them across my frame. This would have been great except that, unlike their example, my bed frame didn’t have anything on the sides to keep the slats from moving or, worse, slipping off. Not wishing to experience this in the middle of the night, I had to do a little extra planning:

Let Me Fix You- Box Spring to Bed Slats

Thanks to my earlier wood measuring error, I had a few extra boards to work with, so I decided to add two support boards to keep the slats from moving and/or slipping off the frame. Once flipped over, the supports would hit against the metal on the frame, thus keeping the slats in place, and look like this:

Let Me Fix You- Box Spring to Bed Slats (1) If only I had made these drawings BEFORE I started and not just for this article. Add that to the lessons-learned list.
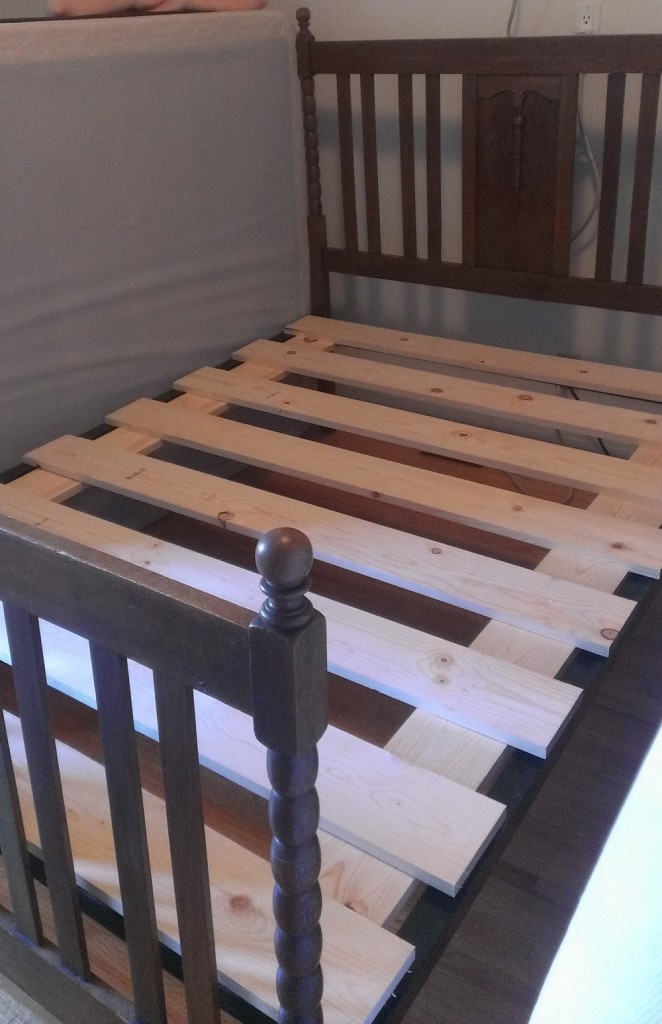
This was the final product:

Bed Slats square

After a month of excellent sleep, without injury or sagging, I think it’s safe to call it a success!

Let Me Fix You: The Pink Chest

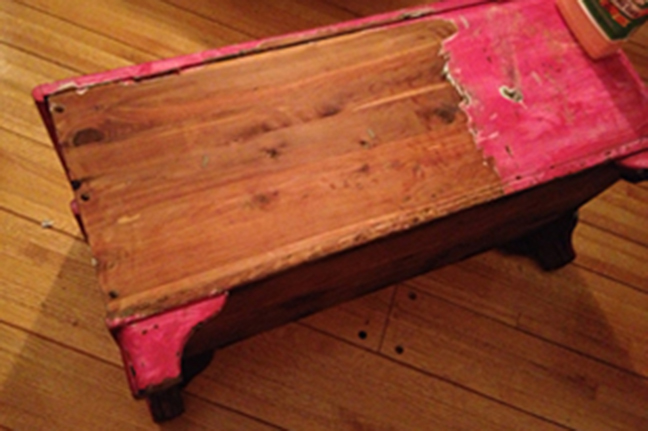
When you live with someone who has a trunk obsession, you might one day find an ugly, ugly, ugly hot pink cedar chest sitting in your living room. Now, because you have taste (and they do too thankfully), the only way this atrocity can stay is if you take it back to its original wooden self. Bring. It. On.

Before I get started though, let me warn you that this is not so much a DIY instructional as it is story time: the trials and tribulations of someone who’s just gonna do stuff and hope for the best.

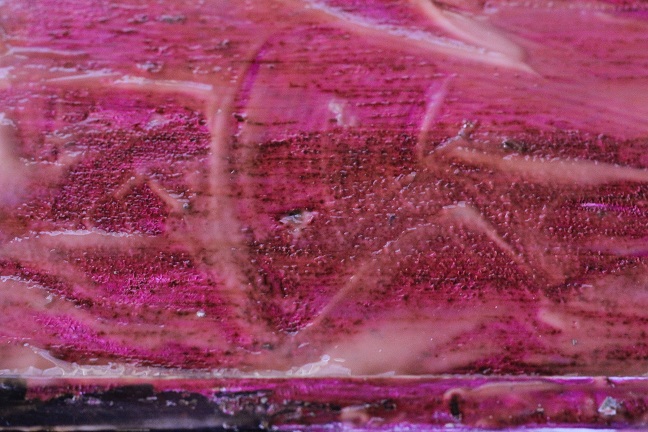
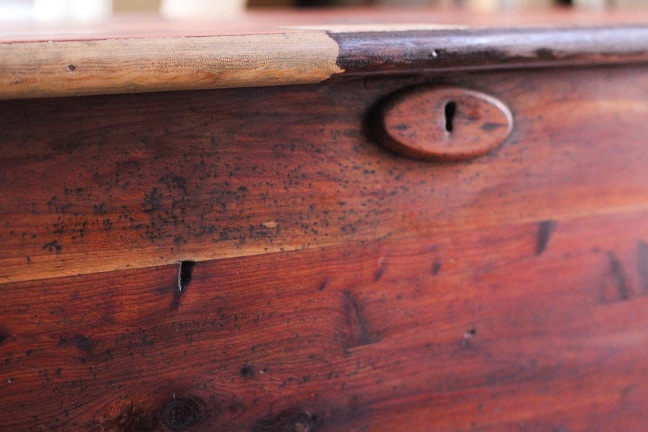
The paint job was straight up shit. Bad paint jobs mean one of two things: either the previous owner was a crap painter or they were trying to cover something up. You never know what you’re going to find, but with the beautiful, untouched cedar wood visible inside, there was a very good chance that treasure lay beneath.

The Stripping

First I wiped the chest down with Murphy’s Oil Orange Multi-Use Wood Cleaner Spray (think Windex for wood). The goal wasn’t to clean it, just to get the crusty chunks of dirt off. I decided to start with the back of the trunk, figuring this is where I’d do the least damage if things went awry. In lieu of the regular, noxious smelling paint stripper I’d used years ago, I decided to try Citristrip because it claimed to be low on fumes yet high on results (since my work space was doubling as my living room).

The basic idea behind all paint strippers is that you apply a coat on top of the paint, wait, and then scrape the paint off. I poured out the Citristrip (which has the consistency of melted Gak) smeared it around, poured some more and smeared again. The directions suggested using a paintbrush, but I opted to finger paint with a pair of rubber gloves. And then I waited the requisite 30 minutes for it to do it’s mojo (and another 10 because, well, I forgot to check on it).

With Citristrip, you don’t see the paint bubble up like you do with the oh-so-fun smelling stuff, but the paint will discolor enough to let you know it’s working. You can keep it stripping for up to 24 hours, though I never left it on more than two. But the thicker it is and longer you leave it, the easier the paint scrapes.

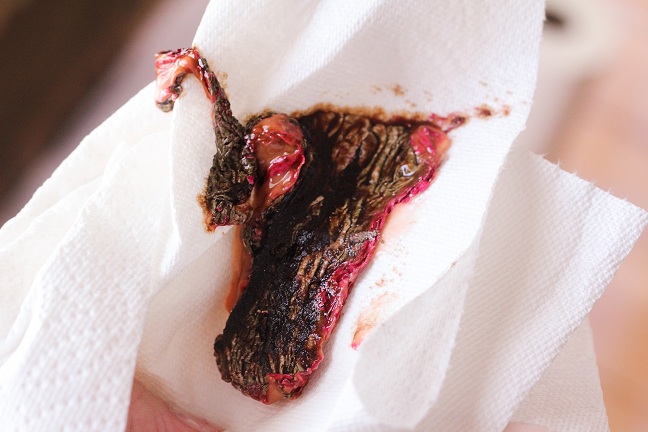
I used a 3” putty knife to scrape. I tried to follow the grain, scraping in one direction for the longest possible pass so that most of the paint ended up on my putty knife. Then I wiped it off on a paper towel, threw it into a plastic bag, and got ready for the next long swipe. Most of the paint scraped off like buttah. For the paint stuck in cracks and gouges, I used Ikea’s curved paring knife. Beware: aggressive scraping leads to wood shavings. If (and when) I saw strips of wood peeling off, I stopped and moved on.

pinkchest_648x431

Because I was only working on a modest sized towel, and I like my furniture and my shiny hardwood floor, I had to be very careful about dripping and spraying. This meant I could only strip one side at a time instead of doing the whole thing at once.

The Scrubbing

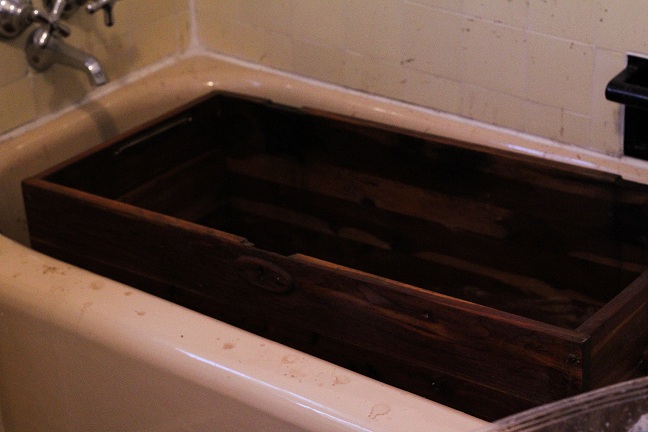
Even after you scrape off most of the paint, there’s still a goopy, residue left on the wood that just smears if you try to wipe it up with a paper towel. In my head this gunk was full of stripping chemicals that were going to hurt the cedar if they stayed caked on. So I washed each side individually after I stripped it and then I threw it in the bathtub (where it fit perfectly) to scrub it some more.

Originally I was using the Orange Cleaner spray with grade #00 steel wool (steel wool comes in several grades). But by the time I’d stripped 3 sides, I only had a 1/4 of the orange spray bottle left, so I moved on to the more economical Murphy’s Original Oil Soap. The steel wool not only picks up the gunk left by the paint stripper, but it also acts as a gentle sander. Unfortunately, the #00 was just a bit too fine which meant it would get matted with all the crud much more quickly. I almost went through the whole 12 pack, hence switching to the coarser grade #1 steel wool which was much better at lifting up stubborn paint.

The advantage of doing this in a bathtub (or if you’re lucky enough to be outside near a hose) is that there’s a constant supply of water and boy oh boy did that liquid blacken. The water that came off was nasty (a putrid diarrhea color) and it sprayed everywhere. Good news was that it smelled nice. It was probably in the bathtub for hour until the water finally ran beige.

The Sanding (or My Big Mistake)

I left the trunk to dry overnight and when I woke up in the morning it looked awful. I have scrubbed this thing to an ashy death, killing all the potential I spent hours scraping and scrubbing into existence… not really, but it felt like it. Having already read things like this, I was aware that this was another step in the process but it wasn’t any less horrifying.

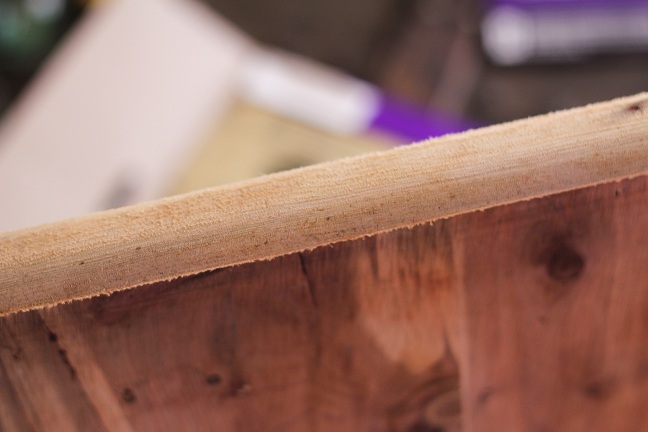
My naivety led to me to think that all the ashy discoloration would simply go away with some oil and that sanding was only for the rough patches. The wear and tear was cool, why sand that away? So I gave it a mild sanding with some 320 grit sandpaper (yes, sandpaper has grades too) and then I moved on to oiling. In retrospect, this was my big mistake, but more on that later. The only thing I actually sanded was the trim because it had this funky peach fuzz going on along with a faint greenish hue left by the original olive colored paint.

The Finish (But Not Really)

Now for what felt like the daunting part: choosing a finish. There were way too many choices, but I surmised the standards were oil, varnish, shellac and laquer. My biggest concern was ease-of-use in a small space, but I also wanted a natural shine, not a plasticy one, so I went with oil.

Typical oil finishes are Danish Oil, Teak Oil, Tung Oil and Linseed Oil. I didn’t want to stain the cedar wood, I just wanted to, ya know, “moisten” it. Linseed was crossed off simply because none of the pretty, DIY blog posts I’d read used it, Danish oils usually have some stain and other chemicals in them, and Teak tends to darken the wood, so the last man standing was: Tung Oil.

Turns out most stores don’t sell the real stuff (the one I found at Home Depot was a Tung “finish” that had more chemicals than oil in it) so I ended up buying Hope’s 100% Tung Oil from Amazon.

I snapped the rubber gloves back on, poured the honey-like oil on a rag (the size of a wash cloth courtesy of an old towel) and rubbed it in. The smell wasn’t amazing (burnt chestnuts?) but tolerable. I did two coats and let it dry.

For the sallow colored trim, I discovered that Minwax made stain pens with which I could essentially Sharpie my furniture. I picked the Red Mahogany color and even though it didn’t stain perfectly even, probably because I’d oiled it first, it gave the illusion of natural wear over the years.

Finally, I waxed the chest with Feed-N-Wax (because other people said to) and hoped that I was done.

The Real Finish

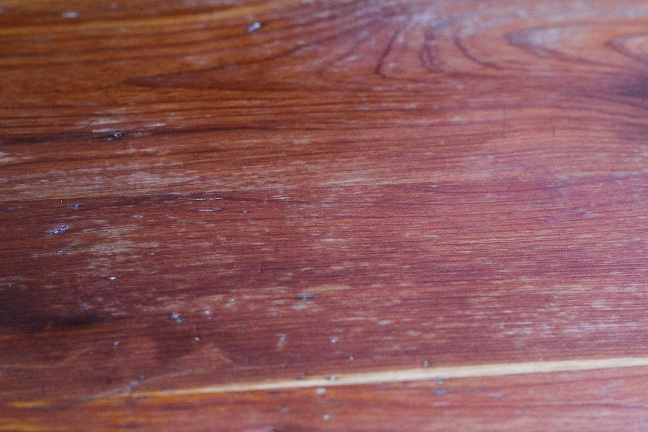
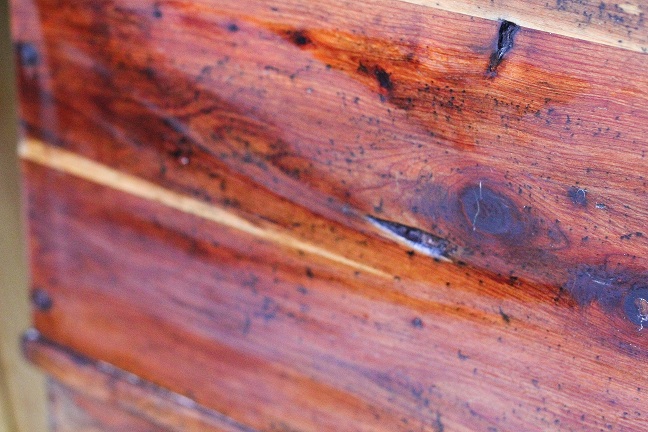
Unfortunately, even after the wax had dried, there were still noticeable parts of the lid that looked ashy/greenish/blah. Annoyed but determined, I found some 60 grit sandpaper in the toolbox and started sanding my little heart out. Not only did the sanding clear up the discolorations, it actually brought out more the wood grain than I expected.

I’m halfway done with sanding and kicking myself that I didn’t do this earlier. What can I say, I’m an idiot perfectionist. The current plan is to try out a power sander and then oil it back up sans annoying imperfections. I might hold off on the waxing though, it dries matte and I’m not sure I like it. I know I’ve sanded away the shine, but I’m making the prettiest goram chest I can, even if I have to backtrack.I started this project having no idea what I was doing, but at the end of the day it’s all trial and error whether you have a manual or not. Just accept that you might screw it all up… or you might not. I’m still figuring it out.

Extra Credit: Apparently, to avoid spontaneous combustion, this is how you dispose of oil soaked rags:

How to Paint a Room

Whether you are painting your dream house or just touching up your bedroom walls, painting can be a very enjoyable, yet daunting, activity for those unfamiliar with the process. This is something that you’re going to have to look at every day, so it is important to do a good job! If you have never painted before, here are the basic steps to help you get started.

Materials You Might Need

This is a basic list of the materials you will need. Every job dictates slightly different tools, but this will get you in the right direction. Talk to the color specialist at your local hardware store for better information about what tools are best for your specific job.

  • Paint/Primer
  • Brushes/Rollers
  • Trays
  • Plastic/Drop Cloths
  • TSP/Cleaning Supplies
  • Spackle/Putty Knife/Sandpaper
  • Ladders
  • Mineral Spirits/Solvents
  • Sand Paper
  • Imagination! (Not Optional.)

Prepping

Before you start painting, you’re going to need to prep your work area.

First, you will want to cover or clear the room of any furniture or other things you don’t want to get paint on. You can use plastic sheeting or drop cloths in order to protect your floor from splattering paint. To make it easier to navigate and prevent trip hazards, you may want to secure the sheeting to the floor with blue masking tape, also known as painter’s tape (or any other tape that won’t leave residue).

If you have a different color trim or need to achieve a nice, crisp line at the edge of where you are painting, you will have to use tape. Often, people use regular blue masking tape because it is relatively cheap; however, if paint is left on the tape for too long, it is very likely to seep beneath the tape and leave hairy looking lines along your edge. What you should use is a tape with some type of foam chemical laced on the edge that will form a seal that prevents any paint from leaking. I recommend using FrogTape, which is the original paint block tape. Any contact with water will activate the chemical, so painting over it with water-based paint will automatically activate it. To use it with oil-based paints, you have to manually activate the product with a damp cloth before painting. Tapes like these can be left up much longer, and your paint will not bleed. If you insist on using regular masking tape, be sure to remove the tape as soon as possible.

The next step is to prepare the surface on which you will be painting. Depending on what type of paint project you are working on, there are several things you may have to do.

For older walls, perhaps already painted once before, you may need to fill in any cracks or nail holes with spackle or nail hole filler. These can be easily applied with a putty knife and are usually around five or six dollars for a small tub. A popular type of spackle for painters is lightweight spackle. If your brand new tub of spackle feels practically empty, it is probably a lightweight spackle. The benefits are that it will dry much faster than regular spackle and, in many cases, they contain primer, making small patch jobs a breeze. Lightweight spackle is not very durable though, so I would only recommend it for small holes and cracks. If you’re working in a bathroom or place with a lot of moisture, use vinyl spackle or one that will dry flexible. These types of putties are less likely to crack when exposed to moisture. Once the putty is applied and dried, just sand it down to the level of the wall with some sandpaper.

Cleaning

The next step is to thoroughly clean the surface you will be painting. At the very least, give the wall a good cleaning with warm soap water, and then rinse it off. However, many people prefer to use Trisodium Phosphate (TSP for short), an all-purpose cleaner that also helps prepare the surface to be painted.

Priming

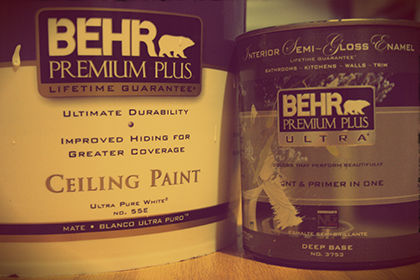
The last thing to do before painting is optional depending on several factors. Many people argue over whether you actually have to use a primer to paint your wall, but it all comes down to what is currently on your wall and what kind of paint you are using. A good rule to remember is that if it is a surface that has never been painted before, you need to prime it. Even with extra coats of paint, it just won’t stick as well without the high levels of titanium dioxide found in primer. (This is essentially what makes the primer adhere to the wall and your paint.) Today, most paints are labeled as “Paint and Primer in One,” which many people assume means they won’t have to prime. Typically, a Paint-and-Primer-in-One paint simply has added titanium dioxide, but it’s not nearly at the same levels as a true primer. What the Paint and Primer in One does is save you from re-priming the previously painted surfaces. However, if you are painting over a deep color and trying to achieve a light color, you will most likely need to prime anyway, otherwise your color will appear much darker because of the previous color underneath.

Painting

Once your work space is ready and your primer is completely dry (your can of primer will have instructions specifying how long to wait), you are ready to paint!

Now that you are all prepped, the actual painting process is actually pretty straightforward. Many people have different preferences regarding the order of things to paint, but traditionally you start with a brush on the edges of the wall and then use a roller to finish the main portion. Many paint manufacturers have different suggestions depending on what type of paint you use, as well. Be sure to read all of the information on your particular can of paint.

To begin, open your can of paint with a screwdriver or a paint can key (you can buy these at most hardware stores for a dollar, and they help preserve the integrity of your can’s lid). Use a stir stick or other stirring device to mix your paint up a bit to ensure none of the pigment has settled on the bottom. If your paint has been sitting for a while, it might even be necessary to have your can of paint shaken again. As long as the can is still in good condition and the can is more than half full, most hardware paint departments will be happy to shake your old can of paint, even if you didn’t buy it from them. Worst case scenario, you can shake the paint by hand in circular motions.

Next, pour some of your paint into a small cup or other paint carrying device. Use your angled brush and dip it about half way into the paint. Wipe off any excess paint, and then cover the edges of the wall. The benefit of the angled brush is you can get a closer, more even application of paint with less risk of getting the paint where you don’t want it. Reapply the paint on your brush occasionally, never letting it get too thin or too thick. If it is too thin, your wall will turn out splotchy. Too much, and it will not dry properly, potentially leading to many other problems later on. There are also smaller rollers designed to be used for this purpose; however, I personally find that a brush gives you a lot more control.

Now that you have finished your edges, you can move onto the main portion of the wall. Pour some paint into your tray (the deeper end). Place your roller into the tray and pull back, bringing some paint with you. You then roll the roller back and forth on the textured portion, ensuring you get a nice, even coverage of paint. If you get too much paint on your roller, it will not roll properly, and is liable to splatter paint back at you when you roll. Too little and you will have to reapply the paint to your roller more frequently. If you are right handed, start from the right end of the wall and work your way left. If you are left handed, do the opposite.

Many people assume the best application with a roller is vertical lines, but in order to get the best coverage and smoothest final product, you should actually apply the paint in a slight angled fashion resembling a narrow W or N shape, and finish with a straight line all the way to the top when your roller starts to run dry. This is so you don’t leave huge gobs of paint at the edge of the ceiling. Every time you finish one strip, your next should overlap by about half the size of the paint roller. To finish up you do a rollover, which is just rolling over the area you just painted with your roller, without applying more paint. This is only to help even out your paint and make sure you didn’t leave any areas particularly thick.

Drying

The last step is to sit back and watch paint dry. I’ll wait for you…

Okay, I guess you should clean up while you wait. It is actually very important for the integrity of your brushes that you clean them immediately after you finish using them. If you are using a water-based paint, this is as simple as using warm soapy water. If you are using an oil-based paint, you will need to use mineral spirits instead.

Last, make sure your brush is left to dry with the bristles hanging down so the water or mineral spirits drains out properly. (This is why paint brushes have holes on the end: so you can hang them up to dry!) The roller can also be cleaned with soap and water. If you have to use it again right after cleaning it, you can buy a roller spinner that will help dry it much faster. It’s important not to use a damp brush or roller, because that will potentially water down your paint.

Assess whether or not your paint job requires a second (or third) coat. If so, repeat. Happy painting and share your stories with us in the comments!

Photo by Sara Slattery

Photo by Sara Slattery