Dinner party with a dozen or so close friends, all gathered in the dining room of my house. Various friends and roommates bustle around, getting food on the table and pulling up chairs. Someone inevitably reaches for the bamboo folding chair and I tense up, clutching the plate of Brussels sprouts I’m holding. Our guest flips the chair open with a caviler flick of the wrist, drops it in front of the table and plops down heavily. My face contorts in an anguished wince as I hear the mournful creak of the old, vintage bamboo as it bends under the weight of our unsuspecting guest.
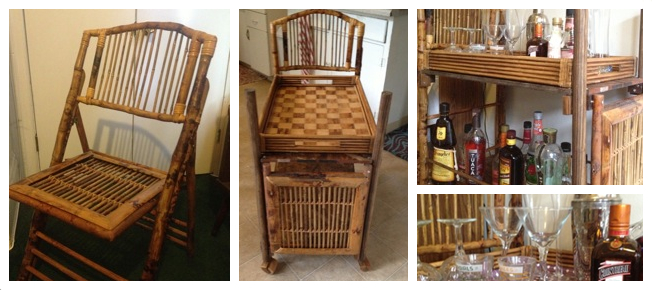
After this scene had replayed itself several times, I began to wonder. Sure, I didn’t like seeing the pretty, antique bamboo chair that I had thrown down 20 bucks for at Urban Ore subjected to the torment of being sat on. However, it had occurred to me that this was, in fact, the primary function of said chair, and perhaps I should either come to terms with that fact or get rid of the thing.
Needless to say, I sat on this knowledge for a good year or so before springing in to action. And when that day came, I did not take either of the equally undesirable actions I had presented to myself. Instead, I thought, I should repurpose it into something. Something awesome. And finally, one day, after spending a good 2¼ hours pining over bar carts on Pinterest, I leapt to my feet, shouting—“I could use my bamboo folding chair for this! I could use it to make my bar cart!” Eureka.
Now, as the title suggests, I did not go into this endeavor with a whole lot of knowledge or experience. I had used a drill, which was great, and I had been to Home Depot before. That was fine, though: I used my networks, consulting with friends, family, and the Internet.
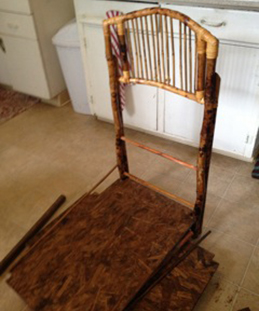
Starting from the brainstorm stage, I took the chair apart and maneuvered it to try to figure out how, exactly, my finished product would look. This also allowed me to take stock of what else I would need to buy to complete my project. Speaking from the wealth of experience I have gained by building exactly one item, I think that having something tangible to manipulate while you brainstorm can really help you visualize what you want and how you can get there.
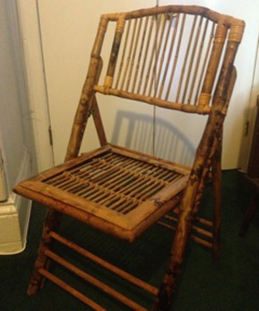 |
 |
 |
| Original chair! | Chair in pieces on my floor as I brainstorm how to put it together. My wood shelves are there too. |
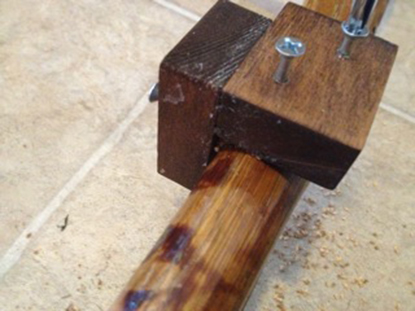
Here are my “L”-shaped supports for the wooden shelves. I just bought a long pice of rectangular wood and cut it into 2 inch pieces.
|
Per my dad’s suggestion, I also measured the materials I had and drew out a sketch, complete with piece measurements and where screws would go. This piece was invaluable—I referred to my sketch often throughout the process and you will too, should you take the prudent route and make a sketch for your own building project. Furthermore, my father’s experience and advice were extremely helpful: no doubt, I would have made a shoddier product were it not for a few of his suggestions. I definitely recommend going over your plan with an acquaintance who has even a tiny bit of experience building something.
In that same vein, when you go to the hardware store to purchase your materials, I also recommend conscripting an employee to help you. This person knows what they are talking about (most of the time, and if they don’t, find someone new). They can help you find the cheapest and best way to get what you need, which can save you money and time. In my experience, hardware stores are way too big and have far too many options for beginners.
Beginning the work back at home, I found the old adage “Measure twice, cut once” to be the best possible advice one could give—particularly after I had to return to the hardware store after failing to abide by it. Once I finally had my pieces cut and ready, I laid them out to stain them.
A few words about wood staining: It took awhile to stain my pieces and let them dry before I could put the piece together, so if you will be using wood stain or paint, be sure to allow for the necessary time and plan a nice, outdoor place for them to dry without asphyxiating yourself. Also, if you use stain, know that you cannot just throw away the cloth you use, as wood stain is crazy flammable. You have to soak it in water and then do some hazardous waste disposal. (When someone writes an article on how to do that, I’ll let you know. And then, I’ll also finally be able to throw out the small can of water and used stain rag that is currently sitting on the floor of my pantry.)
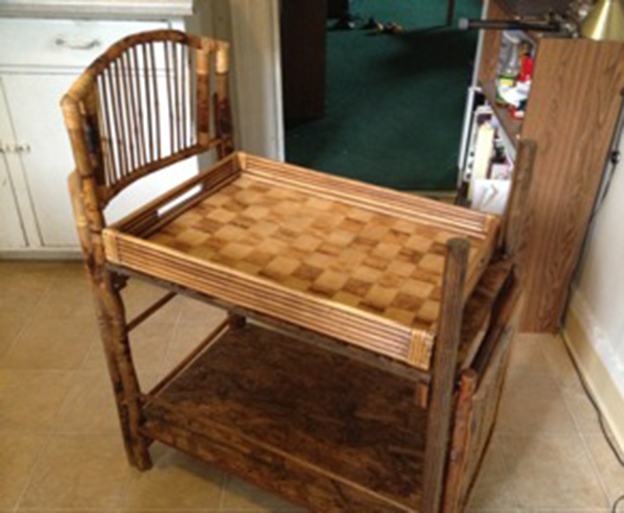
Finished product, with awesome tray!
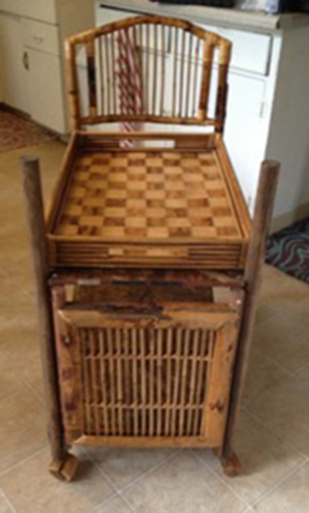
Finished product from a new angle – The back of the chair is farther back in the photo, and the seat of the chair is attached right there in the foreground.
While the stained wood was drying, I began to drill my holes. First, I drilled small holes to make and connect little “L”-shaped supports to set the shelf on. Getting those to be even took several rounds of measuring, recruiting people to hold things to getting, using the level, swearing when it wasn’t level, and measuring again. When I finally had those lined up and screwed on, I had a bigger drill situation to attack. I had, by beautiful, divine providence, come across the perfect bamboo hostess tray to sit at the top tier of my cart at an antique store. Perfect – things would now stay put stylishly. However, I still needed a way to keep the big bottles of rum at the bottom to feel and look somewhat secure. I decided to get two dowel rods, stain them, and make a little railing for the bottom tier.
At this time, I learned quite a bit about the drill that I didn’t know. After attempting to drill a hole big enough to fit my ¾ inch dowel rods only to have the drill whine and sputter at me, I learned that it is necessary start with a small hole and enlarge it gradually by using an increasingly larger bit to grow the hole. Though this may seem super obvious, it took me quite some time to figure it out, so I thought I’d save you the trouble. You will not be able to drill a ½ inch hole directly into solid wood. Start with 1/16 and work your way up. Since I was drilling on my beautiful antique chair, I did some practice drills on spare wood to gear myself up for it. Definitely would do again – I learned the hole enlarging tip that way and saved a bunch of heartache.
After all this crazy work of staining, drilling, and leveling, I could finally assembly my cart! I took the beautiful back of the chair propped it up and the “pushing” end of the cart. I used two mega thick dowel rods, stained to match my chair, and fixed them at the other end. To balance the motif of excessive bamboo rods, I took the seat of the chair and nailed it to the barren, dowel rod end of the cart, giving it more life and visual action. Then, I placed my wooden shelves on their little “L”-shaped supports and fit my dowel rods into their now enormous drill-holes and pushed the whole thing together. I dashed in circles around it, drilling anything that made me nervous, until, with a drop of the tired drill hand and a heavy sigh, I collapsed into a kitchen chair. My bar cart was done!
 |
 |
 |
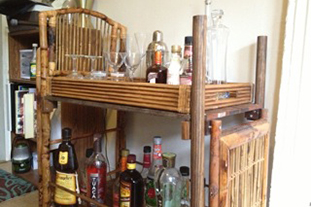
| With drinks! | And accouterments! |
I know there are a million tips and tricks to have a successful building project, and I am still learning so many of them. Still, don’t forget to sand your edges to avoid splinters. Don’t screw screws in too close or the wood will crack. Don’t screw them into slivers of wood too small, either, or the same thing will happen. Use a level so your finished product doesn’t tilt. If the vintage wheels don’t go on, just keep hammering until they do. If you wander antique stores long enough, you’ll find exactly what you need. Make sure, at the end of your project, that you have someone with you whom you can excitedly scream at to “come look” every 5 minutes or so.
And good luck! May your building project bring you as much joy and inebriation as mine has brought me.
This is amazing.
Who’s got a bamboo chair they’re willing to give me???