All posts by Liz Bohinc

A Tale of Two Kitchens: Living With and Without a Microwave

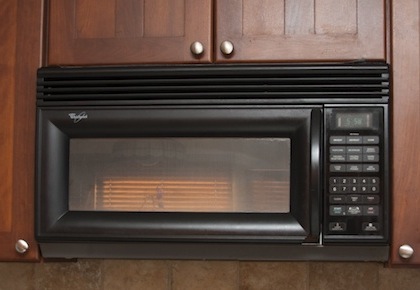
The Microwave Oven. Invented in 1947. Described on Wikipedia as a device that “heats food by bombarding it with electromagnetic radiation.” Though it sounds like something out of a comic book, the microwave is in fact a staple for the young professional, the college student, and the lazy cook.

But there is life beyond the microwave oven for these simple folk.

I would know. I lived without a microwave for a year after moving to Los Angeles. And no, I’m not a big cook. If you open my cabinets right now, there is a lot of instant oatmeal. But I had my reasons for refusing to cave for a microwave.

First, they are kind of expensive for an optional appliance. A quick Target.com search puts them at $55+.  After buying furniture, putting down a security deposit, and starting up my electric bill, I didn’t really want to spend that money. When it came down to the Dirt Devil or the microwave, I chose the Devil.

Also, even quick or instant dinners can be made in a conventional oven—even your Lean Cuisine! It does take a bit longer. You actually have to wait for the oven to heat, and it takes 20-40 minutes to cook instead of three. And there were a few times I may have burned my instant dinner because I forgot it was in the oven. (I was too lazy to invest in a good egg timer—okay, I’m still too lazy to invest in a good egg timer.)

In the end, I still found this cooking technique to be better for me. If I came home from an eleven-hour work day hungry, I would throw something in the microwave and wolf it down. But if I actually have to take my time to heat it up, I eat slower for some reason. Maybe my appetite settles during the cooking process. Without the microwave, I would make big casseroles or veggie stir-fries. I could still reheat them in the oven—even egg dishes like Stratta reheat easily.

And don’t fret: you can pop popcorn and make Ramen on the stove. You don’t even need special popcorn! All you have to do is cut open the bag, pour the kernels into a pot, cover it and turn on the heat. If you have a clear glass lid, it’s even more fun! You can watch the kernels ricochet off the sides of the lid. Kernels in the bag should already be salted and oily but for tips on how to pop and season plain old kernels (not from a bag), Recipe Girl has some great tips.

This does not mean microwaves are evil. You might have noticed I said I “used to” live without a microwave. Yes—I have one now. I acquired it when a friend moved cross-country and couldn’t fit it in her car, so it was free. It is nice to have for defrosting things and reheating leftovers. It is also great for steaming vegetables (certain things just don’t taste good when they are grilled in a skillet on the stove).

But I’m happy I had that year to curb my craving to eat instant pizza every day for dinner, just because it was easy and available. And this microwave takes up so much counter space, I frequently consider giving it to someone else, knowing I could live without it!
MicrowaveHero square

Photo by Meaghan Morrison

(Cheap) Holiday Gifting

Gifting can be tricky: Who is on your list? Can you afford to gift with all your friends? What about your coworkers? Here is a quick guide to holiday gifting from someone who is young and broke.

A good place to start with gifting is to make a list. Who is on it? Do some of them get more expensive gifts than others?

Try splitting your list into groups. I broke my list into A, B, and C and assigned each group a budget range. This helped me budget the entire cost of my holiday shopping before I started looking.

Making Sure the Perfect Gift is the Cheapest Gift

Once you find the perfect gift, make sure to Google it before you buy it. There are so many retailers out there, you never know if you are going to find your gift on sale on a different website. I unexpectedly saved 75% on a gift this year because Neiman Marcus’s Last Call had a one-day sale I stumbled across in a last minute Google!

Gifting with Friends

Let’s say you have made your list and there is just no way you can give each of your friends a substantial gift this holiday season. Consider banding together for a Secret Santa (or Secret Snowflake) gift exchange. You can set a cost ceiling ($20 max is a good idea) to keep anyone from outspending anyone else but still devote your attention to one perfect gift. Additionally, you and your friends will probably get more thoughtful gifts. It’s a lot easier (and cheaper) to find the perfect gift for one person than five.

Also consider gifting an experience. If you are a good cook, gift a home cooked meal. Or a movie night. It’s thoughtful and you get to spend more time with your friend.

What About the Co-workers?

Office gifting can be super awkward. One way to share the love is to host an office White Elephant gift exchange. My office hosts one every year and we reward a “trophy” to the best White Elephant gift each year. The goal of the gift exchange is to re-gift an item, usually one with a story behind it. You are not supposed to buy things! These are just our rules but the basic idea is the same and everyone goes home with a gift.

But what about your boss? Should you get them a gift? First off, good boss etiquette says they should be gifting you something—especially if you don’t qualify for a bonus of any sort. You have worked hard all year and you deserve that recognition. I personally am getting my bosses gifts because they are pretty solid people. But last year I had only been working at my office for a couple weeks–I had no idea what to do! My advice today would be to ask around and find out what the precedent is. Maybe the office pools together funds and buys everyone the same gift. Or maybe everyone is chipping in $5 to buy the department head (or front office manager) a gift card to his or her favorite restaurant. Be aware of the office culture around gifting and if you do decide to go against the norm, try to be discreet about it.

CupcakesHero

Photo by Anastasia Heuer

Plucking Your Eyebrows

Some people go for thin brows with a high arch (giving them a perma-shocked look we can thank the 90s for.) Others prefer for the strong, straight brow that’s becoming increasingly popular today. Whatever your eyebrow taste may be—here are tips on how you can keep people from confusing them with woolly bear caterpillars.

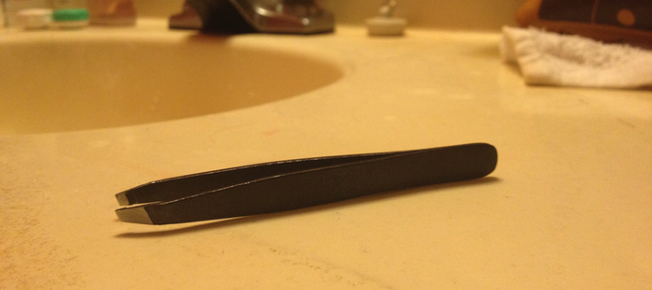
  • Tweezers — Finding the right tweezers is really a matter of personal preference so finding the perfect tweezers can be time consuming. You can either go with slanted edge tweezers or point tip tweezers. I prefer point tip tweezers because they are good for grasping difficult hairs and I find them to be more dexterous. Whatever you choose—make sure to pick stainless steel so they don’t rust.
  • Brow brush/comb — Many make-up stores (Sephora, etc.) sell these as a combined item but you can also find brow brushes that resemble mascara wands and combs that look like they belong in Barbie’s Dream House. I swear they do the job though.
  • Manicure scissors — Kiddie craft scissors are not acceptable substitutes. (Fine, they will work in a pinch.)

1.     Find Your Shape

Again, current fashion trends can dictate how you want your eyebrows to look but generally speaking there are rules about where your eyebrows should start and end. You can check your measurements using a brow pencil or another straight instrument.

If you take the pencil and place it next to your nose in a straight vertical line past the inner corner of your eye, you can find your starting point. Turn your pencil 45 degrees outward, and that’s the endpoint for your eyebrows. The brows should peak in line with the outer side of iris (sorry no pencil trick for this one).

2.     Brushing and Trimming

Shockingly, the first step to eyebrow maintenance is messing them up. Take your comb (not the brush) and comb your brows in the opposite direction of hair growth (if you don’t have a comb, your finger will do). It makes your hair stand up every which-way and you’ll look positively unkempt.

Don’t worry it’s about to get better. Take your manicure scissors and trim away any hairs that stray WAY above your defined brow line. These are hairs that have gotten a little long and out of control. Tame them and now you don’t have to worry about plucking them.

3.     Tweezing Time!

The next step is to brush your brows back in the direction the hair grows. It already looks better right? Now that they are in place again, take a look at your brow line. You’ll notice there are a couple of hairs growing below your brow line. These are the hairs to which you say goodbye. Grab the hair at the root and yank. (If this is your first time, it’s going hurt like a bitch, sorry!) Start with a few hairs on your dominant side and then switch to the other eye. (In my case, my dominant side would be my right eye because I’m right handed.)

Make sure to do this in a well-lit room in front of a standard mirror. No need to use a magnifying mirror—if you can’t see the hair normally, you don’t need to pluck it.

You also ALWAYS want to tweeze from underneath your brow. Never above—otherwise you might end up with bald spots. If you trimmed correctly—everything up top should be under control.

Make sure you don’t get too tweezer happy. Remember how I said to switch eyes? Well you want to tweeze a couple on one side, switch, and then compare so you don’t over-pluck. Specifically, people had a tendency to over-pluck their dominant side.

If you do over-pluck, have a soft brow pencil nearby to fill in any thin spots. But you don’t want to have to draw on your eyebrows everyday so take a step back to gain some perspective throughout the whole process. Walk away from the mirror and come back and see how they look, tweeze a few more then walk away again. Moderation is key.

Also, try not to pluck in the morning before work or before an important event, especially if your skin is sensitive. Obvious swollen red patches all around your eyes are not awesome.

Pro Tip: The best time to tweeze is after a warm shower. It opens your pores and softens up your hair so it’s an easier pull. If you are super sensitive, dab some numbing gel (like baby teething gel) before tweezing. Just keep it out of your eyes.

eyebrows2

Photo by Anastasia Heuer

Taming Your Garbage Disposal

Exciting news! You have recently acquired a fabulous kitchen device called the garbage disposal. Amazing in that if you cook something, you just throw the scraps in there, hit a button and BAM—it’s gone! You save space in your trash can, the landfill, and get to take out some latent aggression on your produce.

But there are things you should never put in the garbage disposal. Save yourself the pain of throwing down money for a plumber with the following tips:

The DO-NOTs – Things you should NOT put down your garbage disposal:

  • Your Hand. In my opinion there were two awesome scenes from Season 1 of Heroes: When Claire (who can heal herself for those of you who haven’t seen it) walks out of the burning house charred from the nuclear explosion and when she sticks her hand down the garbage disposal to fetch a ring only to pull it up all mangled and bloody—showcasing EXACTLY why YOU should NOT stick your hand down a garbage disposal. It is a motorized rotating blade. Even if it is off—DO NOT RISK IT. One accidental flip of the wrong switch and…
  • Grease / Oil may be a liquid but it never should be poured down any drain. Why? Because as it cools, grease coagulates, and can clog your pipes
  • Starchy Veggies such as potatoes, broccoli, and other fiberful family members can also draw water and their long, tough, stringy fibers can tangle and jam the blades.
  • Bones & Fruit Pits will not meet defeat in the garbage disposal. These kitchen leftovers are simply too strong to be processed and can break the disposal’s blade. Be sure to dispose of them in a careful manner, keeping them out of reach of children and pets that could choke on them.
  • Shot Glasses, Plastics, Glass and Paper go in the recycling and not in the garbage disposal. This one should be obvious, despite what the UE Editor-in-Chief may think (Editor’s Note: I claim no knowledge of this, nor have I ever done this…if this had occurred, however, it was by pure and total accident, and ended very badly for everyone, particularly the garbage disposal.) Shot glasses and other broken household objects should never go in your garbage disposal because they will BREAK it.

The jury is still out…

  • Coffee Grounds are tough—there are two schools of thought: Some sources say that the grounds are greats for cleaning out your drain and freshening up odors. Others say they can stick and clog up the drains. I think it’s probably best to avoid putting these babies down the disposal and looking into some of these alternative re-uses for coffee grounds.

The DOs – Things you should put down your garbage disposal:

  • Lemon, Lime and other Citrus peels throw a couple of these peels down the drain and you’ll have a cleaner, better smelling garbage disposal in no time. One of the reason you find citrus fruits in so many household-cleaning products is that they are cleansing and non-corrosive. Citrus juice can even strip dirt from under your fingernails without much effort at all. (Think about that next time you order water with lemon.)
  • Ice, Ice, Baby. (Sorry, couldn’t stop myself.) Crunching large amounts of ice, and a bit of vinegar, in your garbage disposal will help sharpen and clean its blades.

Pro Tip: Is it hot and sticky in the summer? Is your home prone to fruit flies and other winged visitors? If you’re having trouble getting rid of them it’s probably because they are living in your sink drains. Kill them and prevent them from coming back by pouring large amounts of ice over your drain. This makes it too cold for them to lay eggs and survive.

Now that you’re an expert garbage disposal user—feel free to grind away!

Photo by Meaghan Morrison

Protect Your Shit: Renter’s Insurance

Congratulations, you signed your lease on your new apartment! You moved in all your furniture, your PlayStation 3, your MacBook Pro, and your collection of Christian Louboutins. Three weeks later, you arrive home to find that your downstairs neighbor didn’t realize blocking the built-in wall heater with a wooden cabinet was a bad idea. Your apartment is scorched, and your belongings have been reduced to ash. But don’t worry—your landlord has insurance, so you’ll be ok… Right?

Actually, no. Your landlord has insured the building but not your personal property within the apartment. Stories like this are why you should consider getting renter’s insurance.

What is renter’s insurance?

Renter’s insurance covers your personal property within your apartment. In the event that it is damaged or stolen, the insurance company will give you the money to replace the lost belongings. (Just like your parents’ house insurance.) Renter’s insurance also provides liability coverage, which can help you if someone gets injured in your apartment.

How much is it?

Most renter’s insurance plans run $10-$35 per month and the price is determined by the size of your apartment, the value of your belongings, and your deductible. Personally, I’d rather pay a little more per month for a lower deductible—to avoid shelling out $500 before the insurance kicks in—but it’s your choice.

But do I really need it?

That really depends on you. One way to determine if you need renter’s insurance is to add up the costs of all your belongings and decide if that cost merits purchasing insurance. (Try using a rate calculator like this one offered by State Farm.) If not, consider less expensive options, such as getting a safety deposit box at a bank for any priceless treasures.

Another thing to consider is the location of your apartment. What’s the crime rate in your area? Have there been a lot of break-ins? Do you live on the ground floor?  Do you live in a town where frozen pipes are common? Are you (or your roommate or your upstairs neighbor) likely to flood your apartment?

Finally, if you are a pet owner, and your pet was to bite another person, your renter’s insurance may be able to protect you from a liability lawsuit. (There is such a thing as pet insurance but it’s pet health insurance, similar to your medical insurance.)

How do I get it?

Progressive, AAA, Geico—any major insurance company—will offer renter’s insurance. I recommend trying to get a plan with the same carrier as your car insurance because they might offer a sweet multi-plan discount.

Am I missing anything?

Be sure to read the fine print for each plan and know exactly what your plan covers. For example some plans only cover damage on particularly valuable objects—such as musical instruments, electronics and fine jewelry—to a certain value. Others may have additional costs for liability coverage. Some policies will still cover stolen or damaged items even when they’re not at home (for example: in your car or hotel room).

But wait: you’re not done yet. Do you live in an area prone to natural disasters such as earthquakes, hurricanes, tornadoes, and/or floods?

You might have to purchase additional insurance to protect yourself. These plans have varying costs and restrictions. For example, residential insurance policies in California no longer cover damage sustained during an earthquake due to the losses sustained during the 1994 Northridge earthquake. You have to purchase additional insurance for this and other natural disasters, outside of your standard renter’s insurance plan. How this insurance is administered is regulated on a state-by-state basis.

In some cases, you may need multiple policies to cover one disaster. There was a lot of controversy after Hurricane Katrina as certain hurricane insurance policies only covered damage due to wind—despite the fact that hurricanes often bring rain and, therefore, floods. Many people were not covered since they had not purchased additional flood insurance.

I’m still not sure, where else can I get information?

Sites like this one from Allstate or this one from Insure.com have explanations of renter’s insurance that can help.

In the end, whether or not you purchase renter’s insurance is a personal decision. Just remember to make sure you know exactly what you’re getting. Nothing is worse than buying into a policy and, when it’s time to cash in, discovering you aren’t covered the way you thought you were.

rentersinsurancecropped

Photo by Michelle White